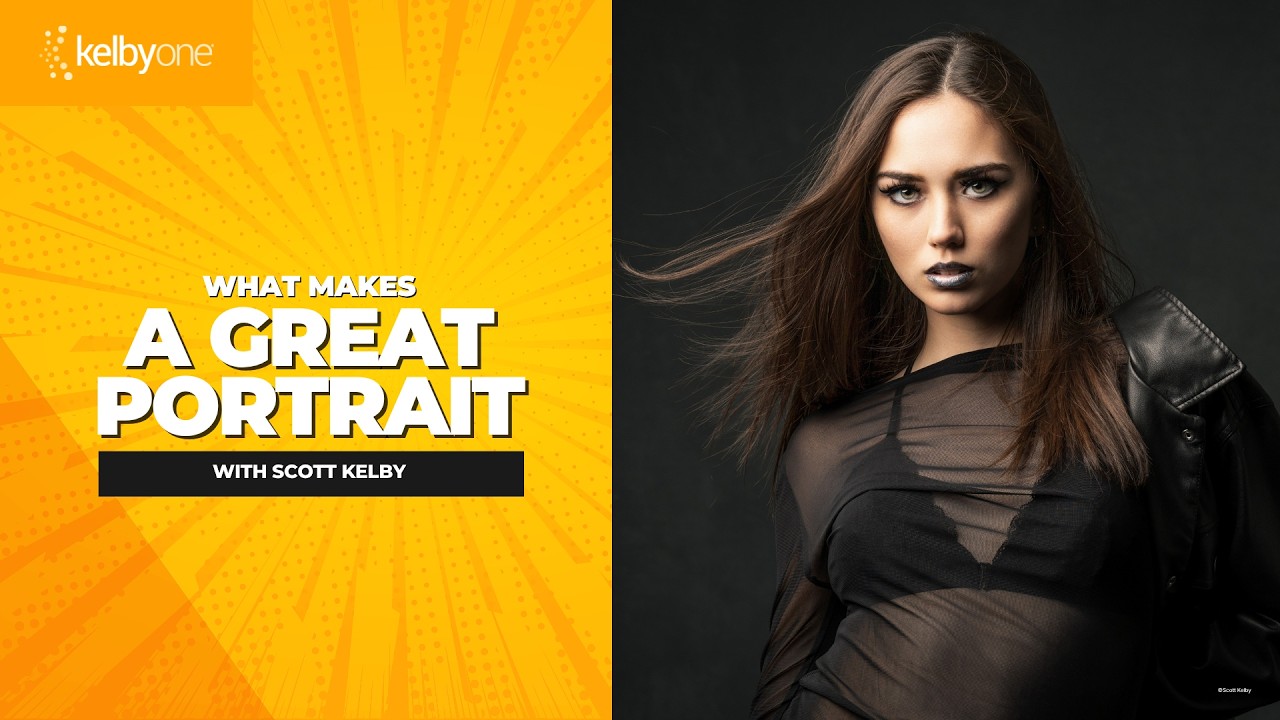
There’s a moment early in my retouching career I don’t talk about enough. A client looked at her finished images, paused, and said, “She doesn’t really look like me anymore.” That was the feedback that made me put down my Healing Brush and start thinking differently about what portrait work is actually for. Making someone look great is not the same as making them look different. The gap between those two things is where most of us get lost.
That’s why when I found Scott Kelby’s portrait framework over at KelbyOne, it landed differently than most tutorials. Watch the full tutorial on YouTube and you’ll see what I mean. It isn’t a Photoshop walkthrough or a lighting diagram. It’s a complete philosophy for portrait-making, structured as ten specific lessons that move from intention to gear to composition to retouching. The kind of thing you wish someone had handed you before your first paid shoot. Below I’ve broken down each lesson into the concrete action it asks of you.
Step 1: Know What You’re Shooting Before You Shoot It
 Scott Kelby introducing the ten portrait techniques
Before you touch a camera, Kelby’s first lesson asks you to define the purpose of the portrait. Is this a LinkedIn headshot? An editorial image? An emotional family portrait? The answer shapes every decision you’ll make afterward, from focal length to retouching intensity. A corporate headshot demands clean, neutral lighting and conservative skin work. A beauty editorial invites more drama in both. Write down one sentence about what this portrait needs to do before the session starts, and use it as your filter for every choice.
Scott Kelby introducing the ten portrait techniques
Before you touch a camera, Kelby’s first lesson asks you to define the purpose of the portrait. Is this a LinkedIn headshot? An editorial image? An emotional family portrait? The answer shapes every decision you’ll make afterward, from focal length to retouching intensity. A corporate headshot demands clean, neutral lighting and conservative skin work. A beauty editorial invites more drama in both. Write down one sentence about what this portrait needs to do before the session starts, and use it as your filter for every choice.
Step 2: The Connection Comes First
 Kelby speaking to camera about making subjects comfortable
Technical perfection means nothing if the person in the frame looks guarded or uncomfortable. Kelby argues that building genuine connection with your subject is the single highest-leverage thing a portrait photographer can do. On a practical level, this means arriving early, talking about anything other than the shoot for the first few minutes, and giving your subject something specific to do or think about rather than just saying “look natural.” I’ve started asking subjects to tell me something they’re proud of right before I shoot. The shift in their expression is immediate and completely un-fakeable.
Kelby speaking to camera about making subjects comfortable
Technical perfection means nothing if the person in the frame looks guarded or uncomfortable. Kelby argues that building genuine connection with your subject is the single highest-leverage thing a portrait photographer can do. On a practical level, this means arriving early, talking about anything other than the shoot for the first few minutes, and giving your subject something specific to do or think about rather than just saying “look natural.” I’ve started asking subjects to tell me something they’re proud of right before I shoot. The shift in their expression is immediate and completely un-fakeable.
Step 3: Light That Flatters, Not Just Illuminates
 Introduction sequence showing portrait lighting concepts
Flattering light for portraiture almost always shares a few characteristics: it’s soft relative to the subject’s face, it has a clear key side and shadow side to create dimension, and it doesn’t create hard shadows under the nose or in the eye sockets. Kelby’s guidance here centers on light placement and quality rather than expensive equipment. A large window with a reflector on the opposite side gives you most of what a $2,000 strobe setup can. The core principle is that the light source should be larger than the face it’s lighting. The larger the source relative to the subject, the softer and more forgiving the light becomes.
Introduction sequence showing portrait lighting concepts
Flattering light for portraiture almost always shares a few characteristics: it’s soft relative to the subject’s face, it has a clear key side and shadow side to create dimension, and it doesn’t create hard shadows under the nose or in the eye sockets. Kelby’s guidance here centers on light placement and quality rather than expensive equipment. A large window with a reflector on the opposite side gives you most of what a $2,000 strobe setup can. The core principle is that the light source should be larger than the face it’s lighting. The larger the source relative to the subject, the softer and more forgiving the light becomes.
Step 4: Retouch Like a Pro, Not a Plastic Surgeon
 Kelby describing the responsible retouching philosophy
This is the lesson I want to print out and tape to my monitor. Kelby frames responsible retouching as subtraction, not transformation. You’re removing distractions, not redesigning a face. On a technical level, that means working on temporary blemishes (reduce or eliminate) differently than permanent features (reduce at most, often leave alone). Keep your healing and clone work on separate layers named for what they’re doing. I have a Photoshop action I call “The Godfather” that sets up my basic retouching stack: one layer for spot healing, one for dodge and burn, one for color correction. That separation keeps everything reversible and everything honest.
Kelby describing the responsible retouching philosophy
This is the lesson I want to print out and tape to my monitor. Kelby frames responsible retouching as subtraction, not transformation. You’re removing distractions, not redesigning a face. On a technical level, that means working on temporary blemishes (reduce or eliminate) differently than permanent features (reduce at most, often leave alone). Keep your healing and clone work on separate layers named for what they’re doing. I have a Photoshop action I call “The Godfather” that sets up my basic retouching stack: one layer for spot healing, one for dodge and burn, one for color correction. That separation keeps everything reversible and everything honest.
Step 5: If Your Color Isn’t Right, It’s Wrong
 Tutorial overview showing color and skin tone as a core lesson
Skin tone accuracy is non-negotiable in portrait and beauty work. Kelby’s approach here focuses on getting it right at the capture stage first, then fine-tuning in post. In practice, that means using a custom white balance (a gray card or ColorChecker passport takes thirty seconds and saves an hour of correction later) and checking your skin tones in the histogram rather than trusting the monitor. In Lightroom or Camera Raw, healthy skin tones generally land in a specific zone: they have warmth, they have luminosity, and they never drift toward gray or green. If your subject looks like they might be coming down with something, your white balance is off.
Tutorial overview showing color and skin tone as a core lesson
Skin tone accuracy is non-negotiable in portrait and beauty work. Kelby’s approach here focuses on getting it right at the capture stage first, then fine-tuning in post. In practice, that means using a custom white balance (a gray card or ColorChecker passport takes thirty seconds and saves an hour of correction later) and checking your skin tones in the histogram rather than trusting the monitor. In Lightroom or Camera Raw, healthy skin tones generally land in a specific zone: they have warmth, they have luminosity, and they never drift toward gray or green. If your subject looks like they might be coming down with something, your white balance is off.
Step 6: The Eyes Have It
 Lesson list showing “The Eyes Have It” as step six
Eyes are where viewers spend most of their time in a portrait, which means sharpness, catchlights, and direction of gaze carry enormous weight. Kelby’s practical guidance: focus on the eye closest to camera, always. In post, a small amount of targeted dodging on the iris (not the whites, which blow out easily) adds life without looking overdone. Catchlights should be visible but not distracting. If your lighting setup is leaving dead, flat eyes, reposition your key light until you see a clean reflection in the iris. No amount of retouching recovers genuinely flat eyes.
Lesson list showing “The Eyes Have It” as step six
Eyes are where viewers spend most of their time in a portrait, which means sharpness, catchlights, and direction of gaze carry enormous weight. Kelby’s practical guidance: focus on the eye closest to camera, always. In post, a small amount of targeted dodging on the iris (not the whites, which blow out easily) adds life without looking overdone. Catchlights should be visible but not distracting. If your lighting setup is leaving dead, flat eyes, reposition your key light until you see a clean reflection in the iris. No amount of retouching recovers genuinely flat eyes.
Step 7: The Right Lens and Composition for Faces
 Kelby discussing gear choices for portrait photography
Kelby addresses lens choice and composition together because they’re inseparable in portraiture. Wider focal lengths used close to a subject distort facial features in unflattering ways. For most portrait work, 85mm through 135mm (full frame equivalent) compresses features gently and produces proportions that match how we actually perceive faces in conversation. Composition-wise, Kelby’s guidance reinforces placing the eyes on or above the upper third line rather than centering the face. Leaving intentional space in the direction the subject is looking creates visual tension that keeps the viewer engaged.
Kelby discussing gear choices for portrait photography
Kelby addresses lens choice and composition together because they’re inseparable in portraiture. Wider focal lengths used close to a subject distort facial features in unflattering ways. For most portrait work, 85mm through 135mm (full frame equivalent) compresses features gently and produces proportions that match how we actually perceive faces in conversation. Composition-wise, Kelby’s guidance reinforces placing the eyes on or above the upper third line rather than centering the face. Leaving intentional space in the direction the subject is looking creates visual tension that keeps the viewer engaged.
What I’d Add From My Own Work
The lesson Kelby doesn’t dwell on long enough for my taste is the one about knowing your subject’s relationship with being photographed before the shoot. Some people are genuinely uncomfortable in front of a camera and need a completely different pace. Some people are performers who want direction. I now send every client a short three-question form beforehand: What do you love about photos of yourself? What do you dislike? What do you want someone to feel when they see this image? The answers reshape everything. They tell me how aggressive to be with retouching, how directive to be during the shoot, and what emotional register to aim for. It takes five minutes and it’s saved dozens of sessions from going sideways.
The single biggest takeaway from Kelby’s framework is this: every element in a great portrait, the light, the lens, the retouching, the composition, is in service of one thing. Making the person in front of you look and feel like the best version of themselves. Not a different person. Not a smoothed-out approximation. Themselves, at their best. That’s the gift he talks about at the very start of the tutorial, and it’s the right frame for all of it.
Watch the full tutorial on YouTube and work through the ten lessons in order. The whole thing is worth your time, and you’ll come back to it.
Comments
Leave a Comment