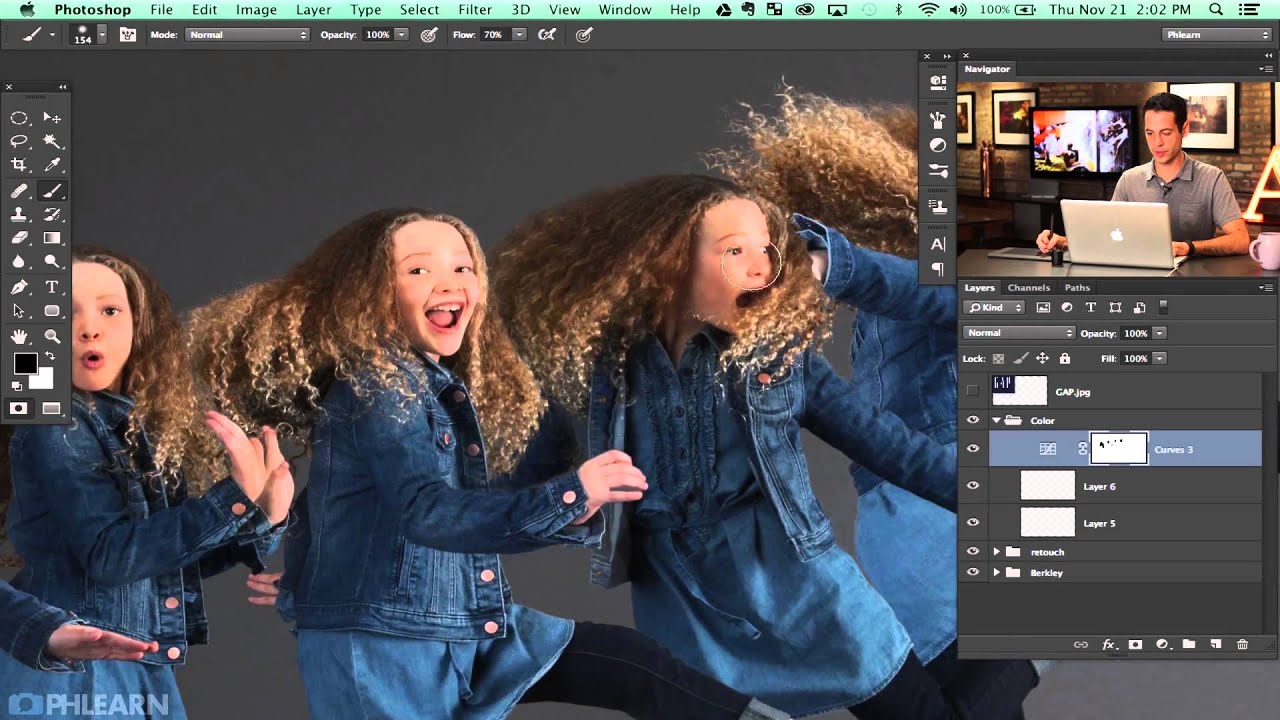
There’s a particular kind of image that separates hobbyist editing from professional work: the composite where multiple subjects share the same frame and it actually looks believable. Not “wow, great Photoshop” believable. Just… real. Getting there requires you to think about how people physically occupy space together, how light wraps around them, and how small overlooked details like a hand or a shadow can quietly destroy the illusion. This is the problem I kept running into early in my retouching career, and it’s exactly what Aaron Nace tackles in this second part of his Gap-inspired fashion shoot series. Watch the full tutorial on YouTube before or alongside this walkthrough.
In this Aaron Nace (PHLEARN) tutorial, the same model appears multiple times in the same frame, and the challenge is making those versions of her interact convincingly. Part two picks up where the rough composite left off, refining how the subjects overlap, cleaning up the backdrop, and adding painted shadows to give the whole thing dimensional weight. It’s a workflow I’ve adapted for beauty campaigns where I’m blending multiple shots of the same face for skin compositing. The principles translate directly.
What I appreciate about Aaron’s approach here is that he’s explicit about what “good enough” looks like at each stage. He’s not chasing perfection on every pass. He’s making deliberate, layered decisions. That’s the mindset shift that will genuinely change how you work.
Step 1: Assess How Your Subjects Interact Before Touching Anything
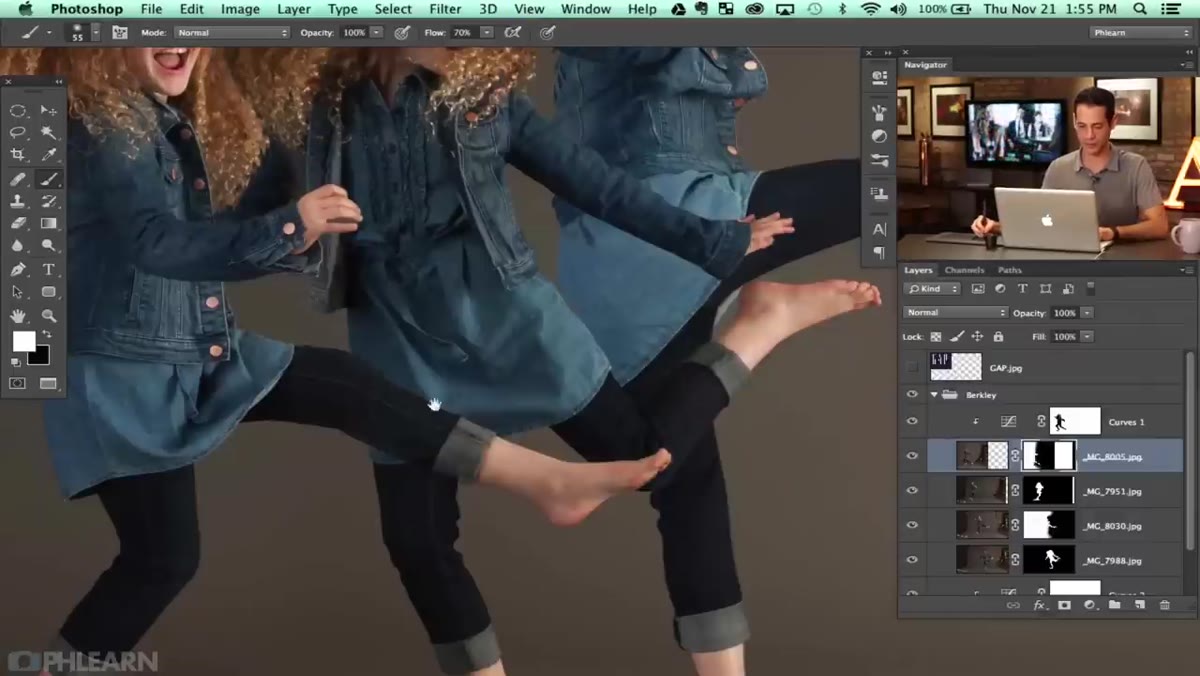 Zoomed-in view of subjects overlapping in the composite
Before reaching for any tool, zoom into your composite and evaluate every edge where subjects overlap. Aaron starts here, and it’s a habit worth building into your own muscle memory. Look at hands, shoulders, and hair. Ask yourself which subject is physically in front and whether your current masking reflects that. In this case, one version of the model’s hand needs to appear in front of the other version of her body, and the existing mask doesn’t show that correctly yet. Spotting this early saves you from painting yourself into a corner later.
Zoomed-in view of subjects overlapping in the composite
Before reaching for any tool, zoom into your composite and evaluate every edge where subjects overlap. Aaron starts here, and it’s a habit worth building into your own muscle memory. Look at hands, shoulders, and hair. Ask yourself which subject is physically in front and whether your current masking reflects that. In this case, one version of the model’s hand needs to appear in front of the other version of her body, and the existing mask doesn’t show that correctly yet. Spotting this early saves you from painting yourself into a corner later.
Step 2: Refine Layer Masks Using the Magic Wand and Inversion
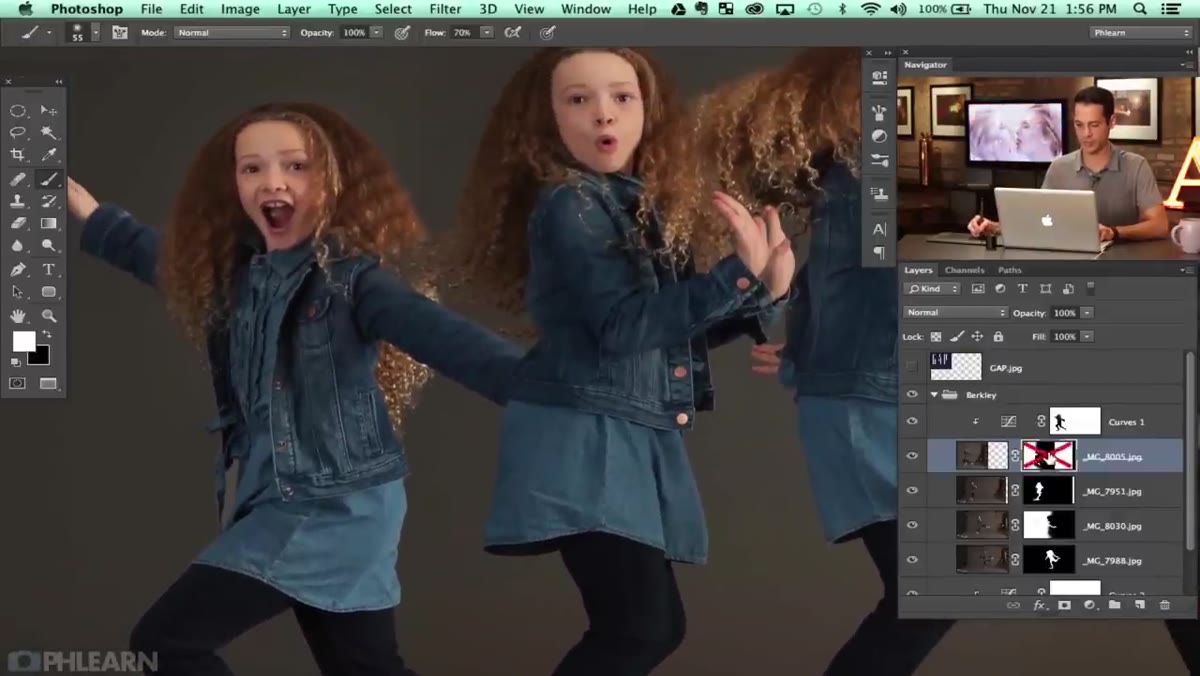 Magic Wand selection active on the background around the hand
With your problem area identified, Shift-click the layer mask thumbnail to view and edit it directly. Switch to the Magic Wand tool (W) and bring your tolerance down to something conservative, around 20 to 30, so you’re selecting precisely. Click the background area around the element you want to reveal, in this case the hand. You’re selecting what you don’t want so you can flip it. Hit Shift+Command+I (Shift+Ctrl+I on PC) to invert the selection, then paint white onto the layer mask with a hard brush. White reveals, black conceals. That one inversion trick is genuinely faster than trying to paint the hand’s outline freehand.
Magic Wand selection active on the background around the hand
With your problem area identified, Shift-click the layer mask thumbnail to view and edit it directly. Switch to the Magic Wand tool (W) and bring your tolerance down to something conservative, around 20 to 30, so you’re selecting precisely. Click the background area around the element you want to reveal, in this case the hand. You’re selecting what you don’t want so you can flip it. Hit Shift+Command+I (Shift+Ctrl+I on PC) to invert the selection, then paint white onto the layer mask with a hard brush. White reveals, black conceals. That one inversion trick is genuinely faster than trying to paint the hand’s outline freehand.
Step 3: Blend Hair Edges With a Small Soft Brush
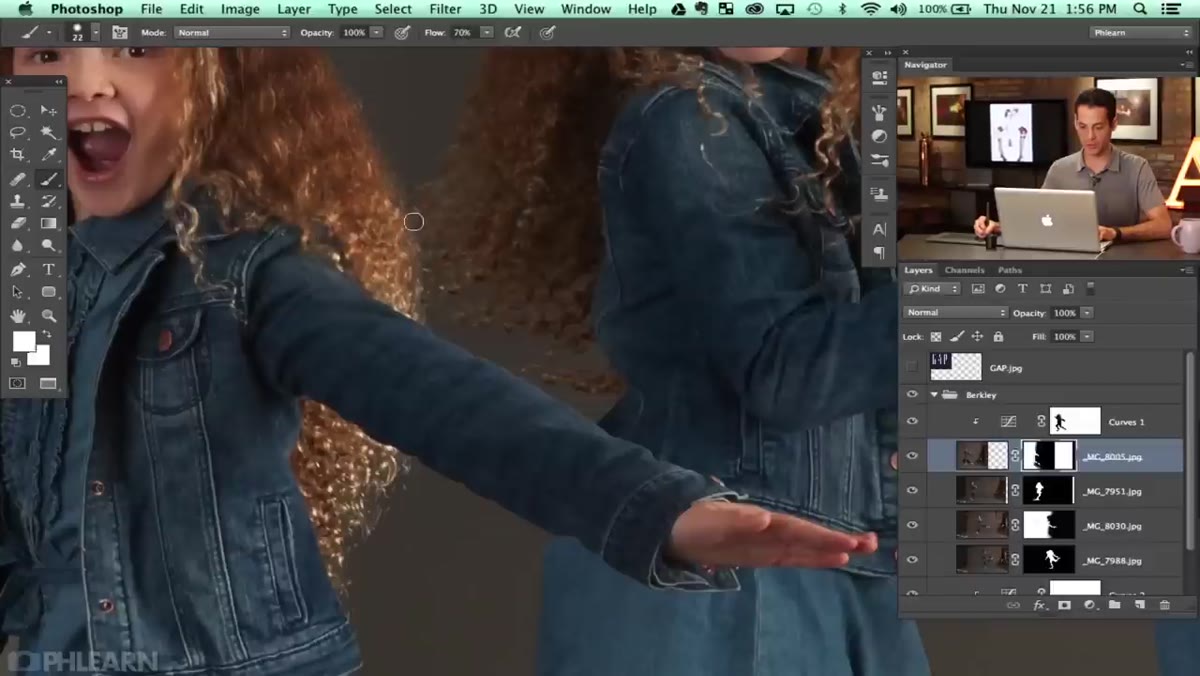 Soft brush blending hair edges on the layer mask
Hair is where composites fall apart or hold together, and there’s no magic selection algorithm that handles it perfectly every time. Once your main mask edit is in place, drop down to a small, soft-edge brush, opacity around 30 to 50 percent, and work along the hair boundary with short, overlapping strokes. You’re not trying to paint a precise edge. You’re feathering the transition so the two layers feel like they belong to the same moment. If you go too far and lose detail, switch to black and bring it back. Small brush, low opacity, patience. That’s the whole technique.
Soft brush blending hair edges on the layer mask
Hair is where composites fall apart or hold together, and there’s no magic selection algorithm that handles it perfectly every time. Once your main mask edit is in place, drop down to a small, soft-edge brush, opacity around 30 to 50 percent, and work along the hair boundary with short, overlapping strokes. You’re not trying to paint a precise edge. You’re feathering the transition so the two layers feel like they belong to the same moment. If you go too far and lose detail, switch to black and bring it back. Small brush, low opacity, patience. That’s the whole technique.
Step 4: Clean the Backdrop With the Healing Brush
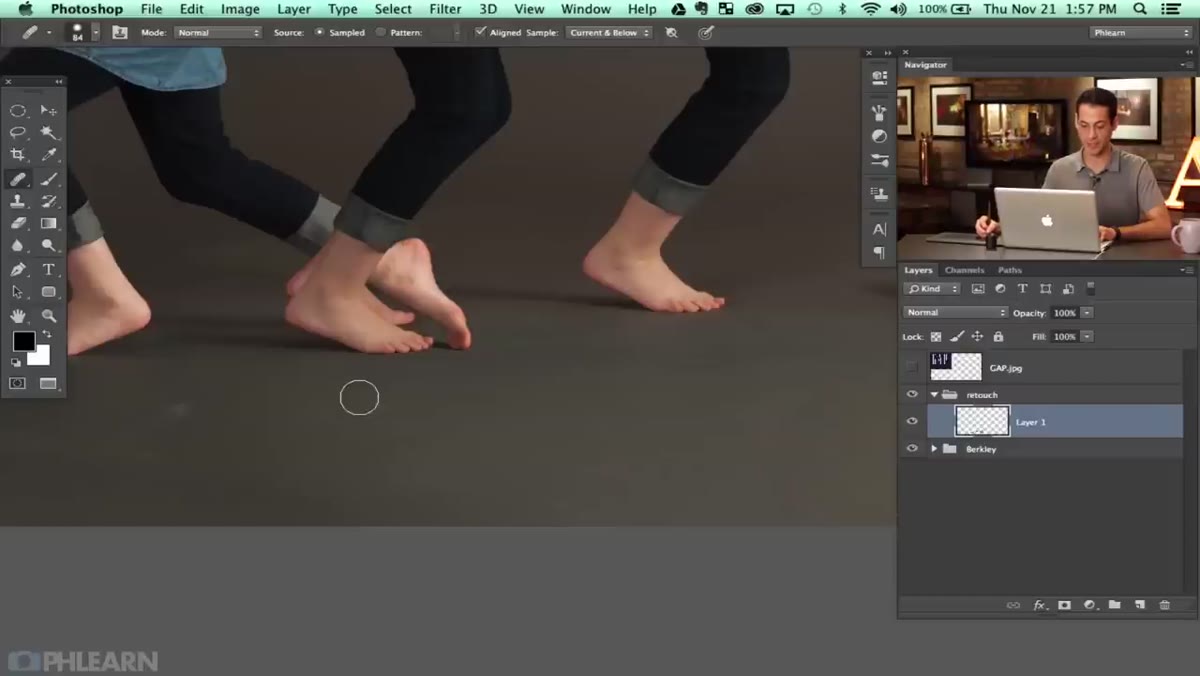 Healing brush sampling clean backdrop area near tape mark
Create a new layer above your subject layers and group everything cleanly. Label the new layer “retouch” or something equally unsexy but functional. Switch to the Healing Brush tool (J), make sure “Sample: Current & Below” or “All Layers” is selected in the options bar so you’re working non-destructively on the empty layer. Now Alt-click (Option-click on Mac) to sample a clean area of your backdrop, then paint directly over any marks, tape, scuffs, or debris. The healing brush blends the texture of the source with the color of the destination, which is why it works so well here. This is the exact same tool and technique you’d use for skin retouching, just applied to a white seamless backdrop instead of a forehead.
Healing brush sampling clean backdrop area near tape mark
Create a new layer above your subject layers and group everything cleanly. Label the new layer “retouch” or something equally unsexy but functional. Switch to the Healing Brush tool (J), make sure “Sample: Current & Below” or “All Layers” is selected in the options bar so you’re working non-destructively on the empty layer. Now Alt-click (Option-click on Mac) to sample a clean area of your backdrop, then paint directly over any marks, tape, scuffs, or debris. The healing brush blends the texture of the source with the color of the destination, which is why it works so well here. This is the exact same tool and technique you’d use for skin retouching, just applied to a white seamless backdrop instead of a forehead.
Step 5: Paint Shadows to Add Dimensional Weight
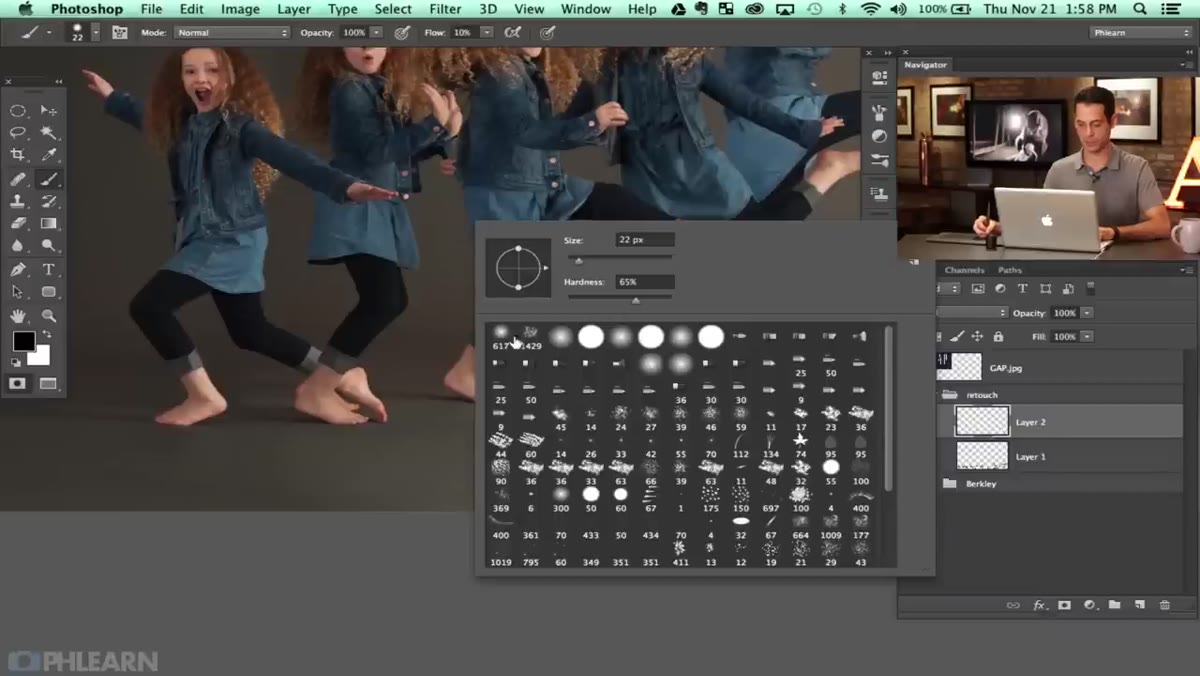 New layer created, soft brush sampling shadow color from image
This is the step most tutorials skip, and it’s the one that makes a composite read as three-dimensional rather than cut-and-paste. Create a new blank layer and set its blend mode to Multiply. Use the eyedropper to sample an existing shadow tone from somewhere in the image so your painted shadows match the color temperature of the ambient light. Choose a large, soft brush with opacity around 10 to 15 percent and build up shadow gradually under and around your subjects. Aaron paints these shadows freehand, pulling color from the existing darker areas of the image. The goal isn’t a dramatic drop shadow. It’s a subtle pooling of tone that tells the viewer’s eye these people are standing on the same surface, in the same light.
New layer created, soft brush sampling shadow color from image
This is the step most tutorials skip, and it’s the one that makes a composite read as three-dimensional rather than cut-and-paste. Create a new blank layer and set its blend mode to Multiply. Use the eyedropper to sample an existing shadow tone from somewhere in the image so your painted shadows match the color temperature of the ambient light. Choose a large, soft brush with opacity around 10 to 15 percent and build up shadow gradually under and around your subjects. Aaron paints these shadows freehand, pulling color from the existing darker areas of the image. The goal isn’t a dramatic drop shadow. It’s a subtle pooling of tone that tells the viewer’s eye these people are standing on the same surface, in the same light.
What I’d Add From My Own Workflow
The healing brush pass Aaron demonstrates on the backdrop is quick and effective, but in my experience on beauty work where backgrounds get heavily scrutinized, I follow it with a second pass using the Clone Stamp tool set to a low opacity on a separate layer. The healing brush can sometimes create a smeared, averaged-out texture in large flat areas. The clone stamp gives you more literal control when you need a specific texture to repeat cleanly. I also keep my shadow painting layer separate from everything else and name it clearly so I can dial the opacity up or down when a client asks for “a little less drama.” Making that layer easy to find at 11pm saves real time.
One more thing worth saying: Aaron mentions that for an actual Gap campaign, this level of cleanup would need to go much further. That’s true. But the workflow he’s demonstrating here is the same workflow, scaled up. Understanding the logic at this level means you can execute it at any level of intensity the job requires.
The single most transferable idea from this tutorial is that compositing is a conversation between layers, not a series of isolated edits. Every decision about masking affects your shadows. Every shadow affects how believable the masking looks. You work the whole image in passes rather than finishing one element completely before touching the next. That iterative, interconnected approach is what separates retouching that looks assembled from retouching that looks made.
Watch the full tutorial on YouTube to see Aaron’s hands moving through these steps in real time. His pacing and the way he talks through decisions as he makes them is worth watching even if you’ve read every word here.
Comments (1)
Tried this technique this morning. Game changer for real.
Leave a Comment