There’s a specific kind of frustration that comes from sending a file to a retoucher and getting back something that looks nothing like what you imagined. I’ve been on both sides of that exchange. Early in my retouching career, a client told me my edits looked “plastic” and I was devastated, mostly because I knew she was right. The problem wasn’t technical skill. It was communication, and a complete lack of a shared visual language between the photographer, the retoucher, and the final image.
That’s why a tutorial like this one stopped me mid-cup-of-green-tea when I came across it. In this CreativeLive tutorial, Watch the full tutorial on YouTube, a photographer walks through their exact process for annotating a portrait before handing it off to a retoucher. It sounds simple. It is not. The workflow they demonstrate is genuinely thoughtful, and the philosophy behind it, that good retouching preserves character rather than erasing it, is something I wish someone had spelled out for me years ago.
What struck me most is how much the annotation step is treated as a creative decision, not just a technical checklist. We’re not just marking problems. We’re making editorial choices about what this image is supposed to feel like. Let me walk you through the steps.
Step 1: Open the File and Create a Blank Annotation Layer
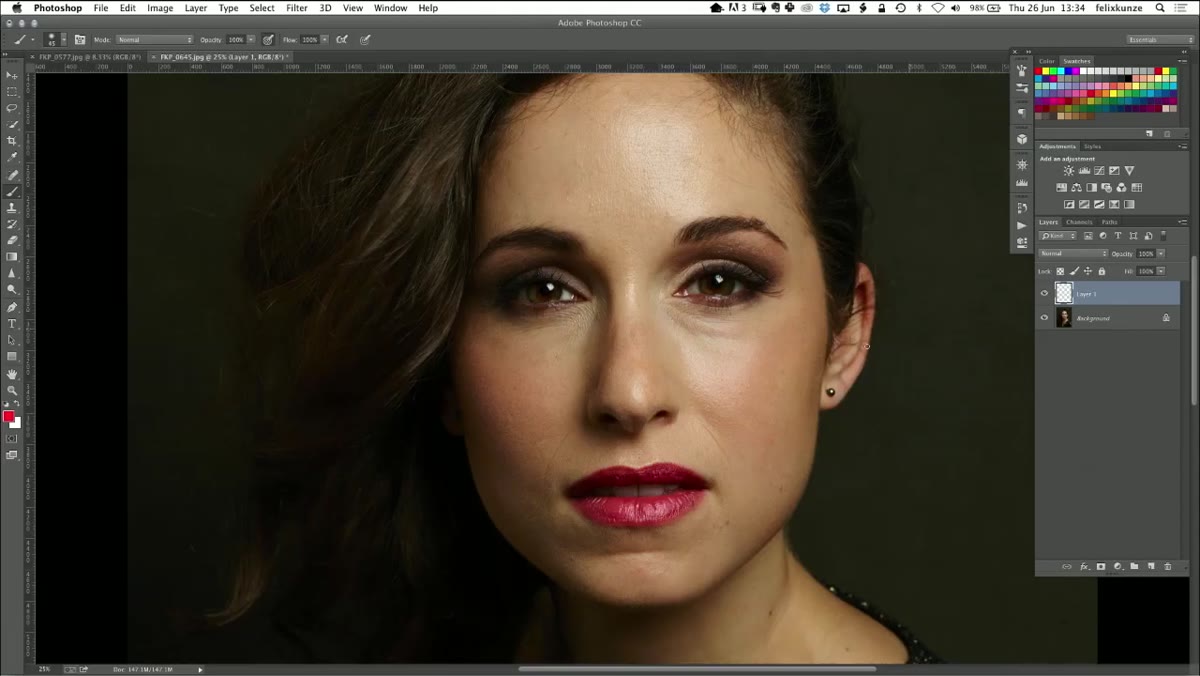 Blank layer created above the portrait in Photoshop
Before touching the actual image, create a new blank layer above your photo. This is your annotation canvas. Nothing you do on it will affect the pixels underneath, and you can toggle it off at any time to compare before and after your notes. In the tutorial, the presenter works with a relatively modest file size, which is worth noting because bloated annotation files slow everything down when you’re emailing or uploading to a retoucher. Keep your annotation layer separate and your working file clean.
Blank layer created above the portrait in Photoshop
Before touching the actual image, create a new blank layer above your photo. This is your annotation canvas. Nothing you do on it will affect the pixels underneath, and you can toggle it off at any time to compare before and after your notes. In the tutorial, the presenter works with a relatively modest file size, which is worth noting because bloated annotation files slow everything down when you’re emailing or uploading to a retoucher. Keep your annotation layer separate and your working file clean.
Set your brush tool to a hard, bright color, red works well because it reads clearly against almost any skin tone or background. Reduce the brush size so your circles and marks stay precise rather than swallowing the area you’re trying to describe.
Step 2: Circle Technical Problems First, Flash Burn and Dust Spots
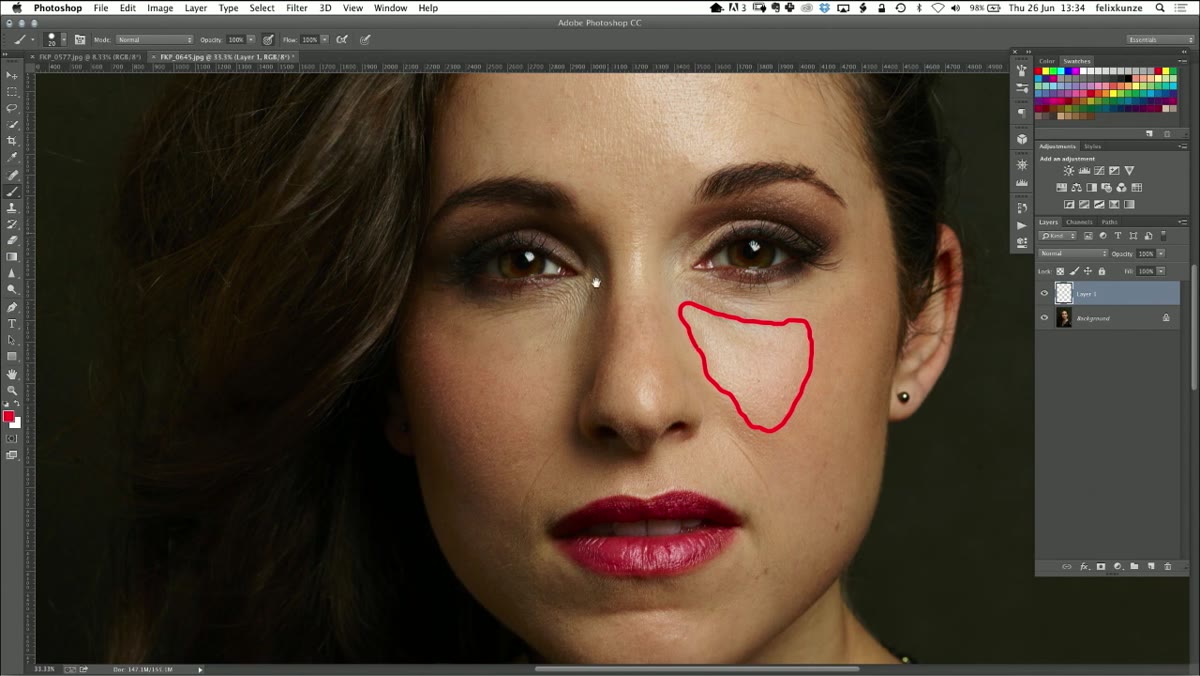 Red brush circles drawn over flash burn areas on the image
Start with the purely technical issues, the things that have no editorial ambiguity. In the tutorial, the first marks go around areas of flash burn, those overexposed hot spots that flatten skin texture and lose detail. These get a simple circle. No need to write a novel. A good retoucher will read a circle over a blown highlight and know exactly what to do.
Red brush circles drawn over flash burn areas on the image
Start with the purely technical issues, the things that have no editorial ambiguity. In the tutorial, the first marks go around areas of flash burn, those overexposed hot spots that flatten skin texture and lose detail. These get a simple circle. No need to write a novel. A good retoucher will read a circle over a blown highlight and know exactly what to do.
From there, move to sensor dust spots. These are the small, soft-edged dark specks that appear when debris lands on your camera sensor. Circle each one. The presenter notes that an experienced retoucher will likely spot these independently, but marking them anyway prevents anything from slipping through, especially in a light background or clear skin area where they’re most visible.
Step 3: Annotate Stray Hairs, But Distinguish Them from Intentional Texture
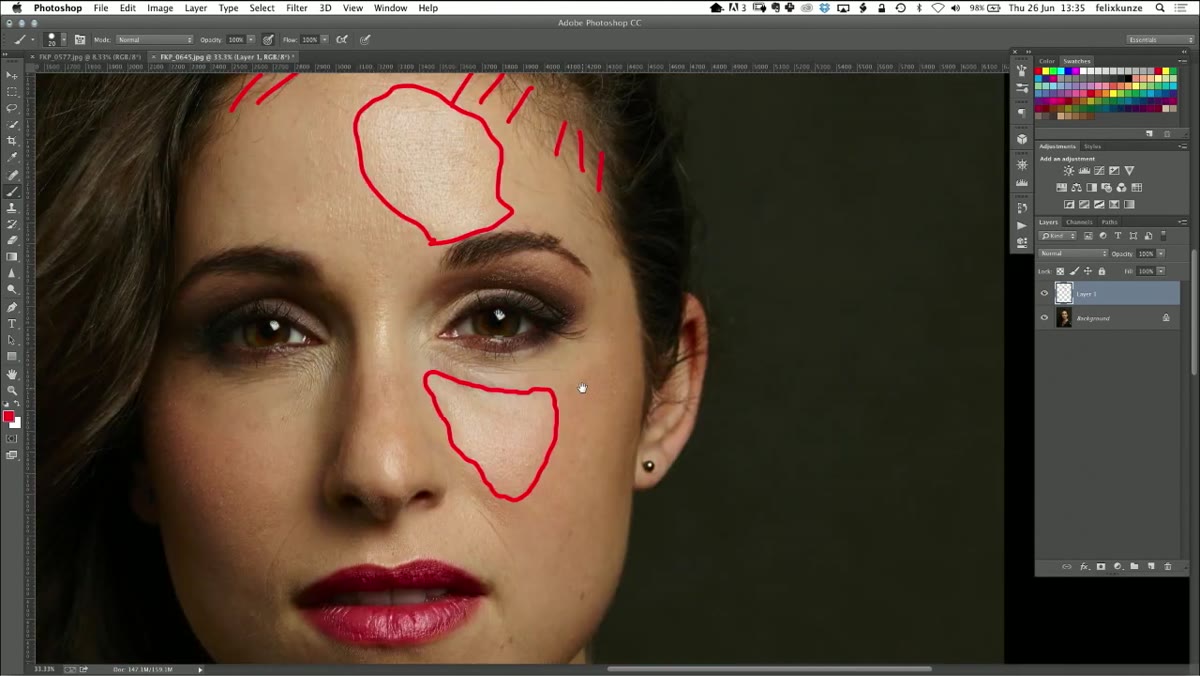 Circles and written notes differentiating stray hairs from styled texture
This is where annotation becomes a creative conversation rather than a repair list. The presenter circles stray hairs that need cleaning up, the random flyaways that don’t contribute to the shape of the style. But they also write a specific note near the teased, textured sections of the hair: leave it. That distinction matters enormously. A retoucher working without direction might smooth everything in the interest of a clean edit, and suddenly the entire mood of the image changes.
Circles and written notes differentiating stray hairs from styled texture
This is where annotation becomes a creative conversation rather than a repair list. The presenter circles stray hairs that need cleaning up, the random flyaways that don’t contribute to the shape of the style. But they also write a specific note near the teased, textured sections of the hair: leave it. That distinction matters enormously. A retoucher working without direction might smooth everything in the interest of a clean edit, and suddenly the entire mood of the image changes.
We use the annotation layer to protect intentional choices just as much as we use it to flag problems. If you worked with a stylist to create a specific texture or volume, write it down. A two-word note directly on the image is faster than a three-paragraph email and far less likely to be misread.
Step 4: Note Highlight Smoothing on Skin
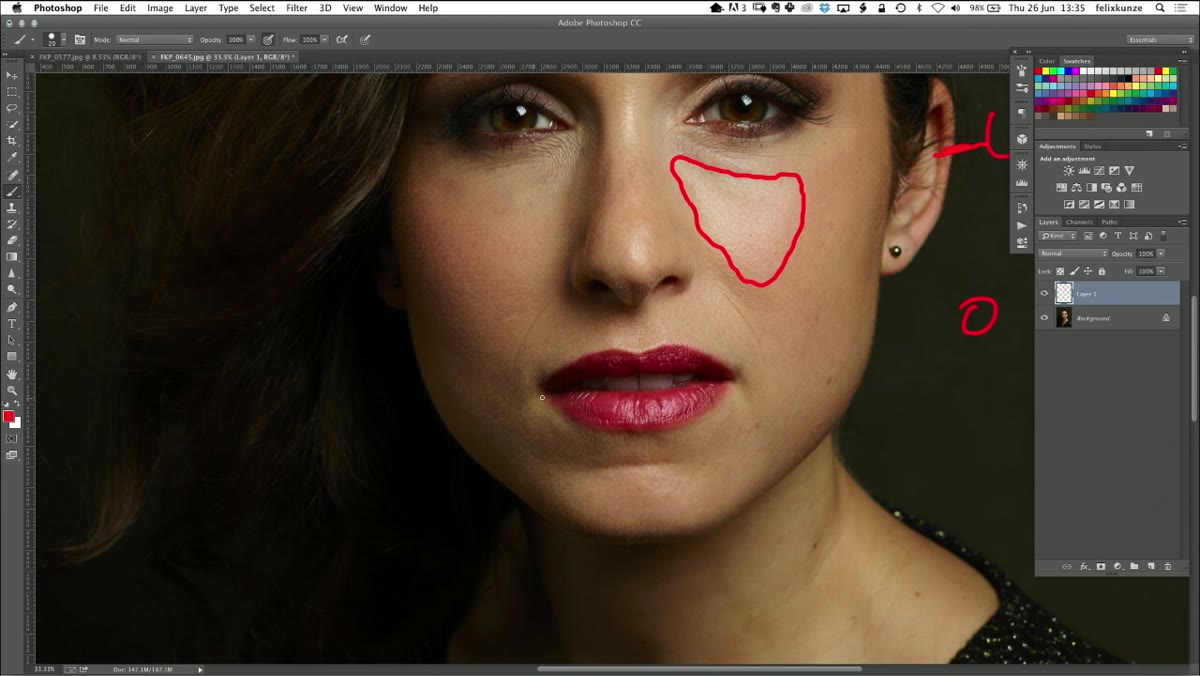 Small circles marking highlight irregularities along the cheekbone area
Moving into the skin, the presenter marks a few areas of uneven highlight, places where the light creates a slightly rough or bumpy read on the surface. The instruction is simple: smooth. Not remove, not relight. Just smooth. That word choice is intentional. It tells the retoucher the goal is refinement, not reconstruction.
Small circles marking highlight irregularities along the cheekbone area
Moving into the skin, the presenter marks a few areas of uneven highlight, places where the light creates a slightly rough or bumpy read on the surface. The instruction is simple: smooth. Not remove, not relight. Just smooth. That word choice is intentional. It tells the retoucher the goal is refinement, not reconstruction.
When you’re marking skin highlights for your own retouchers, be specific about direction. “Smooth” is good. “Smooth along the cheekbone following the natural curve of the light” is better. The more your annotation describes the desired result rather than just the problem, the fewer revision rounds you’ll need.
Step 5: Request Hair Definition with Specific Highlight Notes
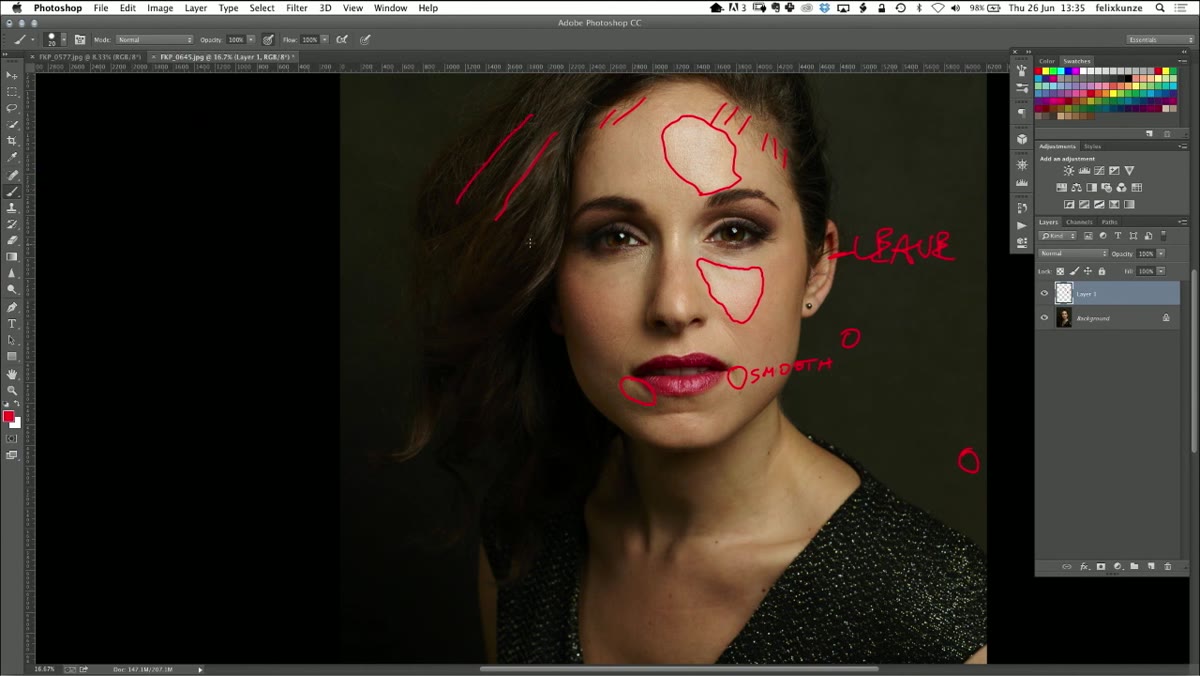 Written annotation requesting more definition added to hair highlights
The presenter zooms out slightly here to look at the hair as a whole and makes a note requesting more definition. In the context of a dark or heavily styled look, hair can read as a flat mass without some separation in the highlights. Asking a retoucher to “add definition” means selectively brightening or clarifying those highlight breaks so individual strands or sections read with more dimensionality.
Written annotation requesting more definition added to hair highlights
The presenter zooms out slightly here to look at the hair as a whole and makes a note requesting more definition. In the context of a dark or heavily styled look, hair can read as a flat mass without some separation in the highlights. Asking a retoucher to “add definition” means selectively brightening or clarifying those highlight breaks so individual strands or sections read with more dimensionality.
This is a good reminder that retouching notes don’t only point to problems. Some of the most useful annotations are additive: asking a retoucher to enhance something that’s almost there but needs a little more presence.
Step 6: Annotate the Eyes for Brightness and Pop
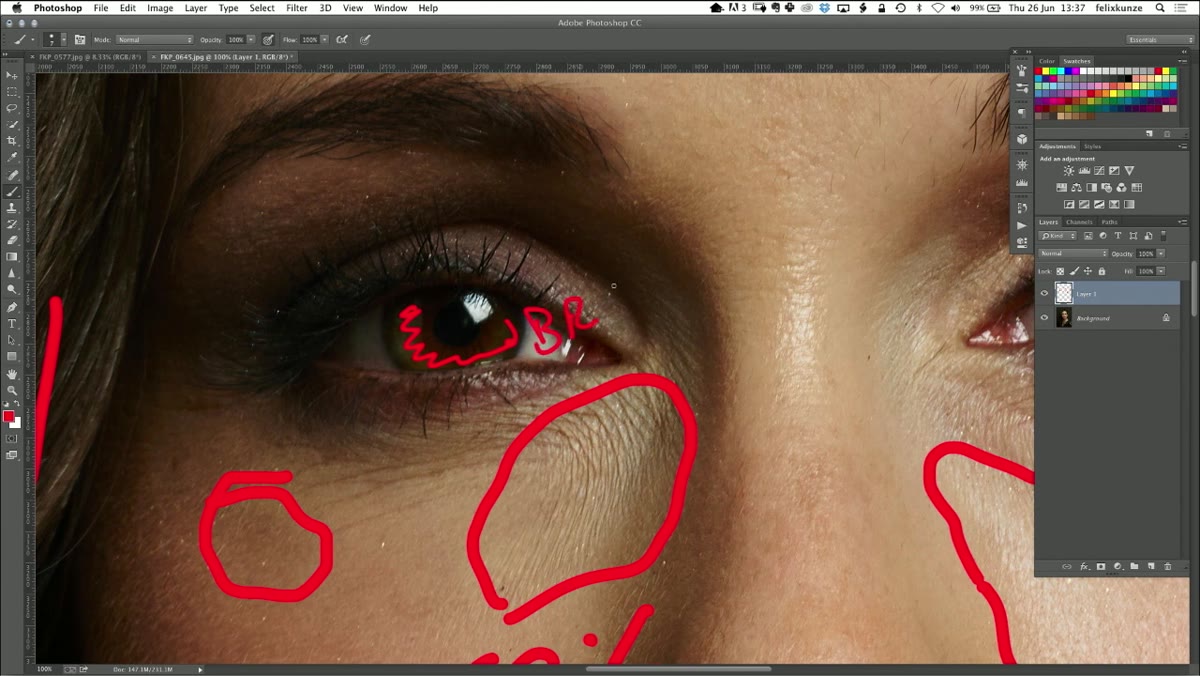 Small brush marks on the iris with a note to brighten and add pop
Eyes are almost always the emotional center of a portrait, and the tutorial treats them accordingly. The presenter drills into the eye area, reduces the brush size significantly, and writes a note asking the retoucher to brighten and add “pop” to the iris. The catch lights are also noted as something to clean up and enhance.
Small brush marks on the iris with a note to brighten and add pop
Eyes are almost always the emotional center of a portrait, and the tutorial treats them accordingly. The presenter drills into the eye area, reduces the brush size significantly, and writes a note asking the retoucher to brighten and add “pop” to the iris. The catch lights are also noted as something to clean up and enhance.
A small note here from my own workflow: I’ve started using specific percentage language when I annotate the eyes. Something like “brighten 20-30%, keep it natural” gives a retoucher a range to work within and signals that I’m not looking for neon, artificially lit irises. It also reduces the back-and-forth that happens when “brighten” means very different things to different people.
Step 7: Make a Deliberate Decision About Facial Lines and Character Features
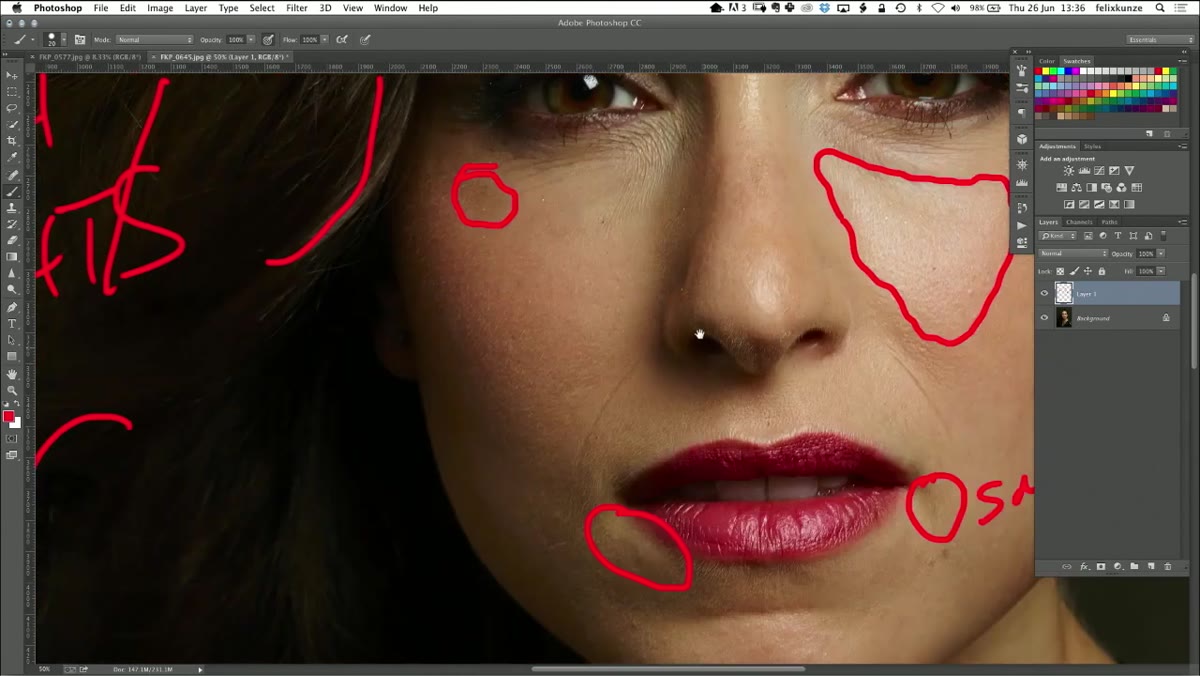 Annotation marks on laugh lines with a note indicating partial reduction
This step is less a technical action and more a philosophical one, but it’s the most important editorial decision in the whole workflow. The presenter looks at the natural lines on the face and makes a conscious choice: soften slightly, maybe 50%, but do not remove. The reasoning is that certain features define a person. Erasing them entirely doesn’t create a better portrait. It creates a different person.
Annotation marks on laugh lines with a note indicating partial reduction
This step is less a technical action and more a philosophical one, but it’s the most important editorial decision in the whole workflow. The presenter looks at the natural lines on the face and makes a conscious choice: soften slightly, maybe 50%, but do not remove. The reasoning is that certain features define a person. Erasing them entirely doesn’t create a better portrait. It creates a different person.
The presenter frames this in terms of knowing your client. A fashion client with a specific brief might require a more aggressive approach. A personal project, an editorial shoot, a portfolio piece, these give you room to preserve what makes a face interesting. We mark it at 50% and move on.
What I’d Add From My Own Experience
The annotation workflow in this tutorial is clean and efficient, but I’d add one habit I developed after years of revision-heavy client work: save a flattened JPEG of your annotation layer alongside your notes. When I’m briefing a retoucher, I send both the original file and a low-res annotated JPEG they can open on any device. It means they never have to hunt for the Photoshop layer, and there’s no excuse for missing a note. Small thing. Saves enormous amounts of time.
I’d also add that this kind of annotation document becomes part of your own editorial record. Looking back at how you marked up a shoot tells you a lot about what you were prioritizing creatively at that moment. I keep annotated files the way some photographers keep contact sheets.
The single most transferable idea from this tutorial is that retouching direction is a creative act, not just a quality control pass. What you choose to mark, what you choose to protect, and how much reduction you ask for on any given feature, those decisions shape the emotional truth of the final image. Get comfortable making them explicitly rather than hoping a retoucher guesses right.
Watch the full tutorial on YouTube and pay particular attention to the moments where the presenter pauses to explain what they’re leaving alone and why. That’s where the real education is.
Comments (1)
I tried this on a client project yesterday and the results were way better than expected.
Leave a Comment