There is a specific kind of dread that comes from finishing a wedding gallery, sending it off, and then realizing you forgot to add a key line to every single image. Or that the skin smoothing you applied so carefully to the hero shot looks nothing like what you did to the rest of the series. I lived that dread more times than I care to admit before I started treating multi-image retouching as a real, deliberate workflow instead of just “doing it again for each photo.” When I came across this CreativeLive tutorial on retouching multiple images at once, I recognized immediately that the instructor was solving exactly that problem, and solving it elegantly.
Watch the full tutorial on YouTube
The core idea here is surprisingly simple: flatten your images together into a single Photoshop document, retouch them as one unit, and let every adjustment hit all of them simultaneously. It sounds almost too obvious once you hear it, but the execution involves a handful of specific techniques worth unpacking step by step. What follows is my breakdown of the workflow, with the settings and tool choices you need to actually replicate it.
Step 1: Drop Out the Backgrounds and Separate Your Subjects
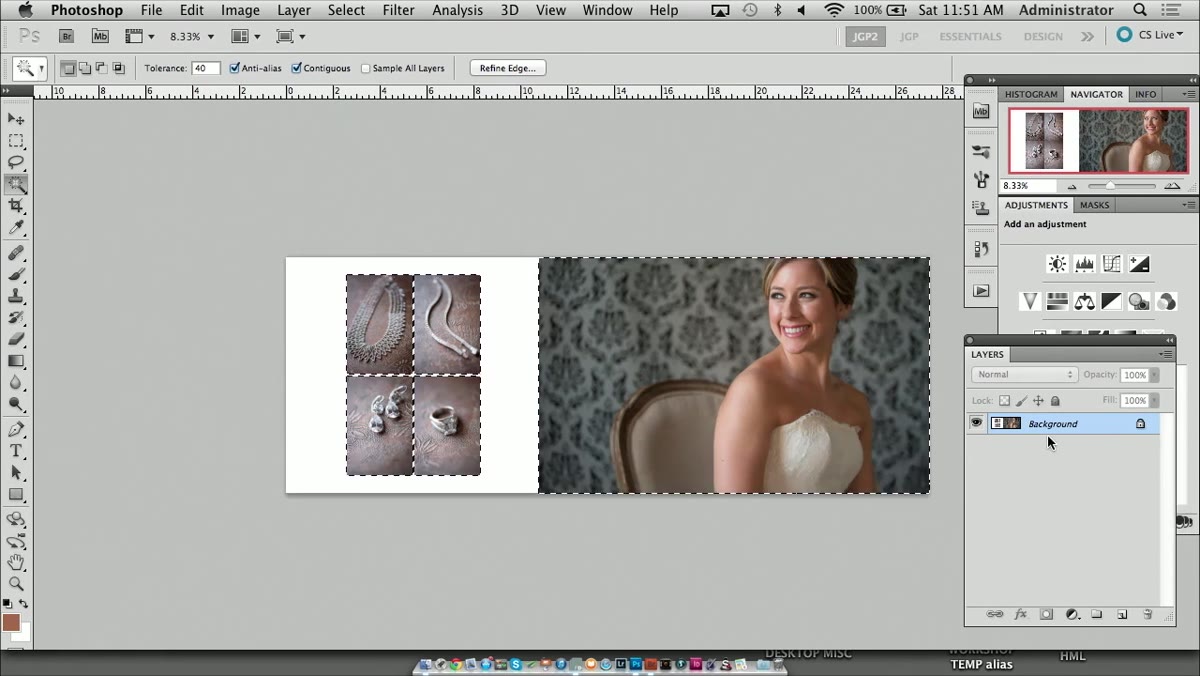 Quick Selection Tool isolating subject from background
Start by using the Quick Selection tool to isolate your subject from the background in each image. Once you have your selection, invert it and use Command+J (Ctrl+J on Windows) to lift the subject onto its own layer. The instructor refers to this as getting the images “floating in space,” and that framing is useful. You are creating clean, isolated subject layers that you can stack or arrange freely before flattening them down.
Quick Selection Tool isolating subject from background
Start by using the Quick Selection tool to isolate your subject from the background in each image. Once you have your selection, invert it and use Command+J (Ctrl+J on Windows) to lift the subject onto its own layer. The instructor refers to this as getting the images “floating in space,” and that framing is useful. You are creating clean, isolated subject layers that you can stack or arrange freely before flattening them down.
Do this for each image before you bring them together. The cleaner your selections at this stage, the less cleanup you will have later. I typically run a quick Select and Mask pass on any edges that look crunchy, especially around hair.
Step 2: Flatten All Images Into a Single Retouch Unit
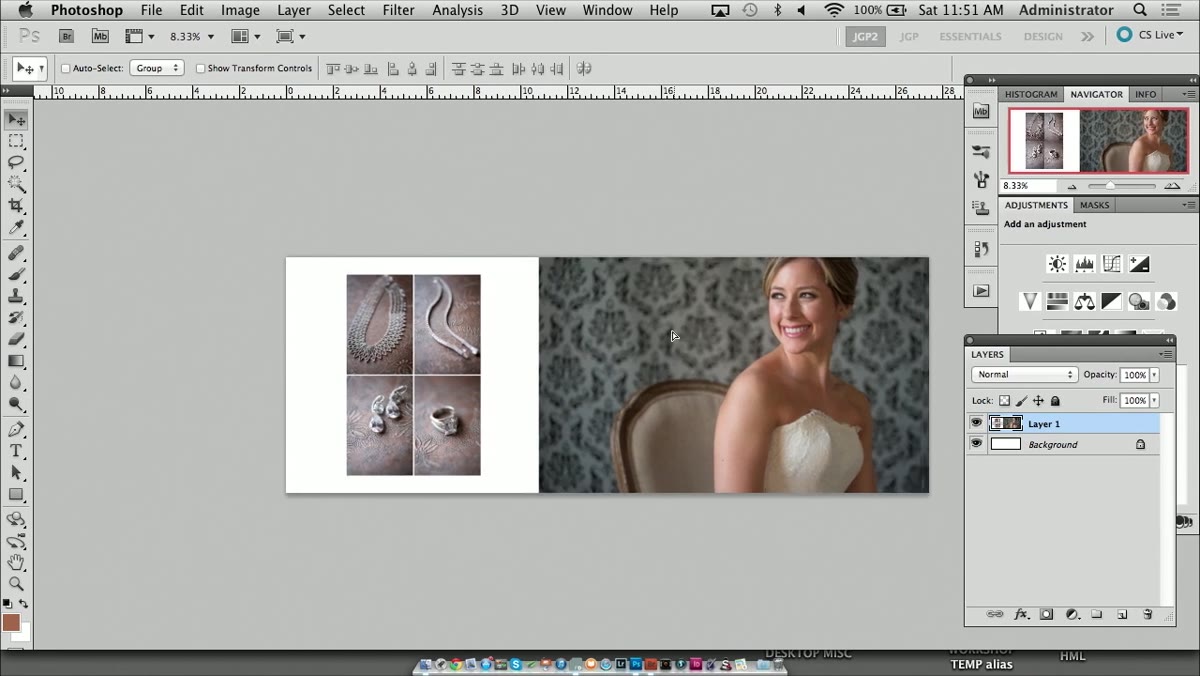 Flattened composite of multiple portraits in one document
Once your subjects are isolated, bring them all into one Photoshop document and flatten them together. The instructor makes a point worth repeating here: this is not fundamentally different from retouching a single image. It is just a larger canvas with more faces on it. Thinking of it as a “multiple image retouch unit” rather than some separate, intimidating process makes the whole thing feel manageable.
Flattened composite of multiple portraits in one document
Once your subjects are isolated, bring them all into one Photoshop document and flatten them together. The instructor makes a point worth repeating here: this is not fundamentally different from retouching a single image. It is just a larger canvas with more faces on it. Thinking of it as a “multiple image retouch unit” rather than some separate, intimidating process makes the whole thing feel manageable.
Flattening them means that any layer effects, adjustments, or filters you apply will hit every image at the same time. This is the whole engine of the workflow.
Step 3: Apply Global Effects Like Stroke or Key Line Across Every Image
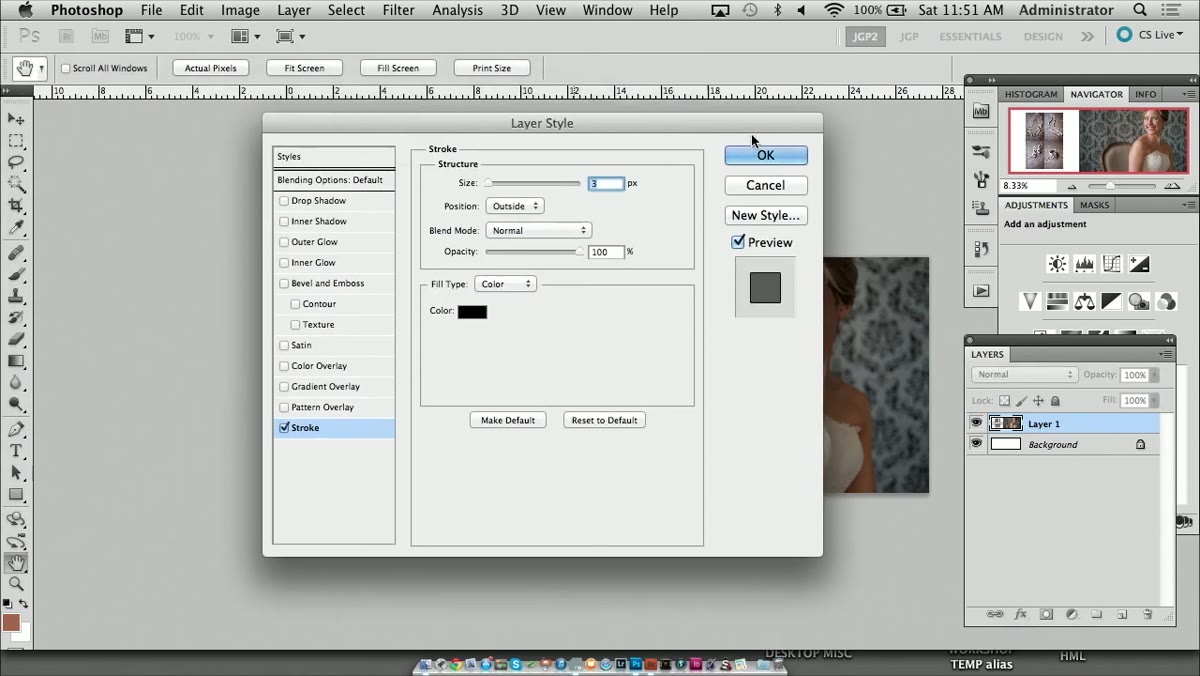 Black stroke layer effect applied uniformly across all portraits
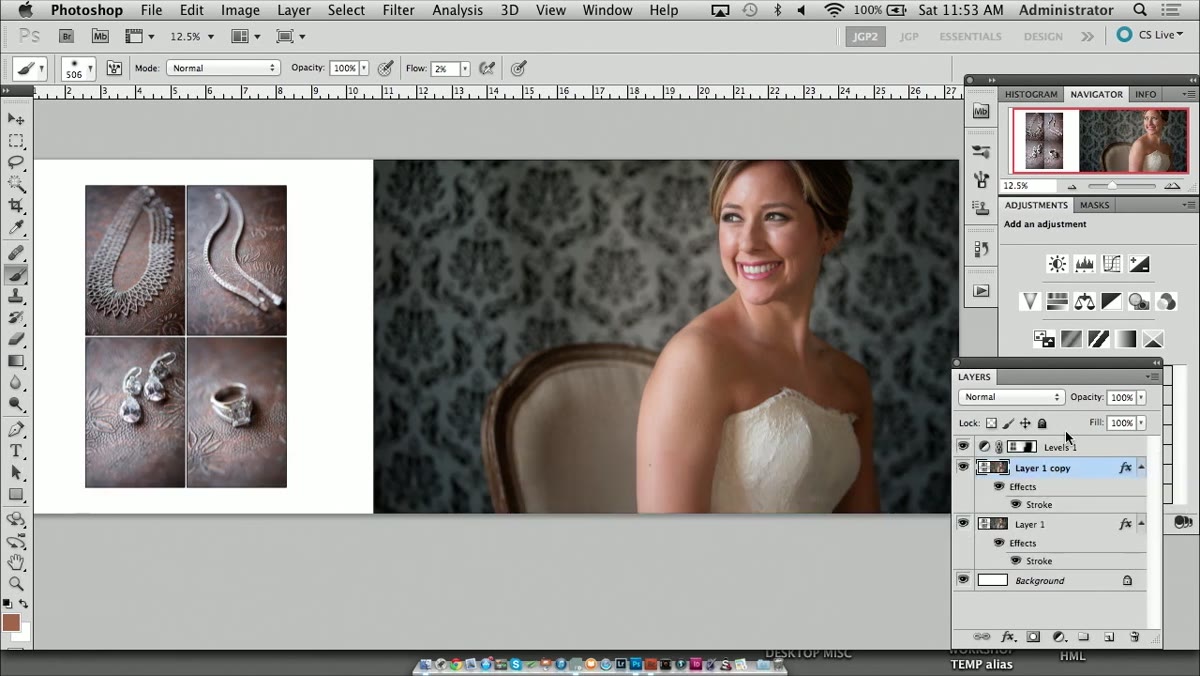
Here is where the efficiency becomes obvious. If you want to add a stroke or key line around your images, apply it once as a layer effect on the flattened composite and it appears on everything. The instructor uses a 3-pixel black stroke on the inside of the layer. Go to Layer > Layer Style > Stroke, set your size, choose Inside for position, and pick your color.
Black stroke layer effect applied uniformly across all portraits
Here is where the efficiency becomes obvious. If you want to add a stroke or key line around your images, apply it once as a layer effect on the flattened composite and it appears on everything. The instructor uses a 3-pixel black stroke on the inside of the layer. Go to Layer > Layer Style > Stroke, set your size, choose Inside for position, and pick your color.
For editorial spreads or client deliverables where consistency is non-negotiable, this single step alone can save you 20 minutes of repetitive clicking. It also removes the risk of slight variations sneaking in when you are applying the same effect manually to a dozen separate files.
Step 4: Use a Feathered Vignette to Pull Attention to the Center
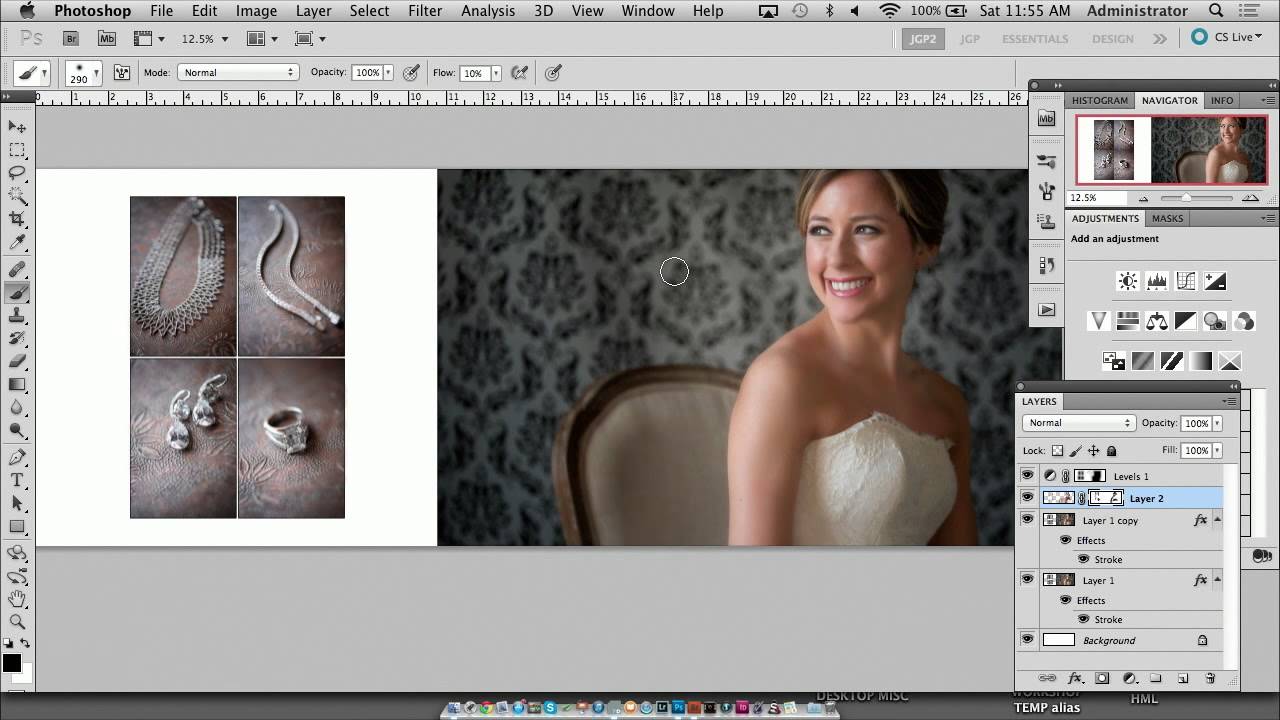
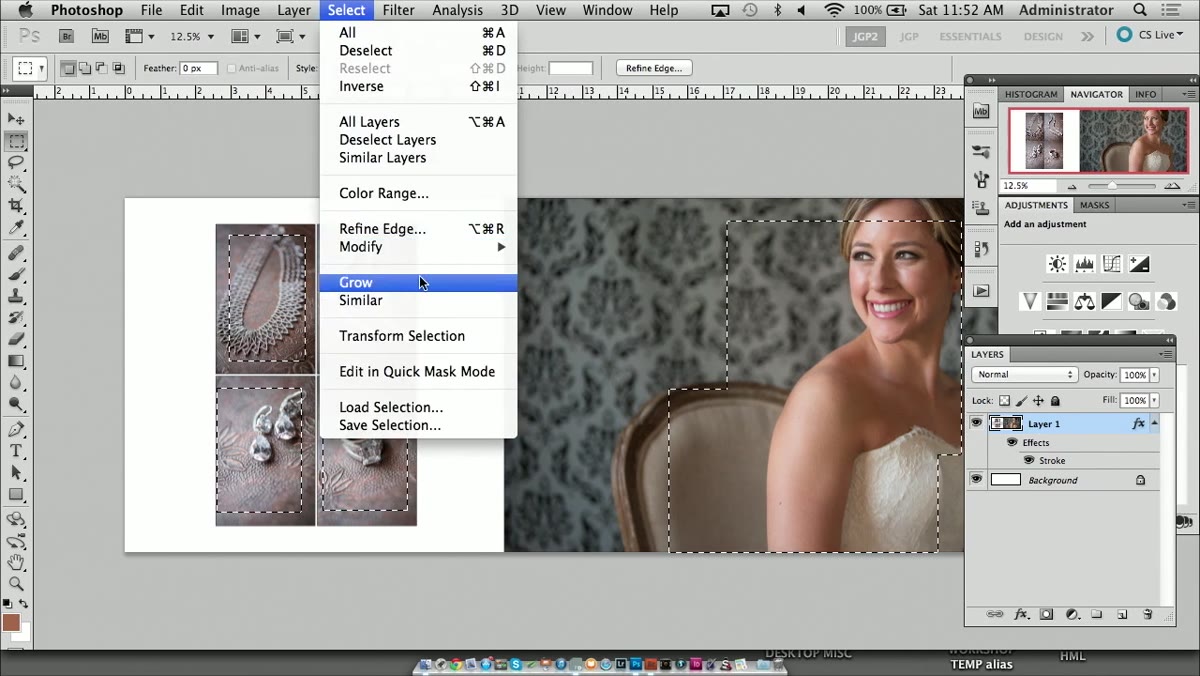 Levels adjustment darkening edges with feathered selection active
Make a loose marquee selection around the center of your composite, then go to Select > Modify > Feather. The instructor uses 200 pixels here, which works for a high-resolution file. For lower-resolution images, scale that down proportionally. After feathering, invert the selection so you are targeting the outer edges of the frame, and darken those edges using a Levels adjustment layer.
Levels adjustment darkening edges with feathered selection active
Make a loose marquee selection around the center of your composite, then go to Select > Modify > Feather. The instructor uses 200 pixels here, which works for a high-resolution file. For lower-resolution images, scale that down proportionally. After feathering, invert the selection so you are targeting the outer edges of the frame, and darken those edges using a Levels adjustment layer.
This is a classic portrait vignette technique, and applying it across a multi-image spread in one move keeps the look unified. Drag the right input shadow slider in Levels gently to the left until the edges fall about half a stop darker than your center. Subtle is almost always right.
Step 5: Use Liquify on Individual Subjects When Needed
 Liquify filter open with warp tool adjusting subject’s arm
Not every correction needs to be global. If one subject has a specific distraction, isolate that image layer before flattening, or pull it back out for Liquify work. The instructor spots that the bride’s arm reads as too prominent in the frame and takes responsibility for it directly, noting that a better pose or light placement in camera would have prevented the issue. That honesty stuck with me.
Liquify filter open with warp tool adjusting subject’s arm
Not every correction needs to be global. If one subject has a specific distraction, isolate that image layer before flattening, or pull it back out for Liquify work. The instructor spots that the bride’s arm reads as too prominent in the frame and takes responsibility for it directly, noting that a better pose or light placement in camera would have prevented the issue. That honesty stuck with me.
Open Liquify via Filter > Liquify and use the Forward Warp tool with a large, soft brush to nudge the arm inward. Keep the adjustment conservative. The goal is to reduce the visual pull of that element, not to sculpt a new silhouette. Work in small strokes and check your before/after toggle often.
Step 6: Select and Smooth Skin Using Color Range
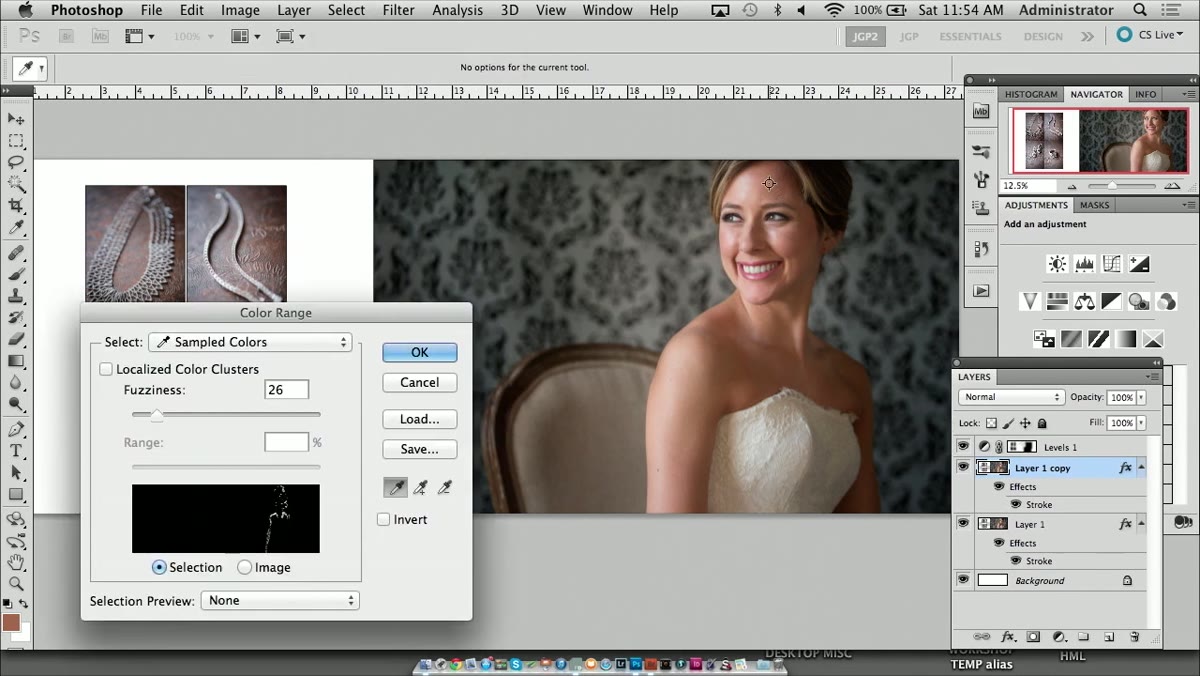 Color Range dialog selecting skin tones across the composite
Go to Select > Color Range and click on the skin in your image. Hold Shift and click in additional areas to expand the selection across highlights and mid-tones. Once you have a reasonable selection of the skin, hit Command+J to copy it to a new layer, then apply a Gaussian Blur to that layer. The amount depends on your resolution and how much texture you want to preserve. The instructor pushes it further than necessary intentionally, then pulls it back using a layer mask.
Color Range dialog selecting skin tones across the composite
Go to Select > Color Range and click on the skin in your image. Hold Shift and click in additional areas to expand the selection across highlights and mid-tones. Once you have a reasonable selection of the skin, hit Command+J to copy it to a new layer, then apply a Gaussian Blur to that layer. The amount depends on your resolution and how much texture you want to preserve. The instructor pushes it further than necessary intentionally, then pulls it back using a layer mask.
Add a layer mask to the blurred skin layer, fill it with black to hide the blur entirely, and then paint back in white only over the areas where you want smoothing. Use a soft brush at low flow (around 20-30%) and build up gradually. Keep blurring away from edges, eyelashes, and any jewelry.
Step 7: Add Grain Back to Prevent a Plastic Look
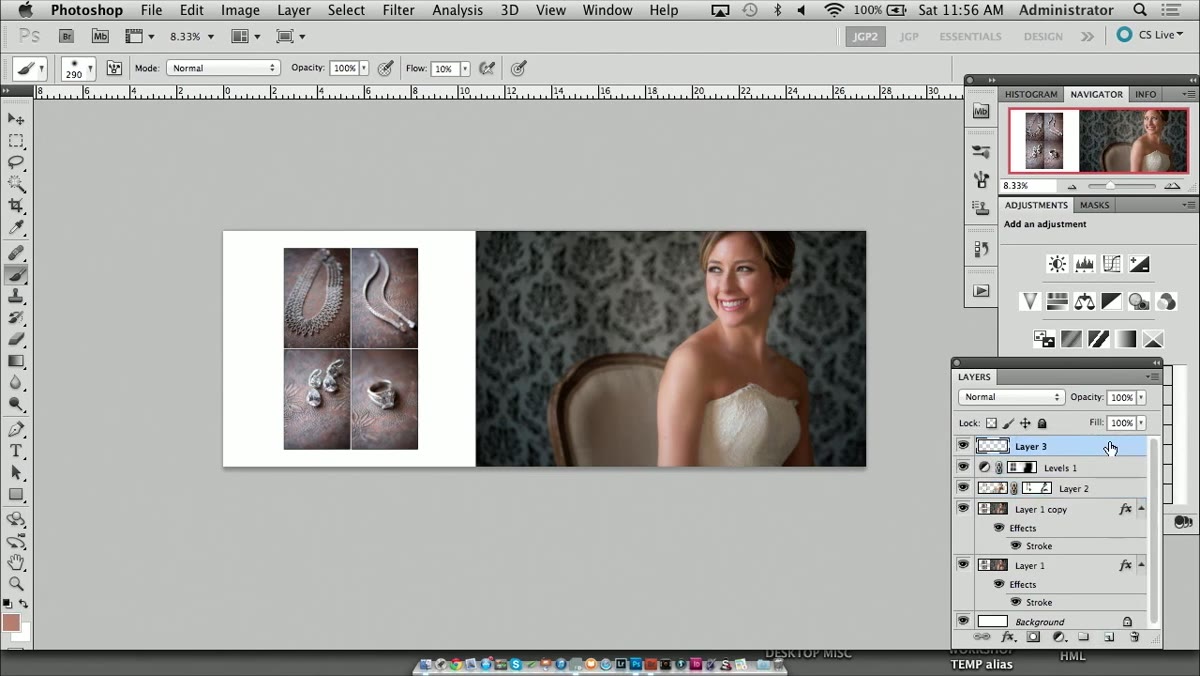 Filter Noise dialog adding grain to a gray overlay layer
After blurring skin, you will almost always need to restore some texture. Create a new blank layer above everything, fill it with 50% gray using Edit > Fill (choose 50% Gray from the dropdown), and set that layer’s blend mode to Overlay. Then go to Filter > Noise > Add Noise. The Overlay blend mode means the gray disappears and only the noise texture remains visible.
Filter Noise dialog adding grain to a gray overlay layer
After blurring skin, you will almost always need to restore some texture. Create a new blank layer above everything, fill it with 50% gray using Edit > Fill (choose 50% Gray from the dropdown), and set that layer’s blend mode to Overlay. Then go to Filter > Noise > Add Noise. The Overlay blend mode means the gray disappears and only the noise texture remains visible.
Match your grain amount to the film grain or sensor noise already present in the image. Zoom to 100% and compare the smoothed skin areas to the untouched background. When they read as the same texture, you are done.
A Note From My Own Workflow
The step I have come to treat as non-negotiable is the grain restoration at the end. Early in my retouching work, a client once told me the skin in her images looked “like a wax figure,” and she was right. I had blurred without restoring and sent it off confidently. Now I keep a saved Photoshop action for grain restoration that I run on every single job. I named it “The Velvet Underground,” because good texture should be felt, not seen.
For batch retouching specifically, I also recommend doing a final zoom-to-100% pass on each individual face in the composite before you export. Global adjustments can occasionally clip something you did not intend to clip, and catching it at the review stage is far better than catching it in a client email.
The single most important idea in this tutorial is that batch retouching is not a workaround or a shortcut. It is a legitimate workflow that produces more consistent results than editing images one by one, especially under deadline pressure. Treating your multi-image spread as one retouch unit, and moving through skin smoothing, vignetting, and grain restoration as a unified process, is how professional retouchers maintain quality at volume.
Watch the full tutorial on YouTube to see every step demonstrated in real time.
Comments
Leave a Comment