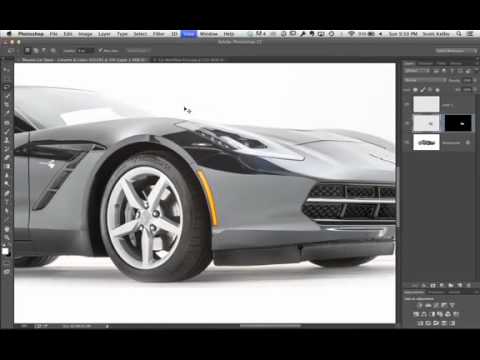
Most of my retouching work lives in skin texture and color grading, but the skills that make a portrait sing translate directly to product and automotive work. Clean surfaces. Controlled reflections. No distracting garbage pulling the eye away from the subject. When a photographer friend asked me to help clean up some studio car shots last year, I realized how much of what I do every day for beauty clients applies to shiny metal just as well as it applies to skin.
In this KelbyOne tutorial, Scott Kelby walks through his retouching approach on a 2014 Corvette he shot in Phoenix. Watch the full tutorial on YouTube – he’s clear that a full car retouch takes him 30 to 45 minutes and this is an overview of the workflow, not every single click. That framing matters. It shifted how I watched it: less as a recipe and more as a way of thinking. The problems he identifies on that Corvette, harsh reflections, visible crew members in the paint, overhead lights, floor clutter, are the same categories of problems that show up on every reflective surface you’ll ever shoot in a studio.
What follows is a breakdown of his workflow in the order he works through it, with enough detail that you can apply it yourself without needing to pause and rewind every 30 seconds.
Step 1: Identify Every Problem Before You Touch Anything
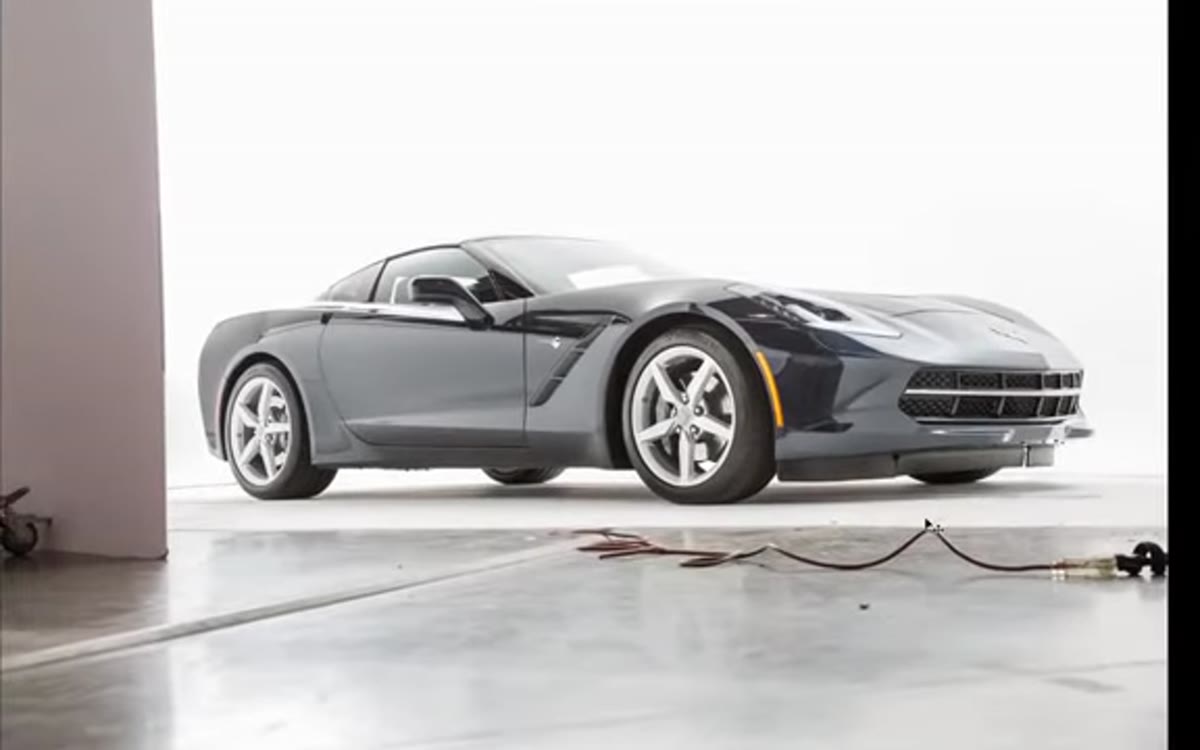 Original unretouched Corvette with bounce card and reflections visible
Before Kelby makes a single edit, he does a full audit of the image. He talks through everything that needs to go: a bounce card visible along one edge, reflections of crew members in the car’s body, overhead studio lights blooming across the paint, random specks and debris on the floor, and cropping that cuts into the car awkwardly. This narration step is easy to skip when you’re eager to start fixing things, but it protects you from solving one problem in a way that creates another.
Original unretouched Corvette with bounce card and reflections visible
Before Kelby makes a single edit, he does a full audit of the image. He talks through everything that needs to go: a bounce card visible along one edge, reflections of crew members in the car’s body, overhead studio lights blooming across the paint, random specks and debris on the floor, and cropping that cuts into the car awkwardly. This narration step is easy to skip when you’re eager to start fixing things, but it protects you from solving one problem in a way that creates another.
I do a version of this on every portrait I open. Before I touch healing brushes or frequency separation, I zoom out to 50% and make a mental list. Where is the eye going? What’s fighting with the subject? On a car, the surface is telling you a story about every light source and every person in the room. You have to read that story before you can edit it.
Step 2: Remove the Bounce Card with a Selection and Free Transform
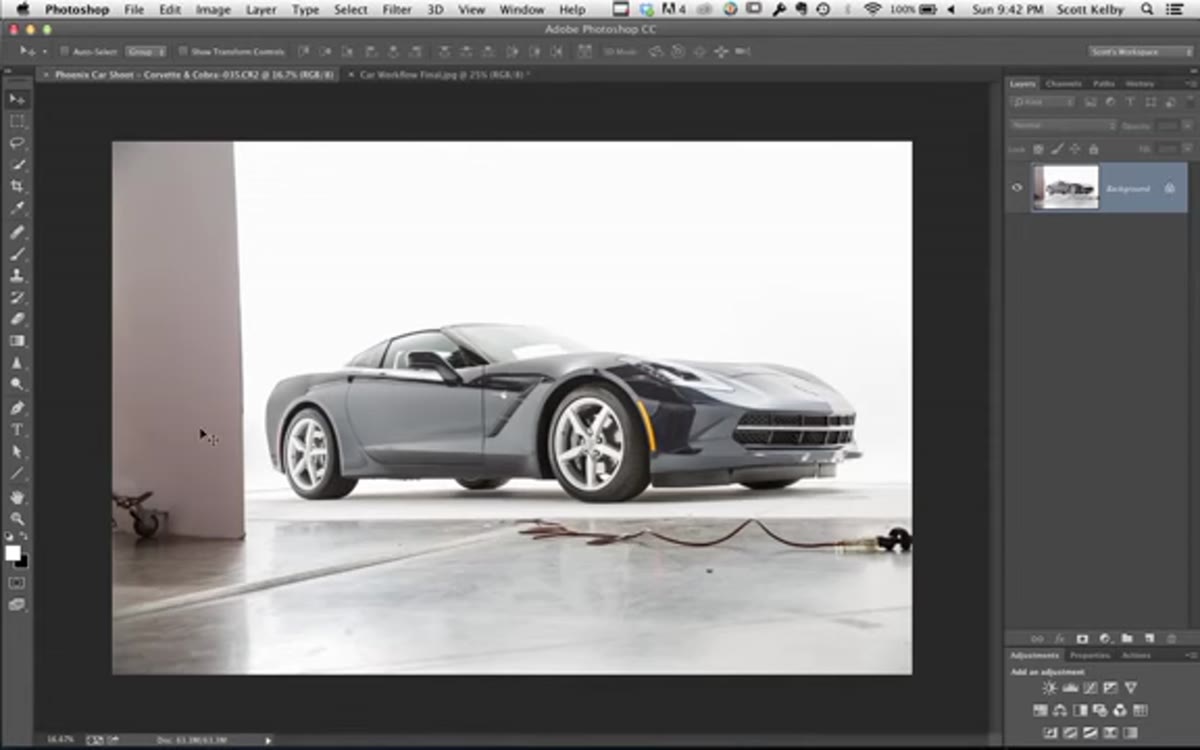 Thin rectangular selection drawn beside the bounce card
The bounce card, a reflector used during the shoot, shows up as a bright rectangular intrusion along one side of the frame. Kelby’s fix is elegant: draw a thin rectangular selection in a clean area directly adjacent to the bounce card, then use Free Transform (Command+T on Mac, Control+T on PC) to drag and stretch that clean area right over the problem. The bounce card disappears under borrowed pixels that already match the surrounding tone and color.
Thin rectangular selection drawn beside the bounce card
The bounce card, a reflector used during the shoot, shows up as a bright rectangular intrusion along one side of the frame. Kelby’s fix is elegant: draw a thin rectangular selection in a clean area directly adjacent to the bounce card, then use Free Transform (Command+T on Mac, Control+T on PC) to drag and stretch that clean area right over the problem. The bounce card disappears under borrowed pixels that already match the surrounding tone and color.
This is a faster and more convincing fix than cloning because you’re scaling existing texture rather than sampling and stamping it in pieces. The key is choosing your source rectangle carefully. It needs to match the gradient and tone of the area you’re covering, not just sit next to it.
Step 3: Expand the Canvas and Fill the Gap
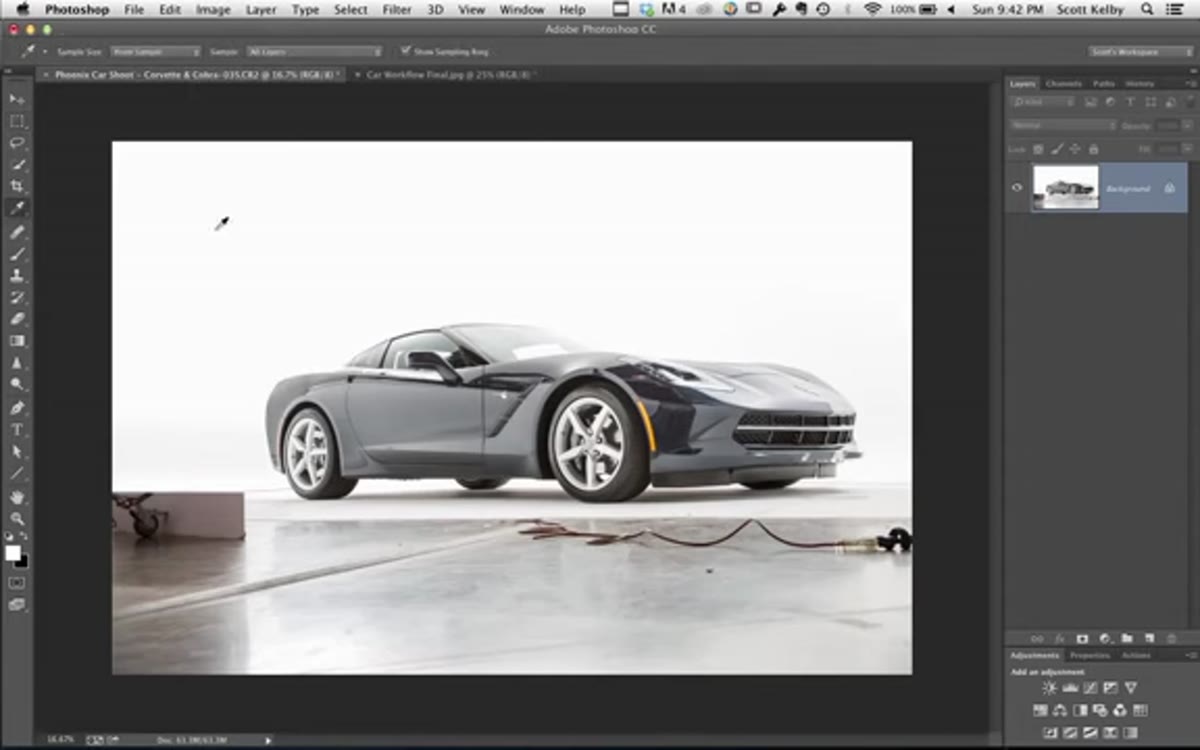 Canvas Size dialog open, space being added to one side
Because the original crop cuts into the car awkwardly, Kelby extends the canvas before he goes any further. First he samples the background color right at the edge of the frame using the eyedropper, making that his foreground color. Then he opens Canvas Size (Image menu), uses the anchor grid to add space only on the side that needs it, and adds about two inches. Photoshop fills that new space with the sampled color.
Canvas Size dialog open, space being added to one side
Because the original crop cuts into the car awkwardly, Kelby extends the canvas before he goes any further. First he samples the background color right at the edge of the frame using the eyedropper, making that his foreground color. Then he opens Canvas Size (Image menu), uses the anchor grid to add space only on the side that needs it, and adds about two inches. Photoshop fills that new space with the sampled color.
The fill won’t look seamless on its own. From there he draws another selection from the existing edge of the image and uses Free Transform to pull real background content over into the new canvas area. The sampled color gets you close enough that the stretched pixels blend without a harsh line.
Step 4: Duplicate, Flip, and Blend for a Natural Extension
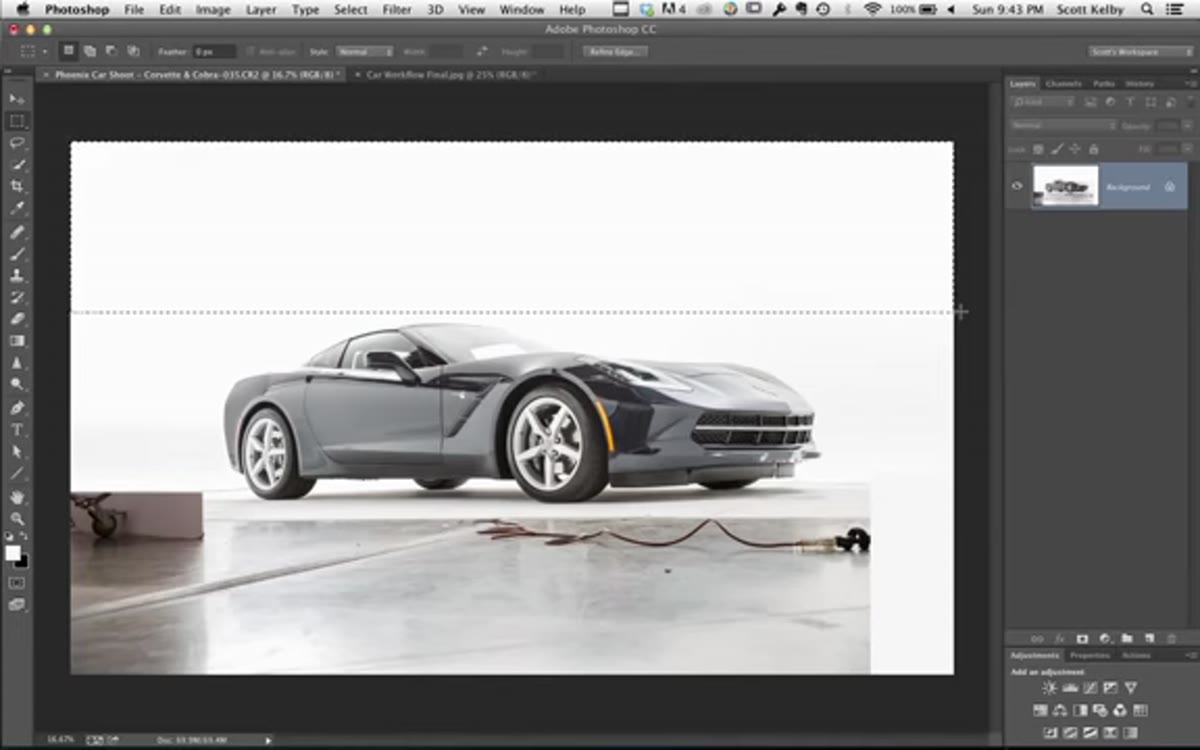 Flipped layer being dragged down to match tone at the edge
Once there’s a rough canvas extension in place, Kelby refines it by selecting just a strip of the original edge content, duplicating it to its own layer (Command+J on Mac, Control+J on PC), and flipping it vertically via Edit, Transform, Flip Vertical. Flipping rather than just copying prevents the repetition from reading as a copy-paste. Our eyes are surprisingly good at detecting mirrored patterns, but a vertical flip breaks up that recognition just enough.
Flipped layer being dragged down to match tone at the edge
Once there’s a rough canvas extension in place, Kelby refines it by selecting just a strip of the original edge content, duplicating it to its own layer (Command+J on Mac, Control+J on PC), and flipping it vertically via Edit, Transform, Flip Vertical. Flipping rather than just copying prevents the repetition from reading as a copy-paste. Our eyes are surprisingly good at detecting mirrored patterns, but a vertical flip breaks up that recognition just enough.
He drags the flipped strip down to align it at the seam, then merges the layers together (Command+E on Mac, Control+E on PC). The result is a background extension that reads as continuous even though it’s entirely constructed.
Step 5: Use the Patch Tool on Isolated Problem Areas
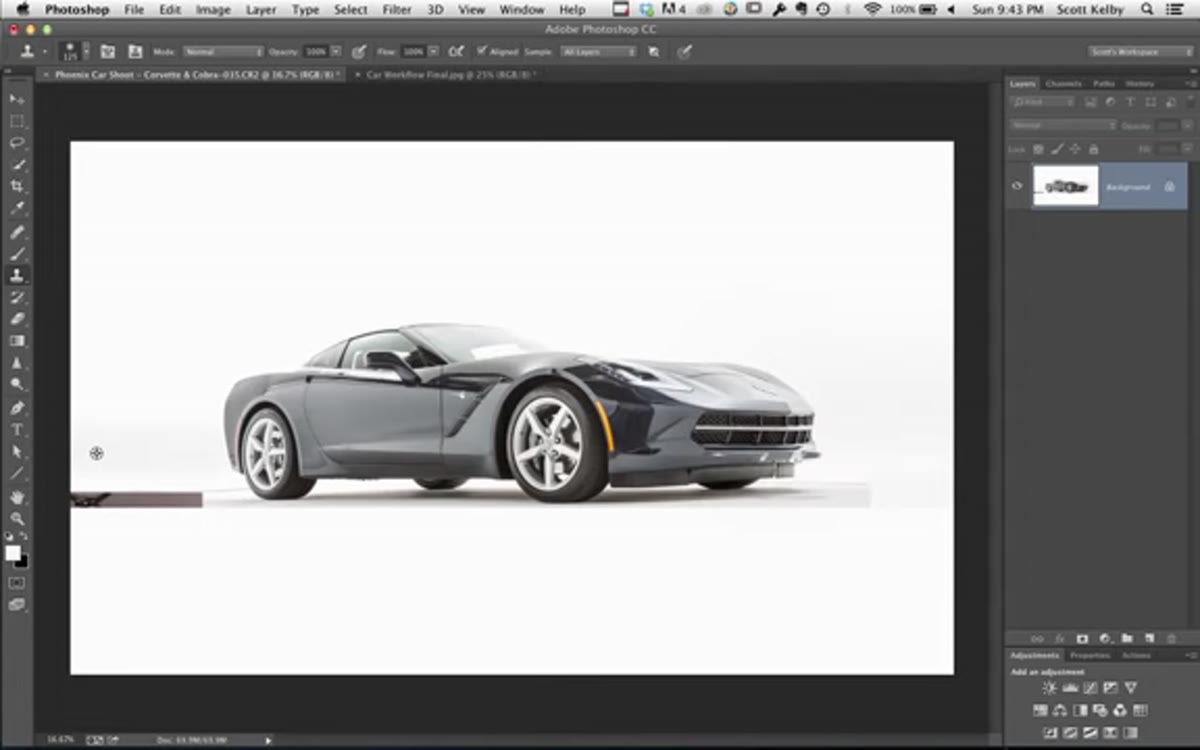 Patch tool selection drawn around isolated floor debris
For stubborn spots that can’t be stretched away, Kelby reaches for the Patch tool. The trick he shares here is specific and worth noting: before using the Patch tool on an element that runs edge to edge, use the Clone Stamp to cut a small hole at each end of the problem area, essentially turning it into an island. If you skip this step, the Patch tool will smear the surrounding content into the edges as it blends, trading one flaw for two.
Patch tool selection drawn around isolated floor debris
For stubborn spots that can’t be stretched away, Kelby reaches for the Patch tool. The trick he shares here is specific and worth noting: before using the Patch tool on an element that runs edge to edge, use the Clone Stamp to cut a small hole at each end of the problem area, essentially turning it into an island. If you skip this step, the Patch tool will smear the surrounding content into the edges as it blends, trading one flaw for two.
Once the problem area is isolated with those small holes, draw a loose Patch selection around it using the lasso-style drag of the P tool, then click inside the selection and drag it to a clean area of the image. When you release, Photoshop blends the replacement in. It’s a two-second fix for spots that would take minutes of careful cloning.
Step 6: Soften Remaining Hard Edges with the Clone Stamp
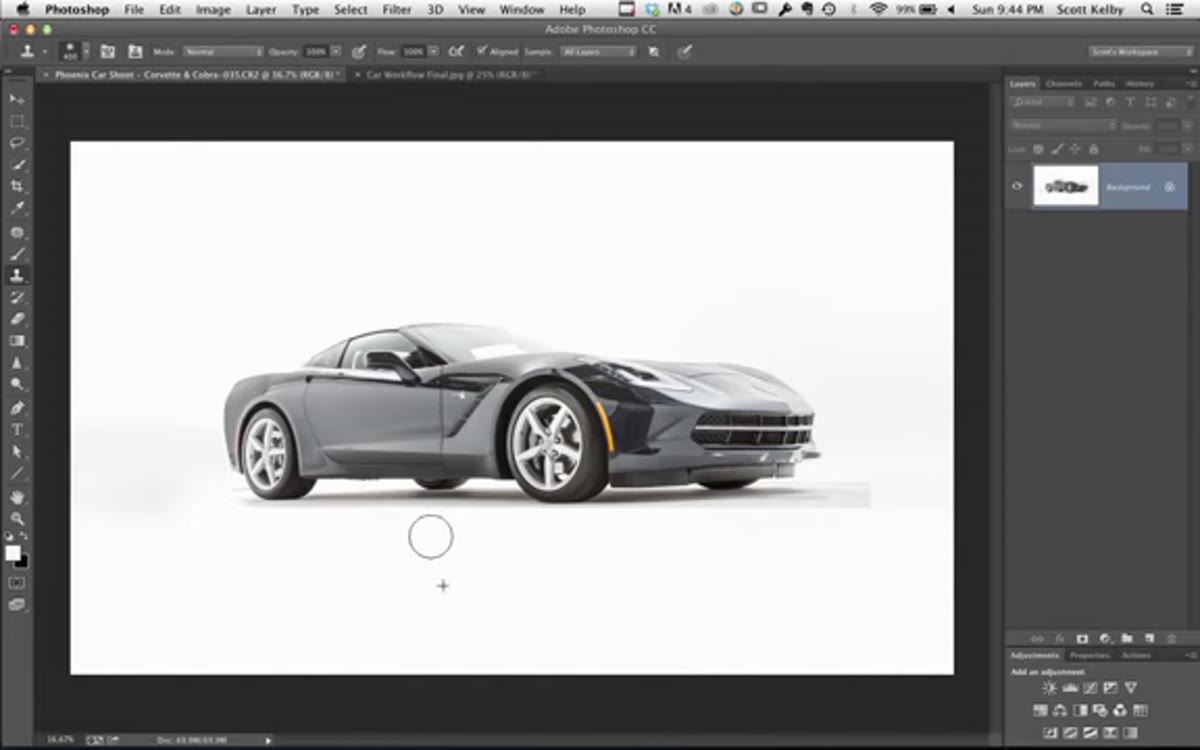 Clone stamp with soft brush painting along a hard floor edge
After the Patch tool cleans up the islands, there are still edges that read too hard. Kelby switches to the Clone Stamp with a large, very soft brush and paints over those transitions, essentially lightening and smoothing rather than replacing. He’s not stamping texture here. He’s using the tool as a low-opacity blending brush to ease the contrast at edges where the floor meets the cleaned area.
Clone stamp with soft brush painting along a hard floor edge
After the Patch tool cleans up the islands, there are still edges that read too hard. Kelby switches to the Clone Stamp with a large, very soft brush and paints over those transitions, essentially lightening and smoothing rather than replacing. He’s not stamping texture here. He’s using the tool as a low-opacity blending brush to ease the contrast at edges where the floor meets the cleaned area.
Brush hardness is doing all the work in this step. A hard brush would carve a new edge. A feathered brush lets you build the transition gradually, which is exactly how light actually falls on a flat surface.
What I’d Add: Reflection Cleanup Is Worth a Dedicated Pass
Kelby mentions crew reflections in the car body but the tutorial focuses mainly on the floor and edges. In my experience, those paint reflections deserve their own pass. On a glossy car surface, each unwanted reflection is essentially a portrait retouching problem: an intrusion that doesn’t belong. I approach each one with a combination of the Healing Brush for small elements and manual content-aware fill for larger ones, always on a separate layer so I can dial back opacity if it kills the metallic quality of the surface.
The instinct to scrub every reflection can backfire. Some reflections are structural. They’re what make the surface read as three-dimensional and real. The goal is the same as it is in portrait work: remove what distracts, keep what informs.
The single biggest takeaway from watching Kelby work through this is that car retouching is fundamentally about surface storytelling. Every flaw you see is information about the shooting environment, and your job is to decide which parts of that story to keep. Clean doesn’t mean sterile. It means intentional.
Watch the full tutorial on YouTube to see Kelby’s hands move through the workflow in real time. Some of what he does is faster to understand by watching than by reading, especially the Free Transform stretching technique.
Comments (2)
The tip about how to retouch car photos in p was the missing piece for me. Thank you.
I keep coming back to this article. It's that useful.
Leave a Comment