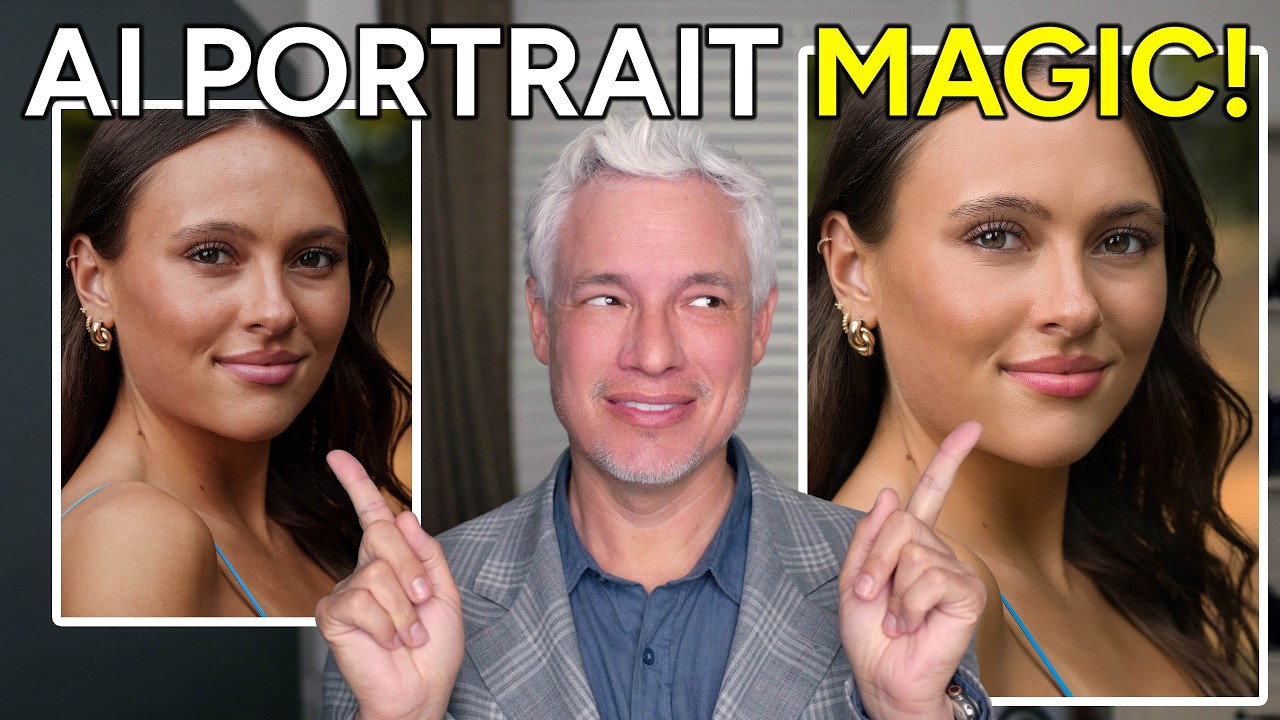
There is a specific kind of dread that comes from delivering a gallery and then getting a reply that says “these look a little… airbrushed.” I know that feeling intimately. Early in my retouching career, I overcorrected for every pore and stray hair until my subjects looked like they were made of latex. The lesson I eventually learned, the hard way, is that great retouching is invisible. People should look like themselves, just on their best day. That standard is what I hold every new tool up against.
So when I sat down with this Tony & Chelsea Northrup tutorial on Luminar Neo’s latest update, I was genuinely curious rather than skeptical. Tony’s framing matched my own philosophy almost word for word: do as little as possible, but never do nothing. And the fact that Luminar Neo processes everything locally, no cloud upload, no subscription, no files leaving your computer, matters a lot when you’re working with beauty clients who care about image rights and privacy. Let me walk you through exactly what the update adds and how to use it without making your subjects look processed.
Step 1: Open Your Raw File and Browse Presets for a Starting Direction
 Luminar Neo preset panel with hover previews on portraits
Luminar Neo handles large raw files well. In the tutorial, Tony works with a 100-megapixel raw file without any noticeable lag, which tells you something about how the software handles local processing. Before touching any sliders, head to the Presets tab. You can hover over any preset to get a live preview on your image without committing to it.
Luminar Neo preset panel with hover previews on portraits
Luminar Neo handles large raw files well. In the tutorial, Tony works with a 100-megapixel raw file without any noticeable lag, which tells you something about how the software handles local processing. Before touching any sliders, head to the Presets tab. You can hover over any preset to get a live preview on your image without committing to it.
This step is less about choosing a final look and more about getting your eye calibrated. Tony mentions the “Experimental” collection for its light-leaking, flaring effects, and highlights presets like “Celebrate” and “Feather Light” for portraits where you want the viewer’s attention drawn to the face. I treat this phase like a mood board pass. Nothing is permanent, and it takes about 90 seconds to scroll through and land on a direction.
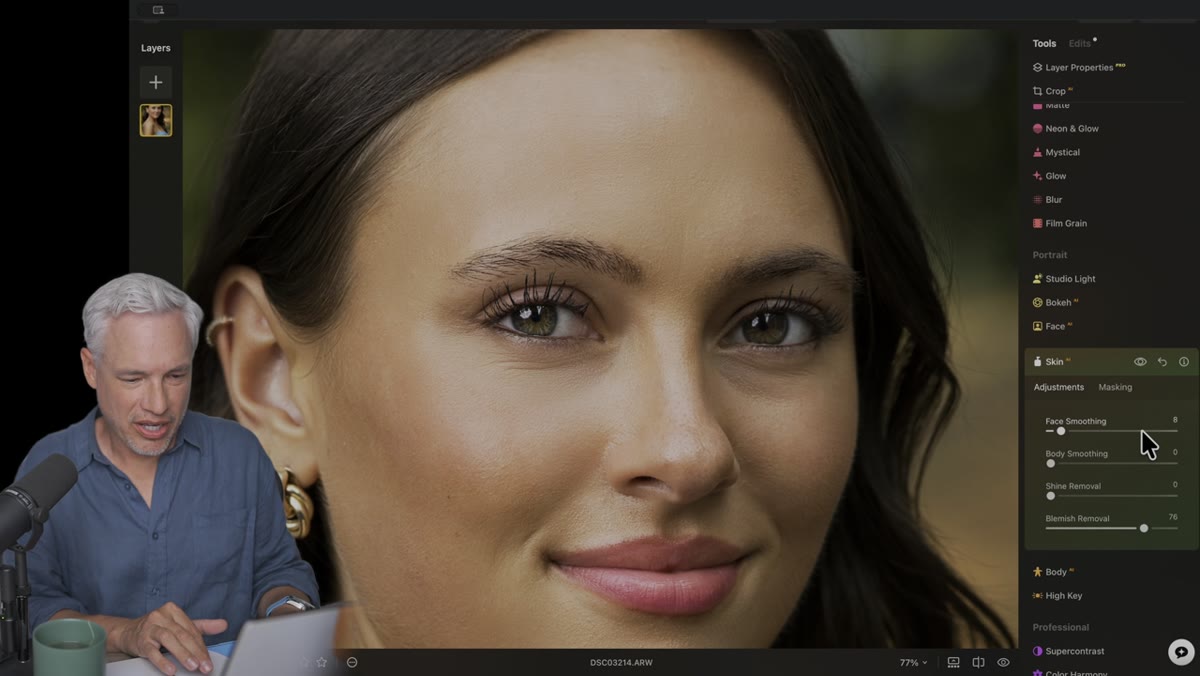
Step 2: Navigate to the Portrait Tab and Open the Skin Panel
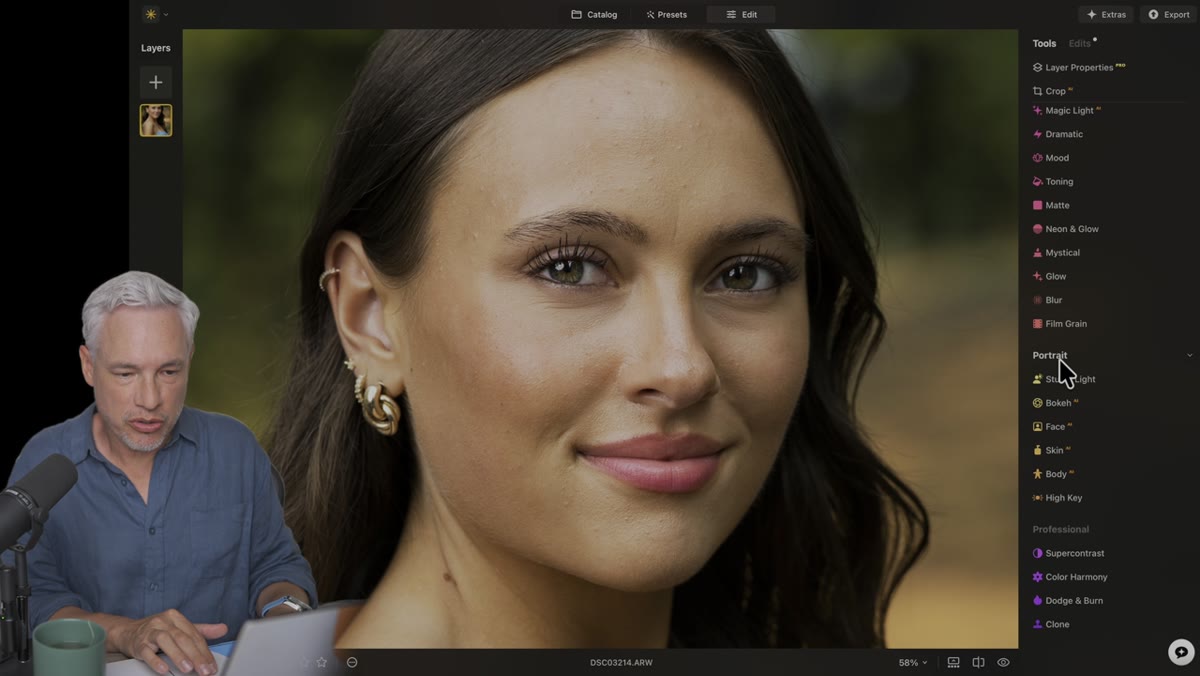 Portrait tab open, Skin section visible with sliders
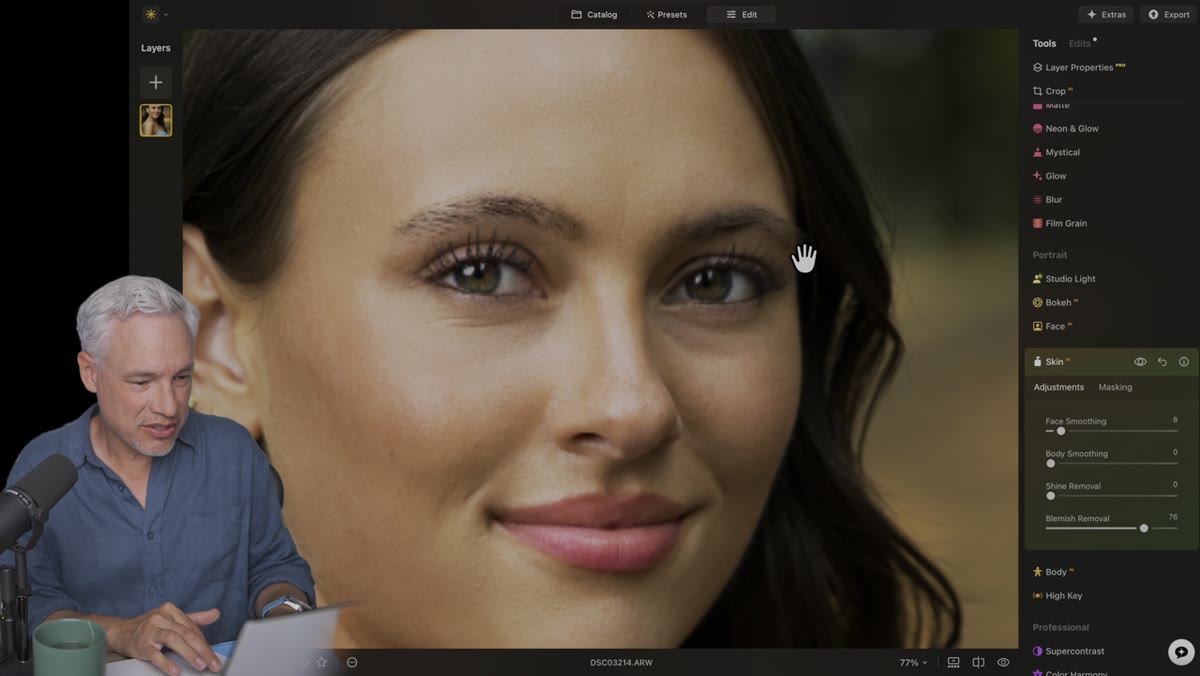
Switch from the Presets tab to the Edit tab, then scroll until you find the Portrait section. Inside it, you will see a Skin subsection. This is where the new update does its most useful work. You will find two primary controls here: Face Smoothing and Blemish Removal.
Portrait tab open, Skin section visible with sliders
Switch from the Presets tab to the Edit tab, then scroll until you find the Portrait section. Inside it, you will see a Skin subsection. This is where the new update does its most useful work. You will find two primary controls here: Face Smoothing and Blemish Removal.
The key is restraint. Tony positions both sliders conservatively, and I think that is exactly right. Pull Blemish Removal up first because it targets discrete spots rather than overall texture, so it reads as less processed. Then bring Face Smoothing up just enough to soften harsh pores that were exaggerated by direct flash or hard light. In 2025 and beyond, clients are trained to recognize over-smoothed skin from AI portrait apps, so if your before and after are dramatically different, you have probably gone too far.
Step 3: Use Before/After View to Calibrate Your Adjustments
 Before/after split view zoomed in on skin texture
Luminar Neo has a before/after toggle that is worth using constantly during skin work, not just at the end. Zoom in to roughly 100 percent and flip back and forth as you move the sliders. What you are looking for is texture retention. Skin should still have pores. There should still be fine lines where they naturally fall. The goal is to reduce distracting blemishes, not to replace skin with a gradient.
Before/after split view zoomed in on skin texture
Luminar Neo has a before/after toggle that is worth using constantly during skin work, not just at the end. Zoom in to roughly 100 percent and flip back and forth as you move the sliders. What you are looking for is texture retention. Skin should still have pores. There should still be fine lines where they naturally fall. The goal is to reduce distracting blemishes, not to replace skin with a gradient.
Tony demonstrates this comparison on a tight crop of his subject’s face, and the difference is clear without being dramatic. Two sliders, a few seconds of adjustment, and what used to require manual spot healing on dozens of individual blemishes is handled automatically. For photographers editing a full session of 50 or 100 portraits, this is the feature that changes your workflow math entirely.
Step 4: Verify Local Processing by Disconnecting from the Internet
 Wi-Fi turned off, editing still functioning in Luminar Neo
This step is less of an editing technique and more of a trust exercise, and Tony actually demonstrates it live in the tutorial. He turns off his Wi-Fi mid-edit and continues working without any interruption. All the AI tools keep functioning exactly as before.
Wi-Fi turned off, editing still functioning in Luminar Neo
This step is less of an editing technique and more of a trust exercise, and Tony actually demonstrates it live in the tutorial. He turns off his Wi-Fi mid-edit and continues working without any interruption. All the AI tools keep functioning exactly as before.
For anyone working with commercial clients, this matters. Your client’s face is not being uploaded to a server to run an AI model. The processing happens on your machine. I have had clients ask directly about where their raw files go during editing, and being able to say “they never leave my hard drive” is a genuinely useful answer. Luminar Neo’s local-first architecture makes that answer honest.
Step 5: Apply Shine Removal for a Natural, Matte Finish
 Shine removal slider in Skin panel, subtle change on forehead
Still inside the Skin panel, there is a Shine Removal slider that deserves its own step because it solves a problem that is surprisingly common and surprisingly annoying to fix manually. Natural skin oils, outdoor heat, and especially flash or studio strobes can leave a reflective sheen on foreheads, noses, and cheekbones that reads as unflattering in still images even if it looked fine in person.
Shine removal slider in Skin panel, subtle change on forehead
Still inside the Skin panel, there is a Shine Removal slider that deserves its own step because it solves a problem that is surprisingly common and surprisingly annoying to fix manually. Natural skin oils, outdoor heat, and especially flash or studio strobes can leave a reflective sheen on foreheads, noses, and cheekbones that reads as unflattering in still images even if it looked fine in person.
Shine Removal works like a digital powder application. Keep it subtle. A small adjustment adds a matte quality to the skin without flattening the overall tonal range of the face. Tony specifically notes this is particularly useful for male subjects who typically are not wearing any makeup or setting powder on set. If you are photographing corporate headshots or editorial portraits of men, this slider alone will save you significant time.
Step 6: Smooth Body Skin with the Body AI Tool
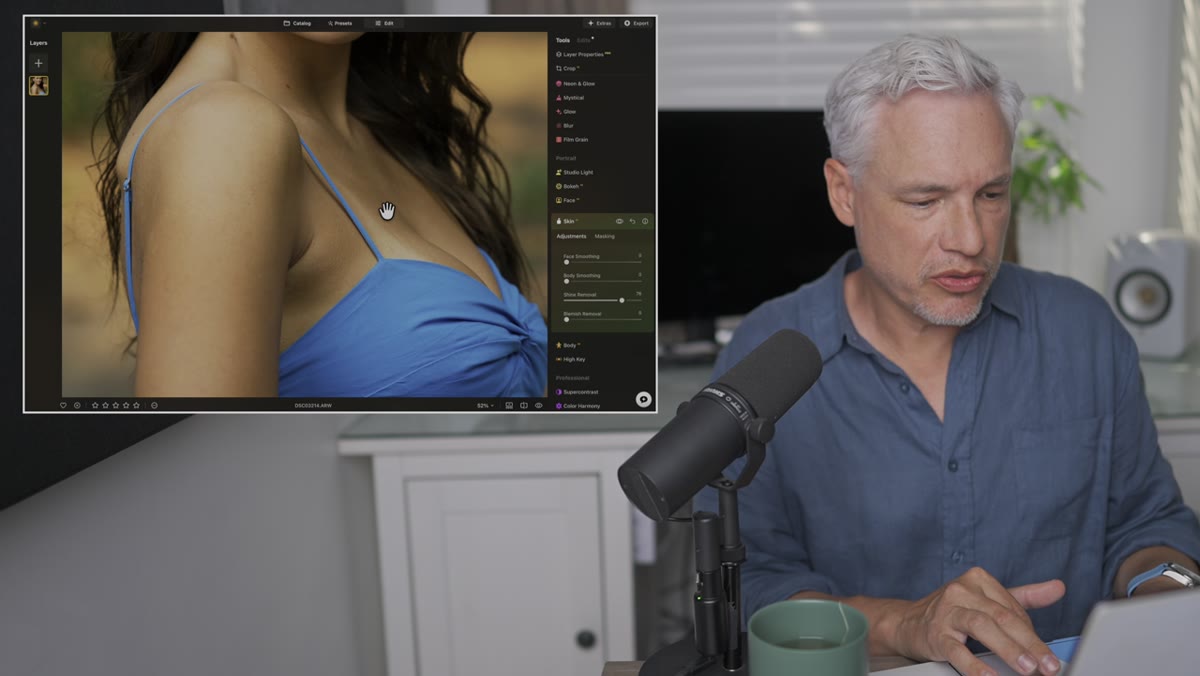 Body smoothing slider applied to skin outside the face
The Skin panel also includes a body smoothing control that applies similar texture softening to shoulders, arms, and other areas outside the face. The same principle applies here: a small adjustment goes a long way. Skin has pores everywhere, and a subtle smoothing pass on arms or a décolletage can bring visual consistency to the image without making the subject look synthetic.
Body smoothing slider applied to skin outside the face
The Skin panel also includes a body smoothing control that applies similar texture softening to shoulders, arms, and other areas outside the face. The same principle applies here: a small adjustment goes a long way. Skin has pores everywhere, and a subtle smoothing pass on arms or a décolletage can bring visual consistency to the image without making the subject look synthetic.
Scroll through the Portrait section to find it. Apply conservatively. Compare before and after at 100 percent zoom. If the skin looks like it belongs to a CGI character, dial it back.
A Note from My Own Workflow
I still reach for frequency separation when I have a single hero image for a major campaign and the retouching needs to be truly invisible under extreme scrutiny. That technique gives me more surgical control over texture versus color/tone independently, and nothing fully replaces it at the high end. But here is the honest truth: the majority of portrait retouching I do every week does not need to be that precise. Client headshots, editorial portraits, workshop samples, these benefit far more from speed and consistency than from pixel-level control. Luminar Neo’s new portrait tools land squarely in that category, and they deliver results that I would have spent 20 minutes achieving in Photoshop in about 90 seconds.
The no-subscription model also changes how I think about tool recommendations for photographers who are not full-time retouchers. Paying to own software outright instead of renting access indefinitely is a different relationship with your tools, and for many working photographers it is the smarter financial choice.
The single most important thing I took from this tutorial: restraint applied with the right tool is faster and better than precision applied with the wrong one. Use the smallest adjustment that gets you to “looks great,” stop there, and go shoot something.
Watch the full tutorial on YouTube to see Tony demonstrate the Bokeh AI and Body AI tools in detail, both of which are worth a separate deep dive.
Comments (2)
Would love to see a follow-up going deeper into this topic.
Really solid breakdown. This pairs perfectly with the business work I've been writing about.
Leave a Comment