
Every fall, Adobe Max rolls around and I do the same thing: I open three browser tabs, scan the announcement pages, and try to figure out which new features will actually matter to my day-to-day work versus which ones are just good conference demos. This year, I saved myself some time by watching Matt Kloskowski’s breakdown of what’s new in Photoshop 2026, and I’m glad I did. Watch the full tutorial on YouTube before or after reading this, because Matt’s pacing and visual examples are worth your time on their own.
The feature I want to dig into most is Harmonize, because it solves a problem that has quietly cost me hours over the years. When I’m working on beauty composites, whether that’s placing a model onto a new background or blending a product shot with an environmental layer, the color mismatch is always the thing that makes the image read as “put together.” Shadows fall at the wrong angle, the color temperature shifts, the whole thing looks assembled rather than captured. I’ve been correcting this manually with Hue/Saturation layers, Color Match, and a lot of squinting. Harmonize is a direct answer to that problem.
Here is the full walkthrough, pulled from Matt’s tutorial and translated into the steps I would follow in my own retouching workflow.
Step 1: Install Photoshop 2026 and Know What You’re Opening
 Adobe Updater showing Photoshop 2026 version numbering
When you go into your Adobe Creative Cloud updater, you will see Photoshop 2026 listed, but the internal version number will read 27. That is normal and not a bug. Adobe has always offset the internal version number by one, and Matt flags this specifically so you don’t second-guess whether you downloaded the right thing. One thing worth knowing: unlike Lightroom, Photoshop lets you keep the previous version installed and running alongside the new one. You don’t have to remove 2025 to install 2026. I personally keep the older version around for a month or so, just in case a plugin I rely on hasn’t updated yet.
Adobe Updater showing Photoshop 2026 version numbering
When you go into your Adobe Creative Cloud updater, you will see Photoshop 2026 listed, but the internal version number will read 27. That is normal and not a bug. Adobe has always offset the internal version number by one, and Matt flags this specifically so you don’t second-guess whether you downloaded the right thing. One thing worth knowing: unlike Lightroom, Photoshop lets you keep the previous version installed and running alongside the new one. You don’t have to remove 2025 to install 2026. I personally keep the older version around for a month or so, just in case a plugin I rely on hasn’t updated yet.
Step 2: Understand What Harmonize Is Actually Doing
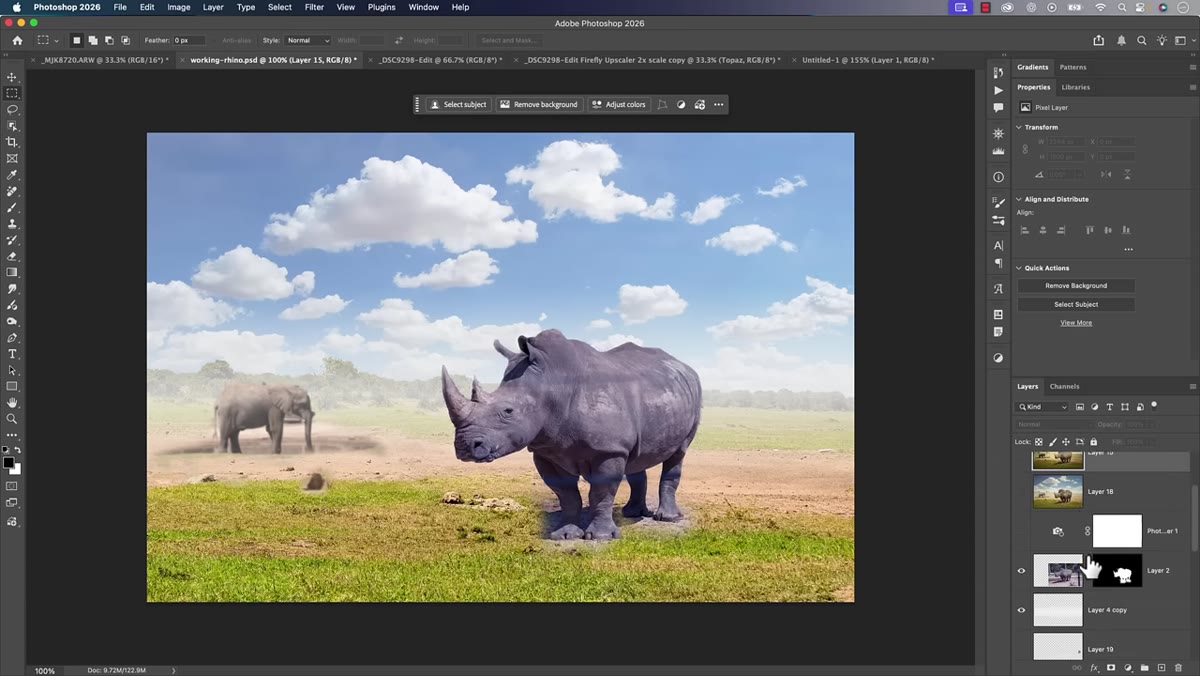 Composite image showing rhino layer against mismatched background
Harmonize is an AI-powered tool designed for composites. The scenario Matt demonstrates involves a subject layer, in his case a rhinoceros, placed over a background it wasn’t originally photographed against. The colors, lighting, and shadows don’t match. Harmonize analyzes the surrounding image and attempts to recolor and relight the subject layer so it feels like it belongs in the scene. Think of it as a much smarter, context-aware version of Photoshop’s old Color Match feature. It does not just shift hue globally. It reads the light sources and shadow behavior in the background and works to apply that logic to the subject.
Composite image showing rhino layer against mismatched background
Harmonize is an AI-powered tool designed for composites. The scenario Matt demonstrates involves a subject layer, in his case a rhinoceros, placed over a background it wasn’t originally photographed against. The colors, lighting, and shadows don’t match. Harmonize analyzes the surrounding image and attempts to recolor and relight the subject layer so it feels like it belongs in the scene. Think of it as a much smarter, context-aware version of Photoshop’s old Color Match feature. It does not just shift hue globally. It reads the light sources and shadow behavior in the background and works to apply that logic to the subject.
Step 3: Locate the Harmonize Button in the Contextual Taskbar
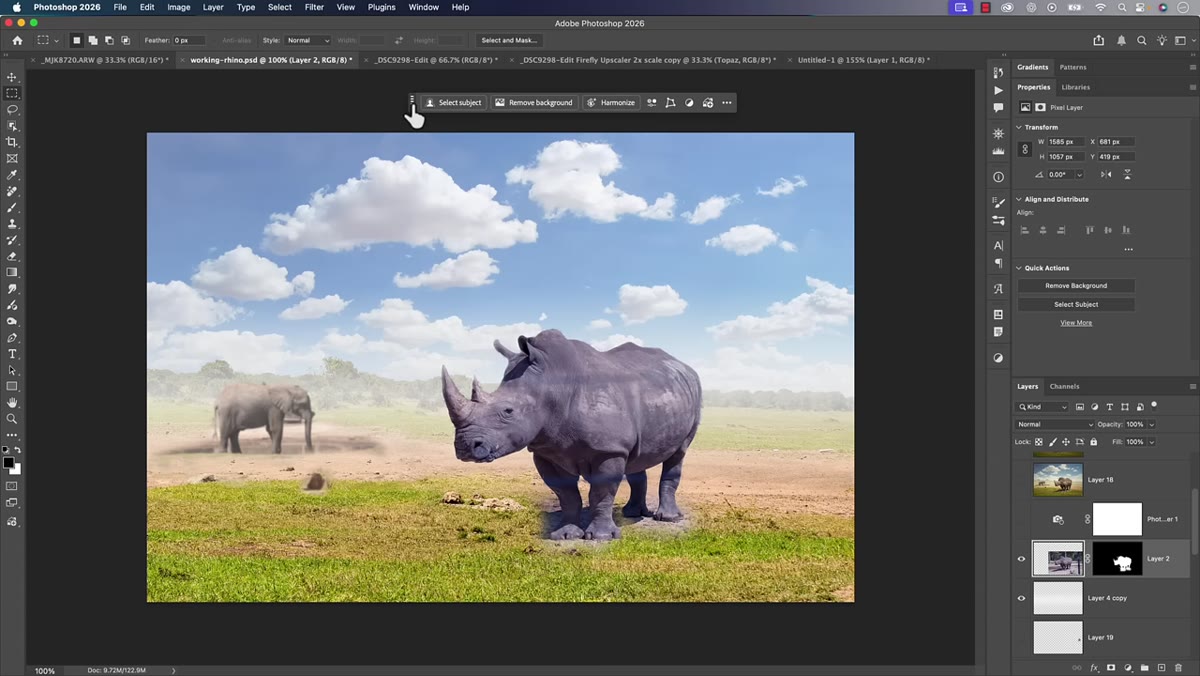 Contextual taskbar with Harmonize button highlighted
With your subject layer selected in the Layers panel, look at the contextual taskbar. This is the small floating bar that updates based on what you have selected. If you have dismissed it or can’t find it, go to Window and scroll down to Contextual Taskbar to bring it back. Once your composite layer is active, you will see a button labeled Harmonize appear in that bar. Click it. There are no settings dialog boxes to configure beforehand. That is by design. The tool takes what it needs from the surrounding image automatically.
Contextual taskbar with Harmonize button highlighted
With your subject layer selected in the Layers panel, look at the contextual taskbar. This is the small floating bar that updates based on what you have selected. If you have dismissed it or can’t find it, go to Window and scroll down to Contextual Taskbar to bring it back. Once your composite layer is active, you will see a button labeled Harmonize appear in that bar. Click it. There are no settings dialog boxes to configure beforehand. That is by design. The tool takes what it needs from the surrounding image automatically.
Step 4: Let Photoshop Generate Multiple Variations
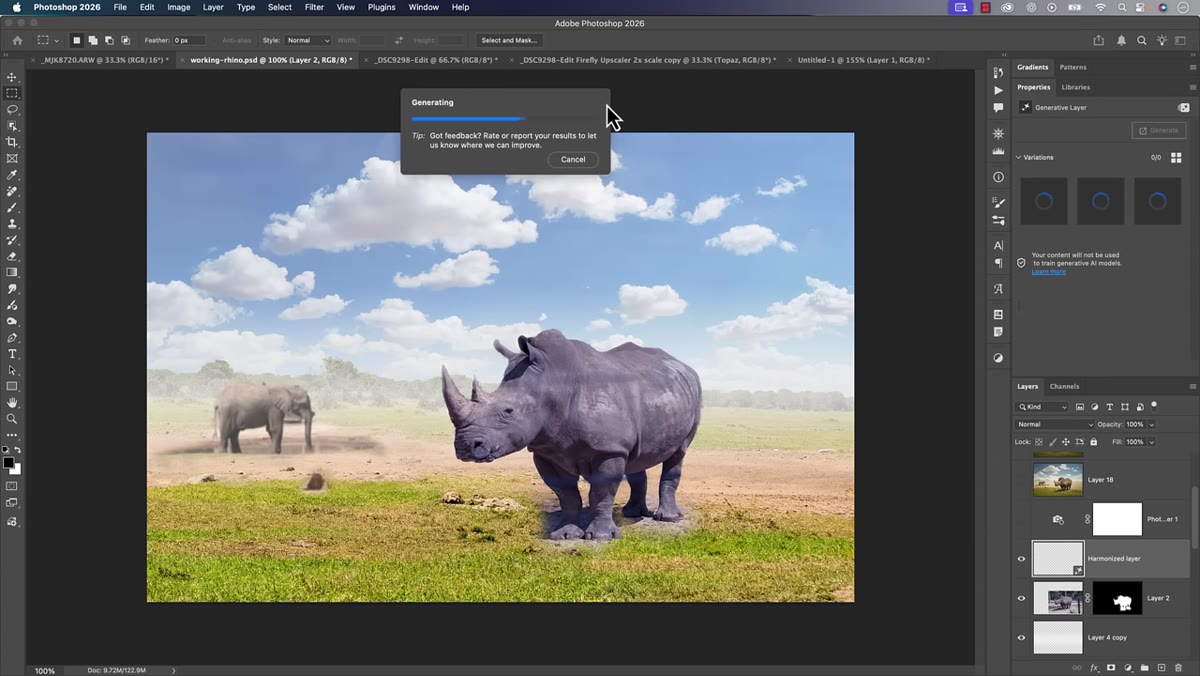 Properties panel showing three Harmonize variation options
After you click Harmonize, Photoshop processes the image and produces several different interpretations rather than a single result. This behavior will feel familiar if you have used Generative Fill, because it works on the same principle of offering you options to choose from. The variations appear in the Properties panel once processing is complete. Matt found three options in his demo, which is typical. Each one applies a slightly different interpretation of color, shadow, and lighting to the subject layer. A new layer is automatically created below your subject, and you can toggle between the variations directly in the Properties panel without any destructive changes to your original.
Properties panel showing three Harmonize variation options
After you click Harmonize, Photoshop processes the image and produces several different interpretations rather than a single result. This behavior will feel familiar if you have used Generative Fill, because it works on the same principle of offering you options to choose from. The variations appear in the Properties panel once processing is complete. Matt found three options in his demo, which is typical. Each one applies a slightly different interpretation of color, shadow, and lighting to the subject layer. A new layer is automatically created below your subject, and you can toggle between the variations directly in the Properties panel without any destructive changes to your original.
Step 5: Evaluate Each Variation Critically
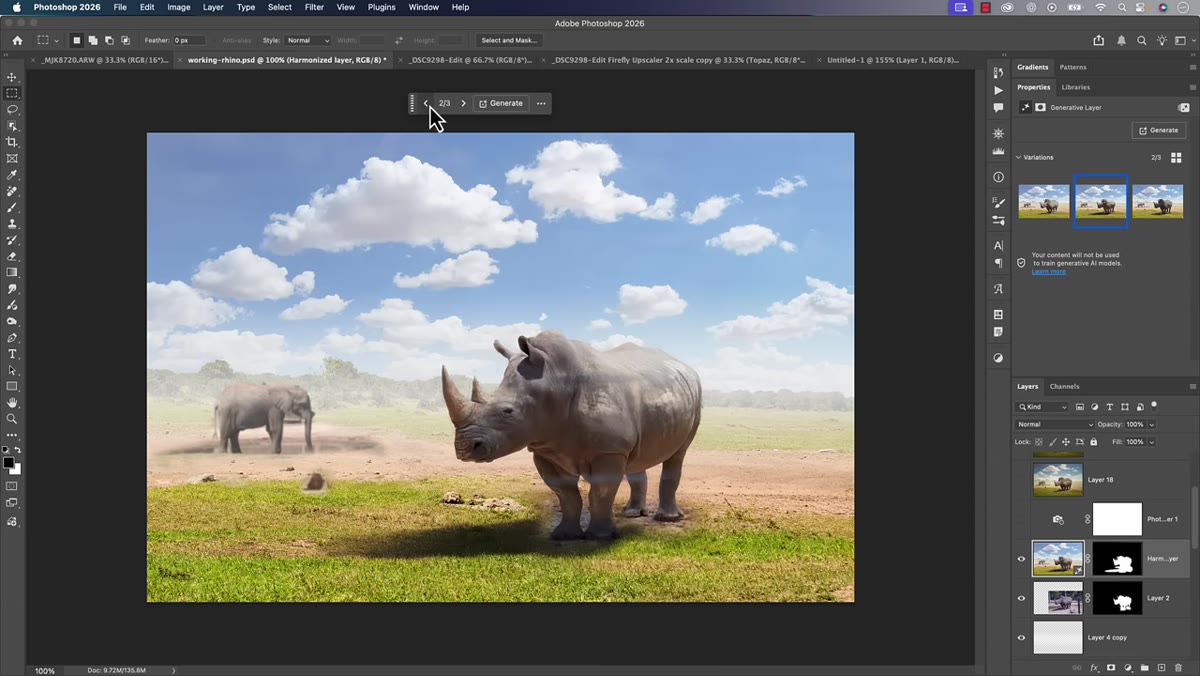 Side-by-side comparison showing lighting and texture differences between variations
This is where the human eye still matters. Matt is honest about something I think is important for retouchers to hear: Harmonize will sometimes alter more than just color. As you scroll through the variations, you may notice texture changes on the subject’s surface, subtle edge differences, or even shifts in fine details like hair. Because the tool uses generative AI, it is not a pure color correction. It is making interpretive decisions, and not all of them will preserve your subject exactly as shot. For beauty work, this is significant. Look carefully at skin texture or product surface detail before committing to a variation. One of the three options is usually clearly stronger than the others. Pick the one that looks most natural, not just the most dramatic.
Side-by-side comparison showing lighting and texture differences between variations
This is where the human eye still matters. Matt is honest about something I think is important for retouchers to hear: Harmonize will sometimes alter more than just color. As you scroll through the variations, you may notice texture changes on the subject’s surface, subtle edge differences, or even shifts in fine details like hair. Because the tool uses generative AI, it is not a pure color correction. It is making interpretive decisions, and not all of them will preserve your subject exactly as shot. For beauty work, this is significant. Look carefully at skin texture or product surface detail before committing to a variation. One of the three options is usually clearly stronger than the others. Pick the one that looks most natural, not just the most dramatic.
Step 6: Check What Improved with Select Subject
 Select Subject running on a detailed portrait or complex background
Matt also covers meaningful improvements to Select Subject, Photoshop’s one-click masking tool. The 2026 version handles edges with noticeably more accuracy, particularly on complex subjects like hair or fine fabric. For beauty retouching specifically, this matters every time we need to isolate skin or hair from a background for local adjustments. A better initial mask means less time in Refine Edge and less halo cleanup after the fact. Matt mentions he wished he had benchmarked it against the previous version before updating, but his live demo showed a clean result on a subject type that typically challenges the tool.
Select Subject running on a detailed portrait or complex background
Matt also covers meaningful improvements to Select Subject, Photoshop’s one-click masking tool. The 2026 version handles edges with noticeably more accuracy, particularly on complex subjects like hair or fine fabric. For beauty retouching specifically, this matters every time we need to isolate skin or hair from a background for local adjustments. A better initial mask means less time in Refine Edge and less halo cleanup after the fact. Matt mentions he wished he had benchmarked it against the previous version before updating, but his live demo showed a clean result on a subject type that typically challenges the tool.
A Note from My Own Retouching Practice
I want to be direct about where I see Harmonize fitting into beauty work specifically, because the tutorial uses a wildlife composite as its demo and that’s a different animal, literally, from what we do here. For beauty retouching, Harmonize is most useful when you’re dropping a portrait subject onto a new background for a campaign or lookbook edit. Where I’d be cautious is skin. If the tool starts generating texture where there was none, or softens detail that was intentional, it could undermine a careful frequency separation pass. My approach will be to run Harmonize first, before any skin work, and treat it as a foundation step rather than a finishing one. That way, the color and light read correctly before I start refining surface detail.
The single most useful thing Photoshop 2026 brings to a beauty retouching workflow is a faster, smarter path from raw composite to cohesive image. Harmonize will not replace judgment, but it will replace a lot of tedious manual layer work that used to eat up the first twenty minutes of any composite job.
Watch the full tutorial on YouTube to see Matt walk through these features with his own images, including additional updates he covers beyond what’s here.
Comments
Leave a Comment