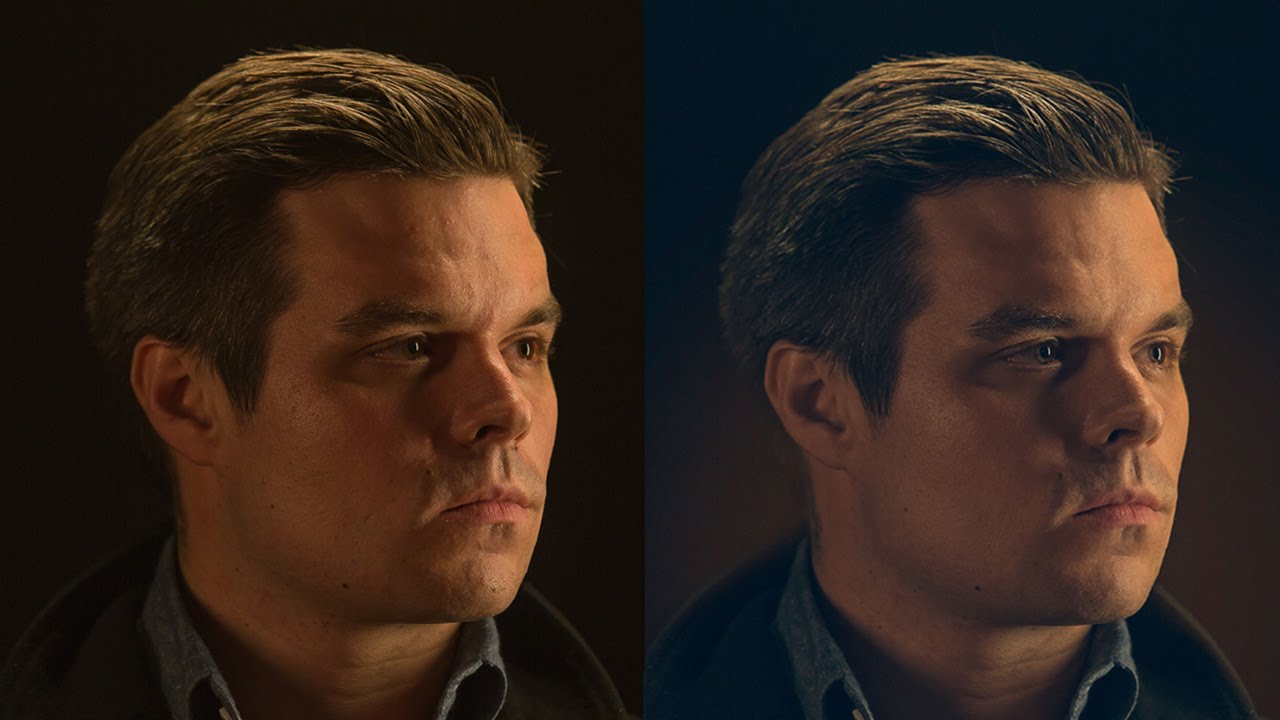
Male portrait retouching has its own specific logic, and for a long time I got it wrong. I’d apply the same approach I used on beauty editorial work and wind up with headshots that looked polished in a way that felt off. Skin too smooth, texture too even, the whole thing reading as slightly artificial. It took a few uncomfortable client conversations before I understood that retouching a man’s face is less about refinement and more about editing with restraint, knowing what to remove and what to leave alone.
That’s why, when I came across this Aaron Nace (PHLEARN) tutorial on retouching a dramatic male headshot, I kept coming back to it. Watch the full tutorial on YouTube. Aaron’s approach is methodical but practical, and it maps well onto the kind of fast-turnaround retouching I do for brand clients who want real but refined. Below is my breakdown of the technique, with the specifics filled in so you can follow along in Photoshop without needing to pause and rewind every thirty seconds.
Step 1: Set Up a Dedicated Healing Layer
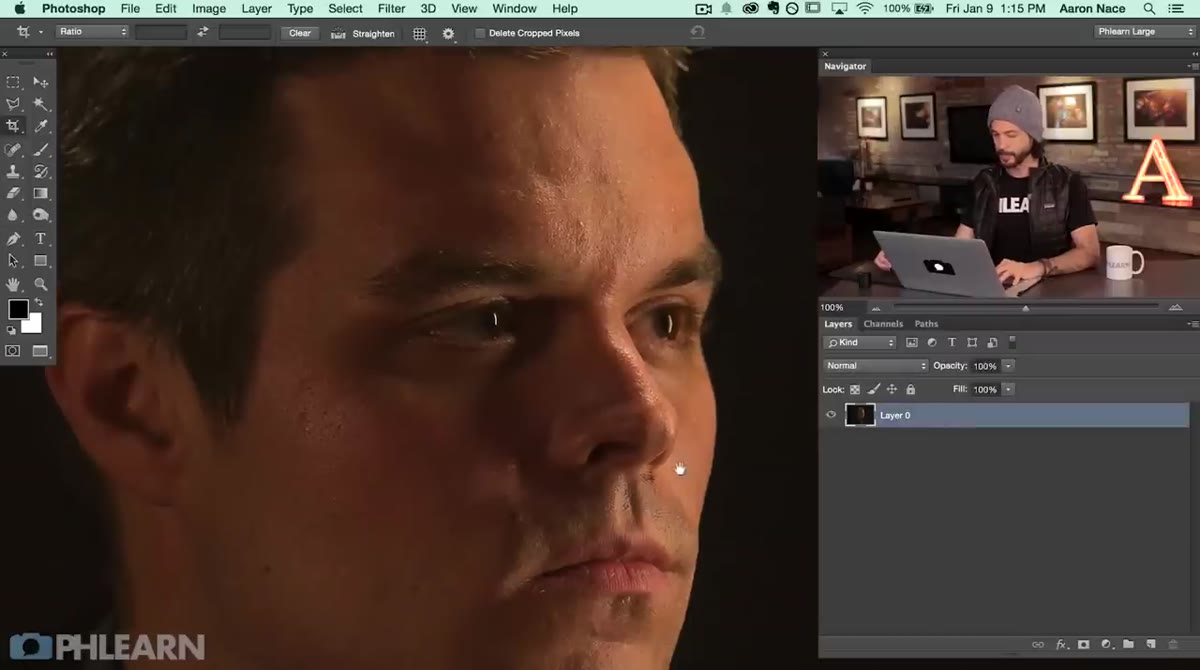 New blank layer created above background in Layers panel
Before touching a single pixel, create a new empty layer above your background. This is non-negotiable for a clean, revisable workflow. Working on a separate layer means every healing stroke you make is isolated and reversible, so if you overdo an area you can simply erase or mask it without affecting the original image underneath.
New blank layer created above background in Layers panel
Before touching a single pixel, create a new empty layer above your background. This is non-negotiable for a clean, revisable workflow. Working on a separate layer means every healing stroke you make is isolated and reversible, so if you overdo an area you can simply erase or mask it without affecting the original image underneath.
Name the layer something useful, like “Skin Heal,” and keep it selected as you work through the next step.
Step 2: Use the Healing Brush (Not the Spot Healing Brush) for Skin Imperfections
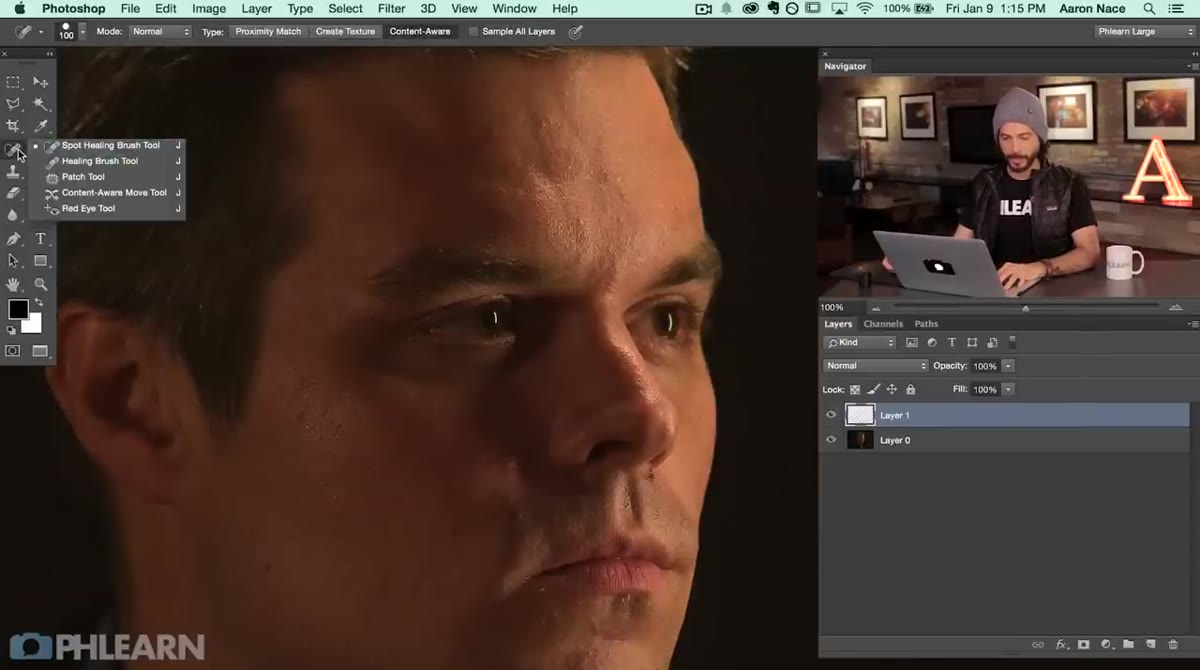 Healing Brush Tool selected in toolbar, options bar visible
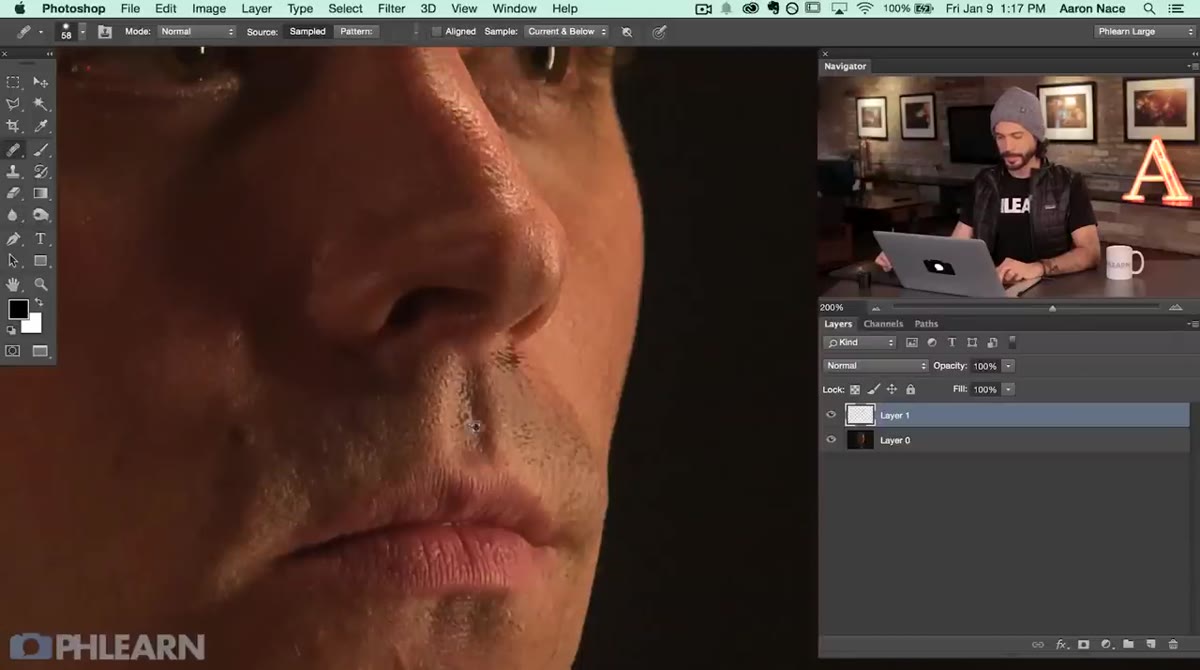
Aaron is specific here, and it’s worth paying attention to. In the toolbar, right-click or long-press the healing brush icon and you’ll see two options: the Spot Healing Brush and the Healing Brush. Choose the Healing Brush. The Spot Healing Brush is convenient, but it makes its own decisions about where to sample from, which can produce muddy or mismatched texture on a closeup portrait. The regular Healing Brush lets you pick your sample point deliberately.
Healing Brush Tool selected in toolbar, options bar visible
Aaron is specific here, and it’s worth paying attention to. In the toolbar, right-click or long-press the healing brush icon and you’ll see two options: the Spot Healing Brush and the Healing Brush. Choose the Healing Brush. The Spot Healing Brush is convenient, but it makes its own decisions about where to sample from, which can produce muddy or mismatched texture on a closeup portrait. The regular Healing Brush lets you pick your sample point deliberately.
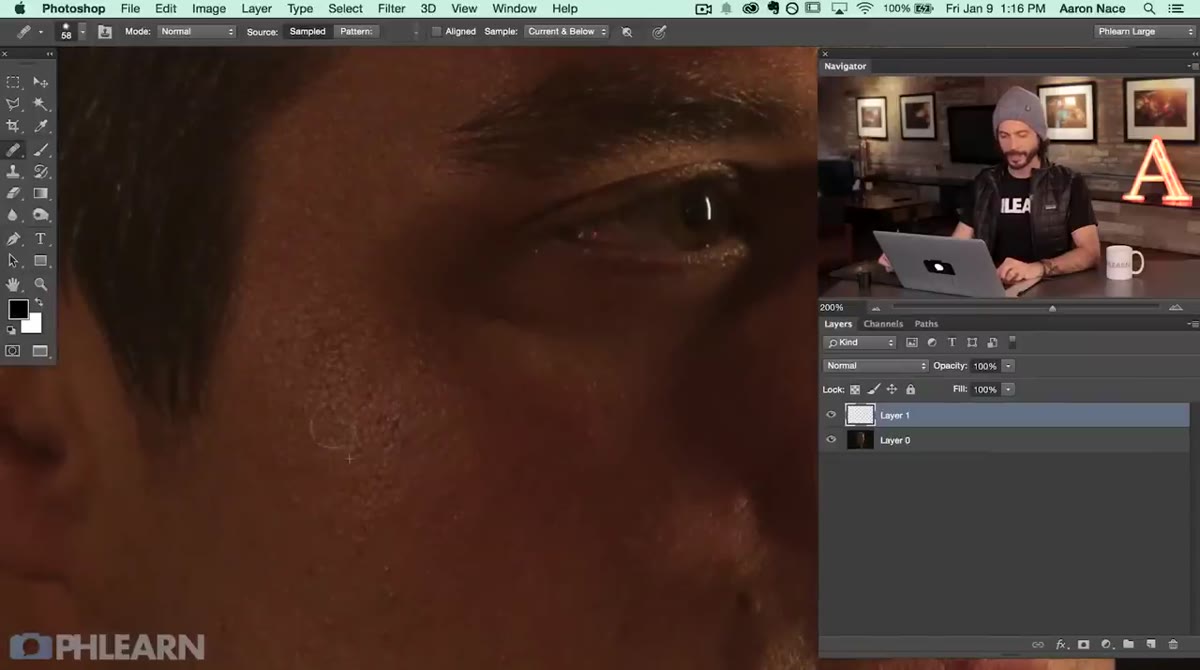
In the options bar, make sure Sample is set to “Current and Below” so the tool reads both your empty healing layer and the locked background beneath it. Set your brush hardness low, around 10 to 20 percent, and size it just slightly larger than the blemish or stray hair you’re working on. Hold Alt (Option on Mac) and click a patch of clean, nearby skin to set your sample point. Then paint directly over the problem area. The key is sampling skin that shares the same lighting and tone as the area you’re correcting. Sampling from a highlight when you’re painting into a shadow will give you a mismatch in seconds.
Step 3: Work Methodically but Keep the Texture
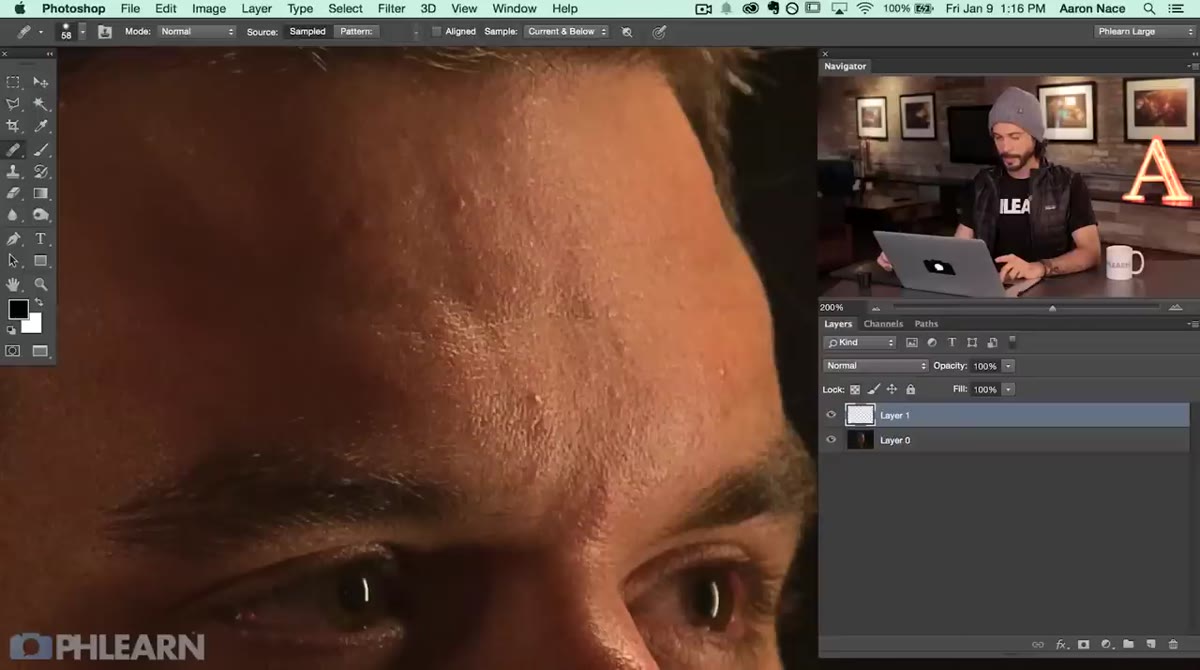 Healing brush being painted over skin imperfections on zoomed-in face
Zoom in to around 100 percent and move through the face systematically, but resist the urge to be thorough in a way that erases character. Aaron makes a point that I think is important and often missed: for male portraits, the goal is blemish removal, not skin transformation. Small scars, shaving irregularities, temporary breakouts, those are worth addressing. But pores, general texture, the natural variation of skin tone across a face, those stay. Men tend to look more like themselves when you preserve that roughness.
Healing brush being painted over skin imperfections on zoomed-in face
Zoom in to around 100 percent and move through the face systematically, but resist the urge to be thorough in a way that erases character. Aaron makes a point that I think is important and often missed: for male portraits, the goal is blemish removal, not skin transformation. Small scars, shaving irregularities, temporary breakouts, those are worth addressing. But pores, general texture, the natural variation of skin tone across a face, those stay. Men tend to look more like themselves when you preserve that roughness.
Budget roughly five minutes for this pass. Move from the forehead down through the cheeks, chin, and neck. Reset your sample point frequently, especially as you move between the highlight and shadow sides of the face. Painting too far from your sample zone is usually what causes the blotchy, overdone look that makes retouching obvious.
Step 4: Even Out Skin Color with a Targeted Adjustment
 Hue/Saturation or color adjustment layer panel open, targeting skin tones
Once the texture pass is done, zoom back out and look at the skin as a whole. Dramatic lighting setups, especially DIY rigs with hard light sources, can leave uneven color shifts across the face, particularly in the shadow zones where redness or sallowness can pool. Aaron addresses this with a targeted color adjustment, working specifically on the tones that are pulling away from the rest of the skin.
Hue/Saturation or color adjustment layer panel open, targeting skin tones
Once the texture pass is done, zoom back out and look at the skin as a whole. Dramatic lighting setups, especially DIY rigs with hard light sources, can leave uneven color shifts across the face, particularly in the shadow zones where redness or sallowness can pool. Aaron addresses this with a targeted color adjustment, working specifically on the tones that are pulling away from the rest of the skin.
Add a Hue/Saturation adjustment layer and use the on-image color picker to target the specific hue range that looks off. This is usually in the reds or yellows. Pull the saturation down slightly in that range rather than making broad corrections. Broad adjustments flatten the skin. Targeted ones clean it up without touching what’s already working. Clip this layer to your composition stack so it only affects the skin areas you intend it to.
Step 5: Color Tone the Full Image
 Color grading adjustment applied across full image, warm or cool tonal shift visible
Aaron brings in a color toning step that shifts the mood of the whole image without disconnecting it from the subject. For a dramatic headshot, you typically want the color grade to reinforce the lighting direction, so if the main light is warm, a subtle warm-cool split with warm in the highlights and a slightly cooler shadow can add depth and intention to the image.
Color grading adjustment applied across full image, warm or cool tonal shift visible
Aaron brings in a color toning step that shifts the mood of the whole image without disconnecting it from the subject. For a dramatic headshot, you typically want the color grade to reinforce the lighting direction, so if the main light is warm, a subtle warm-cool split with warm in the highlights and a slightly cooler shadow can add depth and intention to the image.
Use a Curves adjustment layer and work in the individual color channels, Red, Green, Blue, rather than just the RGB composite curve. Small S-curve adjustments in the red and blue channels go a long way. The goal isn’t a cinematic look, it’s just enough color shaping to make the image feel deliberate rather than straight out of camera.
Step 6: Add a Background Glow to Separate the Subject
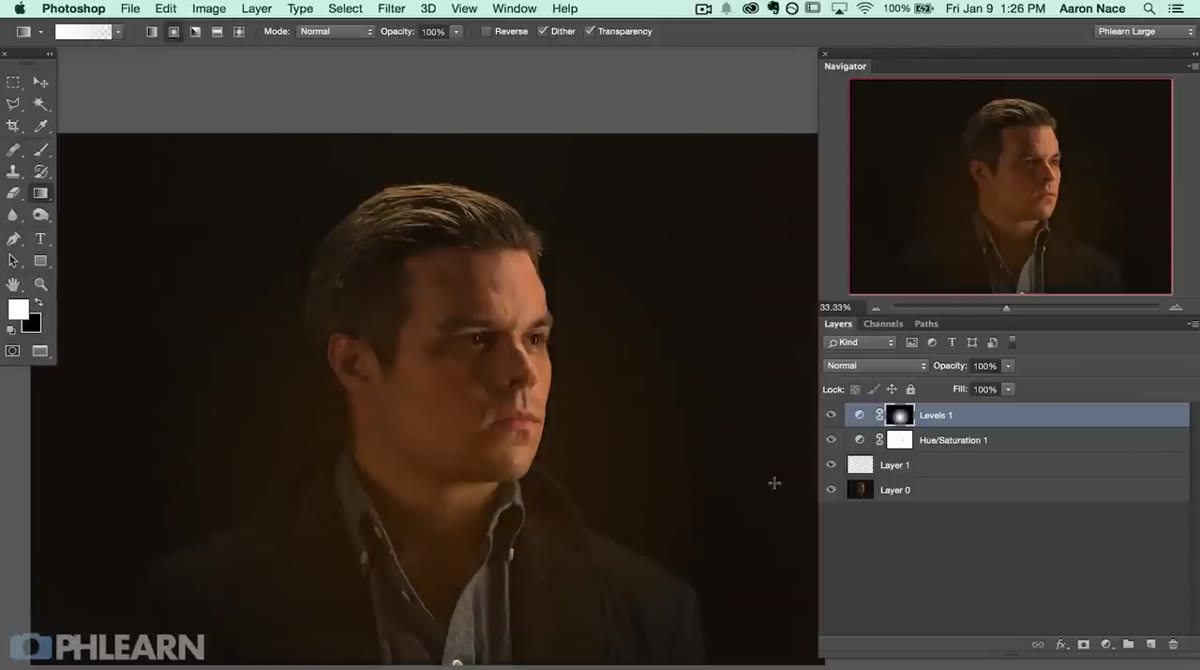 Background glow effect visible behind subject, soft light bloom around head
The finishing touch Aaron uses is a background glow, a soft, radiant bloom around the subject that creates visual separation and adds a sense of dimension. Select the background layer or a merged copy, apply a Gaussian Blur at a relatively high radius, then blend it back in with a layer mask that protects the subject and feathers out into the background zone. Adjust the layer’s opacity until the effect reads as atmospheric rather than obvious.
Background glow effect visible behind subject, soft light bloom around head
The finishing touch Aaron uses is a background glow, a soft, radiant bloom around the subject that creates visual separation and adds a sense of dimension. Select the background layer or a merged copy, apply a Gaussian Blur at a relatively high radius, then blend it back in with a layer mask that protects the subject and feathers out into the background zone. Adjust the layer’s opacity until the effect reads as atmospheric rather than obvious.
This technique works especially well on high-contrast setups where the background is already lit differently than the subject. It gives the finished image that quality of light that looks intentional even if your setup was simple.
What I’d Add from My Own Practice
One thing Aaron doesn’t dig into here but that I’ve found essential for male portrait work specifically: do a final opacity check on your healing layer. After you’ve done your full skin pass, drop the healing layer opacity to around 70 to 80 percent. This brings back a very subtle amount of the original skin variation and can be the difference between retouching that reads as clean and retouching that reads as corrected. It’s a small habit that took me longer than I’d like to admit to develop, and it’s saved me from the “too smooth” trap more than once.
The single most important idea in this whole workflow is knowing when to stop. Retouching creates value when it removes distractions from a compelling image, not when it replaces what’s real with what’s ideal. Aaron demonstrates that with every pass, and it’s the thing I keep coming back to in my own work.
Watch the full tutorial on YouTube to see Aaron walk through the complete process on a real image, including the lighting context that shaped these retouching decisions.
Comments (4)
The before and after really sells it. Incredible difference.
Tried this technique this morning. Game changer for real.
This is fantastic. I've been recommending this approach to my readers too.
Love how you break down complex stuff into manageable steps.
Leave a Comment