
When I was still shooting weddings, I treated lighting modifiers like interchangeable parts. A softbox was a softbox. If the light looked roughly even, I moved on. It wasn’t until I started doing beauty work for skincare brands, where every shadow on a cheekbone is a creative decision, that I realized how differently two modifiers of nearly the same size can actually behave on a face. That distinction matters enormously when a retoucher sits down with the image afterward. The quality of light you start with determines how much work you’re doing in post, and whether that work looks natural or forced.
In this The Slanted Lens tutorial, photographer Jay P. Morgan runs a direct, methodical comparison between a 1x2 softbox and a 24-inch beauty dish on the same subject, under the same conditions. It’s exactly the kind of side-by-side I wish I’d had access to years ago. Watch the full tutorial on YouTube - then come back here for the breakdown.
What makes this comparison useful isn’t just the gear talk. It’s the way Morgan isolates each variable so you can see the light doing specific things to skin texture, shadow transition, and facial shape. As someone who retouches the downstream results of these lighting choices, I find this kind of analysis genuinely clarifying. Let’s walk through what he demonstrates and what it means in practice.
Step 1: Set Up Modifiers of Comparable Size
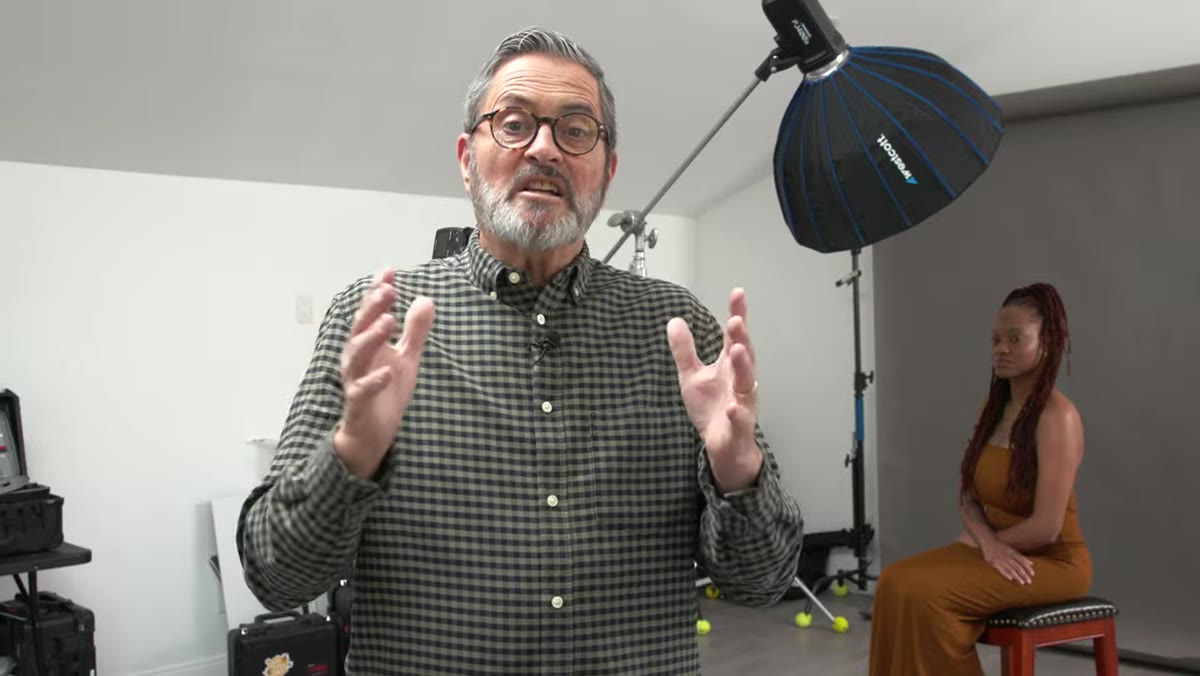 Jay P. Morgan standing beside 1x2 softbox and beauty dish
Before any comparison means anything, the modifiers need to be roughly equivalent in size. Morgan uses a 1x2 softbox and a 24-inch beauty dish because they share a similar widest dimension. They’re not identical, obviously - the softbox is rectangular and the dish is circular - but they’re close enough that size isn’t the variable being tested. If you’re running this kind of comparison yourself, resist the urge to pit a small modifier against a large one. You’ll just be testing size, which you already know the answer to.
Jay P. Morgan standing beside 1x2 softbox and beauty dish
Before any comparison means anything, the modifiers need to be roughly equivalent in size. Morgan uses a 1x2 softbox and a 24-inch beauty dish because they share a similar widest dimension. They’re not identical, obviously - the softbox is rectangular and the dish is circular - but they’re close enough that size isn’t the variable being tested. If you’re running this kind of comparison yourself, resist the urge to pit a small modifier against a large one. You’ll just be testing size, which you already know the answer to.
The rectangular shape of the softbox means it wraps light differently along the vertical axis versus the horizontal, which Morgan notes when he tries both orientations. The dish, being round, radiates more evenly in all directions from its center. That geometric difference is the first thing to hold in your mind before you look at any results.
Step 2: Understand the 3-Foot Rule Before You Fire a Single Frame
 Light modifier positioned approximately 3 feet from subject
This is the part of the tutorial I want to stamp on a sticky note above every photographer’s key light stand. Morgan is firm about it: keep your modifier within roughly 3 feet of your subject. Beyond that distance, even a well-designed softbox starts behaving like a small, directional hard source. The size advantage that makes soft modifiers worth using collapses the further you move them back.
Light modifier positioned approximately 3 feet from subject
This is the part of the tutorial I want to stamp on a sticky note above every photographer’s key light stand. Morgan is firm about it: keep your modifier within roughly 3 feet of your subject. Beyond that distance, even a well-designed softbox starts behaving like a small, directional hard source. The size advantage that makes soft modifiers worth using collapses the further you move them back.
The practical consequence is real. When a modifier is too far away, the wrap disappears. You lose that gradual transition from highlight to shadow on the cheek, the jaw, the collarbone. What you’re left with is light that’s directional but not interesting, neither the controlled drama of a bare strobe nor the wrap of a proper beauty setup. From a retouching standpoint, badly transitioned shadows are the hardest thing to fix believably. Keeping the light close is the single cheapest form of skin retouching available.
Step 3: Shoot Both Modifiers Open-Face First
 Open-face beauty dish with no diffusion sock or baffle in place
Morgan starts with both modifiers stripped down, meaning no diffusion sock on the softbox and no white cover over the beauty dish. Just the bare silver interior reflecting straight at the subject. This gives you a baseline reading of the modifier’s natural character before softening materials are introduced.
Open-face beauty dish with no diffusion sock or baffle in place
Morgan starts with both modifiers stripped down, meaning no diffusion sock on the softbox and no white cover over the beauty dish. Just the bare silver interior reflecting straight at the subject. This gives you a baseline reading of the modifier’s natural character before softening materials are introduced.
In this open configuration, both modifiers produce harder light than you’d typically want for beauty work, but the comparison is still instructive. You’re seeing the underlying behavior of each shape and reflector surface before diffusion smooths anything out. Think of it as seeing the skeleton before the skin.
Step 4: Compare the Shadow Under the Chin
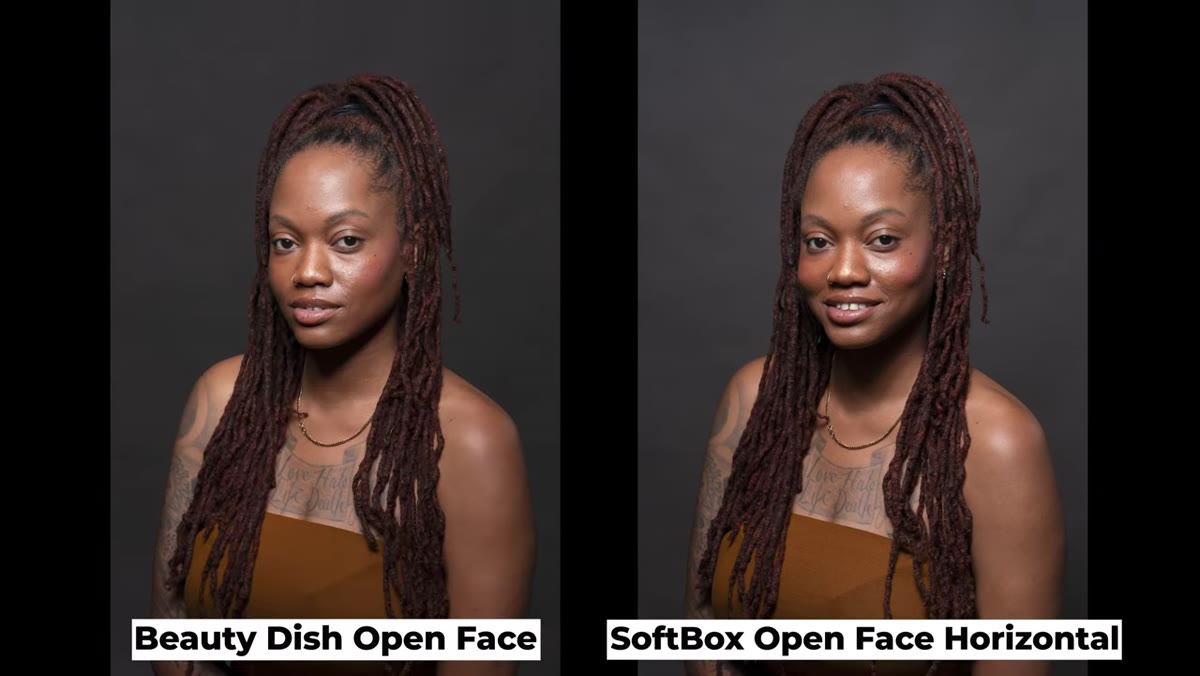 Side-by-side of neck shadows from each modifier
Here’s where things get genuinely interesting, and where the retoucher in me sat up straight. When Morgan examines the shadow cast under the chin and along the neck by each modifier, the difference is more dramatic than the size similarity would suggest. The softbox, shot open-face, throws a harder, longer shadow down the neck with almost no feathering at the edge. It’s abrupt. The beauty dish, by contrast, pulls that shadow up and tucks it tighter under the chin.
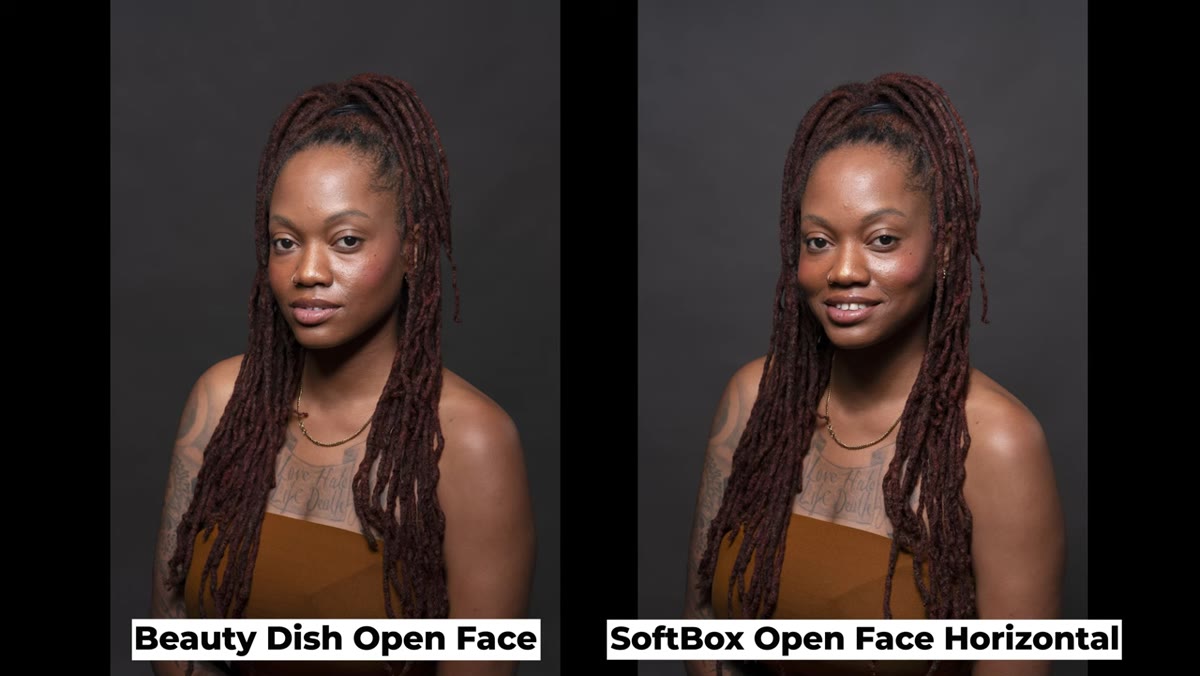
Side-by-side of neck shadows from each modifier
Here’s where things get genuinely interesting, and where the retoucher in me sat up straight. When Morgan examines the shadow cast under the chin and along the neck by each modifier, the difference is more dramatic than the size similarity would suggest. The softbox, shot open-face, throws a harder, longer shadow down the neck with almost no feathering at the edge. It’s abrupt. The beauty dish, by contrast, pulls that shadow up and tucks it tighter under the chin.
Why does this happen? The dish wraps around the face differently because of its concave shape and the way its silver bowl concentrates and then disperses light. The result is a shadow that’s shorter and more flattering. For portraits where neck definition matters, whether you’re shooting a clean beauty look or a fashion editorial, this difference is not trivial. A deep neck shadow that needs to be softened in retouching can cost you 20 minutes and, if handled poorly, look exactly like retouching.
Step 5: Add Diffusion and Reassess
 White diffusion sock being placed over softbox
Once you’ve seen both modifiers in their open configuration, the next step is adding diffusion to each. The softbox gets its front diffusion panel, and the beauty dish gets its white cloth cover. This is where most photographers actually use these tools in a beauty or portrait context.
White diffusion sock being placed over softbox
Once you’ve seen both modifiers in their open configuration, the next step is adding diffusion to each. The softbox gets its front diffusion panel, and the beauty dish gets its white cloth cover. This is where most photographers actually use these tools in a beauty or portrait context.
Pay close attention to how the transition quality changes with diffusion added. The softbox becomes noticeably softer overall. The beauty dish retains more contrast and edge definition even with its cover on, which is part of what makes it a favorite for editorial and commercial beauty work. Softer doesn’t always mean better for portraits. Sometimes you want that presence, that slight snap in the light that makes a face read crisply on a magazine page or a brand campaign.
What I’d Add From My Own Work
The tutorial doesn’t get into the retouching side of things, which is where my day-to-day actually lives. But after years of working on images shot under both these modifiers, here’s what I’d tell any photographer or retoucher thinking about this: the beauty dish earns its reputation not because it’s “better” in some absolute sense, but because it produces transitions on skin that are more structurally sound for editing. The shadows have logic. The highlights have a natural falloff. When you go into frequency separation or dodging and burn on a beauty-dish-lit image, the tonal foundation is already doing part of your job for you.
Softbox images can be just as beautiful, but they sometimes require more judgment calls during retouching, especially if the modifier was placed too far from the subject and the light went a little flat. Flat light sounds forgiving until you realize you have to manufacture all the dimension yourself in post.
The single most important idea from this tutorial is the distance rule. Every other decision, which modifier, which diffusion, which orientation, only pays off if the light source is close enough to actually wrap around your subject. Move it in. Then decide what kind of light you want.
If you’re choosing between these two modifiers or trying to understand the images coming off your own shoots, this comparison is worth your time. Watch the full tutorial on YouTube and pay particular attention to the shadow comparisons. That’s where the real education lives.
Comments
Leave a Comment