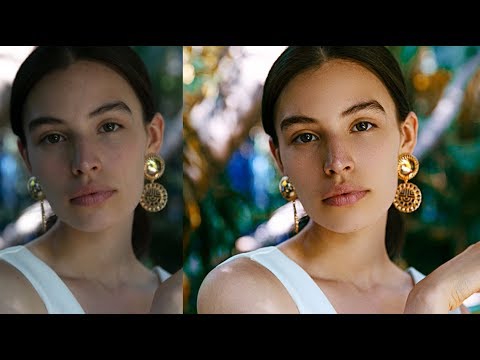
There’s a version of me from about five years ago who skipped Camera Raw entirely. I’d double-click a RAW file, immediately dismiss the panel, and jump straight into Photoshop like I was in a hurry to start making mistakes. The result was always the same: I’d spend twice as long pushing sliders around in adjustment layers trying to fix things that Camera Raw could have handled in thirty seconds. Learning to slow down before the “real” editing begins was one of the more humbling lessons of my career.
That’s exactly why I keep coming back to Watch the full tutorial on YouTube - Jessica Kobeissi’s fashion portrait retouching tutorial. Jessica is a photographer and educator with a sharp eye for color, and in this walkthrough she demonstrates something I now consider non-negotiable: building a solid foundation before you ever touch a layer mask. Her workflow is methodical without being rigid, and watching her make decisions in real time is genuinely instructive.
What follows is my breakdown of her process, step by step, with the settings and reasoning you need to actually follow along. Keep the video open in another tab if you can, but this guide is meant to stand on its own.
Step 1: Open the RAW File Into Camera Raw
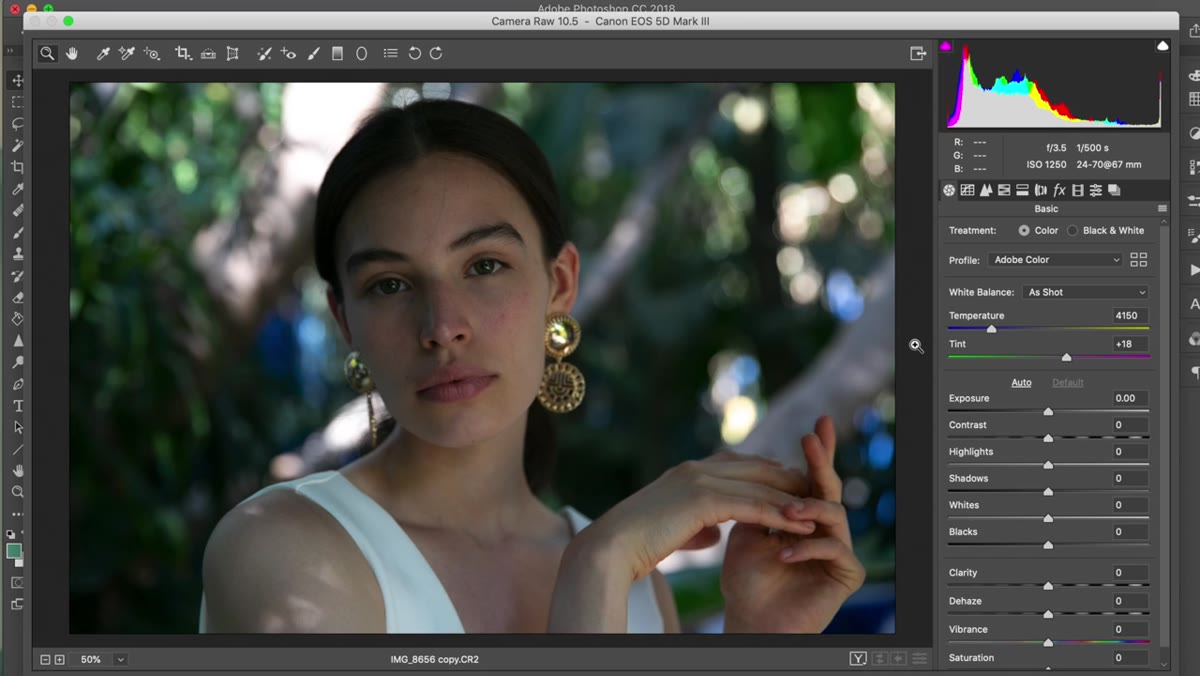 Camera Raw panel open with RAW fashion portrait loaded
If you’re shooting in RAW (and for portrait work, you really should be), Photoshop will route your file through Camera Raw automatically when you double-click it. This is not a detour. This is the first editing room. Jessica is clear that her goal here is subtle adjustment, not a full edit. Think of Camera Raw as the place where you set exposure, recover lost detail, and prime the image for more precise work later. If you try to do everything here, you’ll overshoot. If you skip it, you’ll fight your own image for the rest of the session.
Camera Raw panel open with RAW fashion portrait loaded
If you’re shooting in RAW (and for portrait work, you really should be), Photoshop will route your file through Camera Raw automatically when you double-click it. This is not a detour. This is the first editing room. Jessica is clear that her goal here is subtle adjustment, not a full edit. Think of Camera Raw as the place where you set exposure, recover lost detail, and prime the image for more precise work later. If you try to do everything here, you’ll overshoot. If you skip it, you’ll fight your own image for the rest of the session.
Step 2: Lift the Shadows to Recover Detail
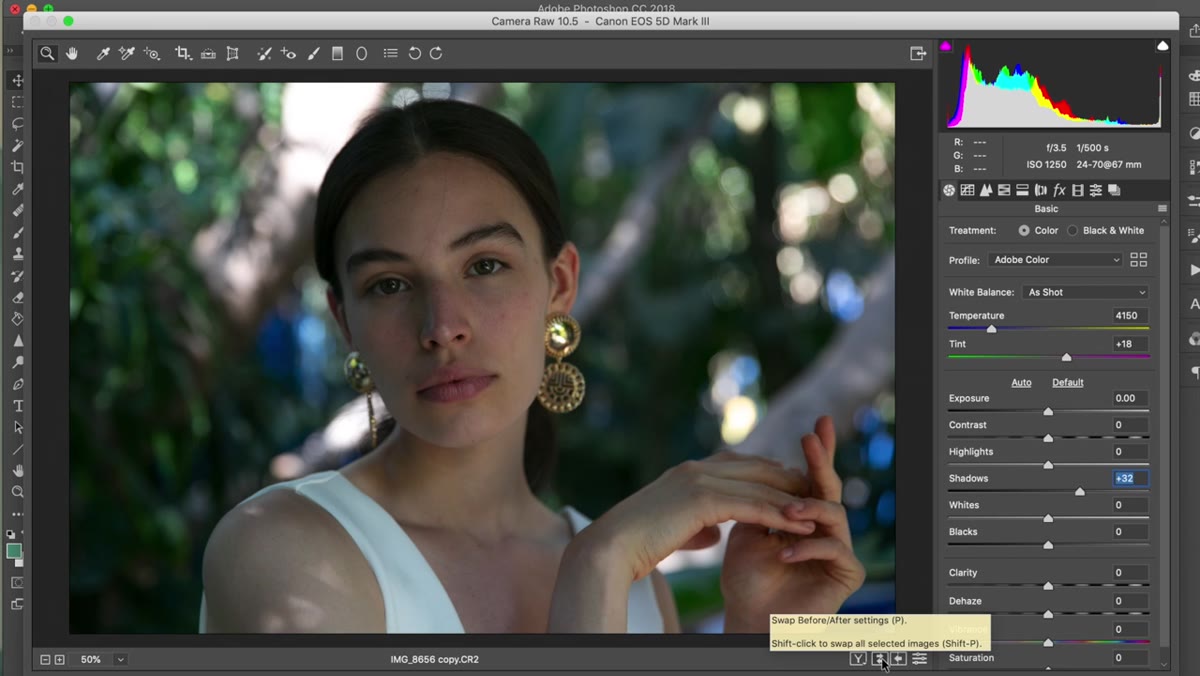 Shadows slider being pulled right in Camera Raw Basic panel
Jessica’s first move is raising the Shadows slider, specifically to pull texture and detail back into the darker areas of the image, particularly the hair. Hair is one of those regions where blocked-up shadows look immediately wrong, even to a non-photographer’s eye. You don’t need a dramatic push here. The goal is to make sure the darkest parts of the frame aren’t a flat wall of black. Bring the slider up until you can see separation in the strands, then stop. Subtlety is doing a lot of work at this stage.
Shadows slider being pulled right in Camera Raw Basic panel
Jessica’s first move is raising the Shadows slider, specifically to pull texture and detail back into the darker areas of the image, particularly the hair. Hair is one of those regions where blocked-up shadows look immediately wrong, even to a non-photographer’s eye. You don’t need a dramatic push here. The goal is to make sure the darkest parts of the frame aren’t a flat wall of black. Bring the slider up until you can see separation in the strands, then stop. Subtlety is doing a lot of work at this stage.
Step 3: Add a Touch of Clarity
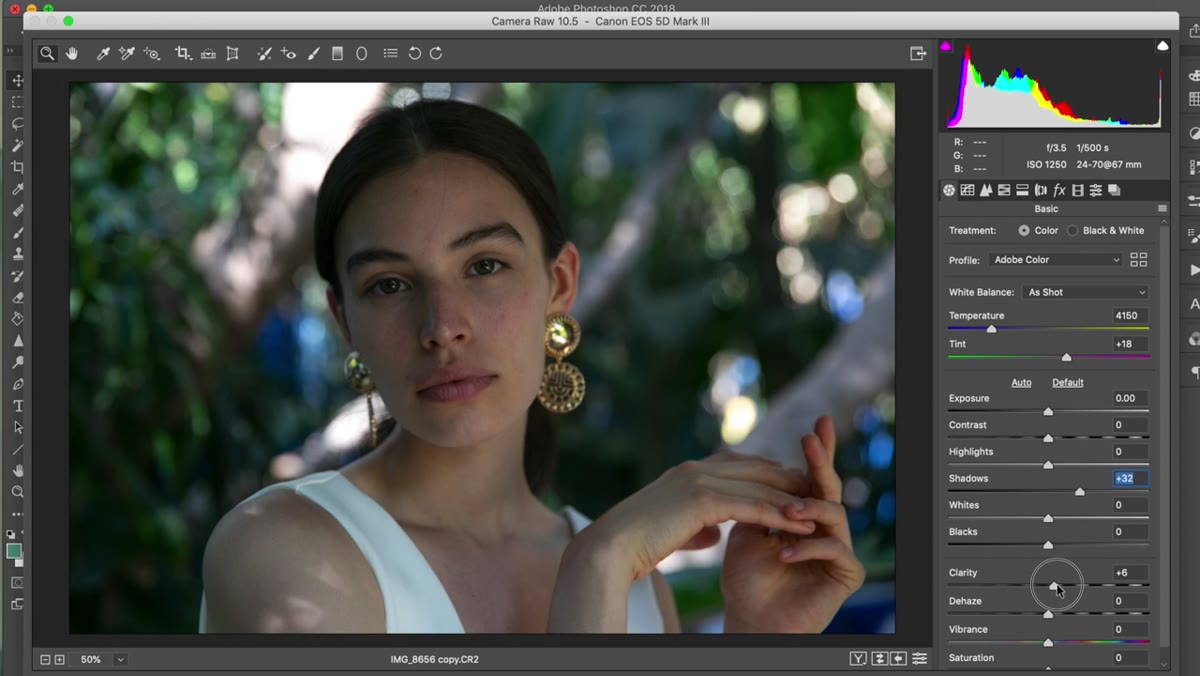 Clarity slider adjusted slightly in Camera Raw
Clarity in Camera Raw works by increasing local contrast around mid-tone edges, which adds a sense of crispness and presence to the image. Jessica’s approach here is conservative, and she makes a point of flagging what not to do: cranking clarity too high creates a gritty, over-processed look that fights the clean aesthetic most fashion and beauty work requires. A small positive adjustment, somewhere in the range of 5 to 15, is usually all you need to give the image a bit of life without making your subject look like they were shot through a texture filter.
Clarity slider adjusted slightly in Camera Raw
Clarity in Camera Raw works by increasing local contrast around mid-tone edges, which adds a sense of crispness and presence to the image. Jessica’s approach here is conservative, and she makes a point of flagging what not to do: cranking clarity too high creates a gritty, over-processed look that fights the clean aesthetic most fashion and beauty work requires. A small positive adjustment, somewhere in the range of 5 to 15, is usually all you need to give the image a bit of life without making your subject look like they were shot through a texture filter.
Step 4: Enable Lens Profile Corrections
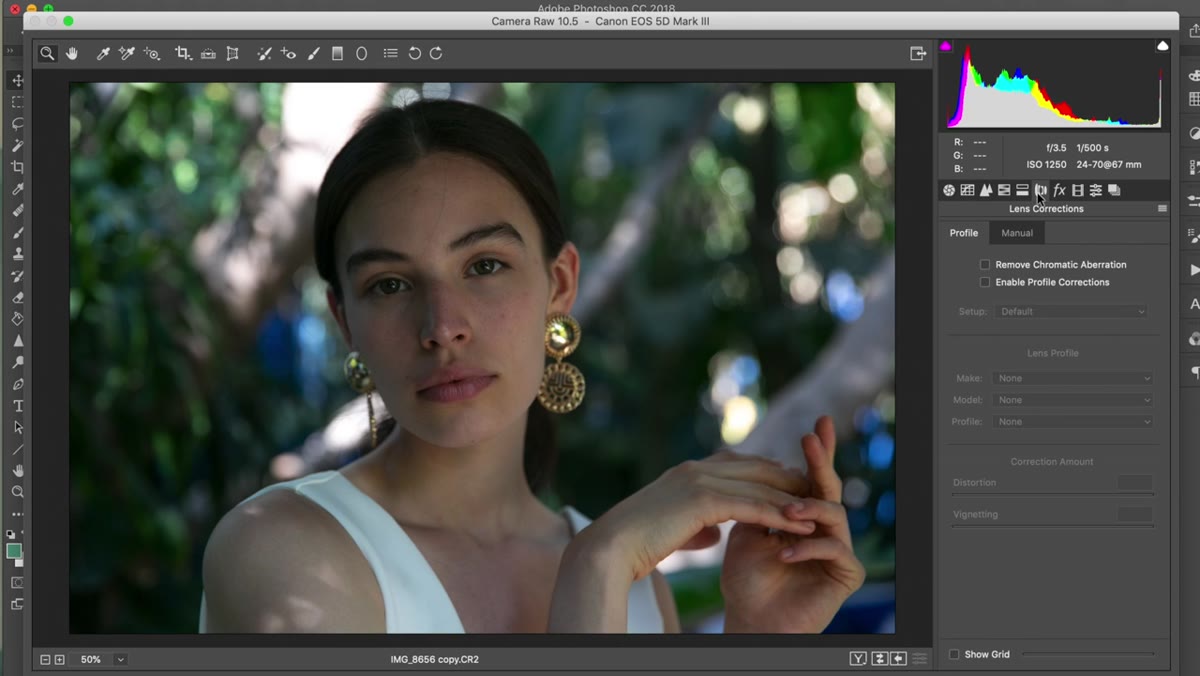 Lens Corrections tab open with profile correction checkbox enabled
Under the Lens Corrections tab (sometimes labeled “Optics” depending on your version of Photoshop), there’s a checkbox to enable profile-based corrections. Jessica is shooting with a 24-70mm lens, and at certain focal lengths that lens introduces subtle vignetting and distortion. Checking this box tells Camera Raw to automatically compensate based on the lens profile. For portrait work where the background is supposed to read as clean and even, correcting that vignette is usually the right call. That said, if you’re going for a more editorial or film-inspired look, the natural vignette can add atmosphere. Know what you want before you check the box.
Lens Corrections tab open with profile correction checkbox enabled
Under the Lens Corrections tab (sometimes labeled “Optics” depending on your version of Photoshop), there’s a checkbox to enable profile-based corrections. Jessica is shooting with a 24-70mm lens, and at certain focal lengths that lens introduces subtle vignetting and distortion. Checking this box tells Camera Raw to automatically compensate based on the lens profile. For portrait work where the background is supposed to read as clean and even, correcting that vignette is usually the right call. That said, if you’re going for a more editorial or film-inspired look, the natural vignette can add atmosphere. Know what you want before you check the box.
Step 5: Shift Background Colors Using HSL
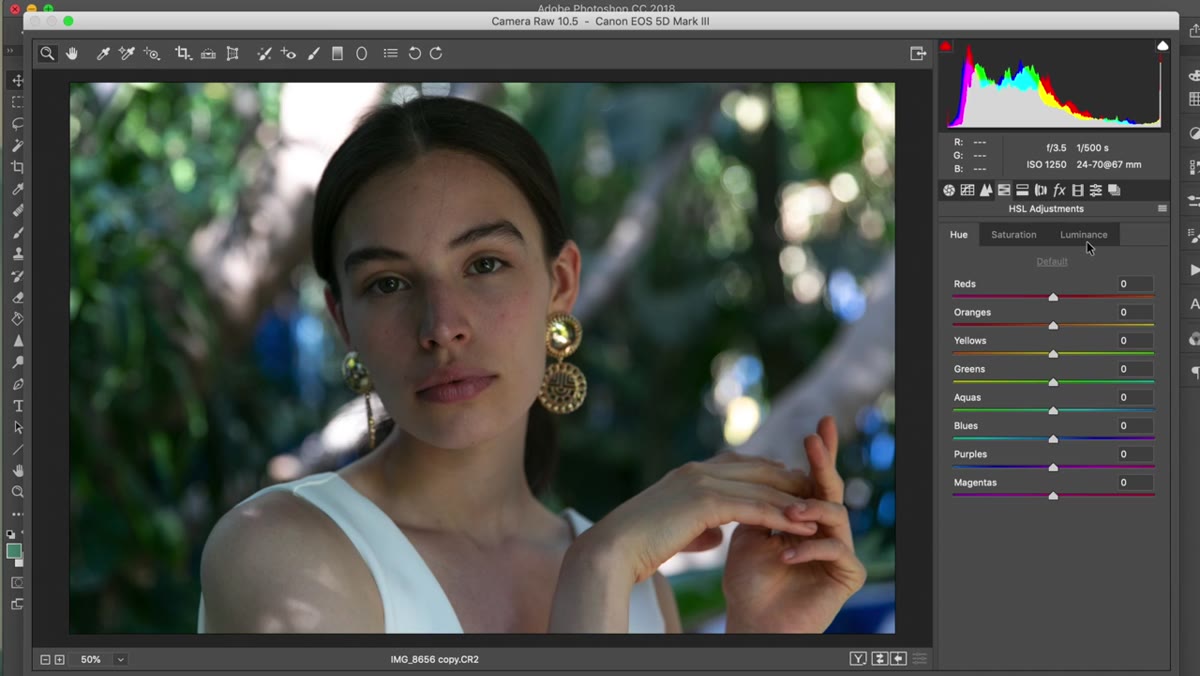 HSL panel open, Hue tab selected with yellow and green sliders pulled down
This is where Jessica’s edit gets interesting, and where I learned something genuinely useful the first time I watched this. She navigates to the HSL panel (Hue, Saturation, Luminance) and focuses specifically on the yellows, greens, and aquas in the background. The reason is strategic: she has a specific color grade in mind for the final image, and the saturated, natural greens in the backdrop will fight that grade if left alone. By shifting the hue of those channels, she neutralizes them before they become a problem.
HSL panel open, Hue tab selected with yellow and green sliders pulled down
This is where Jessica’s edit gets interesting, and where I learned something genuinely useful the first time I watched this. She navigates to the HSL panel (Hue, Saturation, Luminance) and focuses specifically on the yellows, greens, and aquas in the background. The reason is strategic: she has a specific color grade in mind for the final image, and the saturated, natural greens in the backdrop will fight that grade if left alone. By shifting the hue of those channels, she neutralizes them before they become a problem.
Her approach is to pull the Yellow hue slider down to around -18, and then push the Green hue slider much further down. The visual change in the background is significant. She also adjusts the Aqua channel. The key principle here is that you’re not trying to make the background look good on its own terms. You’re setting it up to receive a color grade that will look cohesive across the whole frame. If your background colors are fighting your grade, your grade will always look like it doesn’t belong.
Step 6: Open the Image Into Photoshop
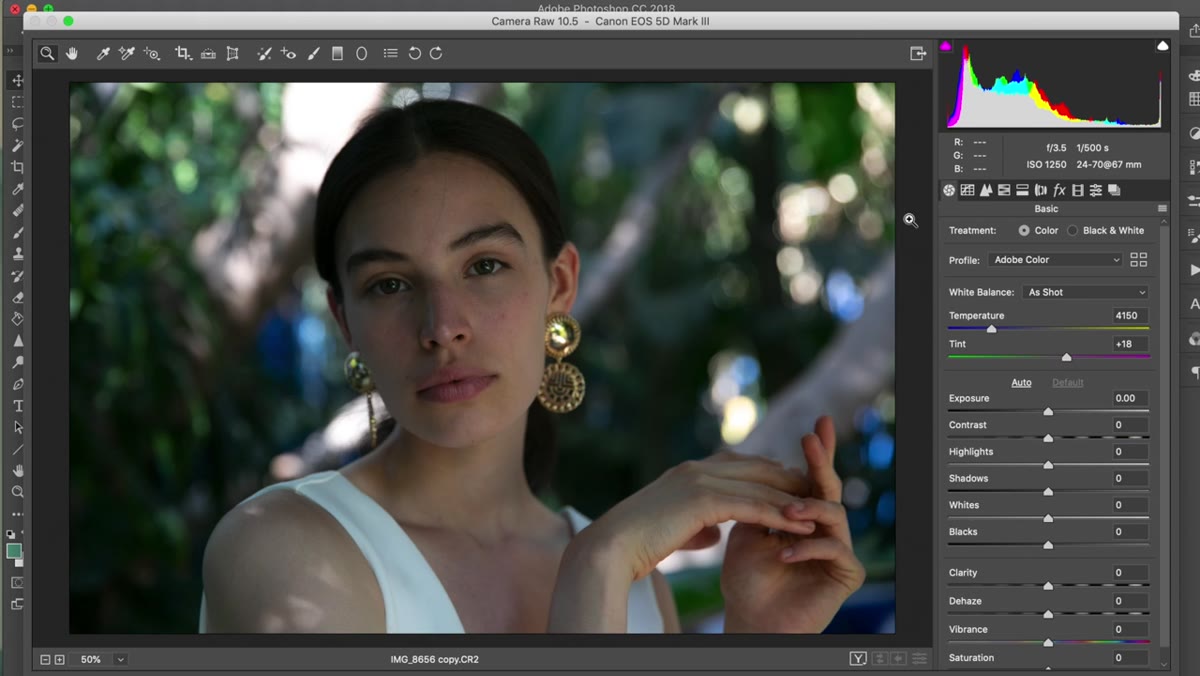 Open Image button at bottom right of Camera Raw dialog
Once the Camera Raw adjustments are dialed in, clicking “Open Image” sends the file into Photoshop as a flattened layer, carrying all those base corrections with it. At this point the image should feel more balanced. shadows present, midtones clear, background colors shifted toward neutral. Everything that follows in Photoshop - skin retouching, color grading, luminosity work - will be easier because the foundation isn’t fighting you.
Open Image button at bottom right of Camera Raw dialog
Once the Camera Raw adjustments are dialed in, clicking “Open Image” sends the file into Photoshop as a flattened layer, carrying all those base corrections with it. At this point the image should feel more balanced. shadows present, midtones clear, background colors shifted toward neutral. Everything that follows in Photoshop - skin retouching, color grading, luminosity work - will be easier because the foundation isn’t fighting you.
What I’d Add From My Own Experience
Jessica’s Camera Raw workflow matches almost exactly how I approach RAW prep for beauty and brand work, but there’s one thing I’d layer on top of her HSL color shifting. After you neutralize the problem colors in the background, go to the Saturation tab within HSL and make a secondary pass. Sometimes shifting the hue of a channel pulls it into a new range that happens to be oversaturated. A quick desaturation of the same channels you just moved keeps the background from looking artificially flat or weirdly vivid. It takes thirty seconds and saves you a Hue/Saturation adjustment layer later.
I also want to echo something implicit in Jessica’s pacing: she never rushes the Camera Raw stage to get to the “good stuff” in Photoshop. That discipline is harder to hold onto than it sounds. When a portrait is sitting right there and you want to start working on skin, the temptation to skip the groundwork is real. Don’t. The fifteen minutes you spend in Camera Raw will pay back double on the other side.
The single most transferable idea in this tutorial is that color problems are easier to solve at the source. Shifting background hues in Camera Raw, before the image even enters Photoshop, is cleaner and more reversible than trying to isolate and correct those same colors with masks and blend modes later. Build the foundation first, and the rest of the edit follows naturally.
Watch the full tutorial on YouTube to follow Jessica through the complete Photoshop retouching and color grading stages that follow this Camera Raw prep.
Comments (1)
Wow, I had no idea you could do this. Mind blown.
Leave a Comment