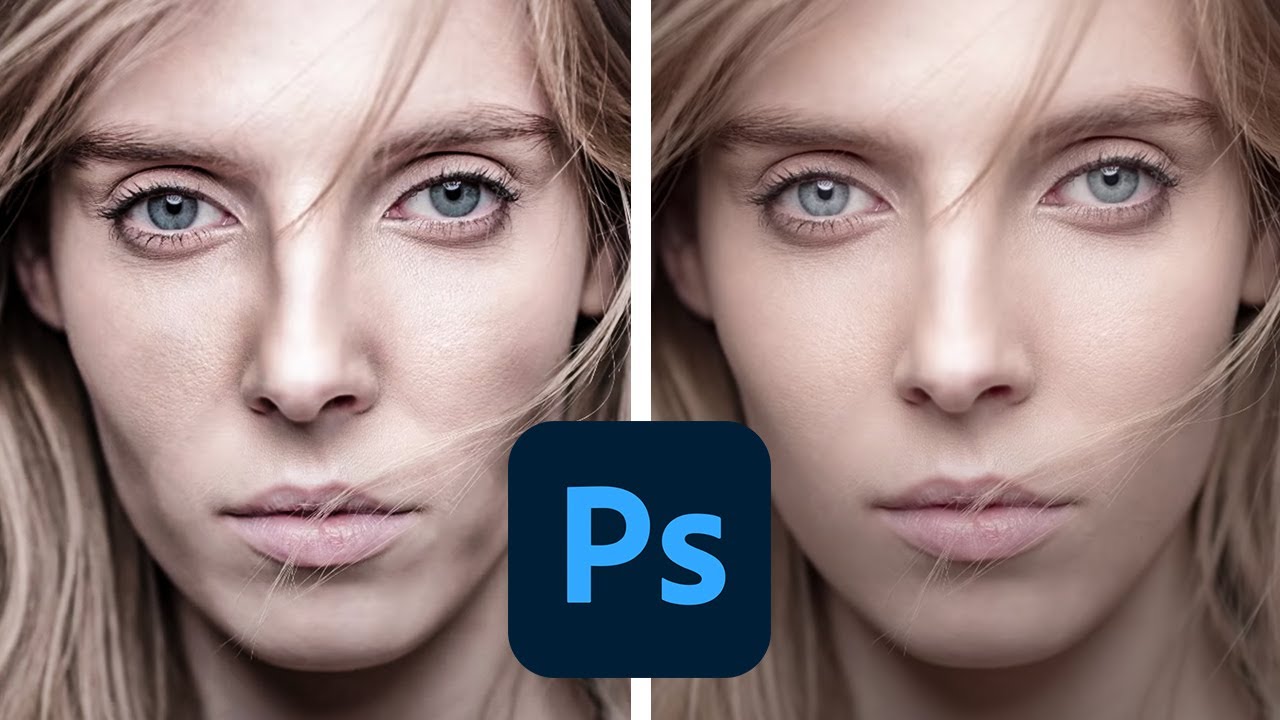
For a long time, I was that retoucher whose skin edits looked like they’d been ironed flat. A client once told me my portraits looked “a little plastic,” and I knew exactly what she meant, even if I didn’t want to admit it. I was heavy-handed with my tools, rushing toward a result instead of building toward it. Dodge and burn was supposed to be my solution, but I’d learned it in a way that made things worse, not better.
That’s why when I came across Watch the full tutorial on YouTube from Joel Grimes, it genuinely shifted how I work. Grimes is the kind of photographer-retoucher who talks about technique the way a carpenter talks about joinery: precise, practical, and a little annoyed that people are still doing it wrong. His approach to dodge and burn is built on one central idea that I wish someone had drilled into me earlier: subtlety is the whole point.
What follows is my breakdown of his method, step by step, with the settings and logic you need to actually use it on your own files. Whether you’re coming from wedding photography like I did, or you’re already working in beauty retouching, this workflow is worth understanding properly.
Step 1: Do Your Basic Cleanup First
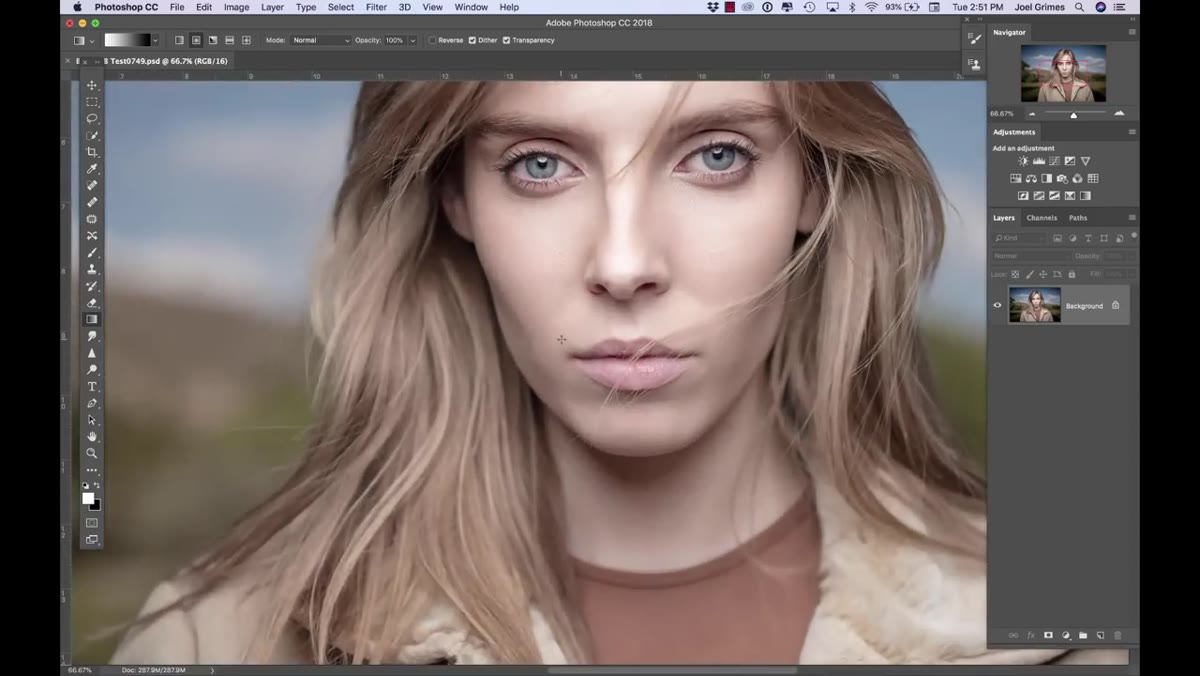 A lightly retouched portrait open in Photoshop
Before any dodging or burning happens, Grimes does a quick round of basic cleanup on the skin, removing obvious blemishes or distracting spots. On a model with great skin, this might only take a minute or two. The key word here is “minimal.” This is not the stage for heavy frequency separation or clone-stamping. You’re just clearing the deck so that the dodge and burn work that follows reads cleanly. Think of it as prepping a canvas rather than painting it.
A lightly retouched portrait open in Photoshop
Before any dodging or burning happens, Grimes does a quick round of basic cleanup on the skin, removing obvious blemishes or distracting spots. On a model with great skin, this might only take a minute or two. The key word here is “minimal.” This is not the stage for heavy frequency separation or clone-stamping. You’re just clearing the deck so that the dodge and burn work that follows reads cleanly. Think of it as prepping a canvas rather than painting it.
He also applies a slight desaturation at this stage to correct for any color cast introduced by shooting with an ND filter. The point is to neutralize the file before working the tones, so your dodge and burn decisions aren’t being confused by color noise underneath.
Step 2: Create a 50% Gray Layer Set to Overlay
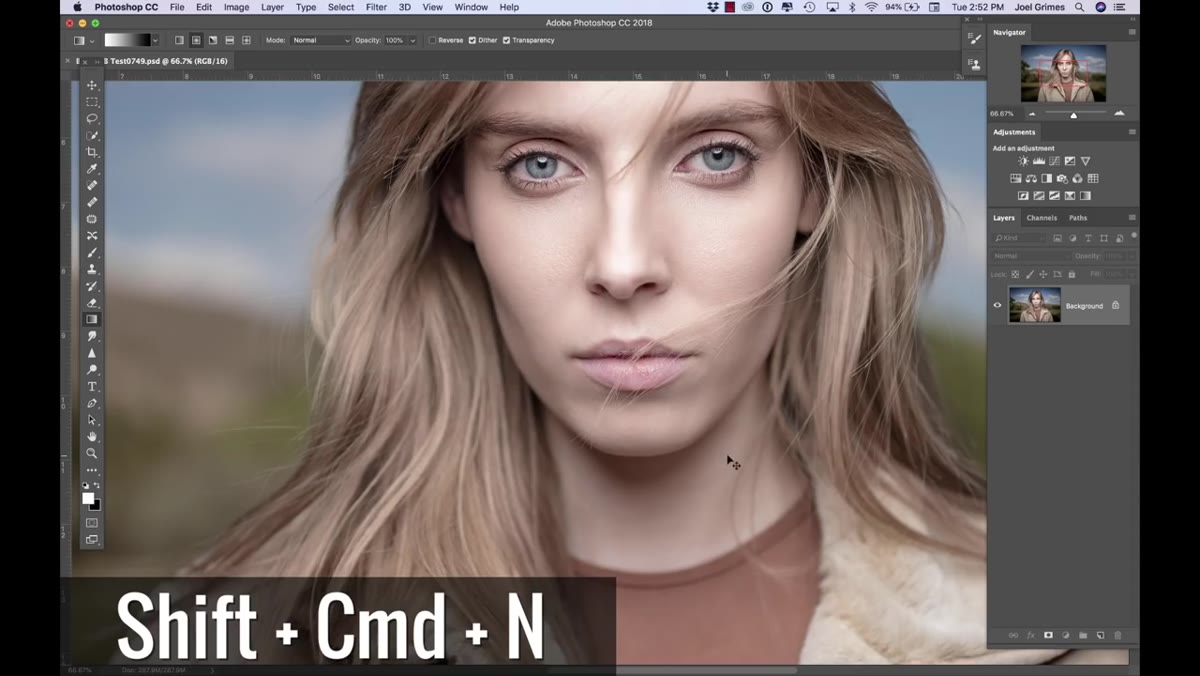 New layer dialog with Overlay blending mode and 50% gray fill
This is the foundation of the whole technique, and it’s where most tutorials either skip the explanation or get vague. Create a new layer (Shift + Command + N on Mac), set the blending mode to Overlay, and fill it with 50% gray. Photoshop will give you the option to do this right inside the new layer dialog, so you don’t even need a separate fill step.
New layer dialog with Overlay blending mode and 50% gray fill
This is the foundation of the whole technique, and it’s where most tutorials either skip the explanation or get vague. Create a new layer (Shift + Command + N on Mac), set the blending mode to Overlay, and fill it with 50% gray. Photoshop will give you the option to do this right inside the new layer dialog, so you don’t even need a separate fill step.
The reason this works: Overlay mode treats 50% gray as completely neutral and renders it invisible. Anything lighter than 50% gray will brighten the layer below; anything darker will deepen it. So you now have a surface you can paint on with the dodge and burn tools, and all of your edits stay completely non-destructive on their own layer, separate from your actual image. Label it something useful, “DB” or “Dodge-Burn,” so you can find it later without guessing.
Step 3: Add a Black and White Adjustment Layer for Reference
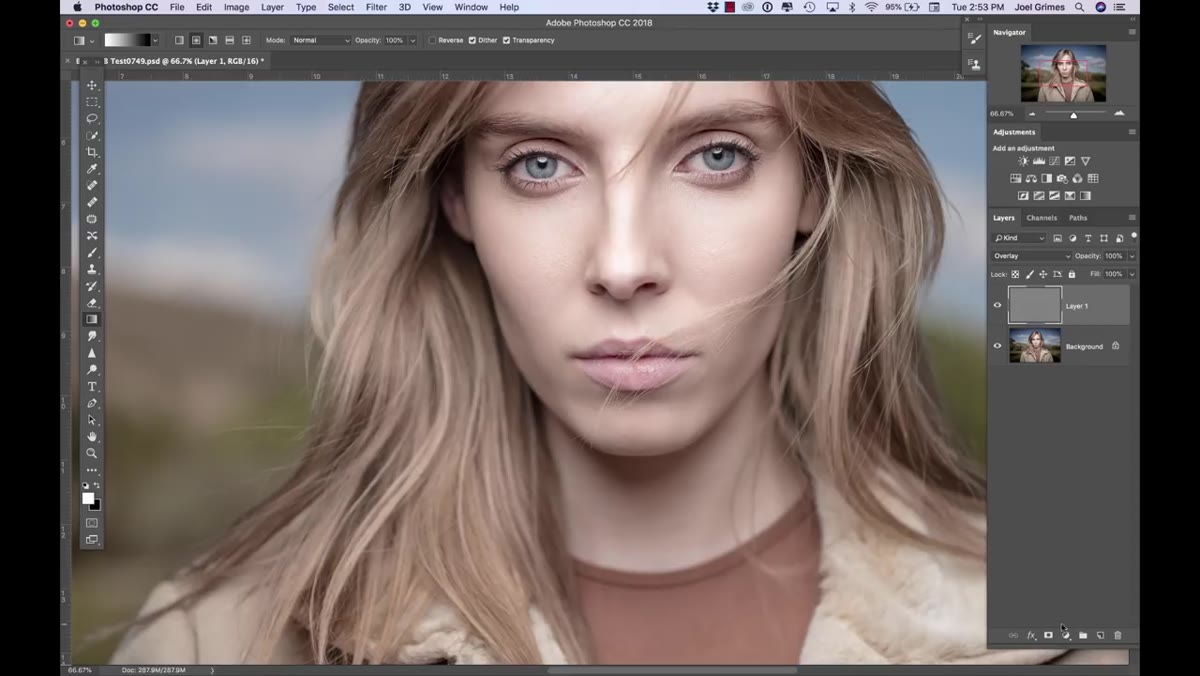 Adjustment layer panel with Black and White option highlighted
This step is one I didn’t see in other tutorials, and it’s genuinely clever. Grimes adds a Black and White adjustment layer above everything else, not as a permanent change, but as a working reference. When you strip out color, you can see the tonal values in the skin much more clearly. Shadows, highlights, and transitions between them become obvious in a way that color can actually obscure.
Adjustment layer panel with Black and White option highlighted
This step is one I didn’t see in other tutorials, and it’s genuinely clever. Grimes adds a Black and White adjustment layer above everything else, not as a permanent change, but as a working reference. When you strip out color, you can see the tonal values in the skin much more clearly. Shadows, highlights, and transitions between them become obvious in a way that color can actually obscure.
You’ll toggle this layer on and off as you work, checking your progress in black and white to make sure your dodge and burn edits are building balanced, natural-looking dimension. It stays off in the final file. Think of it like turning on a grid while you’re drawing and then hiding it before you print.
Step 4: Set Your Dodge Tool to 3% Exposure on Midtones
 Dodge tool options bar showing Midtones range and 3% exposure
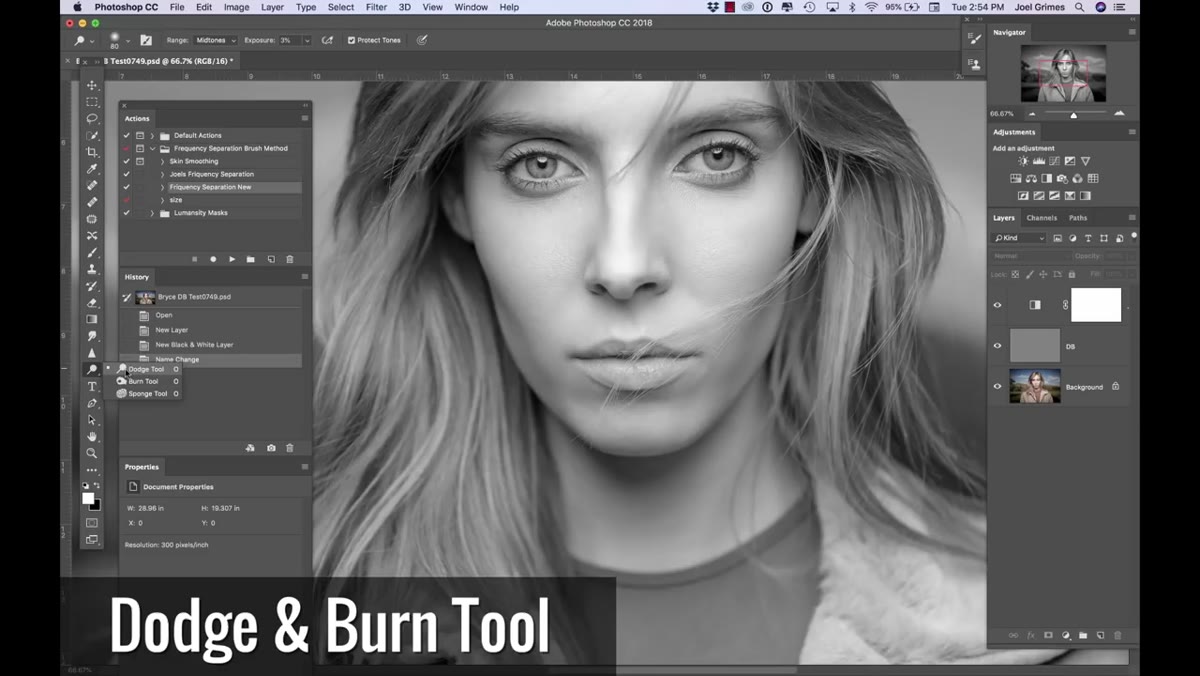
Here is where Grimes says most people go wrong, and I know I did for years. Select the Dodge tool, go to the options bar at the top, set Range to Midtones, and bring Exposure down to around 3%. Also check the “Protect Tones” box if it isn’t already checked. That’s it. Do not set it to 10%, do not set it to 20%. Three percent.
Dodge tool options bar showing Midtones range and 3% exposure
Here is where Grimes says most people go wrong, and I know I did for years. Select the Dodge tool, go to the options bar at the top, set Range to Midtones, and bring Exposure down to around 3%. Also check the “Protect Tones” box if it isn’t already checked. That’s it. Do not set it to 10%, do not set it to 20%. Three percent.
The reason matters: you want to build up brightness gradually across multiple strokes, not slam it in with one heavy pass. When you apply too much exposure at once, you get a flat, blown-out patch of skin that looks edited instead of lit. At 3%, you’re making micro-adjustments that accumulate into something that reads as natural light shaping the face. Grimes sometimes goes as low as 1%. That might feel painstakingly slow at first, but the results look like the light was always there.
Step 5: Mirror These Settings for the Burn Tool
 Burn tool selected in toolbar with matching low-exposure settings
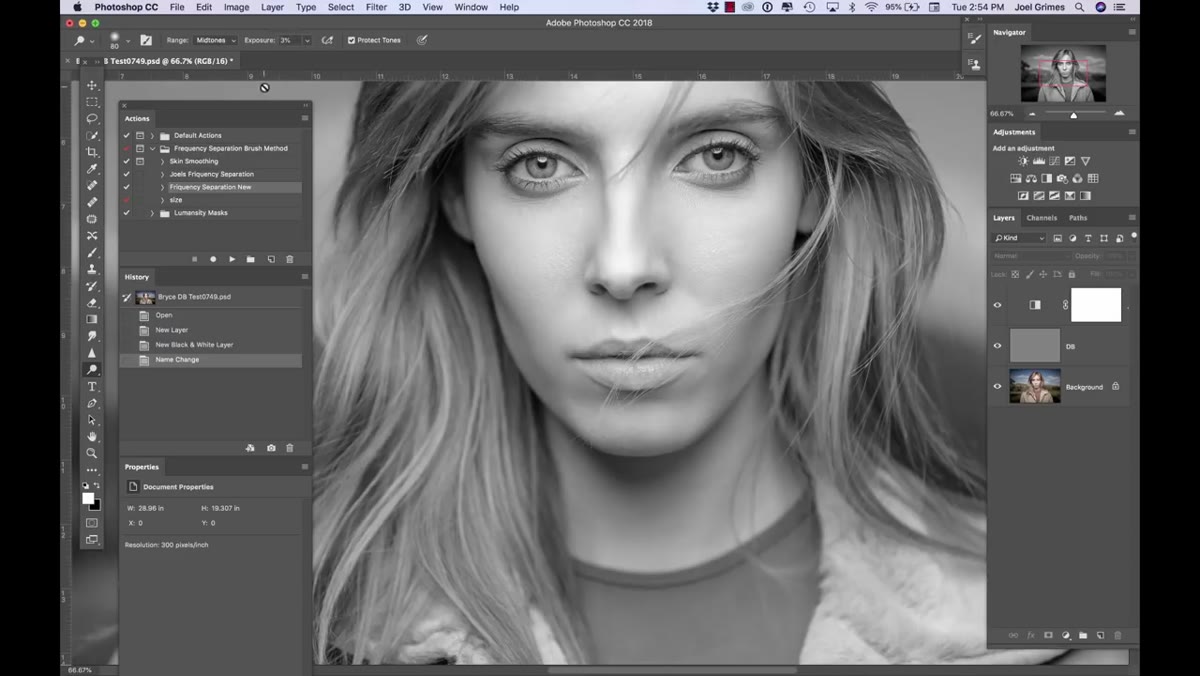
Switch to the Burn tool and apply the same logic: Midtones, 3% Exposure, Protect Tones checked. You’ll use burn to deepen shadows and add weight to the areas of the face that should recede, the sides of the nose, areas under the cheekbones, the outer edges of the forehead. The dodge tool lifts the peaks; the burn tool grounds the valleys. Together, they sculpt.
Burn tool selected in toolbar with matching low-exposure settings
Switch to the Burn tool and apply the same logic: Midtones, 3% Exposure, Protect Tones checked. You’ll use burn to deepen shadows and add weight to the areas of the face that should recede, the sides of the nose, areas under the cheekbones, the outer edges of the forehead. The dodge tool lifts the peaks; the burn tool grounds the valleys. Together, they sculpt.
The biggest mistake I see in workshop participants is using Highlights for the dodge and Shadows for the burn, thinking it sounds logical. It often leads to clipping on both ends. Staying in Midtones gives you the most control over the middle range of tonal values, which is where most of the skin information actually lives.
A Note From My Own Workflow
I’ve added one habit on top of Grimes’ method: I keep my brush size large and my pressure low when I’m working on broader planes of the face, like the forehead or cheeks, and I only switch to a smaller brush for detailed areas around the eyes or nose bridge. Grimes paints loosely and confidently in the tutorial, and that comes from years of practice, but a large soft brush is actually more forgiving when you’re learning because it blends the transitions automatically.
One more thing: if you want to check the actual changes you’re making on the gray layer, temporarily set its blending mode back to Normal. You’ll see exactly where you’ve painted lighter and darker. It’s a useful gut-check before you commit to a direction.
The single most important idea in this entire technique is that dodge and burn is not about correcting skin, it is about shaping light. When your exposure is too high and your strokes are too few, you’re correcting. When your exposure is low and your strokes accumulate slowly, you’re sculpting. That difference is everything.
Watch the full tutorial on YouTube to see Joel Grimes demonstrate this on a real portrait file, with his brush strokes and settings visible in real time. Watching the pace at which he works is honestly as instructive as the technique itself.
Comments
Leave a Comment