There’s a moment in retouching when you realize that chasing perfection with the wrong tools is actually making things worse. For me, that moment came early in my beauty retouching career, when a client told me my edits looked “plastic.” She wasn’t wrong. I was dodging and burning with Photoshop’s built-in Dodge and Burn tools, directly on the pixel layer, and the results were muddy, flat, and irreversible. One mistake and I was undoing fifteen minutes of work.
The technique I’m going to walk you through today fixed all of that. It comes from Watch the full tutorial on YouTube - a CreativeLive Photoshop tutorial on dodging and burning that reframed how I think about luminosity adjustments entirely. The instructor skips Photoshop’s native Dodge and Burn tools in favor of a gray-filled overlay layer and a standard brush, and the difference in control is significant. Everything lives on its own layer, everything is editable, and nothing touches the original image.
This is the version of dodge and burn I now use on every skin retouch, whether I’m cleaning up a foundation campaign or helping a photographer polish a headshot. Here’s exactly how to do it.
Step 1: Create a New Layer With Special Properties
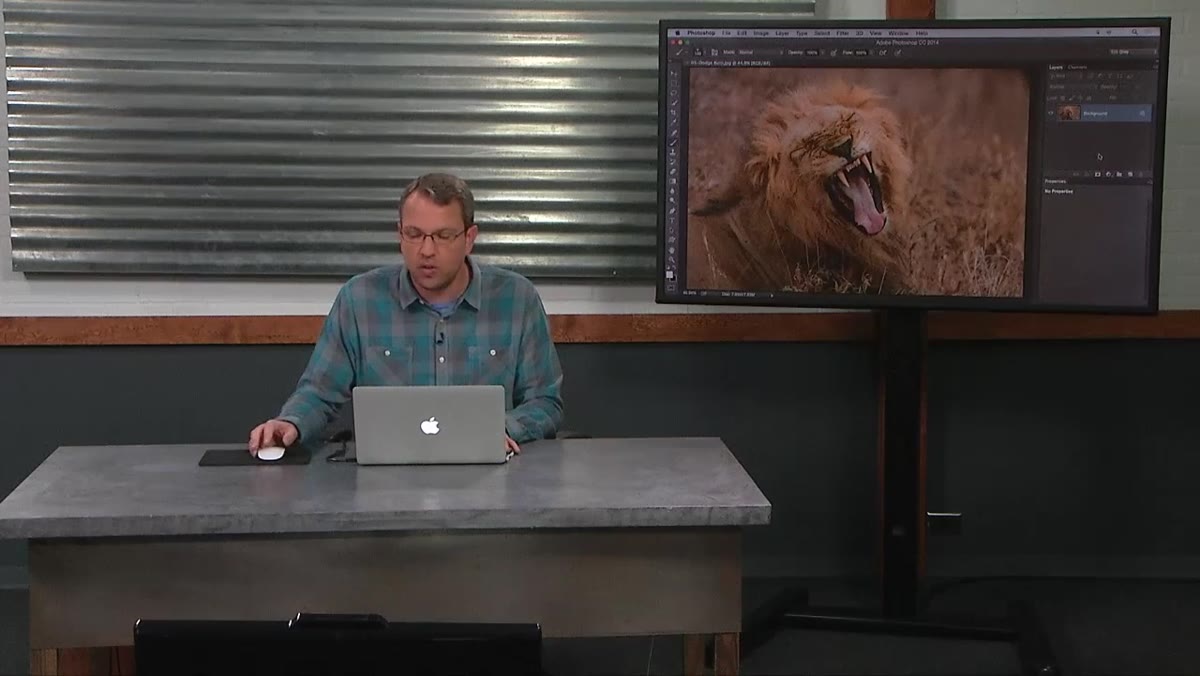 New Layer dialog box open with name field visible
Don’t just click the New Layer button and move on. Instead, hold Alt on Windows or Option on Mac while clicking that blank-sheet icon at the bottom of the Layers panel. That keyboard modifier is the key to this whole technique. It forces Photoshop to open a dialog box before creating the layer, which gives you access to settings you’d otherwise have to apply manually afterward.
New Layer dialog box open with name field visible
Don’t just click the New Layer button and move on. Instead, hold Alt on Windows or Option on Mac while clicking that blank-sheet icon at the bottom of the Layers panel. That keyboard modifier is the key to this whole technique. It forces Photoshop to open a dialog box before creating the layer, which gives you access to settings you’d otherwise have to apply manually afterward.
Name the layer something clear. I call mine “dodge-burn” and have a Photoshop action named after it (yes, I name all my actions after movies, and yes, this one is called “The Gray Man”). The name matters less than what comes next.
Step 2: Set the Blend Mode to Overlay
 Layer dialog showing blend mode dropdown set to Overlay
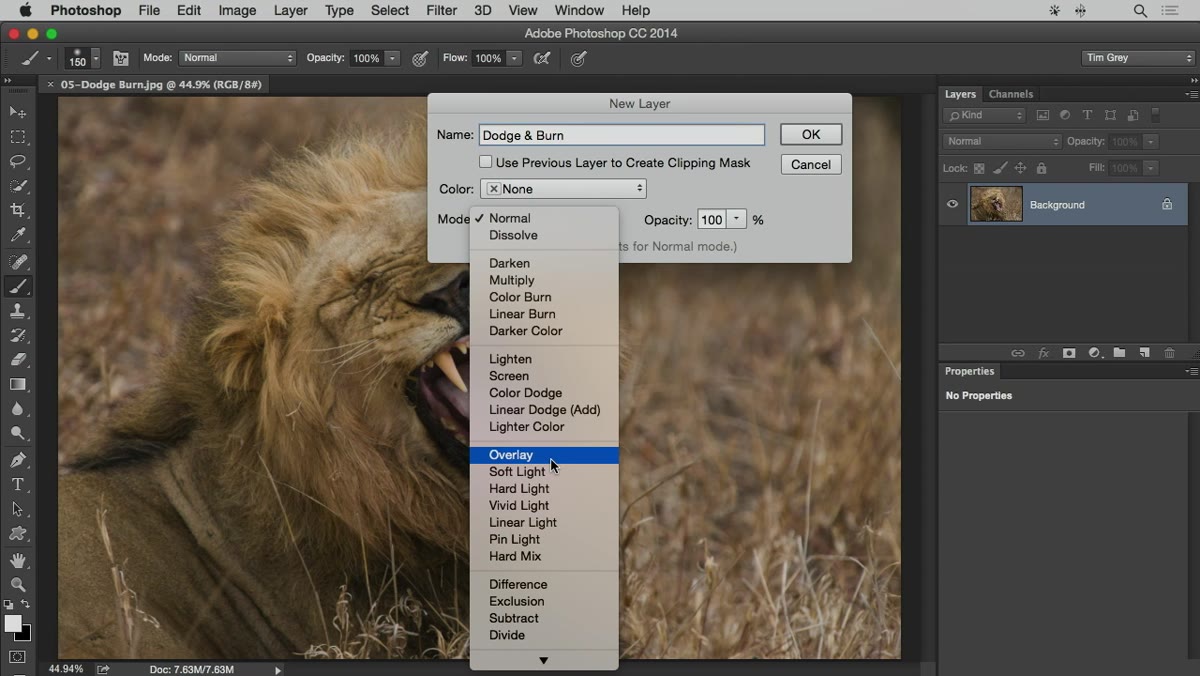
Inside that New Layer dialog, find the Mode dropdown and set it to Overlay. You could also use Soft Light here - it produces a more subtle result - but Overlay gives you a more visible, punchy effect that’s easier to see while you’re working. For skin retouching where you want clear control over highlights and shadows, Overlay is usually the right call.
Layer dialog showing blend mode dropdown set to Overlay
Inside that New Layer dialog, find the Mode dropdown and set it to Overlay. You could also use Soft Light here - it produces a more subtle result - but Overlay gives you a more visible, punchy effect that’s easier to see while you’re working. For skin retouching where you want clear control over highlights and shadows, Overlay is usually the right call.
The reasoning behind this choice is important to understand, not just memorize. The Overlay blend mode treats middle gray (50% gray) as completely neutral - it has zero effect on the pixels below it. Anything lighter than 50% gray will brighten the image; anything darker will darken it. That gray midpoint is where all the flexibility comes from.
Step 3: Fill the Layer With 50% Gray
 Checkbox “Fill with Overlay-neutral color” highlighted in dialog
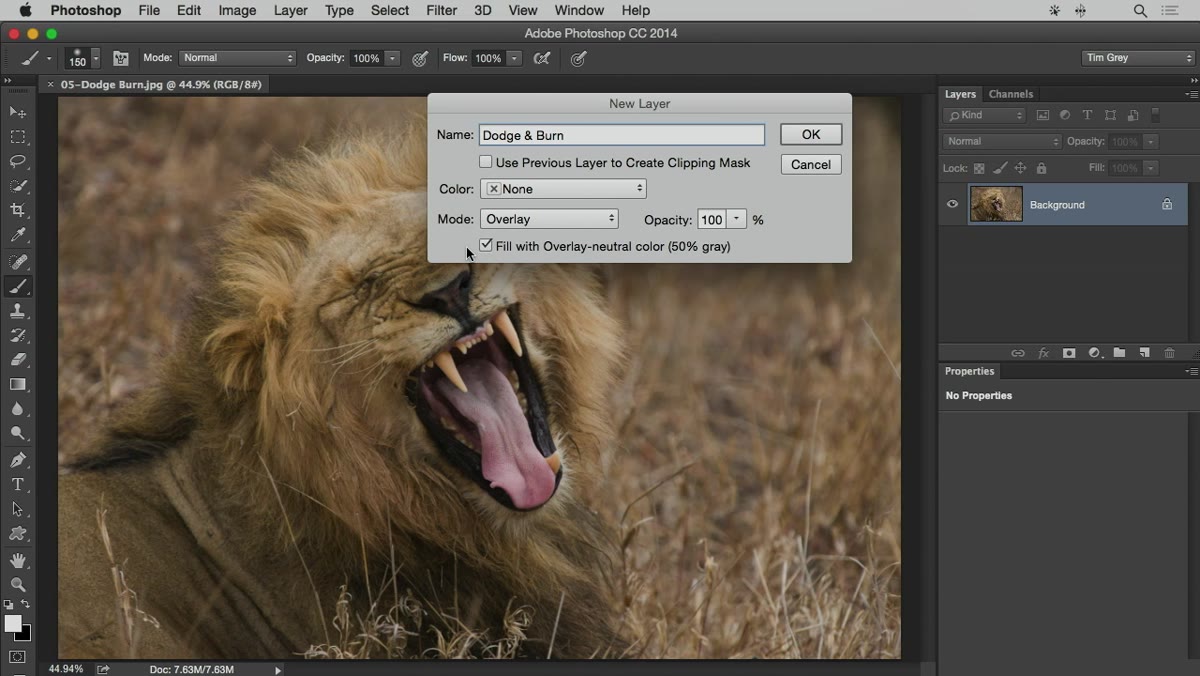
Still inside the New Layer dialog, check the box that says “Fill with Overlay-neutral color.” Photoshop will automatically fill your new layer with 50% gray - the exact midpoint value that’s invisible under the Overlay blend mode. Click OK.
Checkbox “Fill with Overlay-neutral color” highlighted in dialog
Still inside the New Layer dialog, check the box that says “Fill with Overlay-neutral color.” Photoshop will automatically fill your new layer with 50% gray - the exact midpoint value that’s invisible under the Overlay blend mode. Click OK.
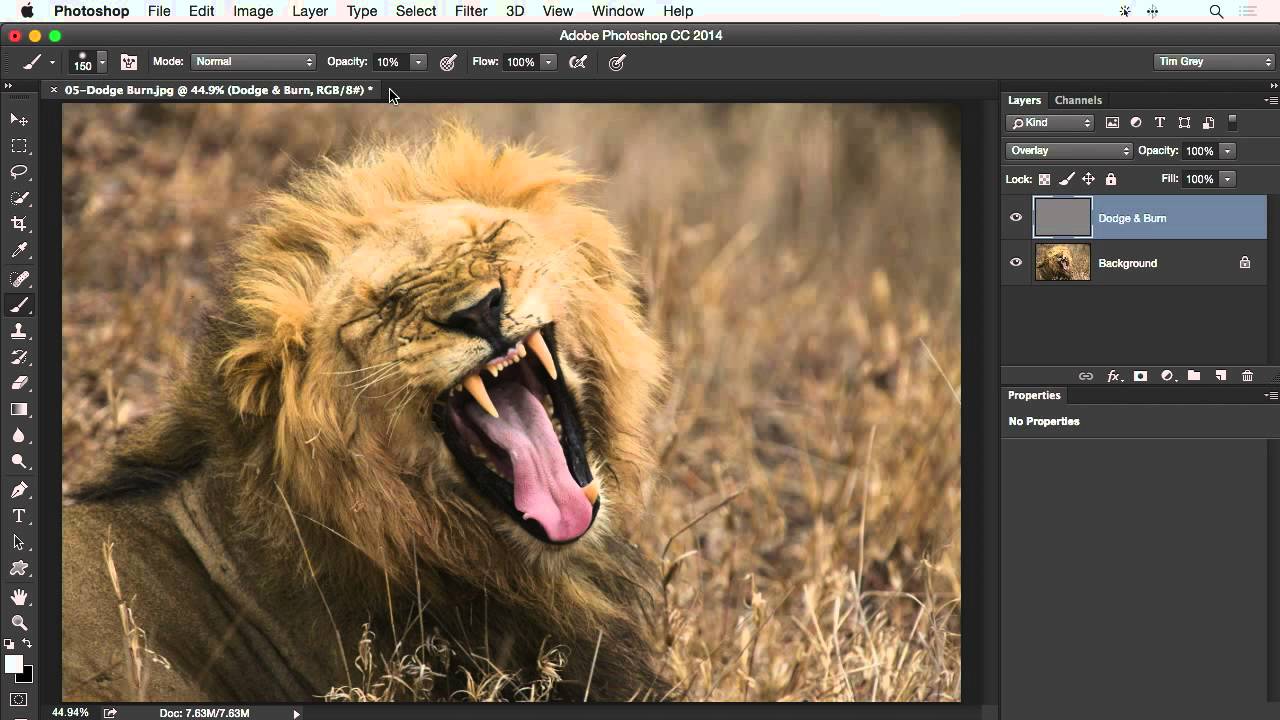
Your canvas will look completely unchanged, which is exactly right. You now have a gray layer sitting above your photo that is doing absolutely nothing visually, but is ready to be painted on. Open your Layers panel and you’ll see the gray fill in the layer thumbnail and the Overlay mode listed at the top. That’s your confirmation that everything is set up correctly.
Step 4: Choose Your Brush and Lower the Opacity
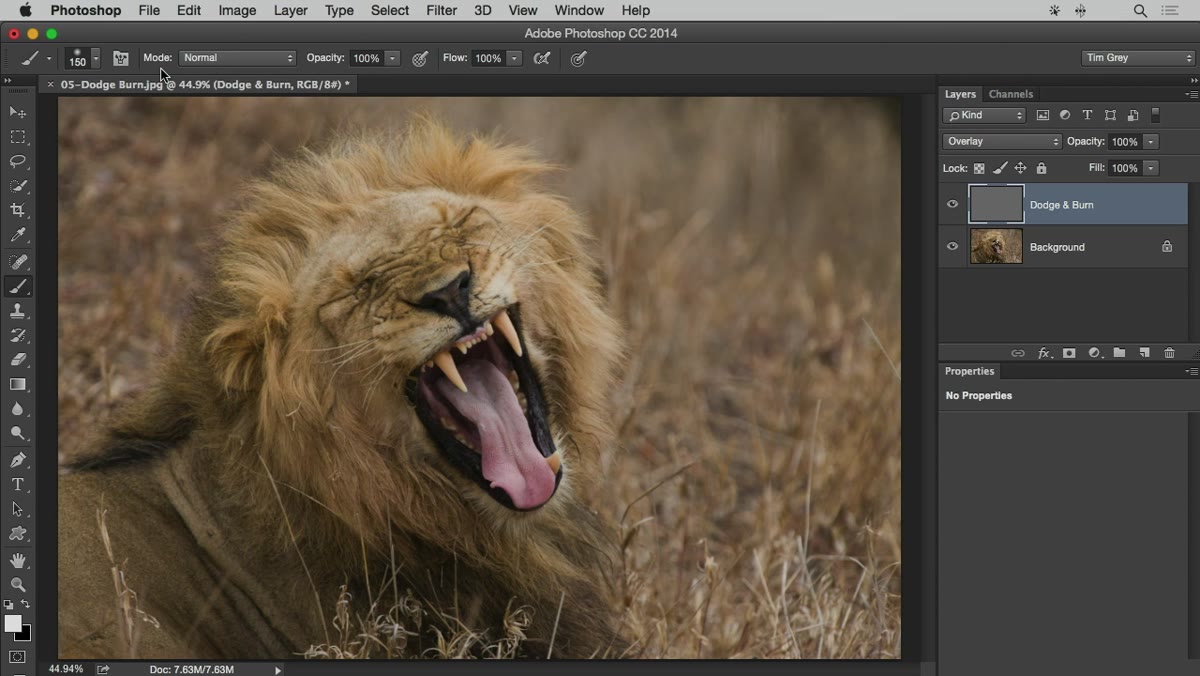 Brush options bar showing Normal blend mode and opacity at 20%
Select the Brush tool and check two things in the options bar at the top: the blend mode for the brush itself should be set to Normal (the blend mode magic is happening at the layer level, not the brush level), and the opacity should be low. The tutorial recommends somewhere between 10 and 20 percent. For most skin work I stay at 10 to 12 percent, building up gradually, but the instructor uses 20 percent here so the effect reads clearly on screen.
Brush options bar showing Normal blend mode and opacity at 20%
Select the Brush tool and check two things in the options bar at the top: the blend mode for the brush itself should be set to Normal (the blend mode magic is happening at the layer level, not the brush level), and the opacity should be low. The tutorial recommends somewhere between 10 and 20 percent. For most skin work I stay at 10 to 12 percent, building up gradually, but the instructor uses 20 percent here so the effect reads clearly on screen.
A quick shortcut worth memorizing: with the Brush tool active, pressing a number key sets your opacity instantly. Press 1 for 10%, 2 for 20%, or type 1 then 5 quickly to land at 15%. Use a soft-edged brush and plan to resize it constantly as you move between larger planes of the face and smaller detail areas.
Step 5: Set Your Foreground Color and Paint to Lighten
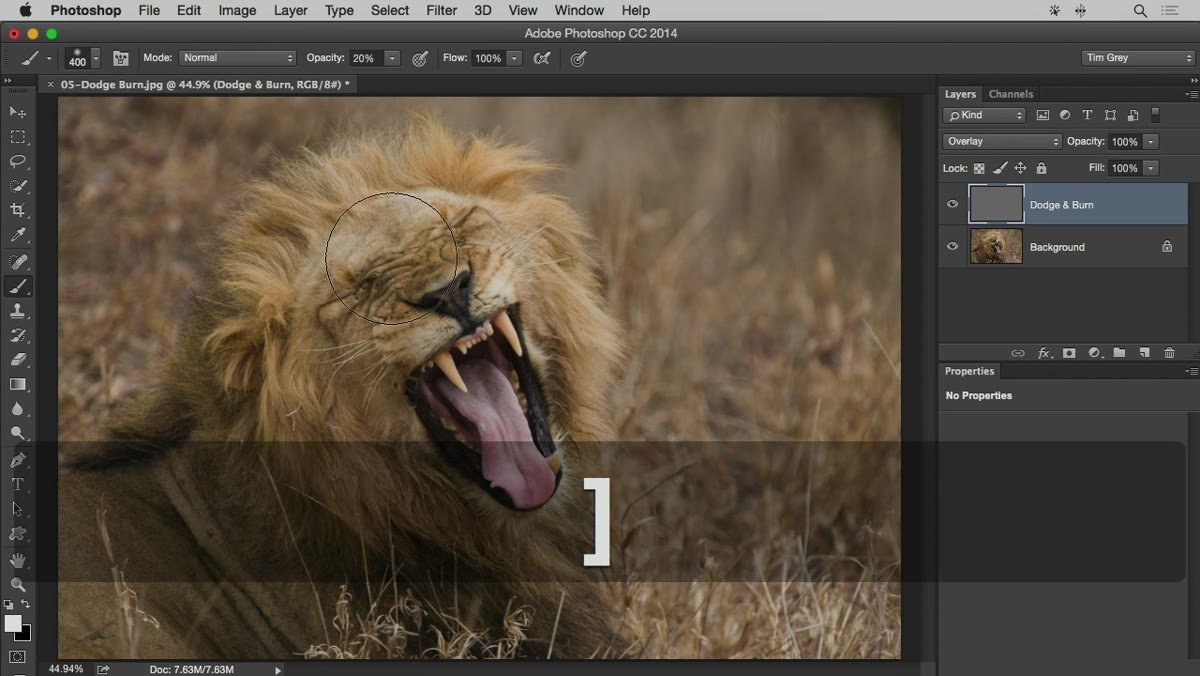 Canvas showing brush strokes lightening subject’s face
Press D to reset your foreground and background colors to the defaults (black and white), then press X to swap so that white is your active foreground color. White is your dodge color - painting with it over the gray layer will lighten whatever is beneath.
Canvas showing brush strokes lightening subject’s face
Press D to reset your foreground and background colors to the defaults (black and white), then press X to swap so that white is your active foreground color. White is your dodge color - painting with it over the gray layer will lighten whatever is beneath.
Work in the natural highlight areas of the face: the center of the forehead, the bridge of the nose, the tops of the cheekbones, the cupid’s bow. Use long, flowing strokes rather than dabbing. Because your opacity is low, a single pass won’t do much - and that’s a feature, not a flaw. You’re building luminosity gradually, which means you have real control over how far you push it.
Step 6: Swap to Black and Paint to Deepen Shadows
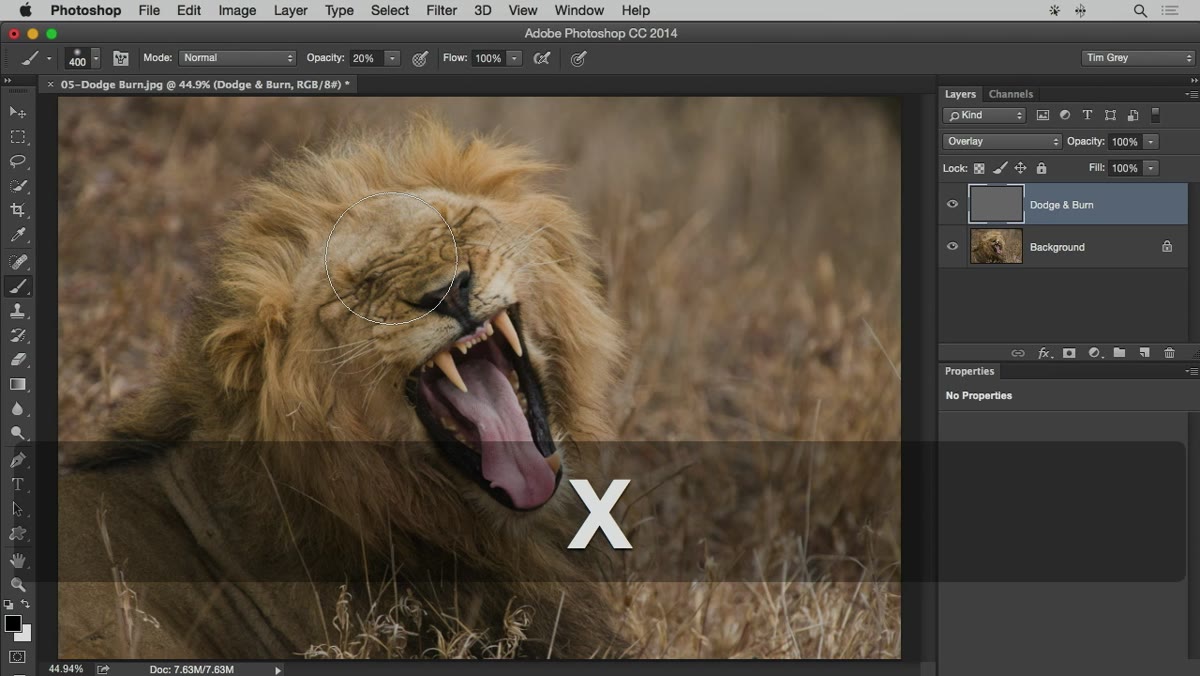 Foreground color switched to black for burning
Press X again to swap to black as your foreground color. Now you’re burning - deepening the shadows in areas like the sides of the nose, under the cheekbones, along the jawline, and at the temples. The same brush, the same low opacity, the same slow build.
Foreground color switched to black for burning
Press X again to swap to black as your foreground color. Now you’re burning - deepening the shadows in areas like the sides of the nose, under the cheekbones, along the jawline, and at the temples. The same brush, the same low opacity, the same slow build.
What makes this approach so valuable is that if you ever overpaint an area, you don’t need to undo anything. Simply switch to the opposite color and paint back over it. White cancels black; black cancels white. You can also lower the layer opacity, toggle the layer on and off to check your work, or even run a Gaussian blur over the gray layer if your strokes look patchy.
What I Do Differently After Years of Using This Technique
The tutorial covers the core method cleanly, but there’s one addition I’ve built into my own workflow: I duplicate the dodge-burn layer at the end and drop its opacity to around 50% before merging. It sounds redundant, but it gives me a second pass to evaluate the cumulative effect at half-strength before committing. Sometimes what looks right while you’re in the weeds is actually too heavy when you step back. That extra moment of comparison has saved me from over-retouching more times than I can count.
I also keep the gray layer visible in the Layers panel rather than flattening it until the client signs off. The gray thumbnail is a perfect visual record of exactly where I lightened and darkened - you can actually see your brush work in the thumbnail - and it makes revisiting the file for revisions much simpler.
The single most important idea here is that 50% gray under Overlay is invisible, and that invisibility is what gives you a completely non-destructive playground for shaping light on a face. Everything you do is reversible, adjustable, and kept separate from your original image.
If you want to see the full technique demonstrated on an actual portrait, Watch the full tutorial on YouTube - the CreativeLive instructor walks through it on a real photo and the effect is immediately convincing.
Comments (4)
The tip about the dodge burn layer trick tha was the missing piece for me. Thank you.
This saved me so much time on my last edit. Wish I'd found this sooner.
Great breakdown. The step-by-step approach really helps.
Excellent tutorial. I'd add that from a photoshop standpoint, this technique is incredibly versatile.
Leave a Comment