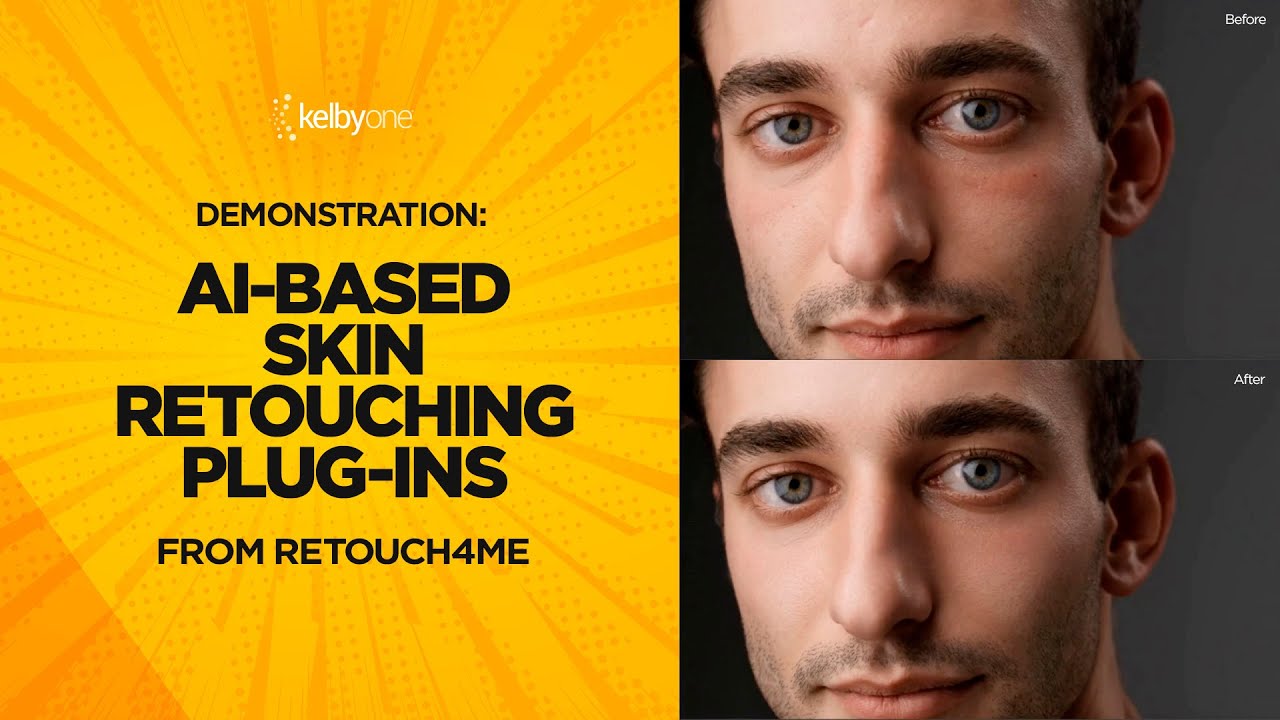
There’s a specific kind of dread I used to feel opening a beauty close-up in Photoshop. Not the creative kind of challenge, the kind where you know what needs to happen, you know how long it’s going to take, and you also know the client wants it back by Thursday. Spot healing, frequency separation, then the real time sink: building out a dodge and burn structure that actually sculpts the face without making the skin look like a vinyl tablecloth. I learned retouching the hard way after a client told me my edits looked “plastic,” and I’ve spent years since then obsessing over keeping texture intact while still doing serious work on light and shadow. So when I came across a KelbyOne tutorial featuring Roman and Vitali from Retouch4Me, I watched it twice in one sitting with my green tea going cold on the desk.
Watch the full tutorial on YouTube
The Retouch4Me suite is a set of AI-powered plugins that run either as standalone software or through Photoshop, Lightroom, and Capture One. The demo covers three specific plugins, and I want to walk you through each one the way I’d explain it to someone in one of my workshops, with the actual steps and the details that matter for getting a clean, professional result.
Step 1: Duplicate Your Layer Before Running Anything
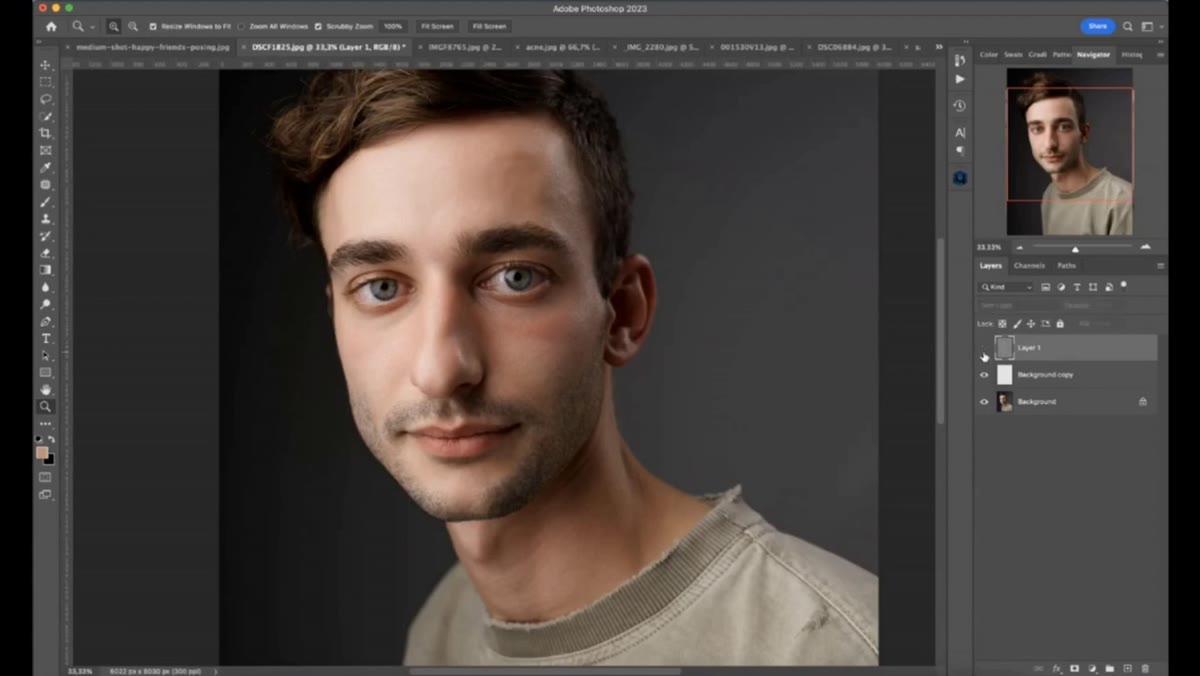
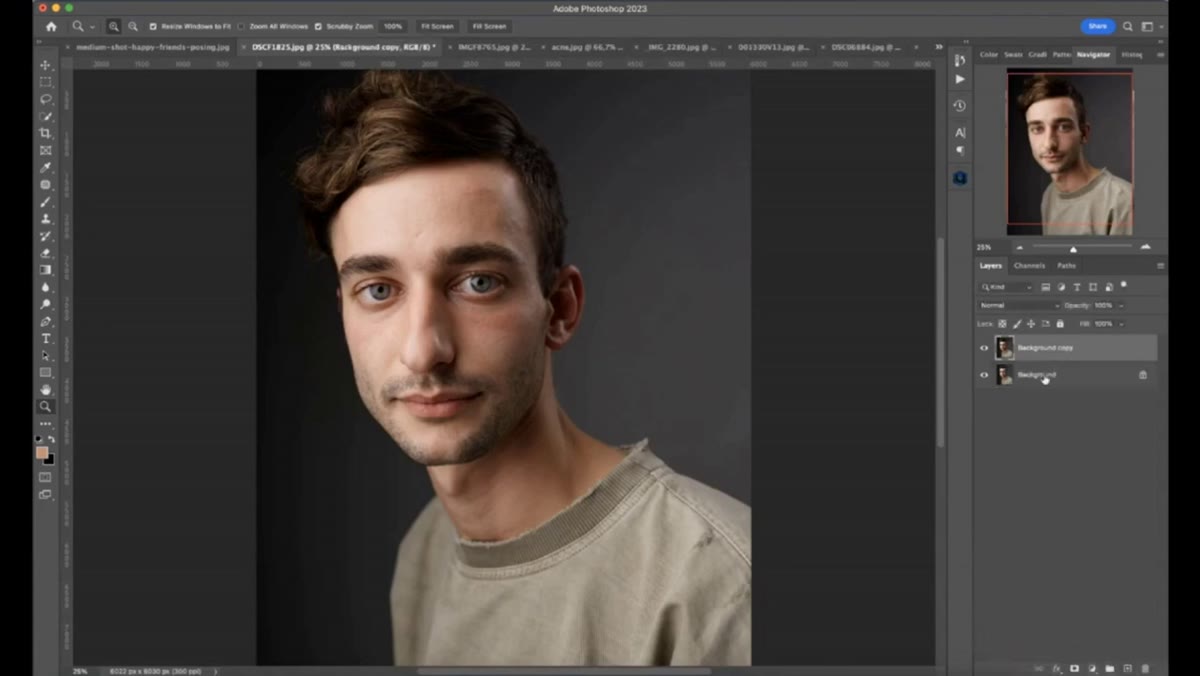 Host duplicates background layer before opening plugin filter
Before you touch the Retouch4Me menu, duplicate your base layer. This is non-negotiable. The plugins are non-destructive in the sense that they preserve skin texture beautifully, but you still want a separate layer so you can mask, reduce opacity, or compare before and after without destroying your original pixel data. In Photoshop, Command+J (Mac) or Ctrl+J (Windows) does the job in one keystroke. Name the layer something useful. I have a Photoshop action called “The Revenant” that does this automatically because duplicating and labeling layers is the kind of thing I forget when I’m tired.
Host duplicates background layer before opening plugin filter
Before you touch the Retouch4Me menu, duplicate your base layer. This is non-negotiable. The plugins are non-destructive in the sense that they preserve skin texture beautifully, but you still want a separate layer so you can mask, reduce opacity, or compare before and after without destroying your original pixel data. In Photoshop, Command+J (Mac) or Ctrl+J (Windows) does the job in one keystroke. Name the layer something useful. I have a Photoshop action called “The Revenant” that does this automatically because duplicating and labeling layers is the kind of thing I forget when I’m tired.
Step 2: Run the Heal Plugin for Spot Removal
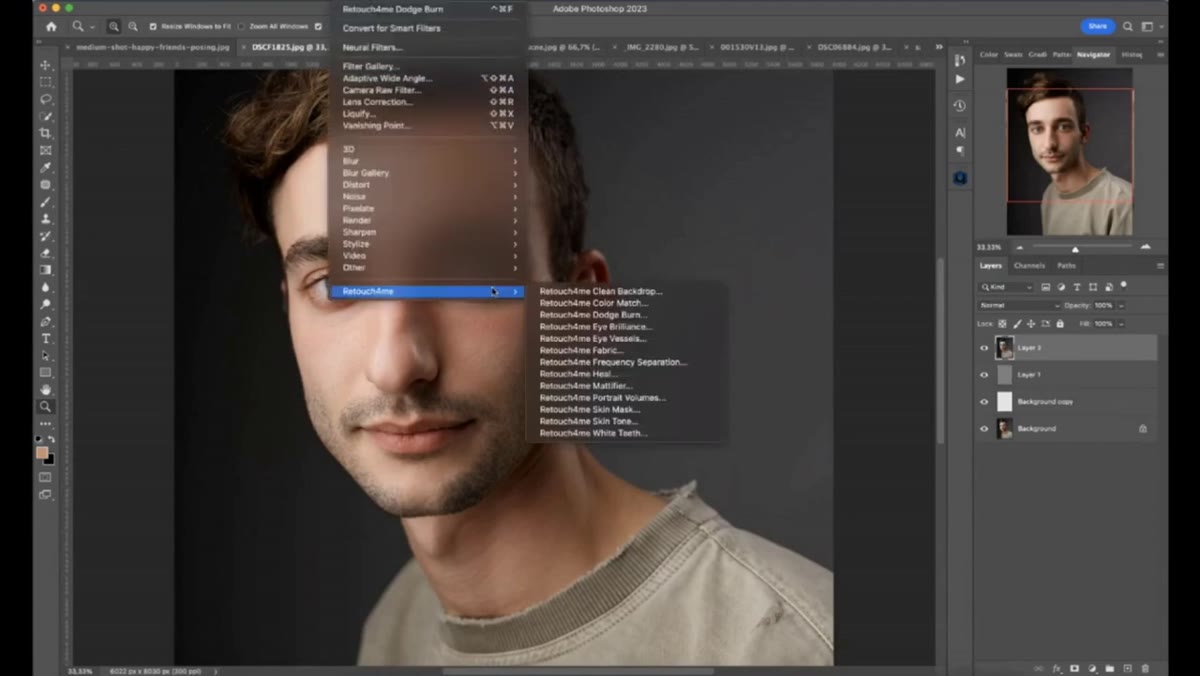
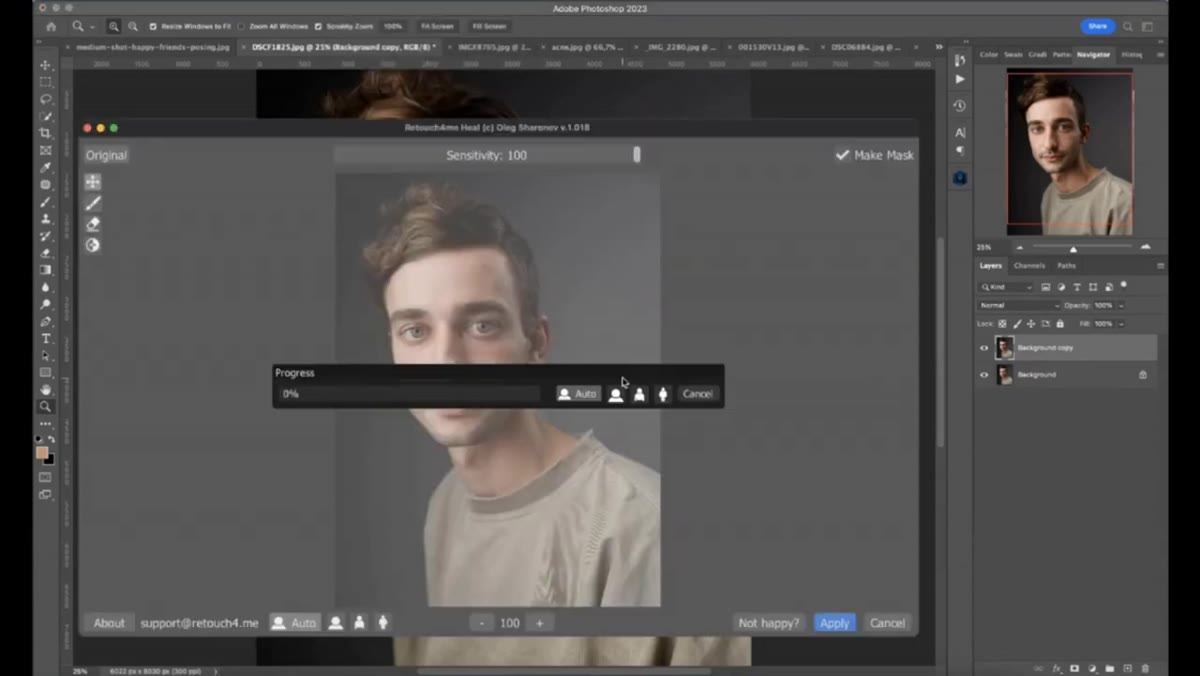 Filter menu open showing Retouch4Me plugin options listed
With your duplicate layer selected, go to Filter, then Retouch4Me, and choose the Heal plugin. You don’t need to adjust anything before running it. Just let it go. The AI analyzes the image and removes surface blemishes, uneven spots, and temporary skin irregularities on its own pass. What makes this different from a standard healing brush is what it leaves behind: the pores, the fine lines, the natural texture of the skin all stay exactly where they are. The plugin is specifically trained to distinguish between the texture layer of skin and the tone and color variations sitting on top of it. When it finishes, do a before and after toggle by clicking the layer visibility on and off. The difference is real, and the skin still looks like skin.
Filter menu open showing Retouch4Me plugin options listed
With your duplicate layer selected, go to Filter, then Retouch4Me, and choose the Heal plugin. You don’t need to adjust anything before running it. Just let it go. The AI analyzes the image and removes surface blemishes, uneven spots, and temporary skin irregularities on its own pass. What makes this different from a standard healing brush is what it leaves behind: the pores, the fine lines, the natural texture of the skin all stay exactly where they are. The plugin is specifically trained to distinguish between the texture layer of skin and the tone and color variations sitting on top of it. When it finishes, do a before and after toggle by clicking the layer visibility on and off. The difference is real, and the skin still looks like skin.
Step 3: Apply the Dodge and Burn Plugin on a New Layer
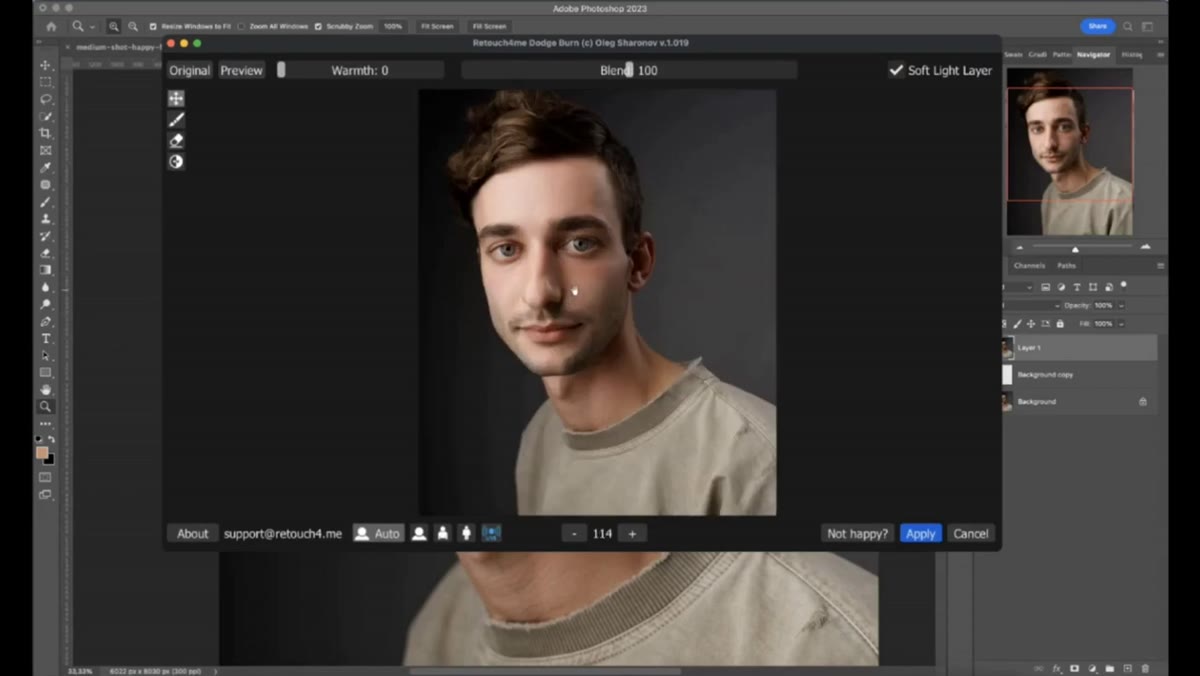 Dodge and burn preview showing bright and dark areas mapped across face
Merge your working layers, then go back to Filter, Retouch4Me, and this time select the Dodge and Burn plugin. Before you click run, look at the preview the plugin generates. It maps the natural highlights and shadows of the face, brightening areas that already catch light and deepening areas that naturally fall into shadow. This is the sculpting pass, and it works on facial structure the way a high-end magazine retoucher would approach it manually. The key setting here is the output option. Choose to save the result on a neutral gray layer, then set that layer’s blend mode to Soft Light. This is the same technique that makes manual dodge and burn work in traditional retouching, the Soft Light blend mode on a gray layer means the midtones disappear and only the light and dark adjustments show through. The plugin builds that layer for you automatically.
Dodge and burn preview showing bright and dark areas mapped across face
Merge your working layers, then go back to Filter, Retouch4Me, and this time select the Dodge and Burn plugin. Before you click run, look at the preview the plugin generates. It maps the natural highlights and shadows of the face, brightening areas that already catch light and deepening areas that naturally fall into shadow. This is the sculpting pass, and it works on facial structure the way a high-end magazine retoucher would approach it manually. The key setting here is the output option. Choose to save the result on a neutral gray layer, then set that layer’s blend mode to Soft Light. This is the same technique that makes manual dodge and burn work in traditional retouching, the Soft Light blend mode on a gray layer means the midtones disappear and only the light and dark adjustments show through. The plugin builds that layer for you automatically.
Step 4: Adjust the Soft Light Layer Opacity to Taste
 Soft light blend mode applied to neutral gray layer in layers panel
Once the Dodge and Burn layer is sitting in Soft Light mode, reduce the layer opacity until the effect feels natural for your specific image. Portrait photography varies enormously in terms of how much existing contrast is in the lighting setup, and a result that looks perfect on a softbox-lit beauty shot will be too heavy on something with more dramatic directional light. Start around 70 percent and dial up or down from there. You’re looking for a face that looks like it was lit better, not a face that looks like someone ran a filter on it. There’s a meaningful difference, and your eye will know it.
Soft light blend mode applied to neutral gray layer in layers panel
Once the Dodge and Burn layer is sitting in Soft Light mode, reduce the layer opacity until the effect feels natural for your specific image. Portrait photography varies enormously in terms of how much existing contrast is in the lighting setup, and a result that looks perfect on a softbox-lit beauty shot will be too heavy on something with more dramatic directional light. Start around 70 percent and dial up or down from there. You’re looking for a face that looks like it was lit better, not a face that looks like someone ran a filter on it. There’s a meaningful difference, and your eye will know it.
Step 5: Use the Portrait Volumes Plugin for Dimensional Sculpting
 Portrait volumes plugin preview showing before and after on merged image
Merge everything down again, then run the third plugin: Portrait Volumes. This one goes further than dodge and burn. Where the previous plugin works with the existing light and shadow on the face, Portrait Volumes actively increases the visual three-dimensionality of the entire shot. It’s analyzing the geometry of the face and adding depth. Like the Dodge and Burn plugin, it gives you the option to output the result onto a neutral gray layer in Soft Light mode, which is the approach worth using here too. Once it’s on that layer, you have full control over the blend amount through opacity, and you can also use a mask to protect any areas where the effect feels like too much.
Portrait volumes plugin preview showing before and after on merged image
Merge everything down again, then run the third plugin: Portrait Volumes. This one goes further than dodge and burn. Where the previous plugin works with the existing light and shadow on the face, Portrait Volumes actively increases the visual three-dimensionality of the entire shot. It’s analyzing the geometry of the face and adding depth. Like the Dodge and Burn plugin, it gives you the option to output the result onto a neutral gray layer in Soft Light mode, which is the approach worth using here too. Once it’s on that layer, you have full control over the blend amount through opacity, and you can also use a mask to protect any areas where the effect feels like too much.
Step 6: Inspect the Generated Mask
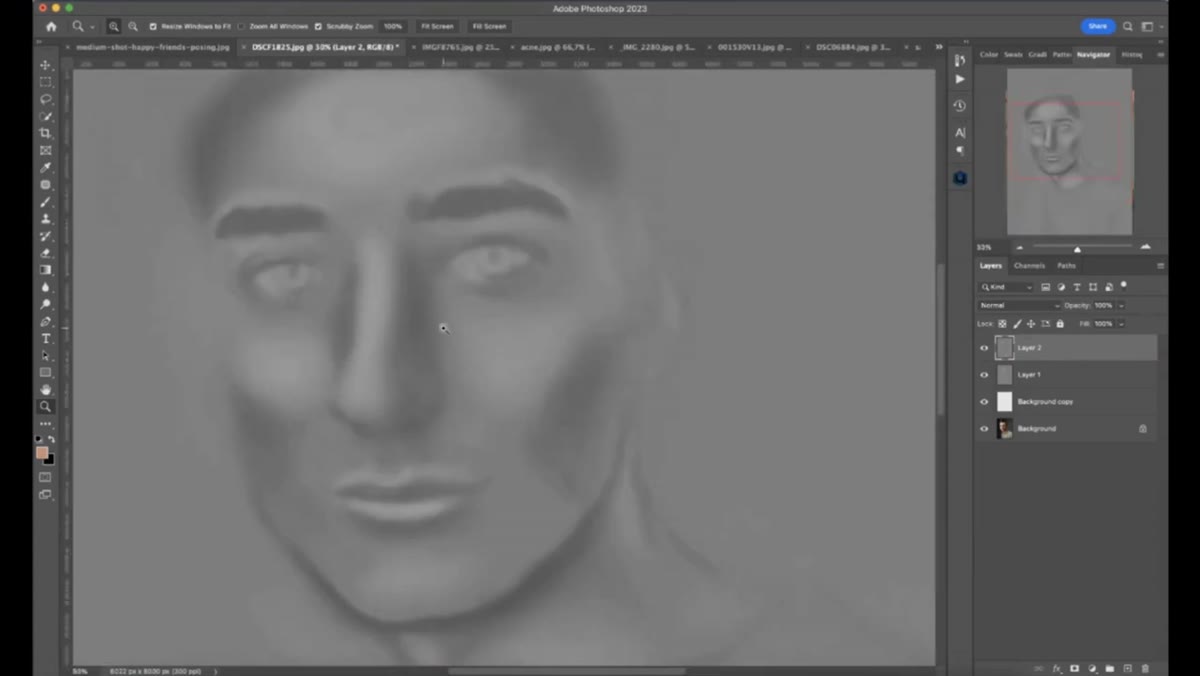 Detailed auto-generated mask showing precise tonal mapping across face
Before you flatten anything, click on the mask thumbnail that the Portrait Volumes plugin generates. Zoom in. What you’re looking at is an incredibly detailed tonal map of the face, one that a human retoucher would have to build carefully over multiple curves adjustments and brush passes to replicate. The edges around features like the nose, the jaw, and the eyes are precise in a way that would take significant time to create manually. This mask is doing serious work and it is generated in seconds.
Detailed auto-generated mask showing precise tonal mapping across face
Before you flatten anything, click on the mask thumbnail that the Portrait Volumes plugin generates. Zoom in. What you’re looking at is an incredibly detailed tonal map of the face, one that a human retoucher would have to build carefully over multiple curves adjustments and brush passes to replicate. The edges around features like the nose, the jaw, and the eyes are precise in a way that would take significant time to create manually. This mask is doing serious work and it is generated in seconds.
A Note From Someone Who Used to Do This the Long Way
I want to be honest about one thing: these plugins do not replace understanding what good retouching looks like. When I first started out, I didn’t have the visual language to evaluate a dodge and burn pass, and a tool like this would have produced results I couldn’t assess or correct. If you’re newer to portrait retouching, spend some time learning why frequency separation works, why Soft Light blend mode behaves the way it does, and what the difference is between surface correction and structural sculpting. That foundation is what lets you use something like Retouch4Me intelligently rather than just clicking buttons and hoping. The plugins accelerate skilled work. They don’t manufacture the skill.
That said, for those of us who have put in that time, the speed here is genuinely significant. The dodge and burn pass alone used to cost me 20 to 30 minutes per image on detailed beauty work. That time adds up fast across a full campaign shoot, and every minute reclaimed from technical execution is a minute that goes back into creative decisions.
The single most important thing I took away from this tutorial is that non-destructive texture preservation is the whole ballgame. Any tool that removes blemishes or sculpts light while keeping pores and skin texture intact is doing something technically difficult and practically valuable. Retouch4Me appears to have built their entire approach around that principle, and the results shown in this demo back it up.
Watch the full tutorial on YouTube to see all three plugins in action side by side, including the before and after comparisons that make the texture preservation much easier to evaluate than any still screenshot can.
Comments (1)
This is exactly what I needed today. Been struggling with this for weeks.
Leave a Comment