
There’s a moment early in my retouching career I still think about. A client flipped through her gallery, paused on a close-up, and said, “She looks like a doll. That’s not what I wanted.” The skin was flawless. It was also completely dead. I’d smoothed away every pore, every subtle shadow, every trace of dimension, and what was left looked like a render, not a person. That feedback stung, but it was the most useful thing anyone ever said to me.
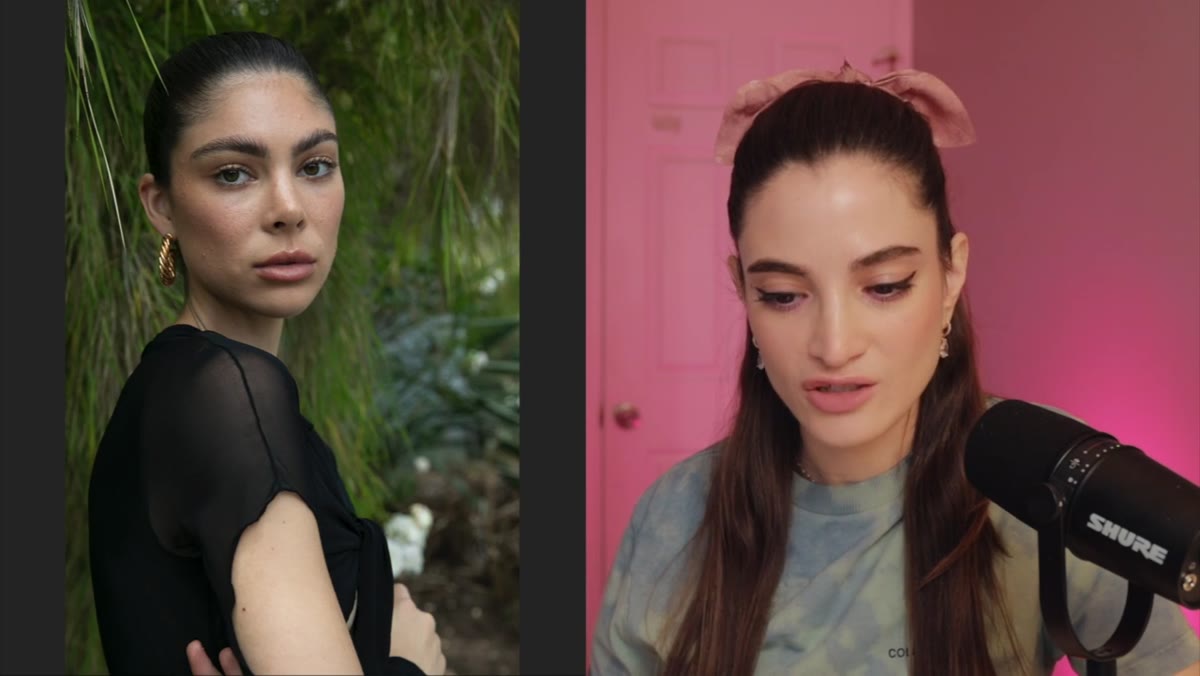
I thought about that moment again while watching this Jessica Kobeissi tutorial, Watch the full tutorial on YouTube, where she paid five different Fiverr retouchers between roughly ten and one hundred fifty dollars to work on the same portrait and reacted to the results live. What struck me wasn’t the price gaps. It was how consistently the best work shared the same quality: restraint combined with precision. The retouchers who impressed her most weren’t doing the most. They were doing the right things, carefully, in the right places. Let me walk you through what those things actually were.
Step 1: Start With Skin Cleanup, Not Skin Erasure
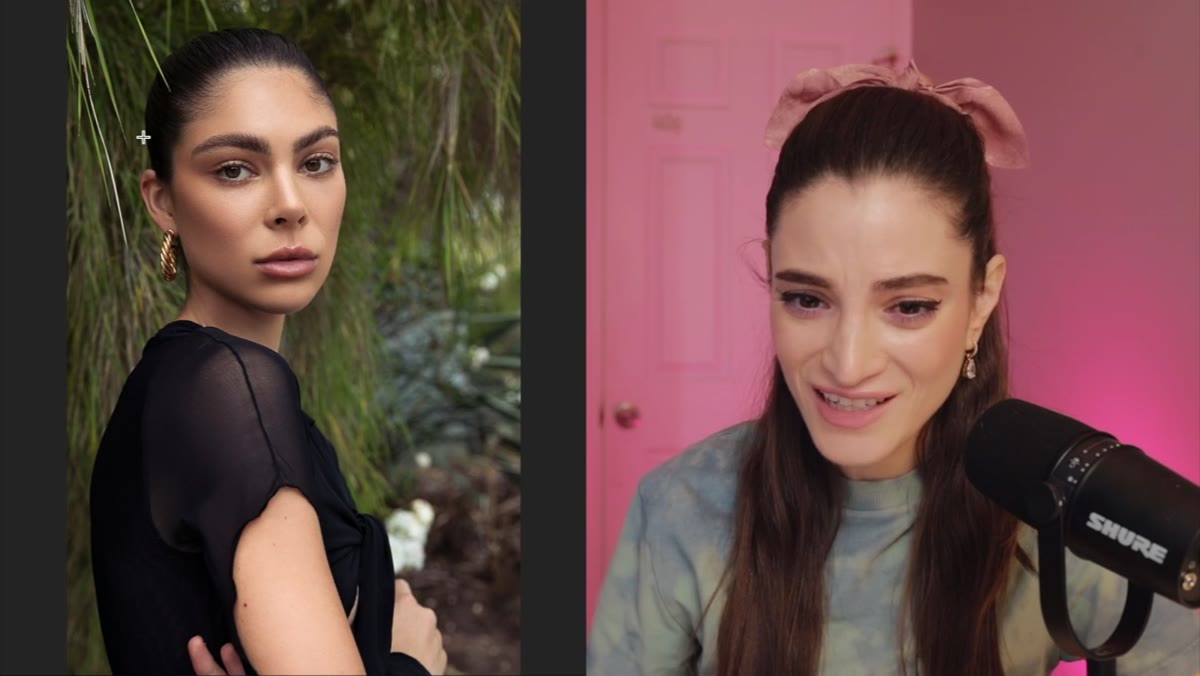 Before and after comparison showing natural skin retouch
The ten-dollar result that stopped Jessica mid-sentence wasn’t dramatic. It was clean. The skin looked like skin, just a better version of what was already there. That distinction matters enormously. When we sit down to retouch a portrait, the instinct, especially early in our practice, is to go after every variation in tone. Resist that. Work with a healing brush or clone stamp at reduced opacity, targeting active blemishes and temporary redness rather than the underlying texture. Your goal in this pass is subtraction of distractions, not the creation of a uniform surface.
Before and after comparison showing natural skin retouch
The ten-dollar result that stopped Jessica mid-sentence wasn’t dramatic. It was clean. The skin looked like skin, just a better version of what was already there. That distinction matters enormously. When we sit down to retouch a portrait, the instinct, especially early in our practice, is to go after every variation in tone. Resist that. Work with a healing brush or clone stamp at reduced opacity, targeting active blemishes and temporary redness rather than the underlying texture. Your goal in this pass is subtraction of distractions, not the creation of a uniform surface.
A useful gut check: zoom out to 50 percent and ask whether the skin still reads as three-dimensional. If it looks flat, you’ve gone too far. The ten-dollar retoucher in this video passed that test without hesitation.
Step 2: Address Specular Highlights Strategically
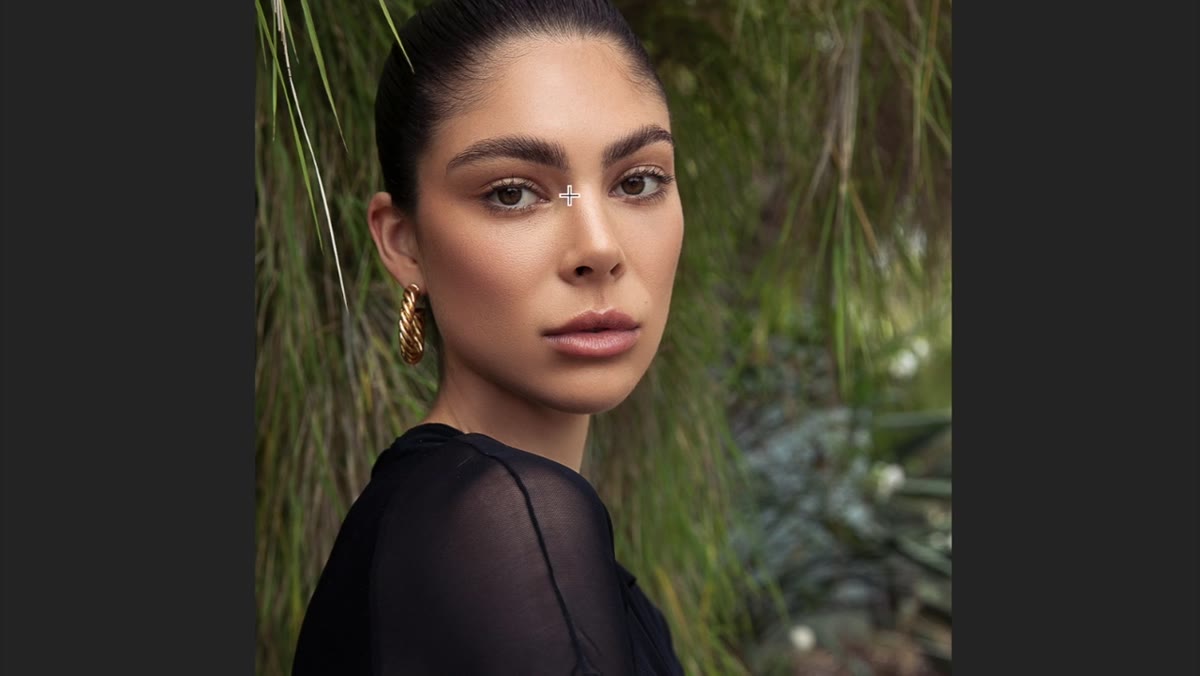 Close-up showing highlight reduction on nose bridge
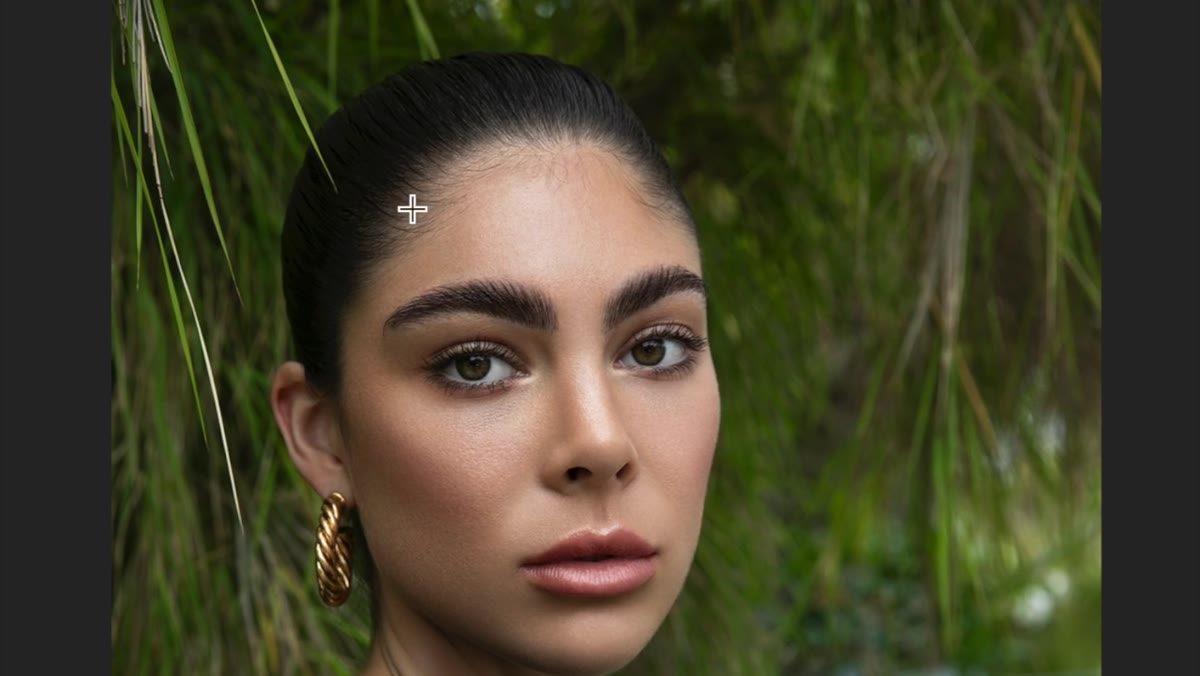
Jessica called out something specific in the budget retouch that I want to emphasize because it’s easy to overlook: the highlight on the nose bridge had been softened. This is a small adjustment with a disproportionate impact on how polished a portrait feels. A blown specular highlight on the nose draws the eye and can flatten the face. Bring it down with a Curves adjustment layer masked tightly to that area, or use the Dodge and Burn method if you want more control over the transition.
Close-up showing highlight reduction on nose bridge
Jessica called out something specific in the budget retouch that I want to emphasize because it’s easy to overlook: the highlight on the nose bridge had been softened. This is a small adjustment with a disproportionate impact on how polished a portrait feels. A blown specular highlight on the nose draws the eye and can flatten the face. Bring it down with a Curves adjustment layer masked tightly to that area, or use the Dodge and Burn method if you want more control over the transition.
The key is keeping the highlight present, just not blown. You want to see that the nose has a ridge and catches light. You’re taming the intensity, not removing the information entirely.
Step 3: Enhance Eyes Without Making Them Look Artificial
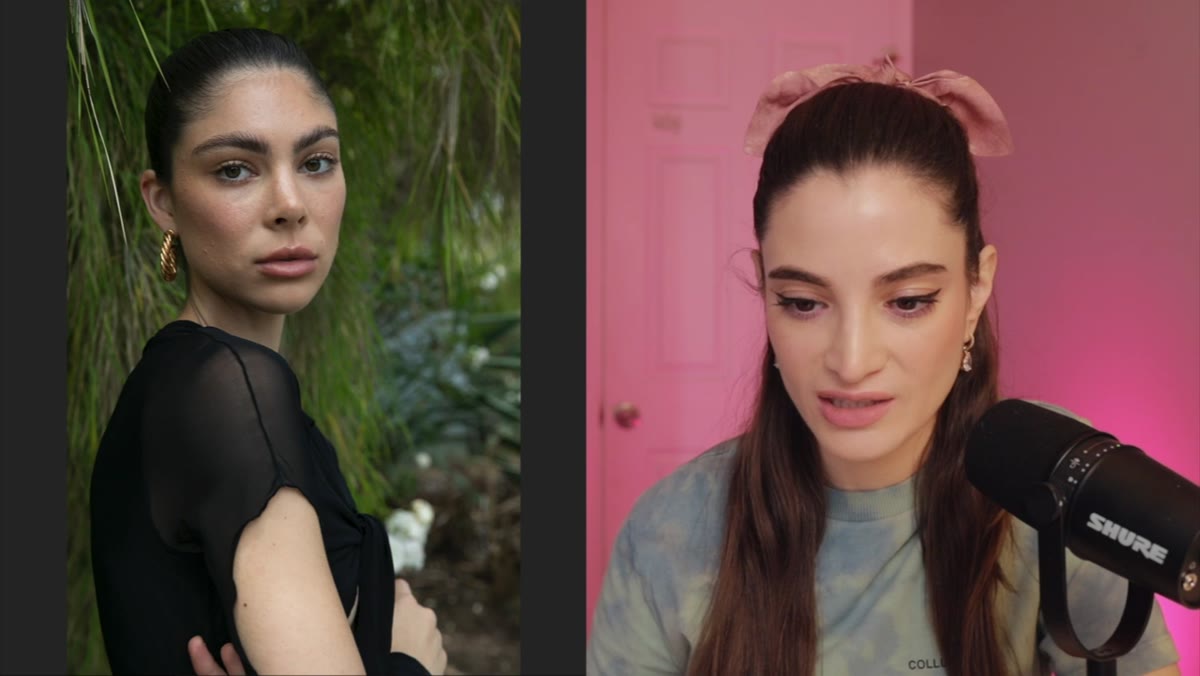 Zoomed comparison showing brightened eyes and added lashes
The twenty-dollar retouch introduced something more ambitious: enhanced eyes, including brighter whites and what appeared to be added lash density in the corners. This is where a lot of retouchers overcook things, and Jessica flagged it honestly, noting the whites had been pushed a little far. The technique itself is sound. The calibration just needed a second pass.
Zoomed comparison showing brightened eyes and added lashes
The twenty-dollar retouch introduced something more ambitious: enhanced eyes, including brighter whites and what appeared to be added lash density in the corners. This is where a lot of retouchers overcook things, and Jessica flagged it honestly, noting the whites had been pushed a little far. The technique itself is sound. The calibration just needed a second pass.
For eye whites, I use a Hue/Saturation layer set to target the reds and yellows, desaturating slightly and lifting brightness. Then I mask it back so only the whites are affected. Keep opacity on that layer under 50 percent. For lashes, stamp or paint in density using a small, pressure-sensitive brush on a multiply layer, working from the lash line outward. The eyelash additions in this video worked so well because they followed the natural direction of the existing lashes rather than creating a uniform strip effect.
Step 4: Use Frequency Separation for Texture-Preserving Skin Work
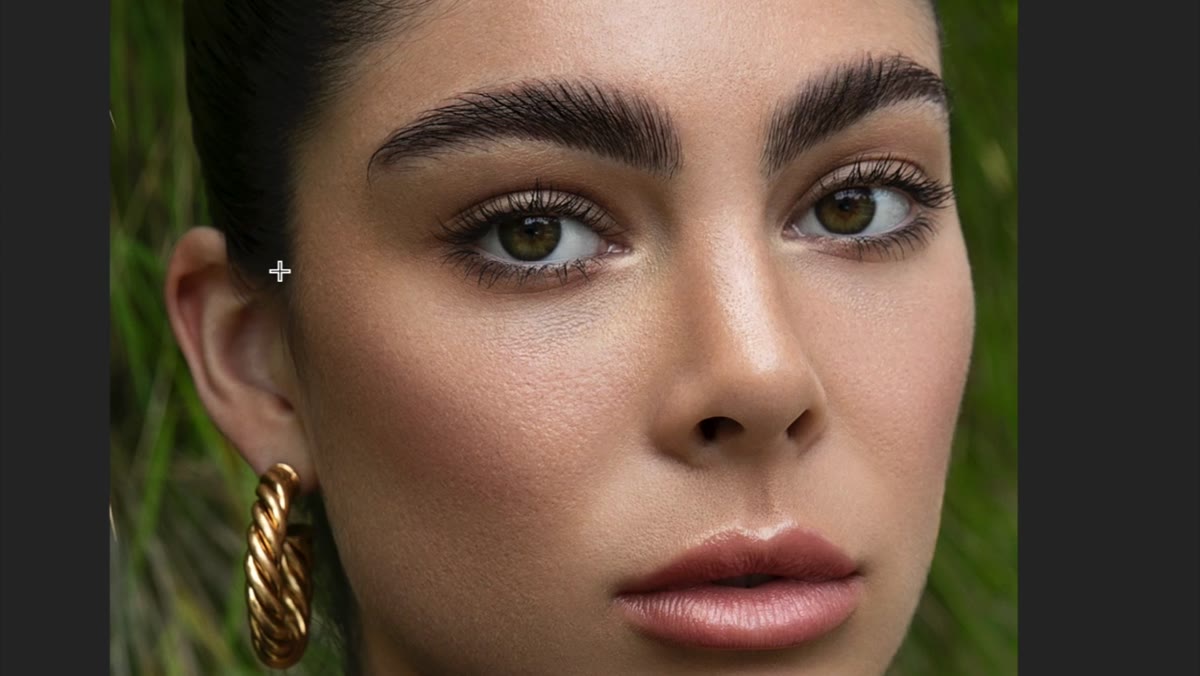 Skin texture visible in close-up of refined retouch
Jessica wondered aloud whether the twenty-dollar retoucher had used frequency separation, and concluded it probably was, given how well the texture had survived the smoothing. Frequency separation is worth learning properly because it solves exactly the problem my early client pointed out to me. By splitting an image into a low-frequency layer (color and tone) and a high-frequency layer (texture and detail), you can smooth blotchy color without touching the pores underneath.
Skin texture visible in close-up of refined retouch
Jessica wondered aloud whether the twenty-dollar retoucher had used frequency separation, and concluded it probably was, given how well the texture had survived the smoothing. Frequency separation is worth learning properly because it solves exactly the problem my early client pointed out to me. By splitting an image into a low-frequency layer (color and tone) and a high-frequency layer (texture and detail), you can smooth blotchy color without touching the pores underneath.
In Photoshop, duplicate your layer twice. On the bottom copy, apply a Gaussian blur of around 4-6 pixels depending on your resolution. On the top copy, go to Image, Apply Image, set the layer to your blurred version, blending to Subtract, scale 2, offset 128. Set that layer to Linear Light. Now paint on the blurred layer to even out color while your texture layer stays untouched above it.
Step 5: Dodge and Burn for Dimension and Contouring
 Before and after showing dodge and burn contouring on face
The hundred-and-fifty-dollar retoucher, Tanya, brought something the others hadn’t leaned into as heavily: intentional dodge and burn shaping. Jessica specifically mentioned the depth of the work and how Tanya had addressed background elements and clothing to serve the overall composition, not just the face. That kind of edit signals a retoucher who sees the whole image, not just a checklist.
Before and after showing dodge and burn contouring on face
The hundred-and-fifty-dollar retoucher, Tanya, brought something the others hadn’t leaned into as heavily: intentional dodge and burn shaping. Jessica specifically mentioned the depth of the work and how Tanya had addressed background elements and clothing to serve the overall composition, not just the face. That kind of edit signals a retoucher who sees the whole image, not just a checklist.
For dodge and burn, I work on a 50 percent gray layer set to Overlay. Dodge (lighten) where the face naturally catches light. Burn (darken) where shadows fall. Use a low-flow brush, around 3 to 5 percent, and build gradually. What you’re sculpting here is light logic. Every stroke should follow what the original lighting was already doing, just with more intention.
Step 6: Fill and Refine Hairlines and Framing Elements
 Hairline area before and after fill adjustment
One detail Jessica caught mid-reaction was a filled hairline, a subtle addition of hair density at the temples to create a cleaner frame for the face. This is the kind of finishing touch that separates a competent retouch from a polished one. Use the Clone Stamp tool with a soft edge and low opacity to sample strands from nearby areas, layering them in with varied angles so they don’t look repeated. Work in the direction hair naturally grows.
Hairline area before and after fill adjustment
One detail Jessica caught mid-reaction was a filled hairline, a subtle addition of hair density at the temples to create a cleaner frame for the face. This is the kind of finishing touch that separates a competent retouch from a polished one. Use the Clone Stamp tool with a soft edge and low opacity to sample strands from nearby areas, layering them in with varied angles so they don’t look repeated. Work in the direction hair naturally grows.
The same principle applies to clothing edges, background transitions, and anything that forms a border around the subject. A messy edge pulls focus. A clean one lets the face do its job.
One Thing I’d Add From My Own Workflow
Everything in this video leans toward making the subject look their best while remaining recognizable. That is the right target. But after years of working with beauty brands, I’ve added one step none of the Fiverr retouchers would have had context for: a final color consistency pass across skin tones. Portraits shot in natural light, like this one, often have subtle color shifts from forehead to chin depending on how the light fell. A selective Color Balance or targeted Hue/Saturation adjustment unifies those variations and makes the whole image feel cohesive rather than corrected. It’s a two-minute step that I now run on every single portrait before delivery.
The biggest lesson from this video isn’t about price brackets. It’s that the retouchers who impressed a professional weren’t showing off. They were solving specific problems quietly and leaving the subject intact. Restraint is a skill, and it takes longer to learn than any tool or technique. Watch all five reactions in context and pay attention to what Jessica notices first in each one.
Watch the full tutorial on YouTube
Comments
Leave a Comment