
There’s a particular kind of portrait that makes me slow down before I even touch a slider: one with a colored gel light behind the subject. The background glow bleeds into the skin tones, the shadows pick up unexpected hues, and every calibration decision you make either elevates the whole mood or turns it into a muddy mess. I’ve lost more than a few hours to gel-lit portraits that felt just slightly off no matter what I tried in the basic panel. When I came across Watch the full tutorial on YouTube from Jessica Kobeissi, I recognized the problem immediately. She’s working with a portrait shot on a Phase One medium format camera, with a gel light casting color behind her subject Zoe, and her opening move is one I now use on nearly every colorful portrait I edit.
What struck me watching Jessica work is that she goes straight to Camera Raw’s Calibration panel before she touches anything in the Basic panel. This is the opposite of what most retouching tutorials teach, and it reframes the entire edit. Instead of correcting a photo and then trying to color grade it, you’re establishing the emotional temperature of the image from the very first adjustment. For anyone who’s ever felt like their color grades looked painted on top of an edit rather than baked into it, this is worth paying close attention to.
The tutorial is relaxed and conversational, which is part of why it lands. Jessica talks openly about comparing her current work to her older work and feeling like she’s regressing as an artist. I’ve been there. I have a hard drive folder I refuse to delete that contains my very first retouching attempts. Keeping them around reminds me that the discomfort of feeling like you’ve plateaued is almost always a sign you’re actually in the middle of growth, not outside of it. The techniques in this video are a good reminder that sometimes the simplest workflow adjustments make the biggest difference.
Step 1: Open the Image in Camera Raw Before Anything Else
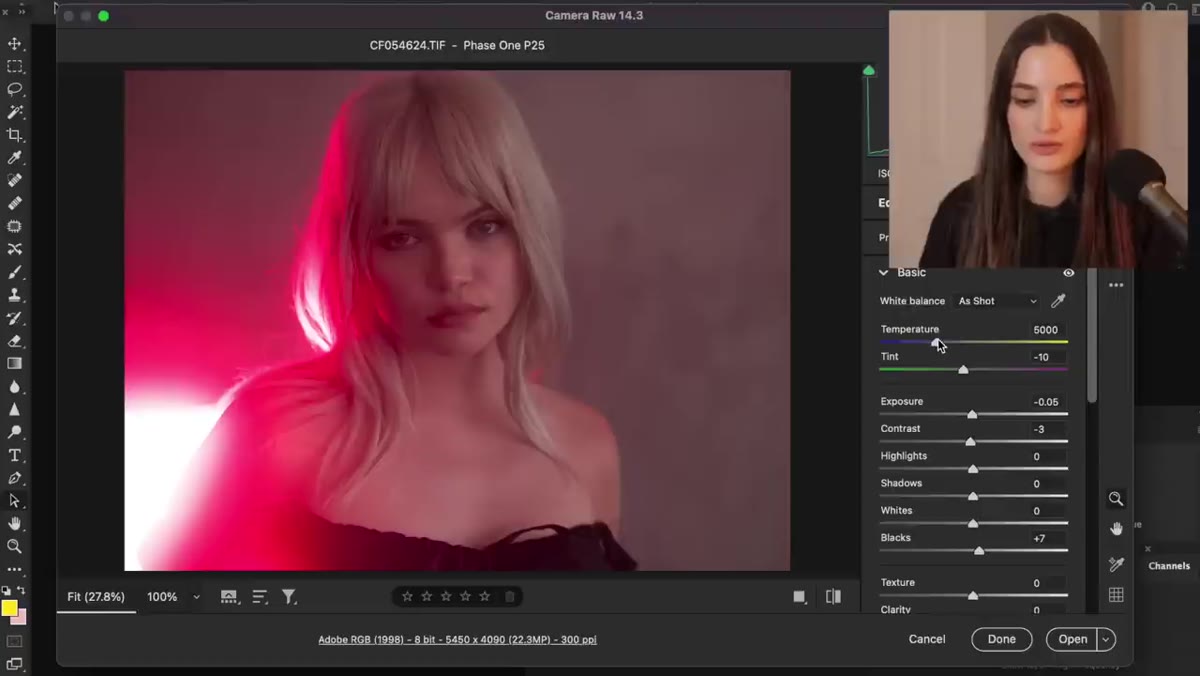 Camera Raw panel open with portrait of Zoe loaded
Bring your raw file directly into Camera Raw rather than opening it straight into Photoshop. If you’re working from Bridge or Lightroom Classic, you can hold Shift and click Open in Camera Raw to keep it in the raw editing environment longer. The point is to do your foundational color work here, not in Photoshop adjustment layers. Camera Raw processes are non-destructive and computationally handled at the raw decode stage, which means your color decisions here are cleaner than anything you’d apply later.
Camera Raw panel open with portrait of Zoe loaded
Bring your raw file directly into Camera Raw rather than opening it straight into Photoshop. If you’re working from Bridge or Lightroom Classic, you can hold Shift and click Open in Camera Raw to keep it in the raw editing environment longer. The point is to do your foundational color work here, not in Photoshop adjustment layers. Camera Raw processes are non-destructive and computationally handled at the raw decode stage, which means your color decisions here are cleaner than anything you’d apply later.
Step 2: Go to the Calibration Panel First
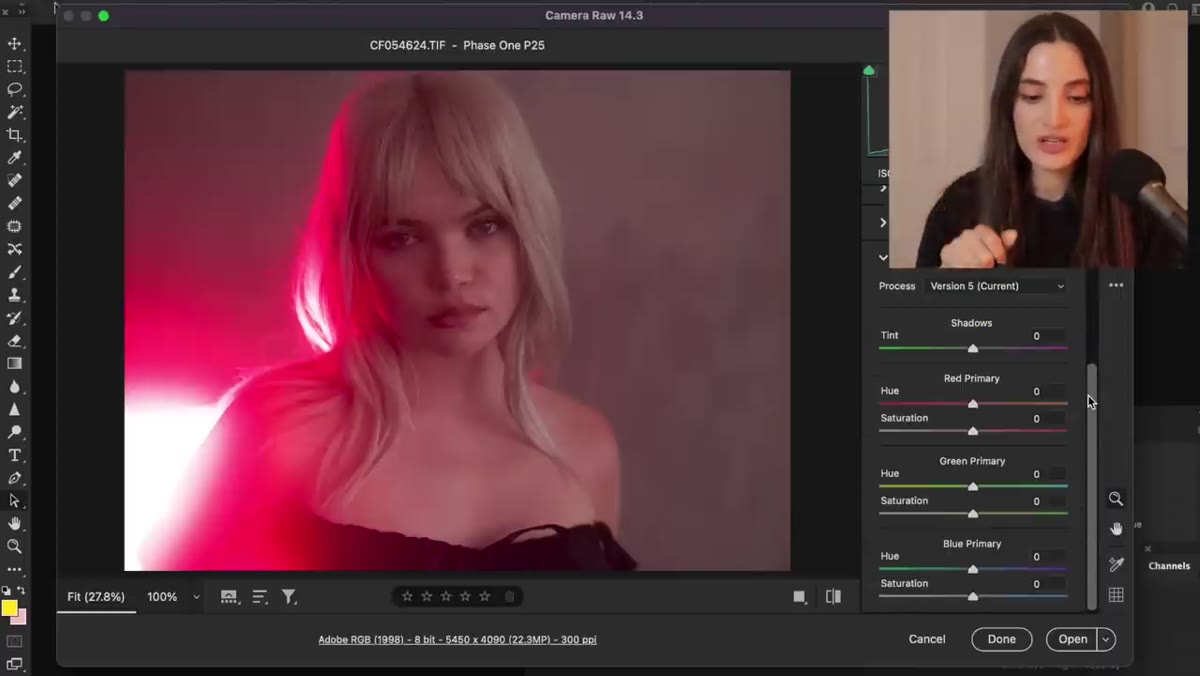 Camera Raw Calibration panel selected in panel navigation
Before touching Exposure, Contrast, or White Balance, scroll all the way down to the Calibration tab in Camera Raw (it’s the last icon in the panel row, often ignored). This panel controls how Camera Raw interprets the raw sensor data itself, affecting the primary red, green, and blue channels independently. Think of it as adjusting the foundation before you build the walls.
Camera Raw Calibration panel selected in panel navigation
Before touching Exposure, Contrast, or White Balance, scroll all the way down to the Calibration tab in Camera Raw (it’s the last icon in the panel row, often ignored). This panel controls how Camera Raw interprets the raw sensor data itself, affecting the primary red, green, and blue channels independently. Think of it as adjusting the foundation before you build the walls.
Jessica uses this panel to work with the gel light color rather than against it. Because there’s a colored light source behind the subject, the image’s color relationships are already unusual. The Calibration panel lets you lean into that intentionally rather than spending time in the HSL panel trying to fix colors that were always supposed to be there.
Step 3: Shift the Hue Sliders to Find Your Color Story
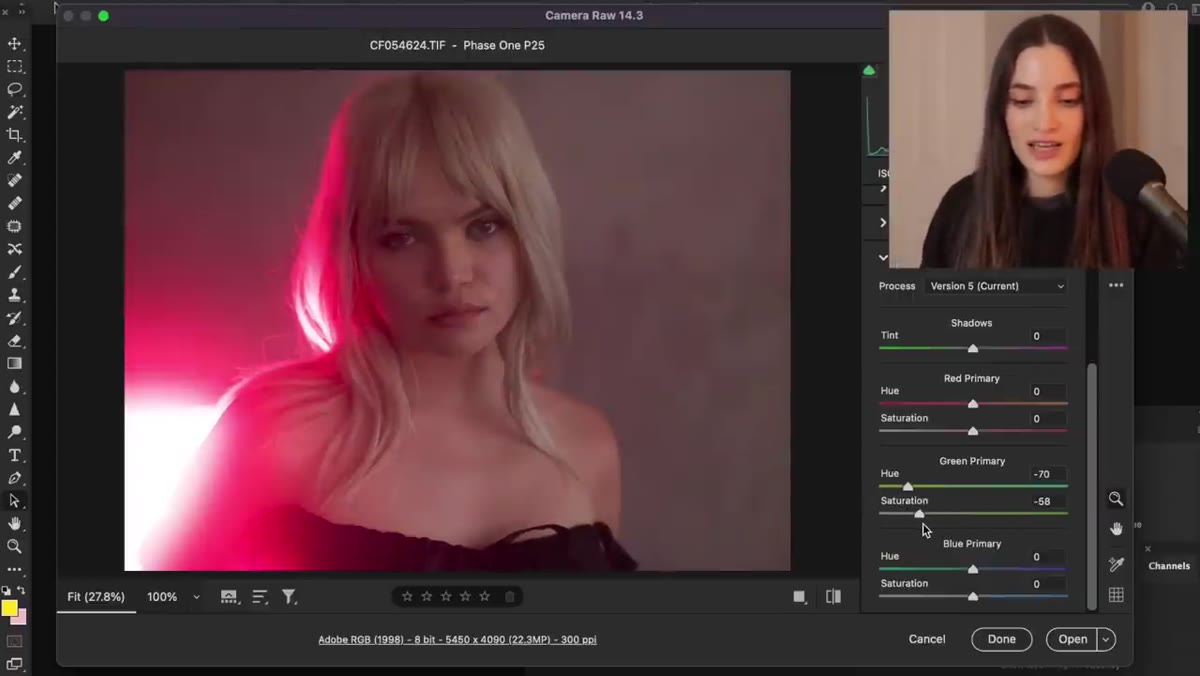 Red primary hue slider being adjusted in Calibration panel
Inside Calibration, you’ll see Hue and Saturation sliders for the Red, Green, and Blue primaries. The Red primary Hue slider is where Jessica focuses first. Pulling it in one direction moves skin tones toward pink and magenta. Pulling it the other way shifts things toward orange and amber. There’s no universally correct position here. This is a creative decision tied directly to the mood you want.
Red primary hue slider being adjusted in Calibration panel
Inside Calibration, you’ll see Hue and Saturation sliders for the Red, Green, and Blue primaries. The Red primary Hue slider is where Jessica focuses first. Pulling it in one direction moves skin tones toward pink and magenta. Pulling it the other way shifts things toward orange and amber. There’s no universally correct position here. This is a creative decision tied directly to the mood you want.
Jessica cycles through a few options out loud, pink tones, orange tones, yellow tones, before settling on something she can commit to. This deliberate comparison process is worth building into your own workflow. I usually make a quick snapshot in Camera Raw of each direction I’m considering so I can flip between them before choosing. The Calibration panel affects the entire image simultaneously, so even small moves read as significant.
Step 4: Evaluate Shadow Color Relationships Before Moving On
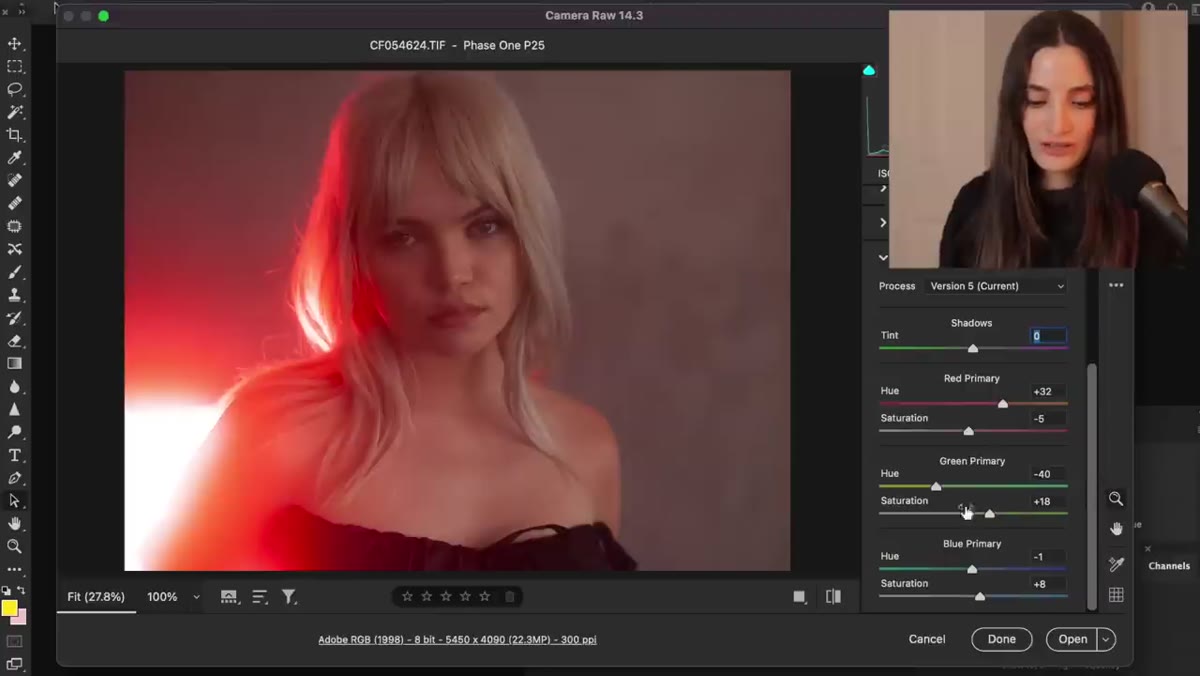 Before and after comparison visible in Camera Raw preview
Once you’ve set your primary hue direction, use Camera Raw’s before/after toggle (the Y key in Camera Raw, or the split-view button) to evaluate how the shadows are behaving. Gel-lit portraits tend to have cool or neutral shadows that contrast with the warm or saturated background glow. The Calibration changes will affect those shadow tones too, sometimes in ways that feel muddy.
Before and after comparison visible in Camera Raw preview
Once you’ve set your primary hue direction, use Camera Raw’s before/after toggle (the Y key in Camera Raw, or the split-view button) to evaluate how the shadows are behaving. Gel-lit portraits tend to have cool or neutral shadows that contrast with the warm or saturated background glow. The Calibration changes will affect those shadow tones too, sometimes in ways that feel muddy.
If the shadows are fighting the background color, a small adjustment to the Blue primary saturation in Calibration can help clean them up without touching your overall white balance. Jessica doesn’t make this a fussy process. She makes a decision and trusts it, which is its own technique worth practicing.
Step 5: Commit and Open Into Photoshop
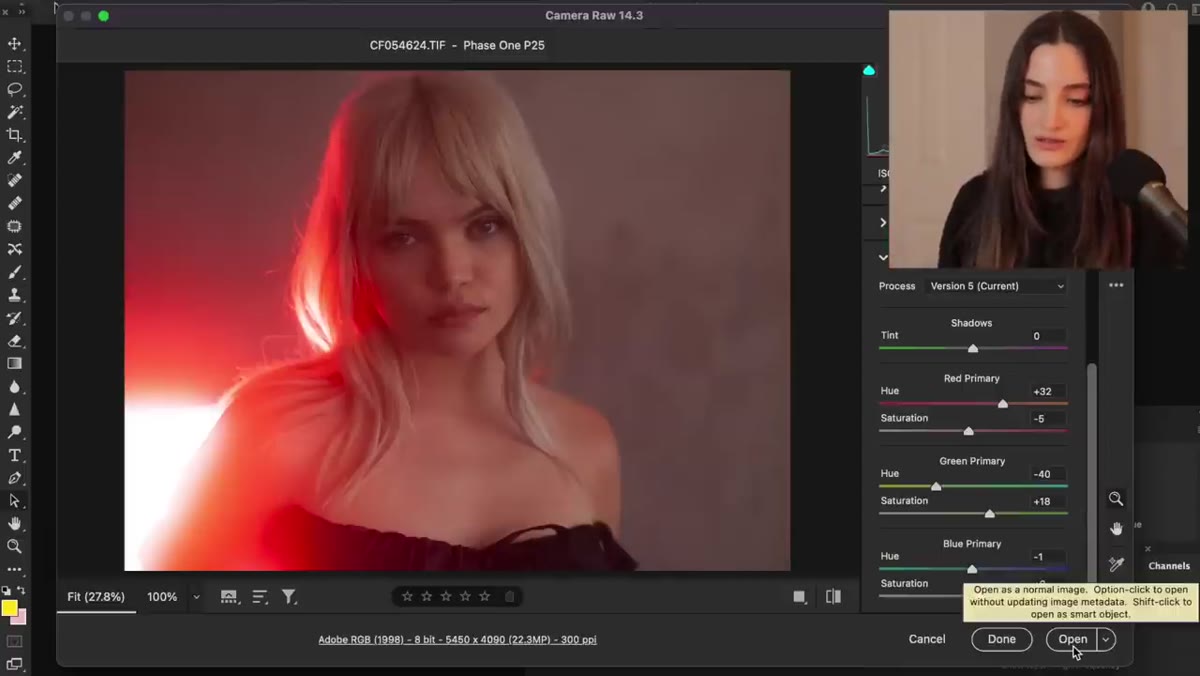 Clicking Open button to bring image from Camera Raw into Photoshop
When your Calibration adjustments feel right, open the image into Photoshop rather than continuing to adjust. This is where I used to stall for too long, tweaking small things in Camera Raw when I should have been working on the image globally. Jessica’s phrasing here is useful: “let’s make a decision and move forward.” Raw editing is powerful, but it can become a place to hide from committing.
Clicking Open button to bring image from Camera Raw into Photoshop
When your Calibration adjustments feel right, open the image into Photoshop rather than continuing to adjust. This is where I used to stall for too long, tweaking small things in Camera Raw when I should have been working on the image globally. Jessica’s phrasing here is useful: “let’s make a decision and move forward.” Raw editing is powerful, but it can become a place to hide from committing.
Clicking Open brings a smart object into Photoshop if you’ve set your workflow that way, which means you can always double-click to return to Camera Raw later. Set this up under Camera Raw preferences so you’re not flattening your raw adjustments prematurely.
What I’d Add From My Own Work
The Calibration panel technique Jessica uses is excellent for any portrait with a strong color influence in the light source, gels, colored walls, golden hour, mixed artificial lighting. Where I’ve extended this in my own workflow is by pairing it with a Hue/Saturation adjustment layer after the image is in Photoshop, set to affect only the skin tone range. After a Calibration shift, the skin can sometimes pick up more saturation than you want even when the overall palette looks right. A masked, targeted desaturation of just the reds and oranges in a Hue/Saturation layer brings the skin back to a natural level without undoing the mood you built in Camera Raw. These two adjustments together, Calibration for the global color story and a targeted Hue/Saturation for skin, solve most of the gel-lit portrait problems I used to spend hours fighting.
The single most transferable thing in this tutorial isn’t a specific slider value. It’s the habit of going to Calibration before the Basic panel when you’re working with creative or unconventional lighting. Most retouchers treat Calibration as a last resort or an advanced correction tool. Jessica uses it as a first move, a way of deciding what the image is before she starts correcting it. That shift in sequence changes the entire character of the edit.
Watch the full tutorial on YouTube and pay particular attention to how she talks through her color decisions out loud. That running commentary on her own reasoning is worth as much as the technique itself.
Comments (1)
I keep coming back to this article. It's that useful.
Leave a Comment