There’s a moment every retoucher eventually faces: you’re deep in a file, nudging a liquify mesh for the fourth time, and you lose the thread of what the person actually looked like. I’ve been there. Early in my freelance career, I handed a client a set of beauty edits that looked so overworked she described them as “plasticky.” That word stuck with me for years. It’s the reason I now keep a printed checklist above my monitor that starts with: “Does this still look like a human being?”
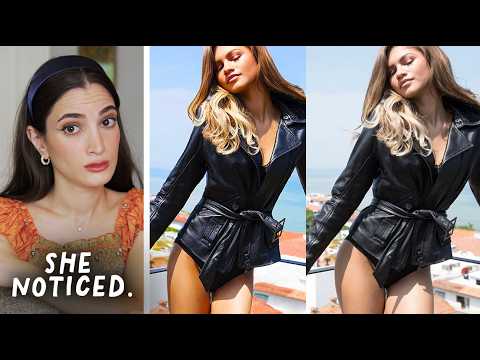
That gut-check matters more than ever in an industry where the gap between “polished” and “fabricated” keeps narrowing. In this Jessica Kobeissi tutorial, Watch the full tutorial on YouTube, Jessica walks through the retouched versus unretouched images from Zendaya’s 2015 Modeliste magazine editorial - the shoot that Zendaya herself called out on Instagram, forcing the magazine to pull the images, apologize publicly, and reissue them closer to their original state. It’s a case study in exactly what happens when the retoucher stops serving the subject and starts serving some imaginary ideal.
What makes this tutorial so valuable is that Jessica isn’t moralizing from the sidelines. She’s a working photographer and retoucher, and she approaches the comparison with a technical eye. She’s not just saying “this is bad.” She’s showing you specifically what was done and why each choice compounds the problem. That combination of ethics and craft is rare, and it’s worth walking through step by step.
Step 1: Start with a Side-by-Side Comparison Before You Touch Anything
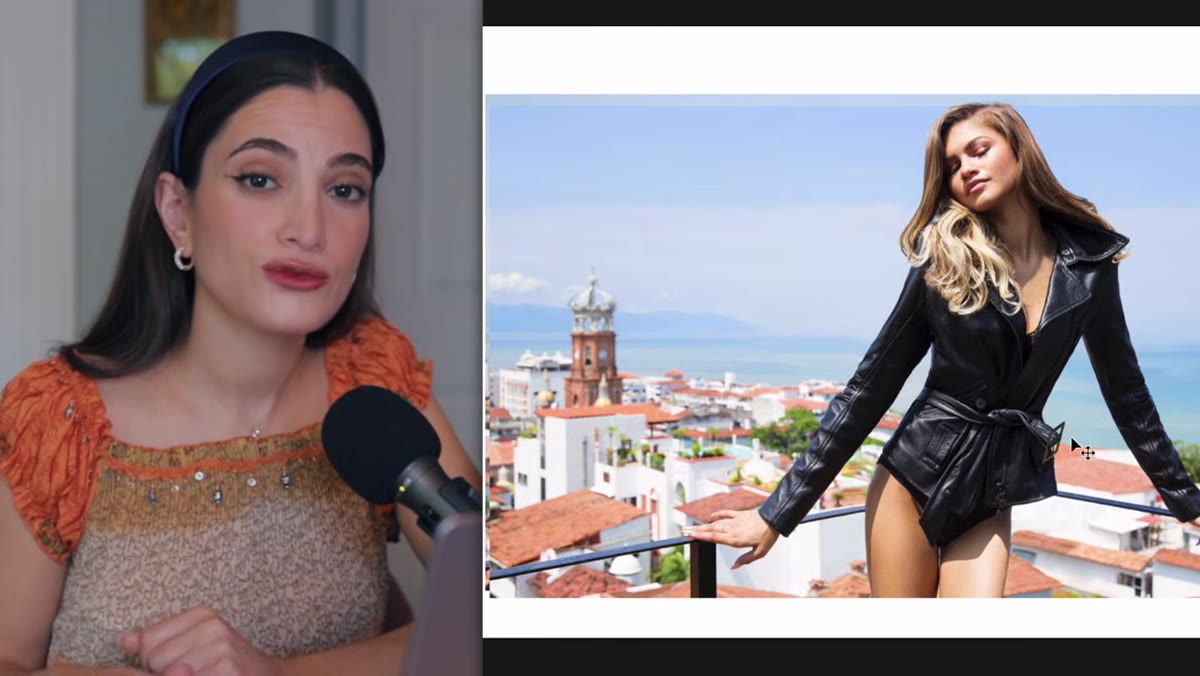 Retouched Zendaya image shown alone before comparison
Before Jessica evaluates a single edit, she presents the retouched image on its own. This is the first lesson, and it’s a workflow habit I’d recommend building into every project you take on. Look at the finished retouch without the original for at least 60 seconds. Ask yourself: does anything look distorted, compressed, or structurally wrong? Your eye will often catch problems before your brain articulates them. When Jessica then flips to the comparison, the issues are immediately obvious - but the point is training yourself to see them even without the reference.
Retouched Zendaya image shown alone before comparison
Before Jessica evaluates a single edit, she presents the retouched image on its own. This is the first lesson, and it’s a workflow habit I’d recommend building into every project you take on. Look at the finished retouch without the original for at least 60 seconds. Ask yourself: does anything look distorted, compressed, or structurally wrong? Your eye will often catch problems before your brain articulates them. When Jessica then flips to the comparison, the issues are immediately obvious - but the point is training yourself to see them even without the reference.
Step 2: Identify Where the Body Has Been Structurally Altered
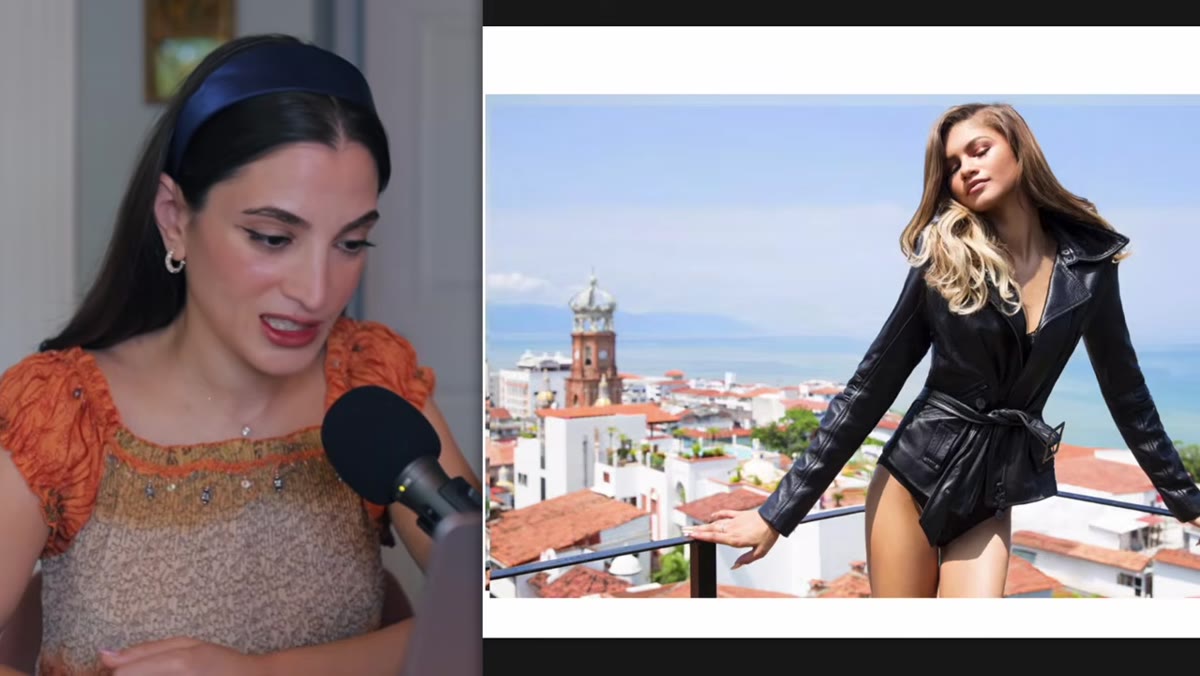 Side-by-side showing slimmed hips and legs in retouched version
The most significant manipulation in the Modeliste images was applied to Zendaya’s hips, torso, and legs - all slimmed using what was almost certainly a combination of Liquify’s Forward Warp tool and possibly a Free Transform squeeze. Jessica points out that the result doesn’t just look thinner, it looks wrong. The proportions between the upper and lower body no longer read as natural. This is the compounding problem with aggressive Liquify work: when you push one area, everything surrounding it has to visually compensate, and if it doesn’t, the image starts to look like a funhouse mirror.
Side-by-side showing slimmed hips and legs in retouched version
The most significant manipulation in the Modeliste images was applied to Zendaya’s hips, torso, and legs - all slimmed using what was almost certainly a combination of Liquify’s Forward Warp tool and possibly a Free Transform squeeze. Jessica points out that the result doesn’t just look thinner, it looks wrong. The proportions between the upper and lower body no longer read as natural. This is the compounding problem with aggressive Liquify work: when you push one area, everything surrounding it has to visually compensate, and if it doesn’t, the image starts to look like a funhouse mirror.
In your own work, the safest Liquify practice is to zoom out to full image view after every three or four brush strokes. You need to see the whole figure, not just the zone you’re working in. And keep your brush size large - a brush that’s too small creates pinching and rippling that’s almost impossible to undo cleanly.
Step 3: Check Whether Shadows Still Make Physical Sense
 Altered shadow shape visible on lower leg of retouched image
This is the detail that genuinely surprised me when I first watched this video. The editors didn’t just slim Zendaya’s legs - they then had to redraw the shadow beneath them, because the original shadow reflected the actual shape of her body. When the body shape changed, the shadow no longer matched. So they altered that too. But the redrawn shadow doesn’t follow natural light logic. It’s the wrong shape for the light source in the image.
Altered shadow shape visible on lower leg of retouched image
This is the detail that genuinely surprised me when I first watched this video. The editors didn’t just slim Zendaya’s legs - they then had to redraw the shadow beneath them, because the original shadow reflected the actual shape of her body. When the body shape changed, the shadow no longer matched. So they altered that too. But the redrawn shadow doesn’t follow natural light logic. It’s the wrong shape for the light source in the image.
Shadows are ground truth in photography. They tell the viewer where the light is coming from and confirm the physical volume of what’s in the frame. When a shadow contradicts the body casting it, the brain registers the image as “off” even if the viewer can’t name why. Before you finalize any composite or heavy liquify pass, overlay a mental check: does every shadow in this image still correspond to the correct light direction and body volume?
Step 4: Notice When Background Elements Have Been Cleaned Up to Redirect Attention
 Background of retouched image with elements removed from water
Jessica also catches something subtle in the background of the image: elements in the water and scenery behind Zendaya have been removed or saturated differently in the retouched version. This is a technique that’s legitimate in moderation - cleaning up a distracting background element to keep the viewer’s eye on the subject. But when it’s paired with aggressive body manipulation, it signals a broader editorial philosophy on that shoot: everything in the frame was treated as infinitely adjustable, including the person.
Background of retouched image with elements removed from water
Jessica also catches something subtle in the background of the image: elements in the water and scenery behind Zendaya have been removed or saturated differently in the retouched version. This is a technique that’s legitimate in moderation - cleaning up a distracting background element to keep the viewer’s eye on the subject. But when it’s paired with aggressive body manipulation, it signals a broader editorial philosophy on that shoot: everything in the frame was treated as infinitely adjustable, including the person.
When you’re cleaning up backgrounds, ask yourself whether the edit serves the composition or serves a narrative. Removing a piece of seaweed that’s touching the subject’s leg is a composition choice. Removing elements specifically to make the setting look more “ideal” starts to shift the image away from documentary reality and toward something constructed. That’s fine for certain genres of work - but it should be a conscious choice, not an automatic reflex.
Step 5: Evaluate the Edit Against the Subject’s Own Stated Identity
 Discussion of Zendaya’s Instagram post calling out the magazine
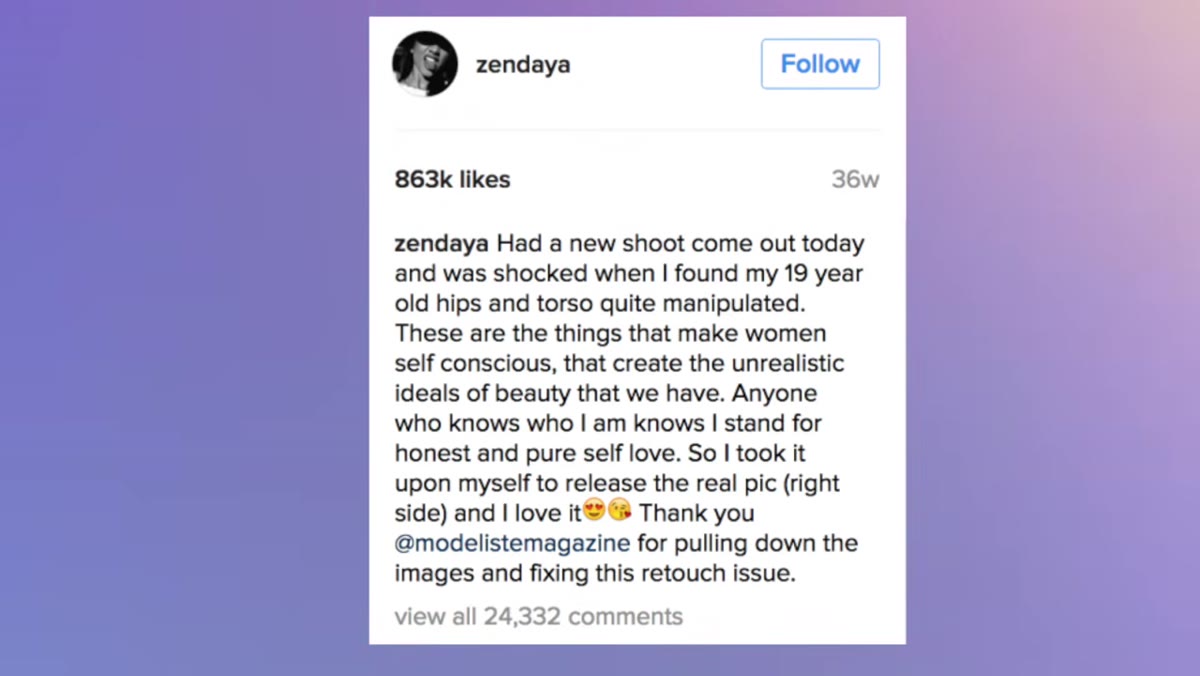
Jessica reads Zendaya’s Instagram statement directly, and this step is less about Photoshop and more about the editorial relationship between retoucher and subject. Zendaya was 19 at the time. She had publicly positioned herself as an advocate for honest self-representation. The magazine’s retouching choices directly contradicted how she had built her public identity - not as a side effect, but structurally, in the images themselves.
Discussion of Zendaya’s Instagram post calling out the magazine
Jessica reads Zendaya’s Instagram statement directly, and this step is less about Photoshop and more about the editorial relationship between retoucher and subject. Zendaya was 19 at the time. She had publicly positioned herself as an advocate for honest self-representation. The magazine’s retouching choices directly contradicted how she had built her public identity - not as a side effect, but structurally, in the images themselves.
As a retoucher working with real people, knowing your subject matters. If you’re hired to retouch an athlete who has publicly spoken about body image, and you slim their arms without a brief to do so, you’ve made an editorial decision that wasn’t yours to make. Always clarify the scope of body retouching in writing before you start a project. “General cleanup and skin retouching” is not the same as “body reshaping,” and that distinction needs to be explicit.
A Note from My Own Practice
The Modeliste situation is an extreme example, but the underlying failure is one I’ve seen in smaller, quieter ways throughout this industry. Retouching brief creep is real. You start with skin, someone asks for a little waist work, and six rounds of feedback later you’re three Liquify sessions deep and nobody’s quite sure what the original image looked like anymore.
I now use a simple rule for body retouching: every structural change I make, I make on a separate Smart Object layer, and I label it clearly. “Hip reduction - client requested.” “Arm slim - art director brief.” That paper trail keeps me honest, and it keeps the client honest too. If I can see the layer history, I can show anyone exactly what decisions were made and when. It’s not about covering yourself legally - it’s about staying conscious of what you’re actually doing to someone’s image.
The single most important thing this tutorial reinforces is that technical skill and ethical judgment are not separate departments. The editors who worked on those Zendaya images were presumably competent at their tools. The problem wasn’t that they didn’t know how to use Liquify - it’s that nobody in the pipeline stopped to ask whether they should. Build that pause into your process before you export, before you deliver, and before you press send.
Watch the full tutorial on YouTube to see Jessica walk through the image comparisons in real time - the visual difference between the retouched and original photos is something you have to see to fully absorb.
Comments (2)
Printing this out and pinning it next to my monitor. That good.
Couldn't agree more. I've seen this make a huge difference in business work specifically.
Leave a Comment