There’s a specific kind of client portrait that every retoucher knows: the one where the subject looks technically fine but somehow unhappy, closed-off, a little flat. You’ve balanced the skin, the light is clean, and yet something about the expression makes the whole image feel heavy. For years, my only options were to either live with it or spend forty minutes carefully painting in a subtler version of whatever the subject’s face was doing. Neither solution was great. In this Scott Kelby tutorial, Watch the full tutorial on YouTube, he walks through a portrait retouch that combines classic non-destructive Liquify work with Photoshop’s Neural Filters in a way that genuinely changes what’s possible in a single sitting.
What caught my attention wasn’t just the tools themselves – it was the workflow logic underneath them. Kelby is careful about sequencing, about non-destructive output, and about masking out the artifacts that AI retouching almost always introduces. That rigor is what separates a technique you try once from one you actually fold into your process.
Step 1: Convert for Smart Filters Before You Do Anything
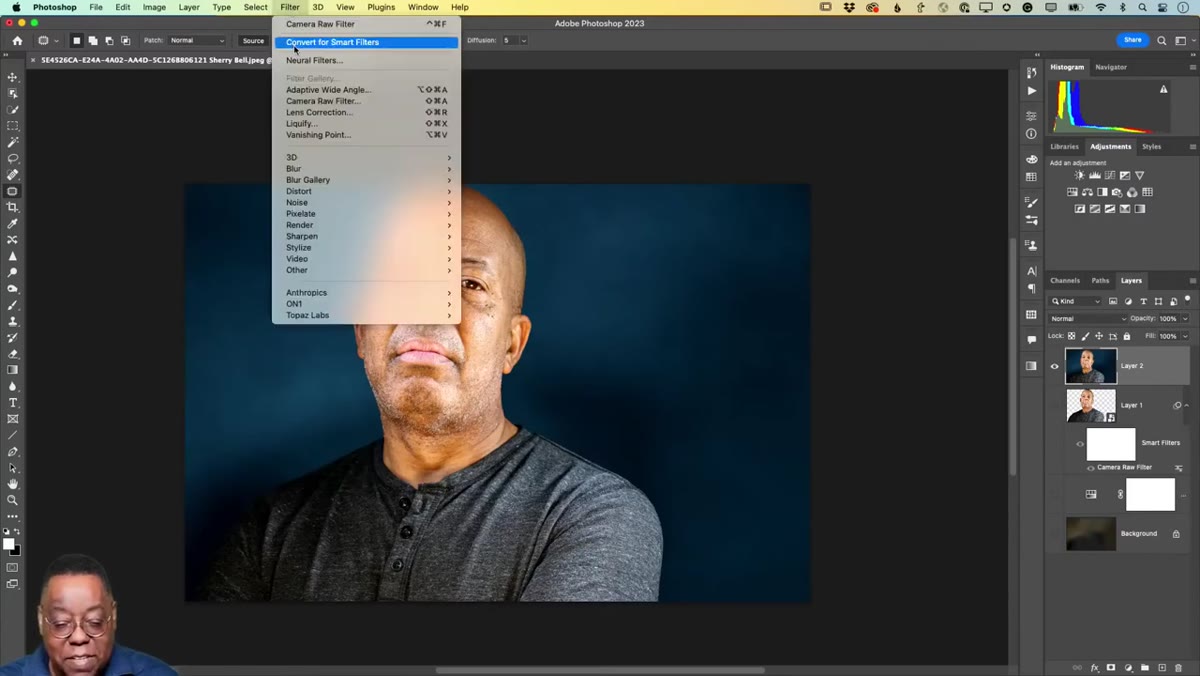 Converting the portrait layer to a Smart Object in Photoshop
Before touching Liquify or any filter, right-click your layer and choose “Convert for Smart Filters.” This converts the layer into a Smart Object, which means every filter you apply sits on top of the original pixel data as an editable, maskable layer. If you skip this step, your adjustments are baked in and painful to revise. Think of it as the non-negotiable foundation for everything that follows – the same way you wouldn’t build a frequency separation workflow on a flattened file.
Converting the portrait layer to a Smart Object in Photoshop
Before touching Liquify or any filter, right-click your layer and choose “Convert for Smart Filters.” This converts the layer into a Smart Object, which means every filter you apply sits on top of the original pixel data as an editable, maskable layer. If you skip this step, your adjustments are baked in and painful to revise. Think of it as the non-negotiable foundation for everything that follows – the same way you wouldn’t build a frequency separation workflow on a flattened file.
Step 2: Run Face-Aware Liquify to Adjust the Expression
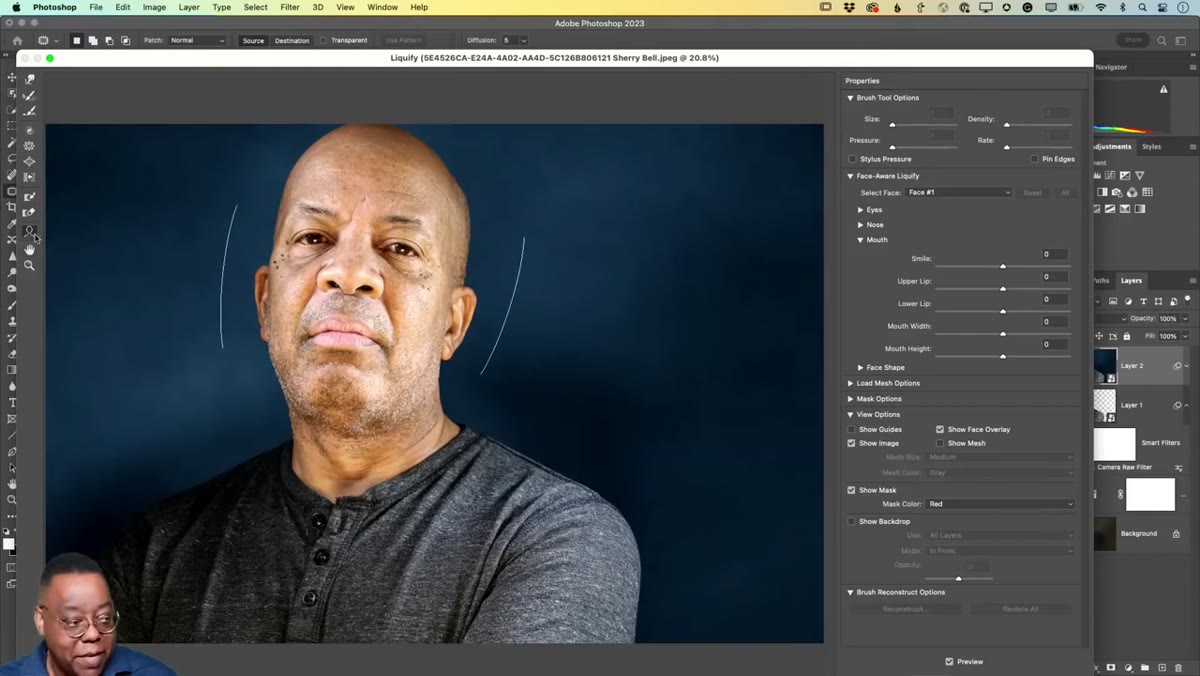 Face-Aware Liquify panel open with face detection active
Go to Filter > Liquify and, once the dialog opens, click the face icon in the left toolbar. This activates Face-Aware Liquify, which automatically detects facial features – eyes, nose, mouth, jawline – and lets you move them with sliders rather than freehand warping. The distinction matters: freehand warping with the Warp tool is useful for pushing in stray fabric or adjusting a shoulder, but around the face it’s easy to introduce distortions that look unnatural at full resolution.
Face-Aware Liquify panel open with face detection active
Go to Filter > Liquify and, once the dialog opens, click the face icon in the left toolbar. This activates Face-Aware Liquify, which automatically detects facial features – eyes, nose, mouth, jawline – and lets you move them with sliders rather than freehand warping. The distinction matters: freehand warping with the Warp tool is useful for pushing in stray fabric or adjusting a shoulder, but around the face it’s easy to introduce distortions that look unnatural at full resolution.
In this case, Kelby focuses on the smile slider, nudging it upward just enough to soften a slight frown. The adjustment is subtle – a small positive value, not a cartoon grin. The goal is plausibility. If you’re working on client portraits, always confirm the subject would be comfortable with expression changes before you make them. That’s not just an ethical note; it’s practical. Clients who feel their likeness has been altered without consent don’t come back.
Step 3: Understand the Difference Between Texture and Clarity
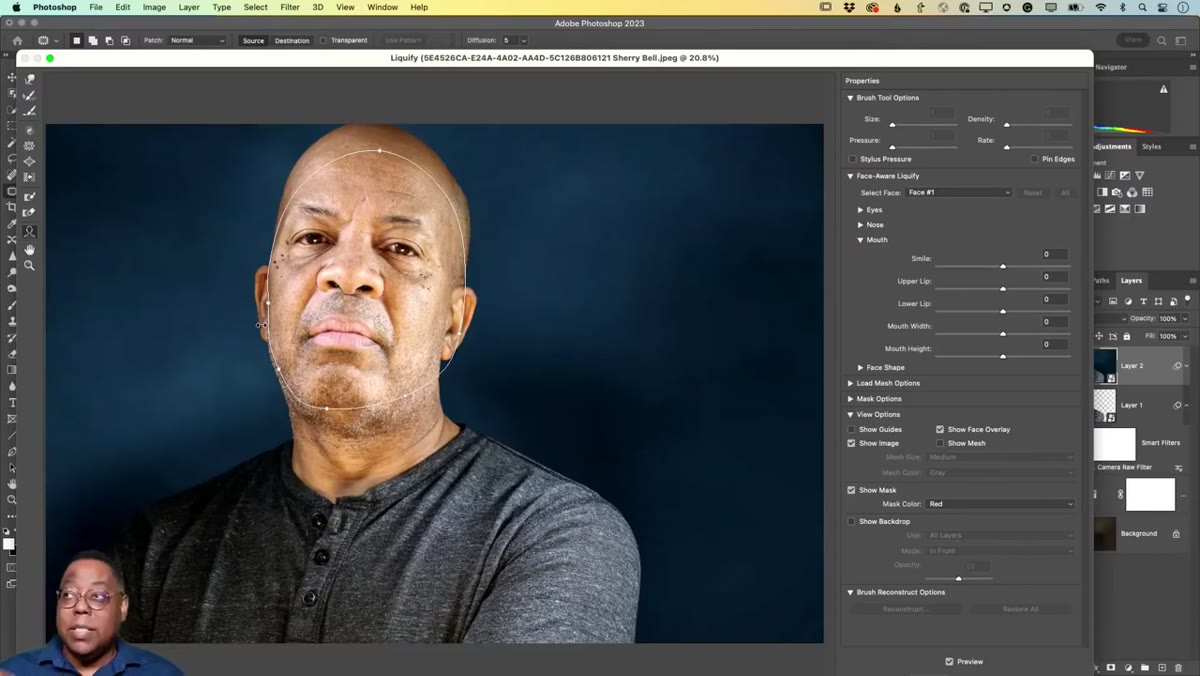 Camera Raw or Properties panel showing Texture and Clarity sliders
This step isn’t a click sequence – it’s a concept that will change how you use two sliders you’ve probably been treating as interchangeable. Texture affects surface detail only: pores, fine lines, the grain of skin. It doesn’t touch your shadows or highlights. Clarity does all of that and also deepens shadows and brightens highlights, which adds a sense of three-dimensionality but also changes the overall lighting of the face.
Camera Raw or Properties panel showing Texture and Clarity sliders
This step isn’t a click sequence – it’s a concept that will change how you use two sliders you’ve probably been treating as interchangeable. Texture affects surface detail only: pores, fine lines, the grain of skin. It doesn’t touch your shadows or highlights. Clarity does all of that and also deepens shadows and brightens highlights, which adds a sense of three-dimensionality but also changes the overall lighting of the face.
For beauty retouching, this difference is significant. If your skin work is already done and you want to add micro-detail without disturbing your light balance, reach for Texture. If you’re working on something with a bit more editorial punch and you want that lifted, defined quality, Clarity is the tool. Try both on a test portrait and compare at 100% zoom – the difference becomes obvious quickly.
Step 4: Apply the Neural Filter Smart Portrait on a New Layer
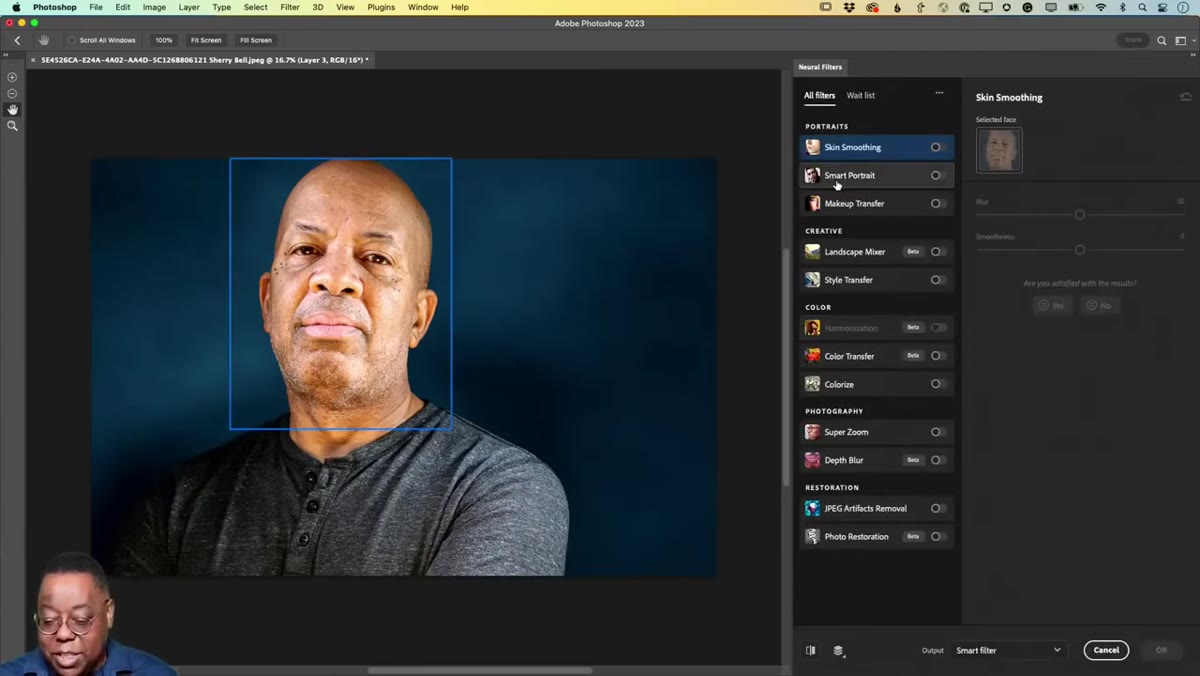 Neural Filters panel open with Smart Portrait filter toggled on
Go to Filter > Neural Filters and toggle on Smart Portrait. Inside the filter, you’ll find a set of expression sliders – including one labeled Happiness, which will make you do a double take the first time you see it. It genuinely exists. Drag it to the right and Photoshop uploads a proxy of your image to Adobe’s cloud servers, processes the expression change using AI, and returns the result.
Neural Filters panel open with Smart Portrait filter toggled on
Go to Filter > Neural Filters and toggle on Smart Portrait. Inside the filter, you’ll find a set of expression sliders – including one labeled Happiness, which will make you do a double take the first time you see it. It genuinely exists. Drag it to the right and Photoshop uploads a proxy of your image to Adobe’s cloud servers, processes the expression change using AI, and returns the result.
Here is the critical part that Kelby learned by doing it the wrong way first: before you click OK, change the output setting from “Smart Filter” to “New Layer.” This is the dropdown at the bottom of the Neural Filters panel. When the filter outputs to a new layer, you get a full, editable pixel layer that you can mask selectively. When it outputs as a Smart Filter, masking the artifacts becomes much harder. Output to a new layer, every time.
Step 5: Mask Out the Artifacts the AI Creates
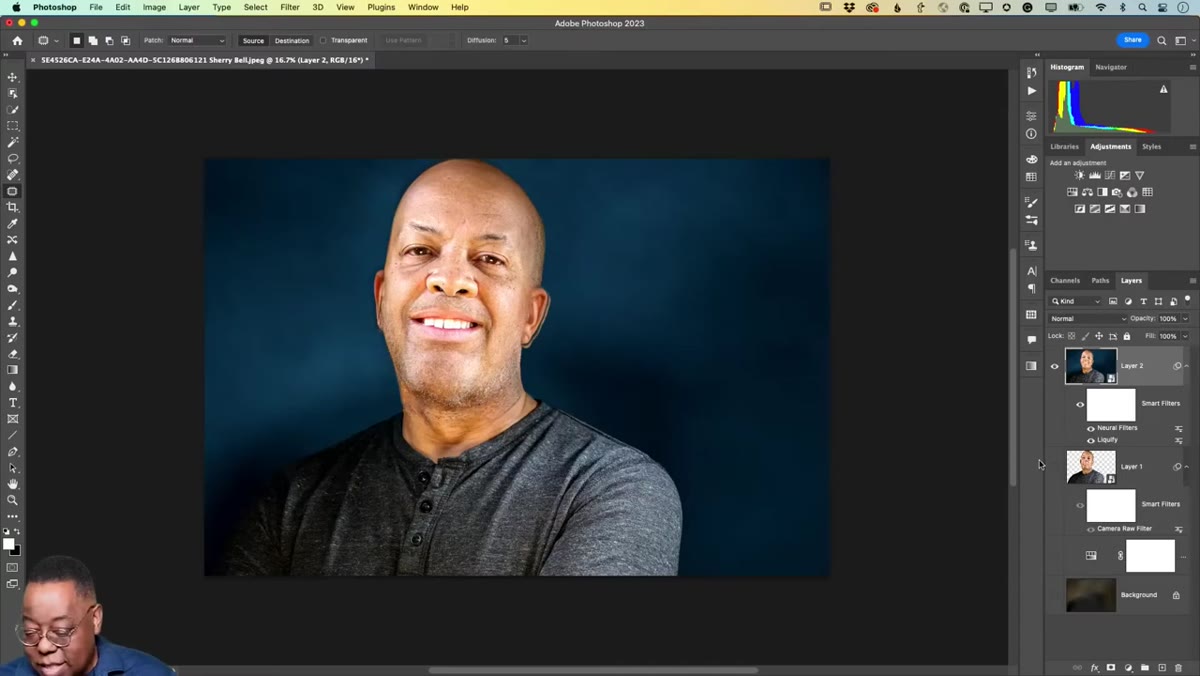 Adding a layer mask to the Neural Filter output layer
AI expression changes are impressive but imprecise. The face changes convincingly, but areas outside the immediate expression zone – ears, hair edges, the neck – can shift in ways that look wrong. Kelby’s example shows the subject’s ear distorting noticeably, which is an immediate dealbreaker if you left it in.
Adding a layer mask to the Neural Filter output layer
AI expression changes are impressive but imprecise. The face changes convincingly, but areas outside the immediate expression zone – ears, hair edges, the neck – can shift in ways that look wrong. Kelby’s example shows the subject’s ear distorting noticeably, which is an immediate dealbreaker if you left it in.
With the Neural Filter result on its own layer, add a layer mask by clicking the mask icon at the bottom of the Layers panel. Fill the mask with black to hide the entire layer, then paint back in white only over the areas where the expression change looks good – typically the mouth, the eyes, and the immediate surrounding skin. Use a soft brush at around 70-80% opacity and work gradually. This way you keep the AI’s best work and quietly discard the parts that aren’t convincing.
A Note From My Own Practice: Keep the Happiness Slider Honest
The Happiness slider is genuinely useful but genuinely easy to overdo. I’ve found that values above roughly 25-30 start to introduce teeth that weren’t in the original image – the AI synthesizes them from the expression data, and while they’re technically plausible, they rarely hold up at full resolution or in print. The geometry gets slightly off, the speculars don’t match the image’s light source, and the whole thing reads as touched.
My habit now is to run the slider low, get the subtle lift in the corners of the mouth and the eyes, and stop there. If a client genuinely needs visible teeth, that’s a conversation for the photographer on set. Retouching is supposed to enhance what was captured, not fabricate a different moment. I learned that the hard way early in my career – a client once told me my edits made the subject “look like someone else,” and she wasn’t wrong. That feedback stuck.
The single most important thing this tutorial demonstrates isn’t any individual tool – it’s the habit of building every filter onto a structure you can mask and revise. Smart Objects, new layer output, black-filled masks painted back selectively: that’s the architecture that makes AI retouching usable in a professional workflow rather than just a demo. Watch Kelby walk through all of it himself here: Watch the full tutorial on YouTube.
Comments (3)
I've watched a dozen tutorials on this and yours is the clearest by far.
Simple but effective. Sometimes that's all you need.
Bookmarked. Coming back to this one for sure.
Leave a Comment