
There’s a specific kind of frustration that comes from receiving a portrait file where the photographer made choices you now have to work around in post. Muddy backgrounds competing with the subject. A face that’s half-lit because the aperture was set too wide on a two-person shot. Or skin tones so blown out from compensating for a dark environment that no amount of careful retouching will save the highlight detail. I’ve been on the receiving end of all of these, and after years of freelancing for beauty brands, I can tell you that understanding the relationship between aperture, light, and skin texture is just as important for retouchers as it is for photographers. A lot of us wear both hats anyway.
In this Aaron Nace (PHLEARN) Q&A tutorial, Watch the full tutorial on YouTube, Aaron answers a handful of practical questions that come up constantly in portrait and beauty work. The two that matter most to me, and the ones I keep sending to my workshop students, are about choosing your aperture for portraits and how to apply content-aware edits non-destructively. Both of these seem simple on the surface. Both of them have tripped up professionals I respect. Here’s how to think through each one.
Step 1: Understand What Aperture Is Actually Controlling
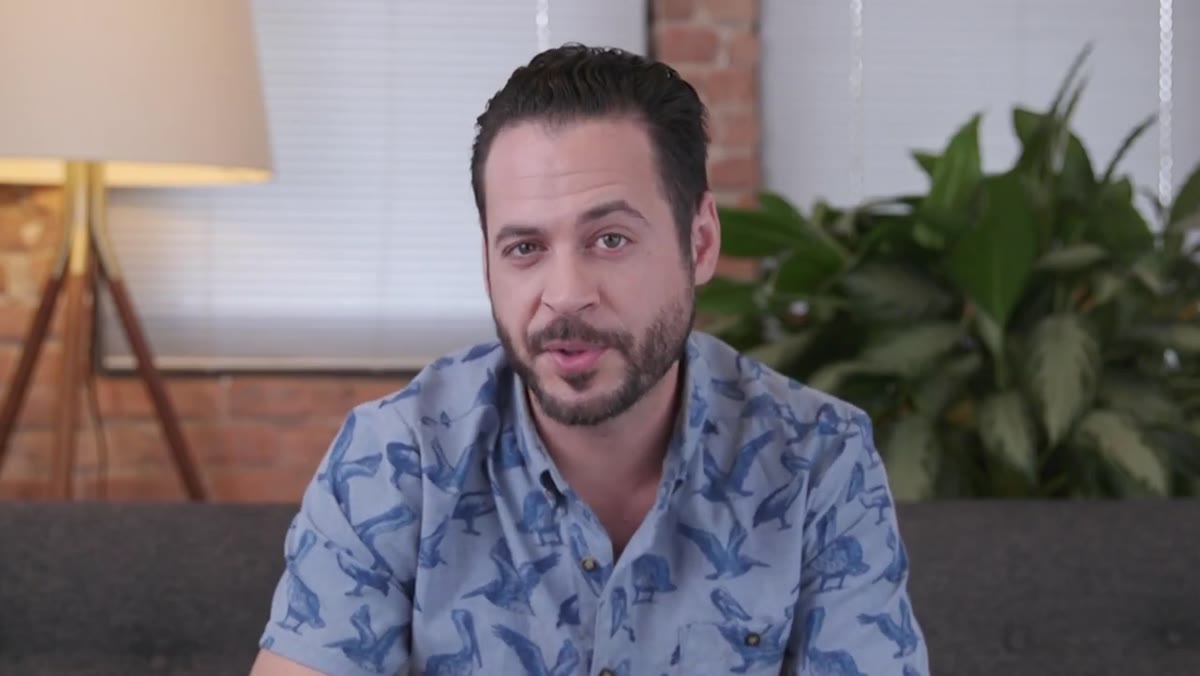 Aaron explaining aperture and depth of field for portraits
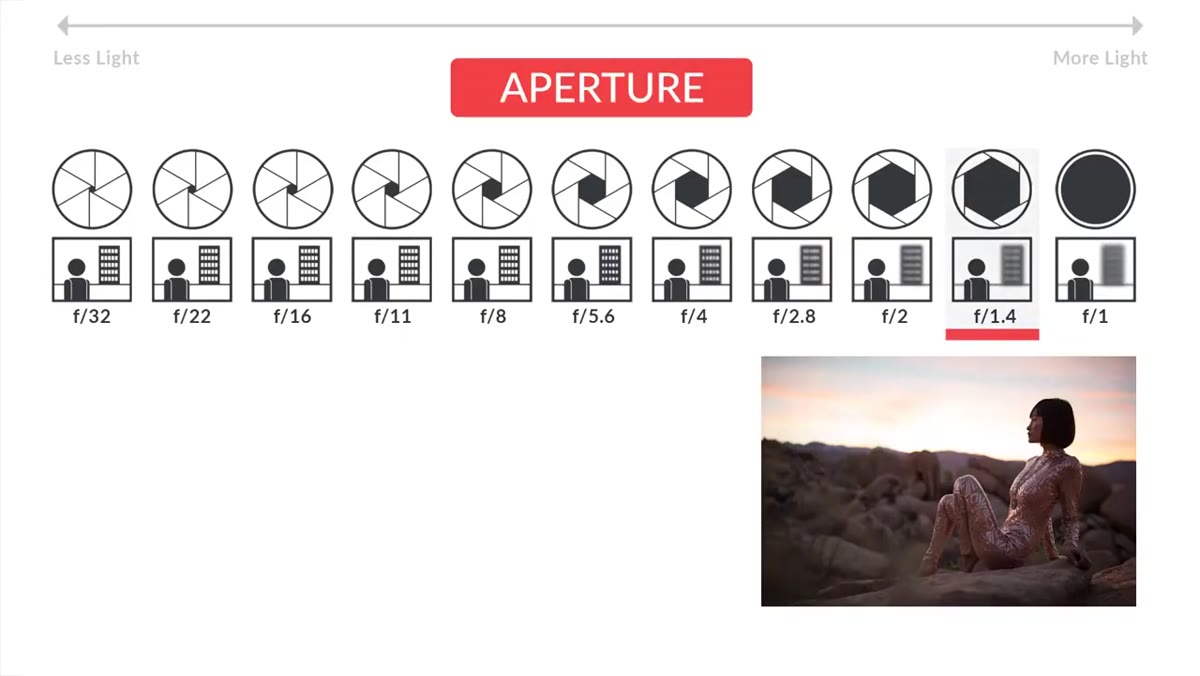
When someone asks which aperture to use for a portrait, the real question underneath is: how much of this frame do I want in focus? That’s depth of field, and aperture is one of the main levers that controls it. A wide aperture, meaning a low f-number like f/1.4 or f/2.0, produces a shallow depth of field where the subject is sharp and the background melts away. A narrow aperture like f/8, f/11, or f/16 keeps more of the scene in focus from front to back.
Aaron explaining aperture and depth of field for portraits
When someone asks which aperture to use for a portrait, the real question underneath is: how much of this frame do I want in focus? That’s depth of field, and aperture is one of the main levers that controls it. A wide aperture, meaning a low f-number like f/1.4 or f/2.0, produces a shallow depth of field where the subject is sharp and the background melts away. A narrow aperture like f/8, f/11, or f/16 keeps more of the scene in focus from front to back.
For retouchers, this matters because shallow depth of field is one of the most powerful natural skin-softening tools available before you ever open Photoshop. Background separation reduces visual noise, draws the eye to the face, and means less competing texture in the frame. But it also means focus errors are punishing. Miss the eyes by two inches at f/1.4 and you have a technically unusable shot.
Step 2: Factor in Focal Length, Not Just the F-Stop
 Diagram or Aaron describing focal length and sensor size effects
Aperture doesn’t work in isolation. Aaron makes a point here that I wish someone had explained to me earlier: focal length changes how depth of field behaves at the same aperture. A wide-angle lens at f/2.8 will keep far more of the image in focus than an 85mm at f/2.8. So if you’re shooting with a wider lens and wondering why your background isn’t blurring the way you expected, focal length is likely part of the answer.
Diagram or Aaron describing focal length and sensor size effects
Aperture doesn’t work in isolation. Aaron makes a point here that I wish someone had explained to me earlier: focal length changes how depth of field behaves at the same aperture. A wide-angle lens at f/2.8 will keep far more of the image in focus than an 85mm at f/2.8. So if you’re shooting with a wider lens and wondering why your background isn’t blurring the way you expected, focal length is likely part of the answer.
Sensor size also plays a role, though it’s a less practical variable for most shooters since you’re working with the camera you have. The key takeaway is to think of aperture, focal length, and sensor size as a system, not as independent controls. Adjust one and the others follow.
Step 3: Match Your Aperture Choice to the Actual Goal
 Aaron listing recommended aperture values for different portrait scenarios
Aaron gives clear practical anchors here. For a blurred, cinematic background, he recommends f/1.4, f/2.0, or f/2.8. For full environmental context where you want the location visible and sharp, f/8 through f/16. Both are legitimate creative choices depending on the story you’re telling. The mistake is treating f/1.8 as universally correct for portraits just because it sounds impressive.
Aaron listing recommended aperture values for different portrait scenarios
Aaron gives clear practical anchors here. For a blurred, cinematic background, he recommends f/1.4, f/2.0, or f/2.8. For full environmental context where you want the location visible and sharp, f/8 through f/16. Both are legitimate creative choices depending on the story you’re telling. The mistake is treating f/1.8 as universally correct for portraits just because it sounds impressive.
The second variable is available light. Narrower apertures let in less light, which forces either a slower shutter speed or a higher ISO to compensate. In beauty and portrait work, a slow shutter introduces motion blur and a high ISO introduces grain that then has to be managed in retouching. If you’re in a low-light environment, a wider aperture isn’t just an aesthetic choice, it’s often a technical necessity. Aaron specifically calls out the 50mm f/1.4 and 85mm f/1.4 as portrait-friendly lenses that minimize facial distortion while still giving you that background separation. Both are on my short list for a reason.
Step 4: Stop Ignoring Light Quality in Favor of Gear
 Aaron discussing quality of light over quality of equipment
This part of the tutorial isn’t about aperture or Photoshop, but I’d argue it’s the most important thing Aaron says in the whole video. When asked how to take good photos with a budget camera, he doesn’t talk about lenses or bodies. He talks about light. Specifically, he says that bad lighting will ruin a photo regardless of camera quality, and that good light will elevate even a modest setup.
Aaron discussing quality of light over quality of equipment
This part of the tutorial isn’t about aperture or Photoshop, but I’d argue it’s the most important thing Aaron says in the whole video. When asked how to take good photos with a budget camera, he doesn’t talk about lenses or bodies. He talks about light. Specifically, he says that bad lighting will ruin a photo regardless of camera quality, and that good light will elevate even a modest setup.
For anyone doing beauty retouching, this is foundational. Skin retouching is exponentially harder when the original lighting is flat, harsh, or mismatched. The structure that makes dodge and burn effective, the shadows that define cheekbones, the highlights that give skin its glow, comes from the light that was present when the shutter fired. We can sculpt in post, but we can’t manufacture good base lighting from nothing. Aaron points to golden hour, early morning and late evening, as free, available, and consistently flattering. I’d add that a single well-placed reflector can do more than hours of frequency separation on badly lit skin.
Step 5: Apply Content-Aware Edits Non-Destructively with Apply Image
 New blank layer with Apply Image dialog open in Photoshop
Here’s where we get into the Photoshop mechanics. Content-Aware Fill is one of those tools that can’t be applied to a blank layer the way a healing brush can. Same goes for Liquify and lens flares. So if you want to use it non-destructively, meaning on a separate layer you can mask, adjust, or discard without touching your original, you need a workaround.
New blank layer with Apply Image dialog open in Photoshop
Here’s where we get into the Photoshop mechanics. Content-Aware Fill is one of those tools that can’t be applied to a blank layer the way a healing brush can. Same goes for Liquify and lens flares. So if you want to use it non-destructively, meaning on a separate layer you can mask, adjust, or discard without touching your original, you need a workaround.
The process Aaron outlines: create a new blank layer above your working layer, then go to Image and choose Apply Image. This stamps a merged version of the image onto that new layer. From there, you run your Content-Aware Fill or other effect on that stamped layer and then add a mask to limit the effect only to the area you actually want changed. It’s an extra step, but it preserves your flexibility completely. In beauty retouching, where a client revision can come in two weeks after you thought the file was closed, that flexibility is everything.
From My Own Practice: Why Dodge and Burn Starts Before You Open Photoshop
I’ve been retouching long enough to know that my most convincing dodge and burn work happens on files where the photographer already did half the job for me. When light is directional and intentional, there are natural shadows to deepen and highlights to lift. The structure is already there. What I’m doing in Photoshop is refinement, not construction.
When I’m consulting on a shoot, I now push for apertures that keep the face’s depth in play, typically f/2 to f/4 on an 85mm, so I have enough plane of focus to work with while still getting separation from the background. I’ve learned to think of dodge and burn not as a retouching step but as the final expression of light decisions that started at the camera.
The most transferable idea from this tutorial is deceptively simple: every decision you make in-camera is a retouching decision made in advance. Aperture shapes what your skin texture looks like, what your background does, and how much latitude you have in post. If you want to go deeper on the techniques Aaron covers here, including how these concepts connect to a full Photoshop workflow, Watch the full tutorial on YouTube. It’s worth the twenty minutes.
Comments (1)
This is going in my reference folder. Incredibly useful.
Leave a Comment