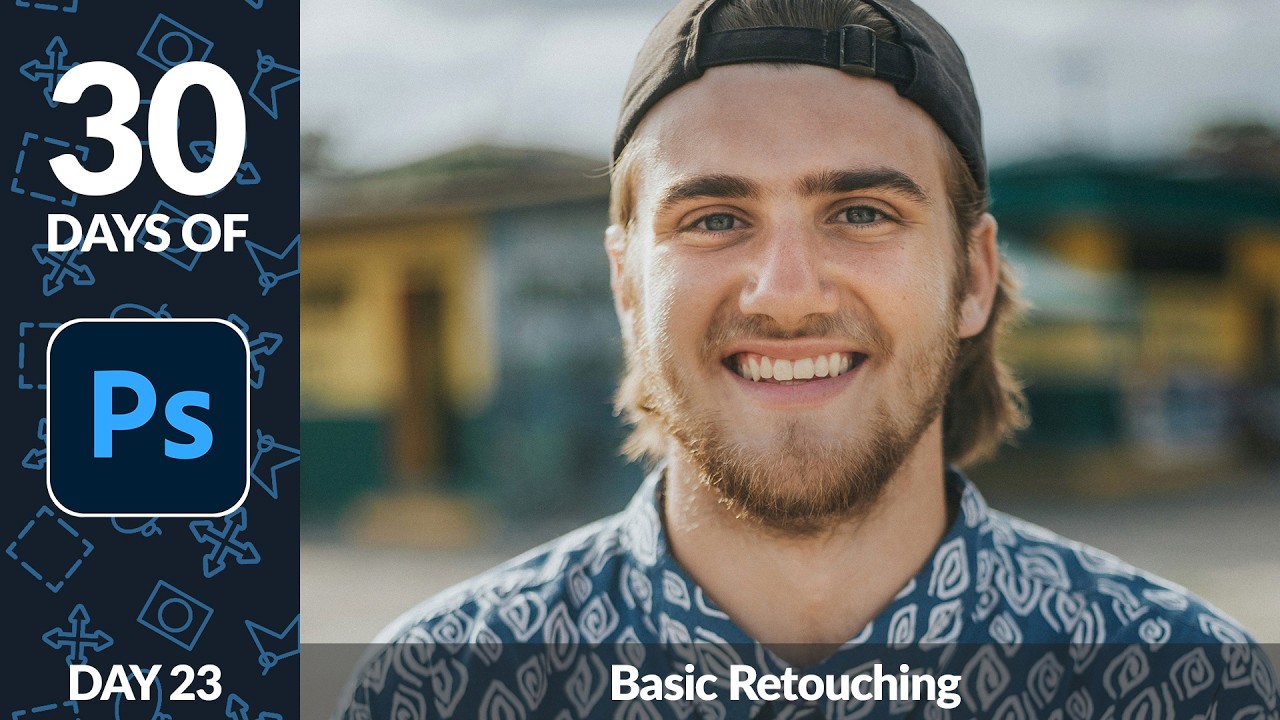
There’s a version of me from about five years ago who would have spent forty-five minutes with the Healing Brush, sampling and resampling, zooming in to 300% to obsess over a single pore. The results were technically clean and somehow completely lifeless. It took a client politely describing my work as “a little plastic-looking” for me to finally step back and rethink my whole approach to basic cleanup. What I needed wasn’t a new technique so much as a smarter starting order and better tool choices. That’s exactly what Aaron Nace covers in this foundational tutorial from his 30 Days of Photoshop series. Watch the full tutorial on YouTube before or after reading through these steps – either way works.
The workflow Aaron walks through hits the three things that come up on almost every portrait I touch for beauty clients: temporary blemishes and distractions on the skin, uneven redness in the complexion, and under-eye darkness that makes a subject look tired when they weren’t. These aren’t glamorous problems, but solving them cleanly and quickly is the whole job. What I appreciate about this particular breakdown is how deliberately he sequences the work. You handle the physical cleanup first, then the color correction, then the luminosity work. Each layer of editing builds on a cleaner foundation than the one before it.
Step 1: Set Up a Dedicated Removal Layer
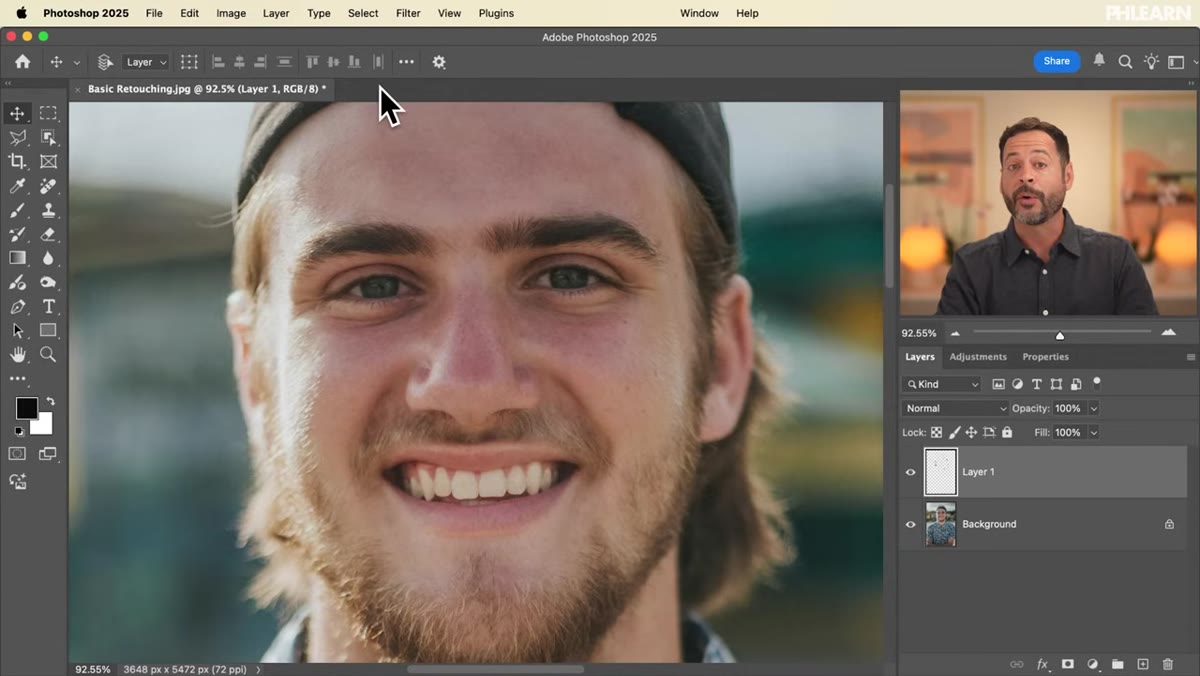
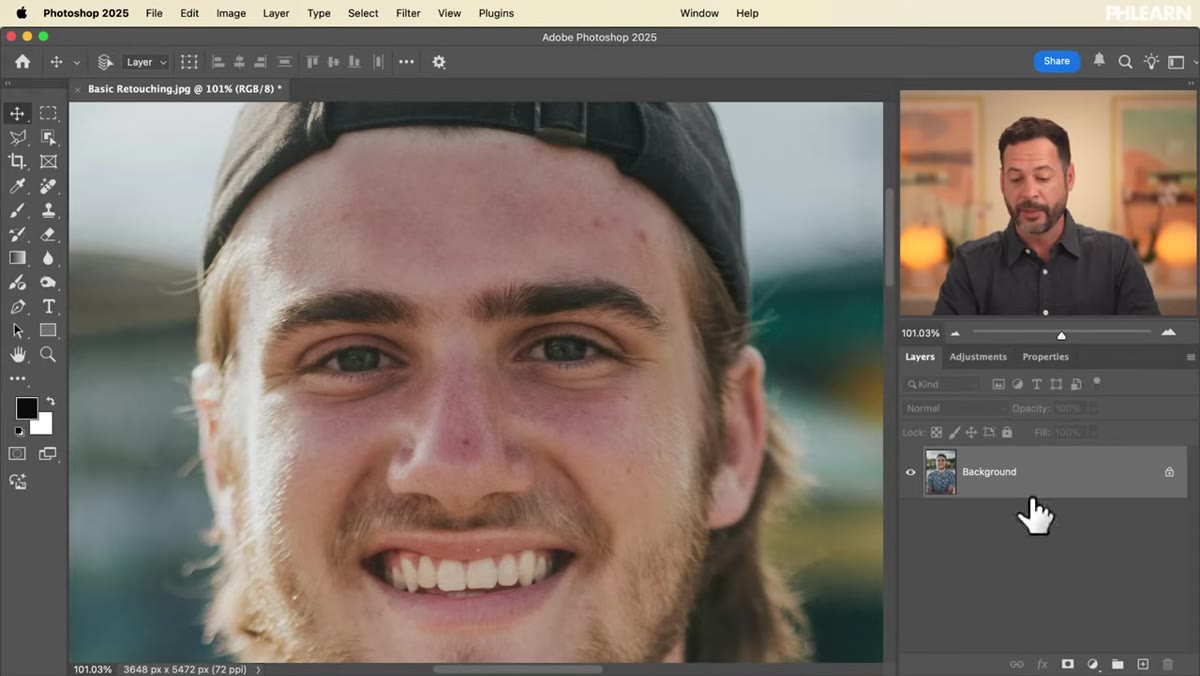 New layer created above background layer in Layers panel
Before touching a single blemish, create a new empty layer above your background. This is non-destructive working practice at its most basic, and it matters more than it might seem. When you do your cleanup on a separate layer, you can dial back the opacity later, mask out any overcorrected areas, or throw the whole thing away and start over without touching your original pixel data. In my own workflow, I name this layer something like “cleanup” and keep it directly above the background so I always know where my removal work lives.
New layer created above background layer in Layers panel
Before touching a single blemish, create a new empty layer above your background. This is non-destructive working practice at its most basic, and it matters more than it might seem. When you do your cleanup on a separate layer, you can dial back the opacity later, mask out any overcorrected areas, or throw the whole thing away and start over without touching your original pixel data. In my own workflow, I name this layer something like “cleanup” and keep it directly above the background so I always know where my removal work lives.
Step 2: Select the Remove Tool and Set It to Auto Mode
 Remove tool selected in toolbar, Mode dropdown set to Auto
With your empty layer selected, grab the Remove Tool from the toolbar – it looks like a small brush with a starburst. Up in the options bar at the top of the screen, find the Mode dropdown and set it to Auto. This setting lets Photoshop decide whether to use standard content-aware fill or generative AI fill depending on what the area needs. Aaron recommends leaving it on Auto rather than forcing one method, and in practice I’ve found that’s the right call. The tool reads the surrounding texture better than I’d predict, and second-guessing it usually just creates more work.
Remove tool selected in toolbar, Mode dropdown set to Auto
With your empty layer selected, grab the Remove Tool from the toolbar – it looks like a small brush with a starburst. Up in the options bar at the top of the screen, find the Mode dropdown and set it to Auto. This setting lets Photoshop decide whether to use standard content-aware fill or generative AI fill depending on what the area needs. Aaron recommends leaving it on Auto rather than forcing one method, and in practice I’ve found that’s the right call. The tool reads the surrounding texture better than I’d predict, and second-guessing it usually just creates more work.
One quick note on the brush highlight color: the default is magenta, which can disappear against warm skin tones. Aaron switches his to chartreuse in the settings panel so his paint strokes are easy to see against the subject’s complexion. It’s a small thing, but when you’re working fast across a whole face, visibility matters.
Step 3: Paint Over Blemishes, Distractions, and Temporary Marks
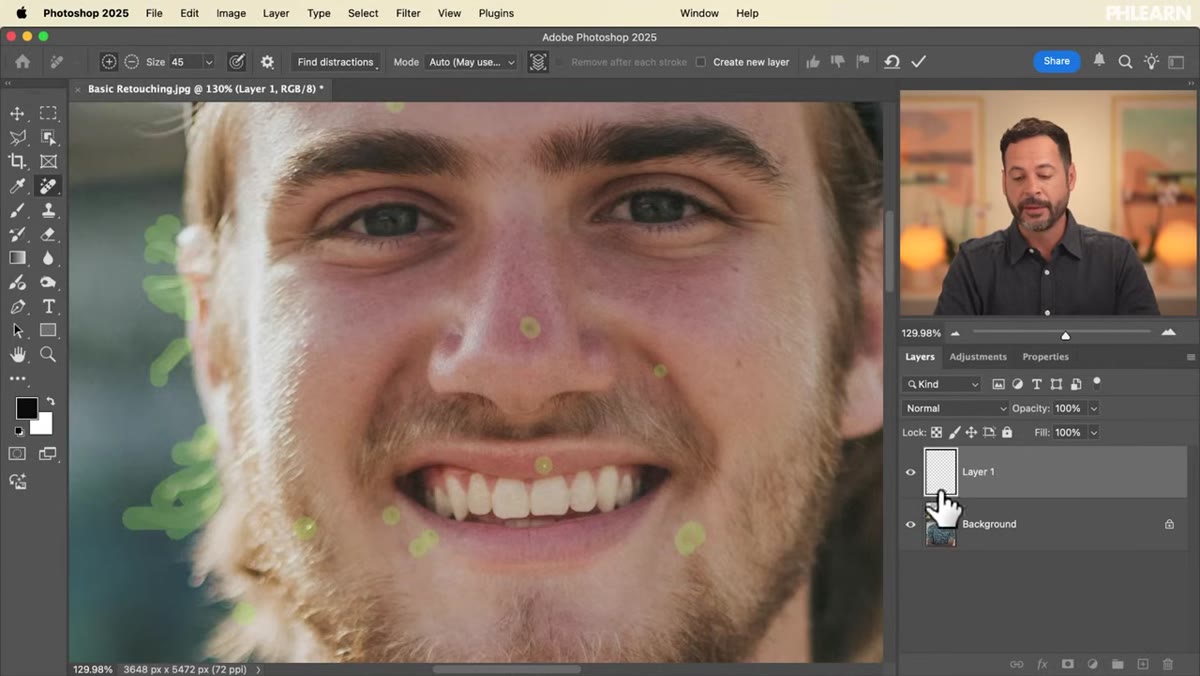
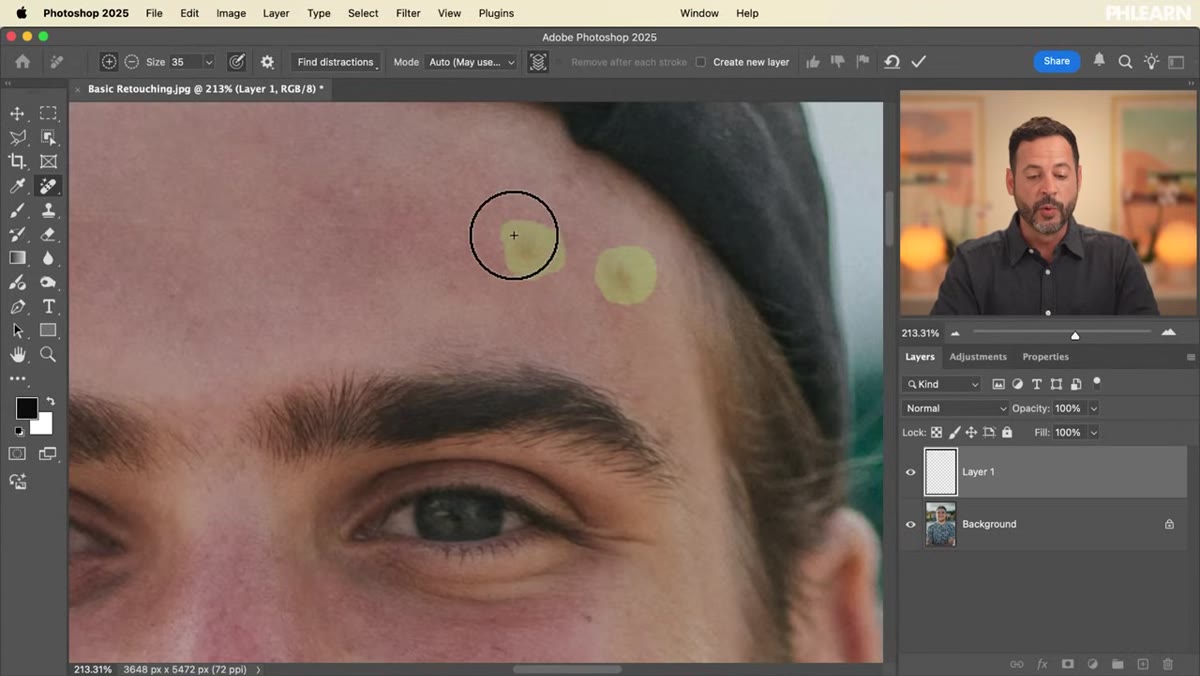 Chartreuse brush strokes painted over blemishes on subject’s face
Now just paint over anything that you and your subject have agreed to remove. Temporary blemishes, small spots, a stray hair catching the light at an odd angle – all fair game. Aaron makes a point I think is worth pausing on: some marks belong to a person’s face permanently and shouldn’t be removed without asking. A mole or a scar someone’s had their whole life is part of how they look. The goal of this step is to clear away the distracting noise, not to redesign the subject’s face. I always have a quick conversation with clients before I sit down to edit about what they want addressed. It saves revision rounds and it’s just the respectful thing to do.
Chartreuse brush strokes painted over blemishes on subject’s face
Now just paint over anything that you and your subject have agreed to remove. Temporary blemishes, small spots, a stray hair catching the light at an odd angle – all fair game. Aaron makes a point I think is worth pausing on: some marks belong to a person’s face permanently and shouldn’t be removed without asking. A mole or a scar someone’s had their whole life is part of how they look. The goal of this step is to clear away the distracting noise, not to redesign the subject’s face. I always have a quick conversation with clients before I sit down to edit about what they want addressed. It saves revision rounds and it’s just the respectful thing to do.
Once you’ve painted your strokes, Photoshop processes the whole pass at once. The Remove Tool in its current form is genuinely fast and accurate on skin texture. For years I relied on the Healing Brush for everything, and while I still reach for it in specific situations, this tool handles broad cleanup passes in a fraction of the time.
Step 4: Address Skin Redness with Targeted Color Correction
 Hue/Saturation adjustment layer with Reds channel selected
After the physical cleanup is done, the next problem to solve is uneven redness – usually concentrated around the nose, cheeks, or anywhere the skin runs warm. Aaron handles this with a Hue/Saturation adjustment layer, but the key is working on the Reds channel specifically rather than the Master channel. In the Properties panel, click the dropdown that says Master and switch it to Reds. From there, you can nudge the Hue slider slightly toward yellow, or pull down the Saturation on just the red range, without affecting the rest of the skin tones.
Hue/Saturation adjustment layer with Reds channel selected
After the physical cleanup is done, the next problem to solve is uneven redness – usually concentrated around the nose, cheeks, or anywhere the skin runs warm. Aaron handles this with a Hue/Saturation adjustment layer, but the key is working on the Reds channel specifically rather than the Master channel. In the Properties panel, click the dropdown that says Master and switch it to Reds. From there, you can nudge the Hue slider slightly toward yellow, or pull down the Saturation on just the red range, without affecting the rest of the skin tones.
This is a much cleaner approach than trying to paint over redness with the Brush Tool or using a color balance adjustment that shifts everything at once. Because the change is targeted to a specific hue range, it stays on the skin where the problem actually lives.
Step 5: Brighten the Under-Eye Area
 Curves adjustment layer with mask painted around under-eye area
The last piece of the basic retouch is brightening the area under the eyes. Darkness there reads as fatigue in a photograph even when the subject was perfectly rested. Aaron approaches this with a Curves adjustment layer, pulling the curve upward to add brightness, then using the layer mask to paint that lightening effect only onto the under-eye zones. Everything else on the image stays untouched.
Curves adjustment layer with mask painted around under-eye area
The last piece of the basic retouch is brightening the area under the eyes. Darkness there reads as fatigue in a photograph even when the subject was perfectly rested. Aaron approaches this with a Curves adjustment layer, pulling the curve upward to add brightness, then using the layer mask to paint that lightening effect only onto the under-eye zones. Everything else on the image stays untouched.
When I do this step, I keep the brush opacity low – somewhere around 20 to 30 percent – and build the brightening up gradually with multiple passes. Heavy-handed brightening in this area is one of the fastest ways to make a retouch look fake. You want the viewer’s eye to travel toward the subject’s gaze, not to notice a patch of skin that looks like it was lit differently from the rest of the face.
What I’d Add From My Own Practice
The sequencing Aaron demonstrates here is the part I’d underline twice. Cleanup first, color second, luminosity last. When I used to work in a different order, my color corrections would sometimes interact with blemish work in ways that looked inconsistent, and I’d end up redoing steps. Working from surface texture outward to color to light keeps each adjustment operating on a clean foundation.
I’d also add one habit I picked up from doing this for beauty brands specifically: zoom out to 50% view before you call the retouch done. At 100% or higher, the eye starts hunting for imperfections. At 50%, you see what the image actually communicates – which is usually closer to how a viewer will experience it.
The remove tool, the targeted Hue/Saturation adjustment, and a masked Curves layer. That’s the core of a basic portrait cleanup, and when those three things are done well in the right order, the result looks like the person just had a good day rather than like someone ran their face through a filter. Watch the full tutorial on YouTube to see Aaron walk through each step on the actual image – watching the Remove Tool process in real time is worth it on its own.
Comments (1)
Shared this with my photography group. Everyone loved it.
Leave a Comment