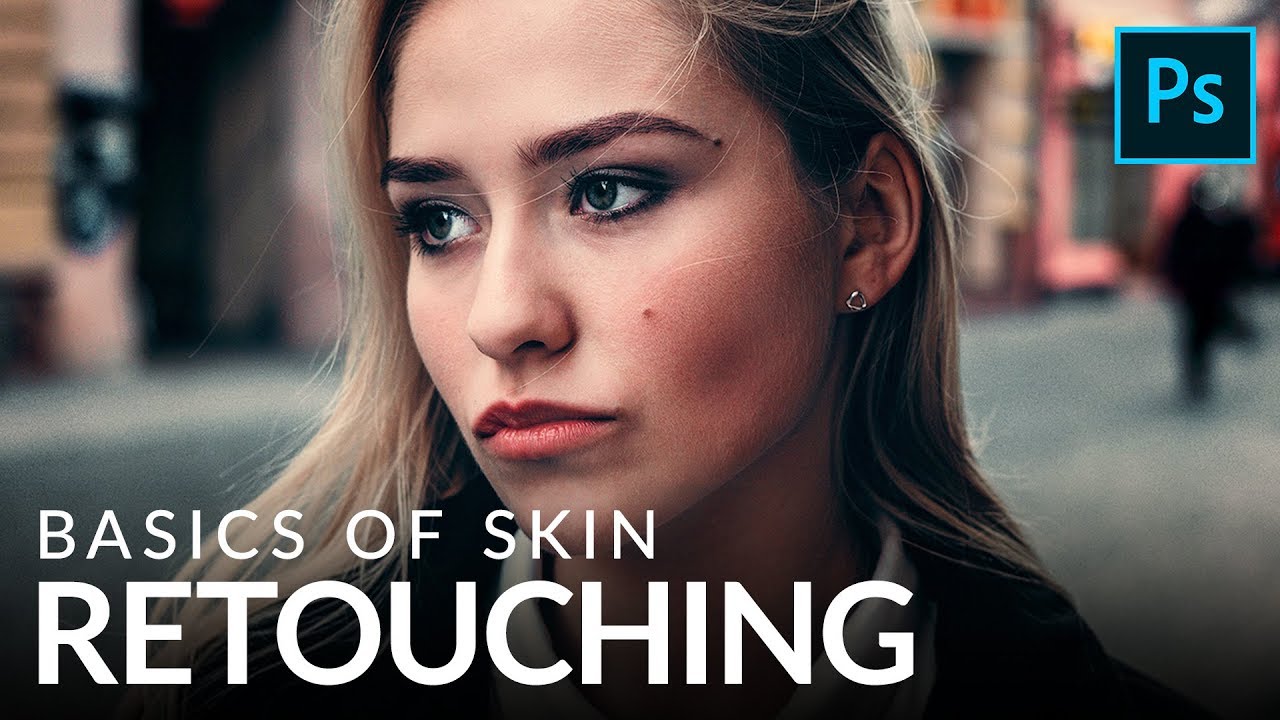
There’s a particular kind of client feedback that sticks with you. Early in my retouching career, someone told me my edits looked “plastic” - and they weren’t wrong. I had been smoothing everything into oblivion, removing what made a face a face. Learning to retouch well meant learning restraint, and it meant studying how experienced retouchers actually approach skin. That’s exactly why I keep coming back to tutorials from Aaron Nace over at PHLEARN. His approach is methodical, non-destructive, and he never loses sight of the person underneath the pixels.
In this Aaron Nace (PHLEARN) tutorial on skin retouching basics, he walks through three core techniques: removing blemishes and flyaway hairs with the Spot Healing Brush, cleaning up details with the Clone Stamp, and evening out skin tone using a curves-based dodge and burn method. It’s a genuinely useful foundation whether you’re new to retouching or just looking to tighten up your workflow. Watch the full tutorial on YouTube alongside this guide - or use these steps as a standalone reference when you’re at your desk and need to move fast.
What I appreciate most about Aaron’s approach is that he treats the techniques as tools, not rules. He demonstrates removing a mole and then promptly erases the change, noting that defining features deserve to stay. That kind of editorial thinking is what separates retouching from overprocessing, and it’s baked into every step below.
Step 1: Set Up a New Layer Before You Touch Anything
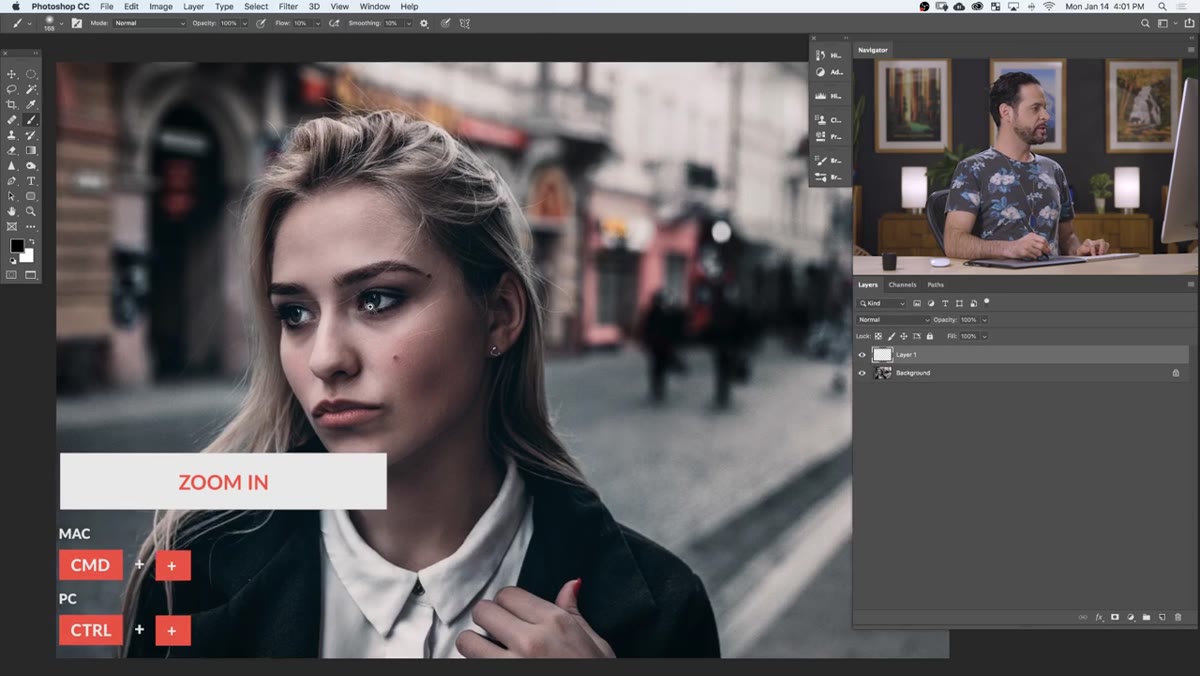 Spot Healing Brush selected, new blank layer active in Layers panel
Before you reach for the Spot Healing Brush, create a new empty layer above your background. This keeps every correction you make completely separate from the original image. If something goes wrong - or a client changes their mind - you can erase individual strokes or throw the whole layer away without touching the source file. Non-destructive habits like this are the single biggest quality-of-life improvement you can make to your retouching workflow.
Spot Healing Brush selected, new blank layer active in Layers panel
Before you reach for the Spot Healing Brush, create a new empty layer above your background. This keeps every correction you make completely separate from the original image. If something goes wrong - or a client changes their mind - you can erase individual strokes or throw the whole layer away without touching the source file. Non-destructive habits like this are the single biggest quality-of-life improvement you can make to your retouching workflow.
With your new layer active, select the Spot Healing Brush tool from the toolbar. In the options bar at the top, set the Type to “Content Aware” and check “Sample All Layers.” That second setting is critical - without it, the tool will only read pixels from the active (empty) layer and produce nothing useful.
Step 2: Remove Flyaway Hairs with the Spot Healing Brush
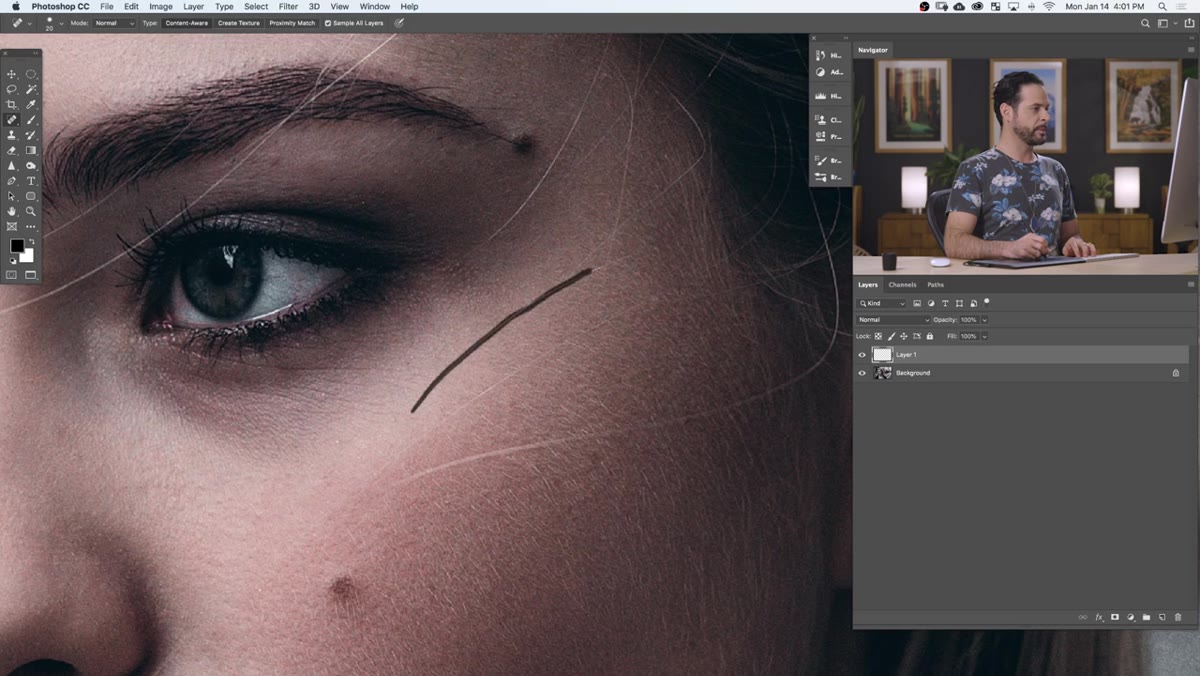 Brush stroke being painted over flyaway hair on portrait
Zoom into an area where flyaway hairs cross over skin or a clean background. Rather than clicking, click and drag the Spot Healing Brush in a single stroke along the length of the hair. Photoshop samples the surrounding texture, calculates what should be there instead, and fills it in. It’s impressively accurate on fine, isolated hairs - the kind that escape from an updo and land across a cheek or forehead.
Brush stroke being painted over flyaway hair on portrait
Zoom into an area where flyaway hairs cross over skin or a clean background. Rather than clicking, click and drag the Spot Healing Brush in a single stroke along the length of the hair. Photoshop samples the surrounding texture, calculates what should be there instead, and fills it in. It’s impressively accurate on fine, isolated hairs - the kind that escape from an updo and land across a cheek or forehead.
If one pass doesn’t fully eliminate a strand, just paint over it again. The tool responds well to repetition, and you can always zoom out to check your work at a realistic viewing size. Don’t zoom in so close that you lose your sense of how the image actually reads - a mistake I still catch myself making on busy days.
Step 3: Soften Fine Lines and Minor Blemishes
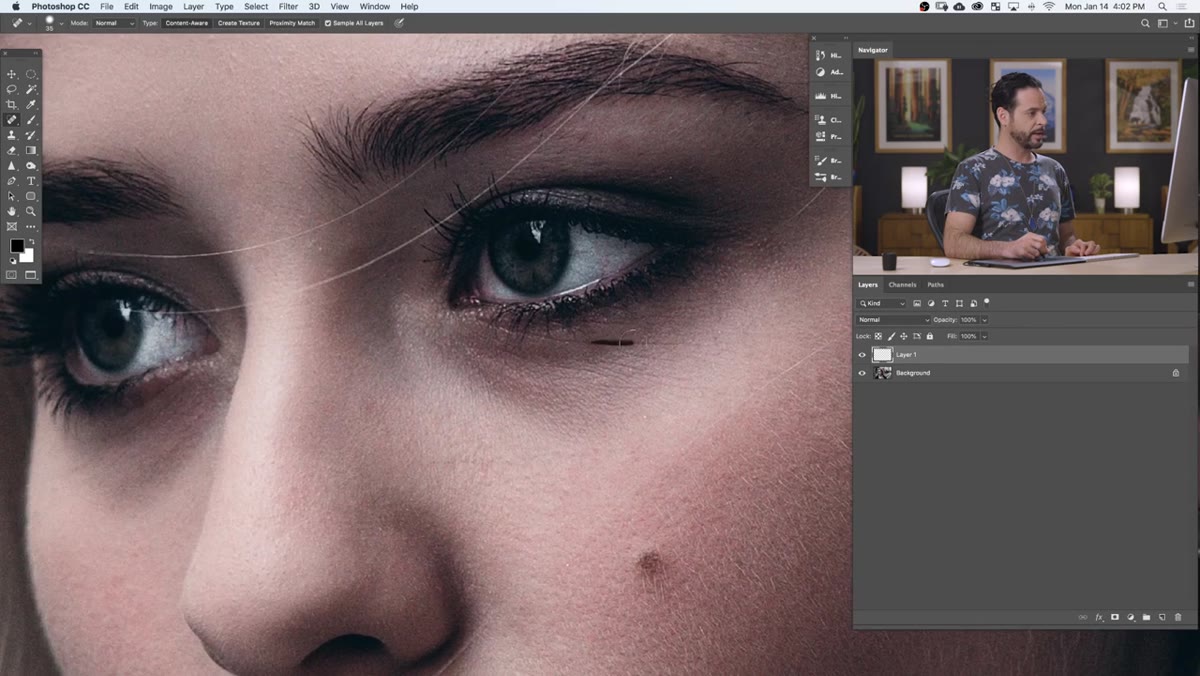 Spot Healing Brush softening fine lines under subject’s eye
The same tool handles fine lines and small blemishes beautifully. Aaron demonstrates on the lines under the subject’s eyes - common territory in portrait work. Use a brush size that’s just slightly larger than the detail you’re targeting, and keep your strokes short and controlled. You’re not trying to erase the natural structure of the face; you’re just reducing the visual weight of areas that photograph more harshly than they appear in person.
Spot Healing Brush softening fine lines under subject’s eye
The same tool handles fine lines and small blemishes beautifully. Aaron demonstrates on the lines under the subject’s eyes - common territory in portrait work. Use a brush size that’s just slightly larger than the detail you’re targeting, and keep your strokes short and controlled. You’re not trying to erase the natural structure of the face; you’re just reducing the visual weight of areas that photograph more harshly than they appear in person.
For actual blemishes, the approach is identical: paint directly over the spot and release. If the fill looks slightly off-toned, paint over it once more. Most of the time, a second pass is all it takes. The key is painting with a light touch rather than grinding over the same spot repeatedly.
Step 4: Refine Problem Areas with the Clone Stamp Tool
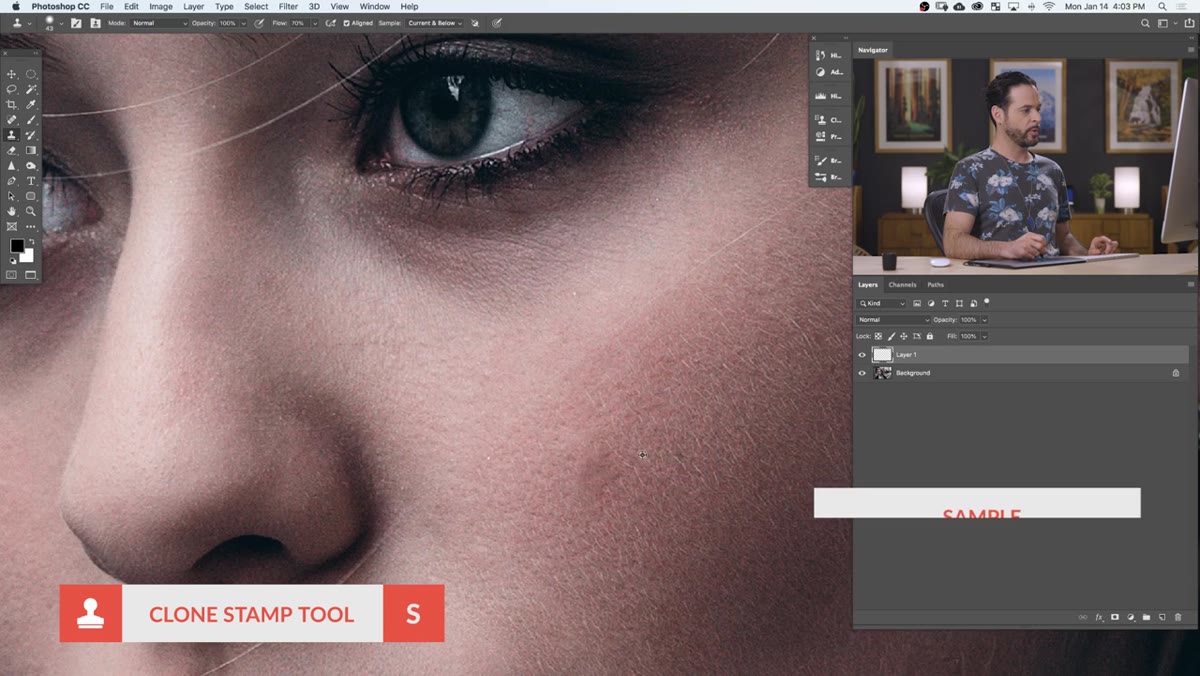 Clone Stamp tool sampling clean skin area near retouched zone
When the Spot Healing Brush produces a fill that looks a little muddy or mismatched, the Clone Stamp gives you precise control. Hold Alt (Windows) or Option (Mac) and click on a patch of clean skin nearby - somewhere with similar tone and texture to the area you’re fixing. Then paint over the problem area in small, careful strokes.
Clone Stamp tool sampling clean skin area near retouched zone
When the Spot Healing Brush produces a fill that looks a little muddy or mismatched, the Clone Stamp gives you precise control. Hold Alt (Windows) or Option (Mac) and click on a patch of clean skin nearby - somewhere with similar tone and texture to the area you’re fixing. Then paint over the problem area in small, careful strokes.
The Clone Stamp is better for situations where you need to pull specific texture from a specific location, rather than letting Photoshop make an educated guess. Use it sparingly, as a finishing tool rather than a first pass. And remember: you’re working on a separate layer, so any Clone Stamp work is equally reversible.
Step 5: Create a Curves Dodge Layer for Highlights
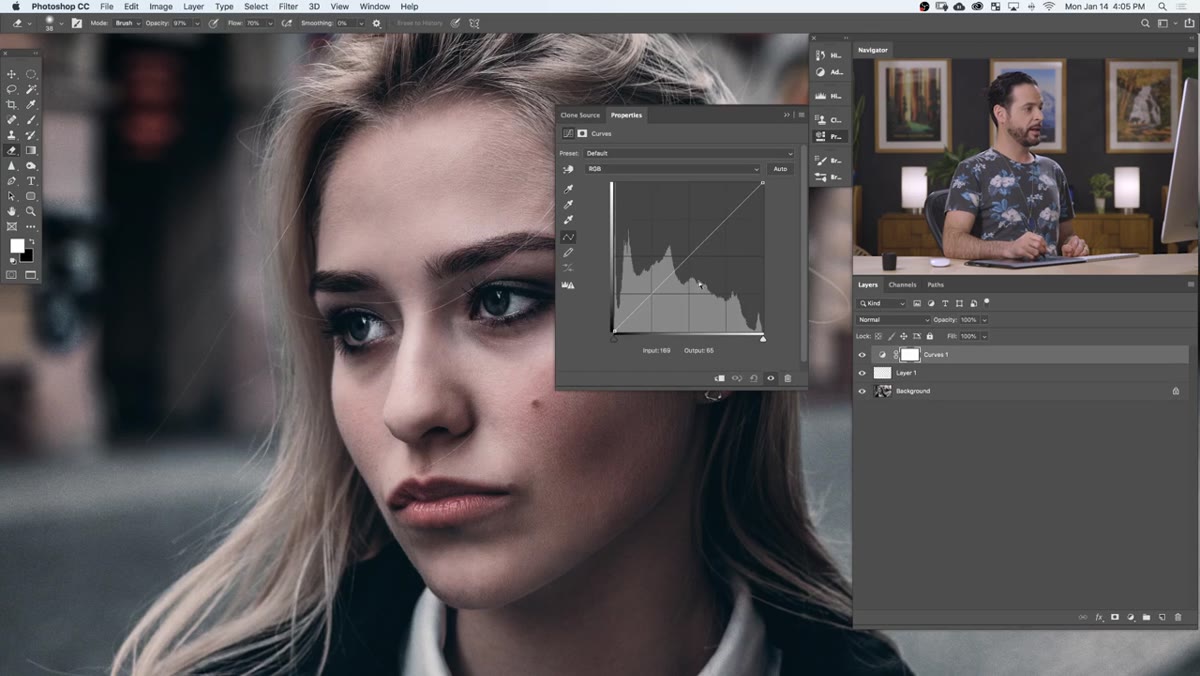 Curves adjustment layer dialog open with slight brightness lift applied
Dodge and burn - lightening and darkening selected areas of skin - is how you even out the uneven. Aaron’s method uses two Curves adjustment layers rather than the actual Dodge and Burn tools, which can degrade pixels over time. Go to Layer, then New Adjustment Layer, then Curves. In the Properties panel, pull the curve up slightly to create a gentle brightness boost. Double-click the layer name and call it something that makes sense to you - Aaron calls his “Dodge.”
Curves adjustment layer dialog open with slight brightness lift applied
Dodge and burn - lightening and darkening selected areas of skin - is how you even out the uneven. Aaron’s method uses two Curves adjustment layers rather than the actual Dodge and Burn tools, which can degrade pixels over time. Go to Layer, then New Adjustment Layer, then Curves. In the Properties panel, pull the curve up slightly to create a gentle brightness boost. Double-click the layer name and call it something that makes sense to you - Aaron calls his “Dodge.”
Here’s the important part: change the blending mode of this layer from Normal to Luminosity. This restricts the adjustment to affecting brightness only, without shifting any color values in the skin. Then hit Command+I (Mac) or Ctrl+I (Windows) on the layer mask to invert it from white to black, which hides the effect entirely. You’re starting with a blank slate.
Step 6: Paint the Dodge Effect Where the Skin Needs It
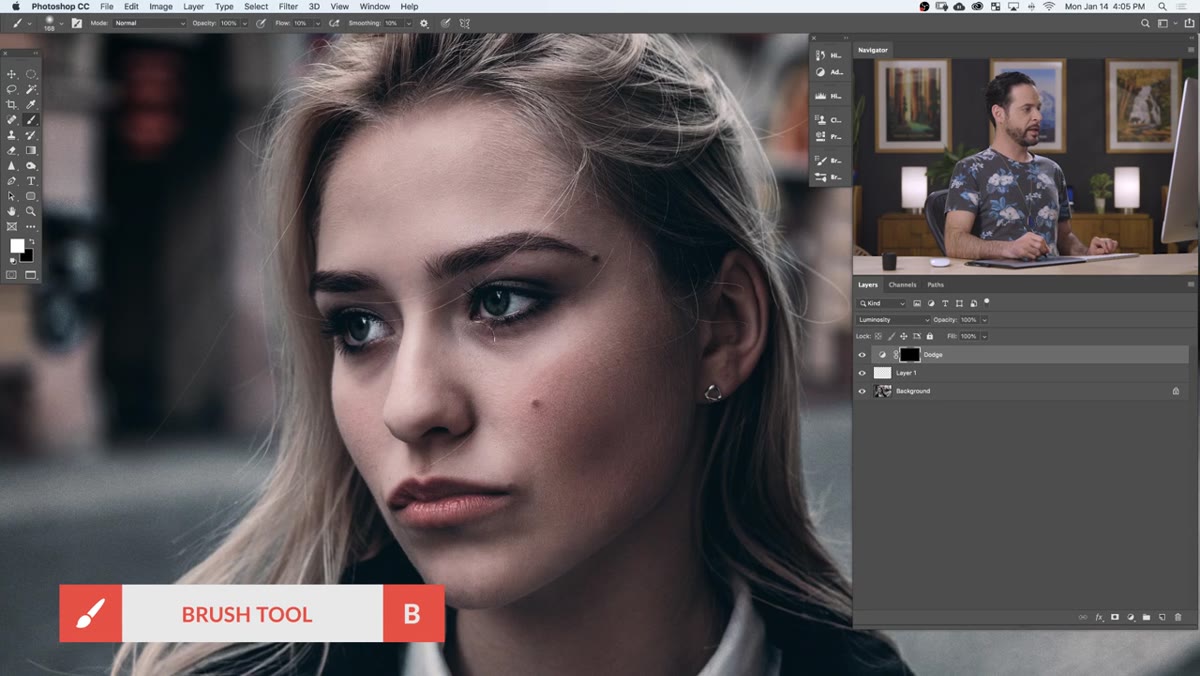 White brush strokes revealed on black layer mask in Layers panel
With a soft white brush at low opacity - somewhere between 10 and 20 percent is usually right - paint over any areas of the face that appear darker than they should relative to the surrounding skin. Shadows under the eyes, uneven patches along the jawline, and areas where highlights have fallen unevenly are all good candidates. Because your opacity is low, each stroke builds gradually and you can add just as much or as little as the image needs.
White brush strokes revealed on black layer mask in Layers panel
With a soft white brush at low opacity - somewhere between 10 and 20 percent is usually right - paint over any areas of the face that appear darker than they should relative to the surrounding skin. Shadows under the eyes, uneven patches along the jawline, and areas where highlights have fallen unevenly are all good candidates. Because your opacity is low, each stroke builds gradually and you can add just as much or as little as the image needs.
The black mask keeps everything hidden until you paint it in, which means you have total control and no surprises. A separate Burn layer follows the same logic but in reverse: create another Curves layer, drag the curve down slightly to darken, set it to Luminosity, invert the mask, and paint with white wherever you want to deepen shadows.
A Note on What to Leave Alone
This is the part Aaron touches on that I think about constantly in my own work: not everything that can be removed should be removed. Moles, beauty marks, the particular way someone’s eyes crinkle - these are the features that make a portrait look like that specific person rather than a smoothed-out approximation of them.
My rule of thumb is to ask whether I’m reducing something or erasing it. Reducing the visibility of a temporary blemish is fair game. Erasing a permanent feature changes the person. When I’m working for beauty brands, I’m sometimes asked to do the latter - and I’ve learned to flag it rather than just comply, because the conversation is worth having.
The single most important thing to take from this workflow is that every correction lives on its own layer. That discipline alone will save you from the kind of irreversible mistakes that make retouching feel stressful. Start there, and the rest becomes a lot more forgiving.
Watch the full tutorial on YouTube to see Aaron demonstrate each technique in real time - the way he moves through the image is itself worth studying.
Comments (2)
Bookmarked. Coming back to this one for sure.
Couldn't agree more. I've seen this make a huge difference in business work specifically.
Leave a Comment