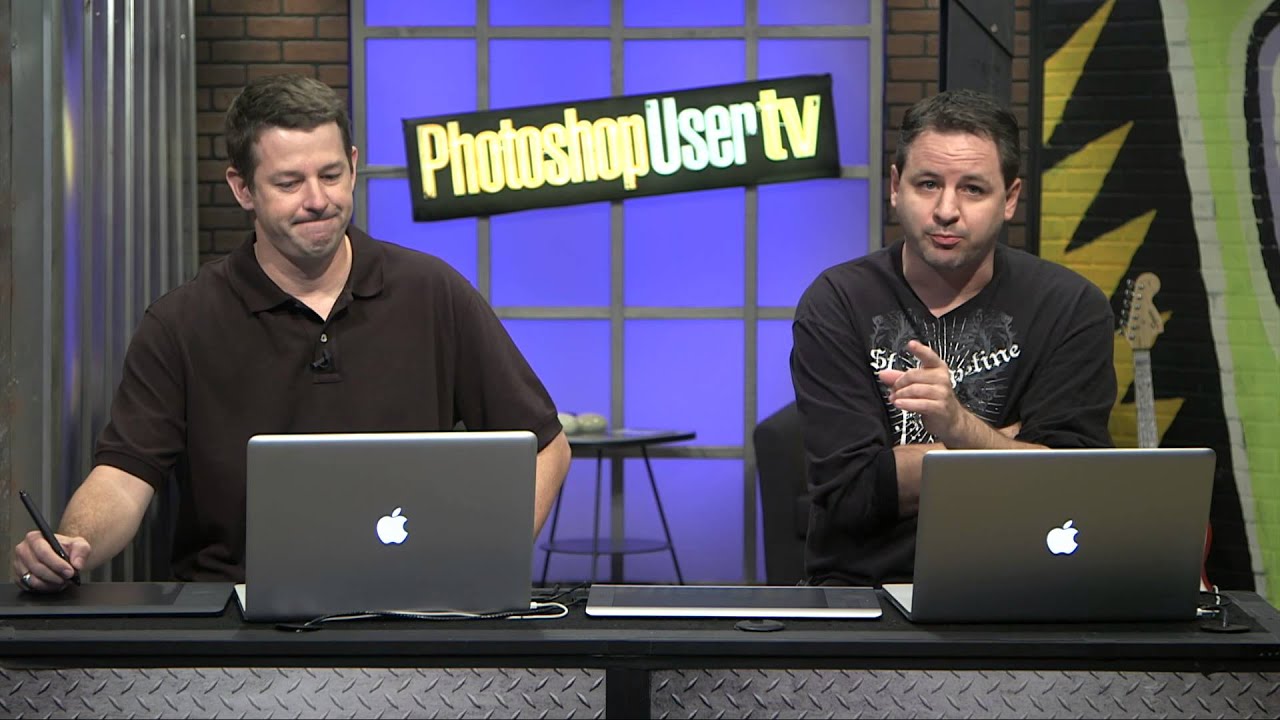
Clients almost never show up to a shoot with their makeup exactly right. After years of photographing weddings and then pivoting to beauty work, I can tell you that this is just the reality of the job. Sometimes the budget doesn’t stretch to a makeup artist. Sometimes the subject did their own and it photographs flat. Sometimes they look at the final gallery and ask if you can “make the lips pop a little more.” You need a reliable, non-destructive way to add or intensify makeup in post, and it has to look like skin, not like someone filled a selection with the paint bucket tool.
Watch the full tutorial on YouTube
In this KelbyOne tutorial, Pete Collins walks through a quick and genuinely elegant approach to digital makeup retouching using nothing more than blank layers, a soft brush, Soft Light blend mode, and a layer mask to clean up the edges. The whole thing takes maybe ten minutes once you know the steps, and the result is makeup that interacts with the skin tones underneath rather than sitting on top of them like a colored sticker. I’ve worked variations of this technique into my own client workflow, and the reason it holds up is the blend mode doing all the heavy lifting. Let me break it down.
Step 1: Set Up a Blank Layer for the Lips
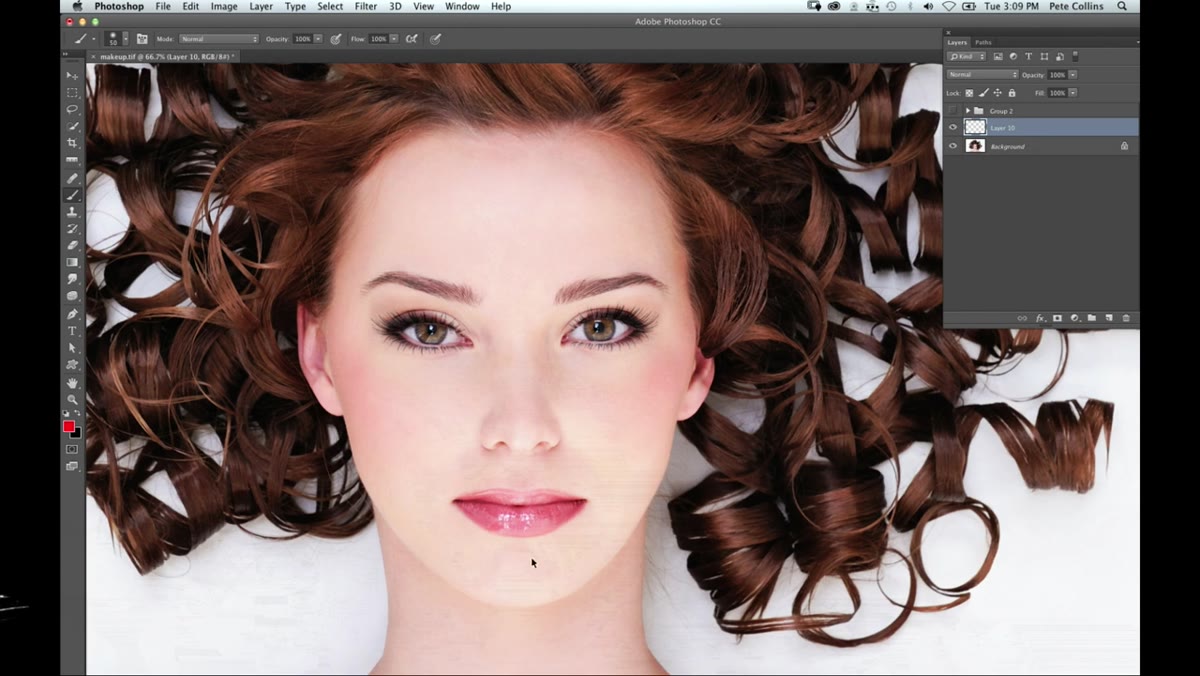 New blank layer created above the portrait layer
Before touching the face at all, create a new empty layer above your portrait layer. This is non-negotiable. Working on a separate layer keeps every brush stroke isolated and fully reversible, and it means you can dial the opacity up or down at any point without affecting the original image. Name it something that tells you what it contains, “lips” works fine, though I tend to name mine after films. Label it whatever helps you stay organized.
New blank layer created above the portrait layer
Before touching the face at all, create a new empty layer above your portrait layer. This is non-negotiable. Working on a separate layer keeps every brush stroke isolated and fully reversible, and it means you can dial the opacity up or down at any point without affecting the original image. Name it something that tells you what it contains, “lips” works fine, though I tend to name mine after films. Label it whatever helps you stay organized.
With that blank layer active, grab your Brush tool and choose your color. Pete demonstrates this with a rich, saturated hue rather than a standard red, which is worth thinking about because a deeply saturated color interacts more visibly with Soft Light blending. Start by picking your foreground color from the color picker and setting a soft, round brush at a size that roughly matches the lips in your frame.
Step 2: Switch the Layer Blend Mode to Soft Light Before Painting
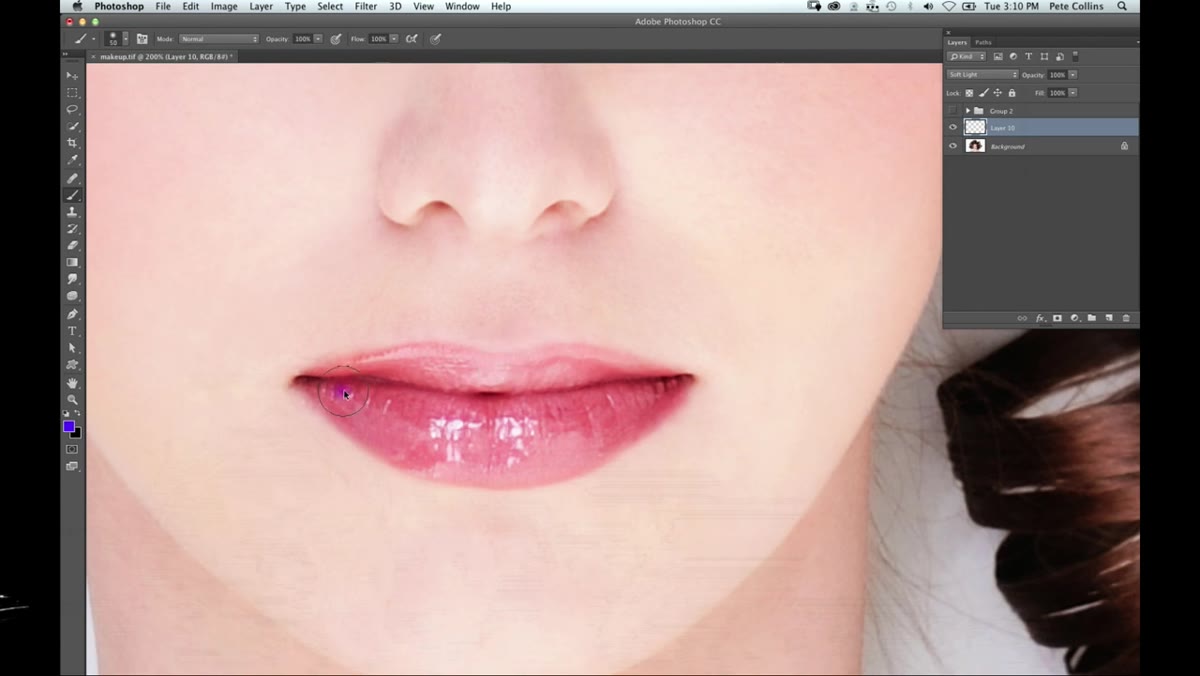 Layer blend mode dropdown set to Soft Light
This is the step that makes everything work. Before you paint a single stroke, go to the Layers panel and change the blend mode of your blank layer from Normal to Soft Light. If you paint in Normal mode first and then switch, you’ll see the difference immediately: Normal mode drops flat, opaque color onto the image and looks like exactly what it is. Soft Light reads the luminosity and texture of the pixels underneath and blends your painted color into them, so the result looks like the light source is actually tinting the skin.
Layer blend mode dropdown set to Soft Light
This is the step that makes everything work. Before you paint a single stroke, go to the Layers panel and change the blend mode of your blank layer from Normal to Soft Light. If you paint in Normal mode first and then switch, you’ll see the difference immediately: Normal mode drops flat, opaque color onto the image and looks like exactly what it is. Soft Light reads the luminosity and texture of the pixels underneath and blends your painted color into them, so the result looks like the light source is actually tinting the skin.
Once Soft Light is active, start painting over the lips with a soft brush. You’ll see the color integrating into the lip texture rather than covering it. The pores, the natural variation in tone, the highlights on the cupid’s bow, all of it stays visible underneath the color. Build it gradually with multiple strokes if you want more intensity, or keep it to one pass for something subtle.
Step 3: Add a Layer Mask to Clean Up the Edges
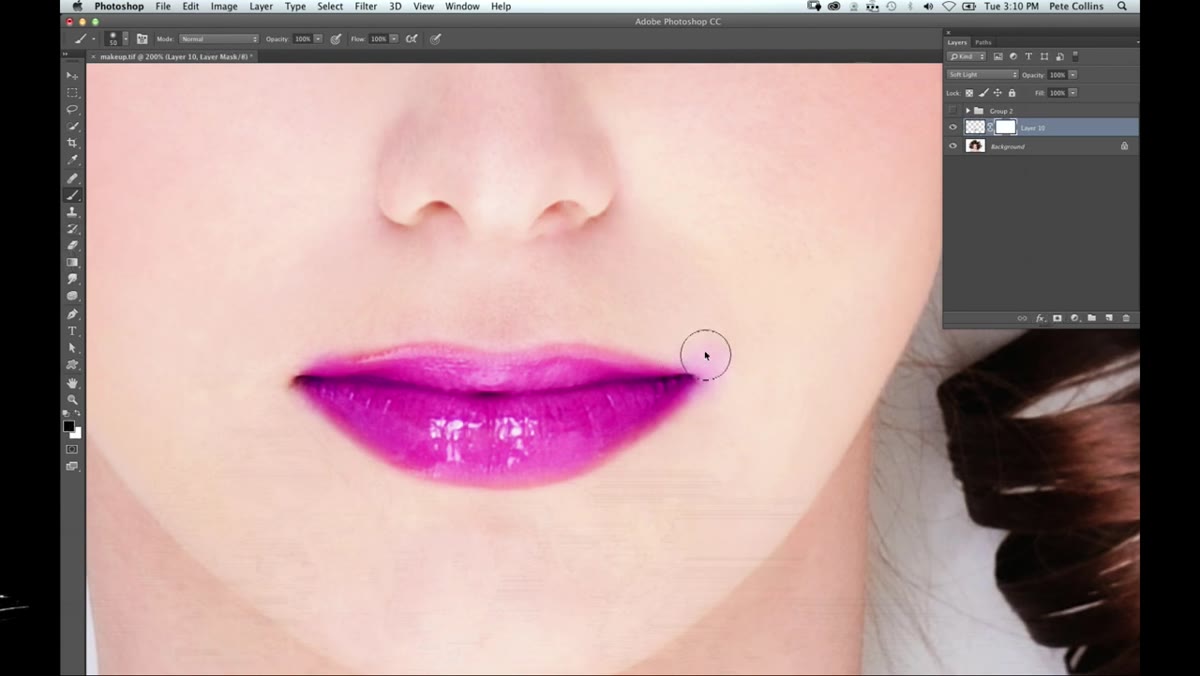 Layer mask added, painting with black brush to trim edges
You’re almost certainly going to paint slightly outside the lip line, especially around the corners of the mouth where the edge gets complex. That’s fine and expected. Click the Add Layer Mask button at the bottom of the Layers panel (the rectangle with a circle icon) to add a mask to your lip color layer. Set your foreground color to black, drop your brush size down, and carefully paint over any areas where the color spilled onto the skin around the lips.
Layer mask added, painting with black brush to trim edges
You’re almost certainly going to paint slightly outside the lip line, especially around the corners of the mouth where the edge gets complex. That’s fine and expected. Click the Add Layer Mask button at the bottom of the Layers panel (the rectangle with a circle icon) to add a mask to your lip color layer. Set your foreground color to black, drop your brush size down, and carefully paint over any areas where the color spilled onto the skin around the lips.
The mask is completely non-destructive. If you accidentally erase too much, switch your foreground to white and paint back over that area to restore the color. Work around the full perimeter of the lips until the edge looks clean. At this scale, spending an extra two minutes on the mask is the difference between the edit looking invisible and looking edited.
Step 4: Adjust Opacity to Taste
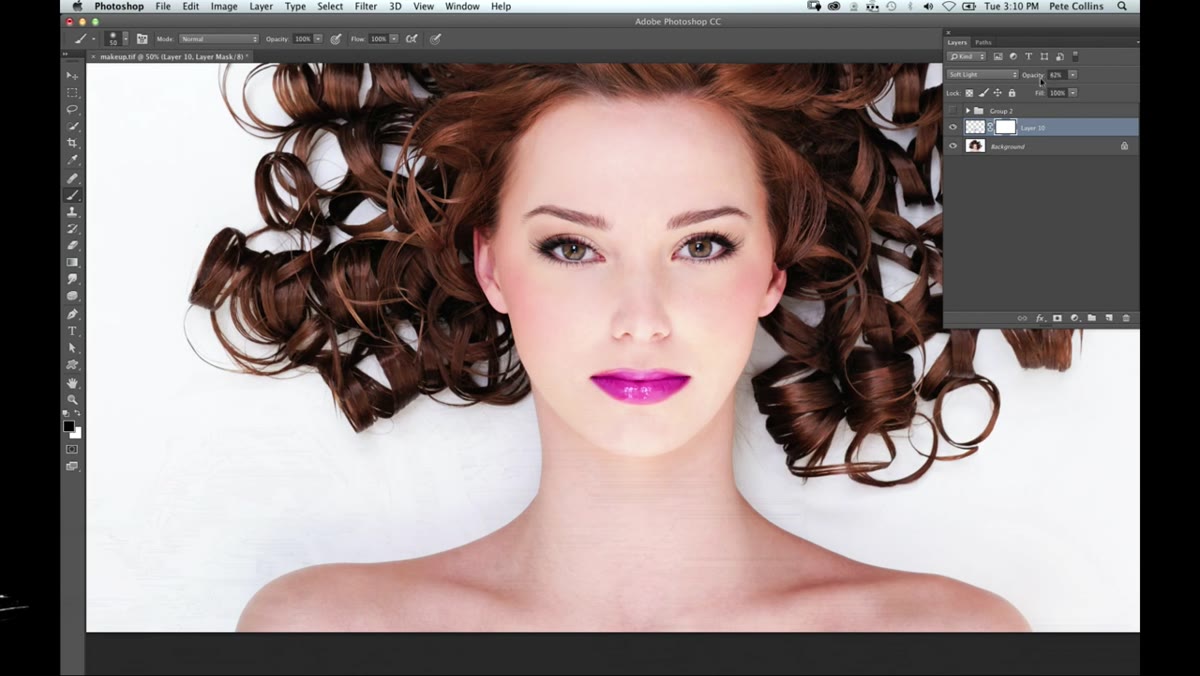 Opacity slider on lip layer being lowered
With the mask cleaned up, look at the lip color layer’s opacity slider in the Layers panel. At 100%, the color may be more intense than what the image actually needs. Pulling the opacity down to somewhere between 60% and 80% usually lands in a more believable range, though this is entirely subjective and image-dependent. Because you’re working on an isolated layer, you have full real-time control here. Slide it until it reads naturally in context.
Opacity slider on lip layer being lowered
With the mask cleaned up, look at the lip color layer’s opacity slider in the Layers panel. At 100%, the color may be more intense than what the image actually needs. Pulling the opacity down to somewhere between 60% and 80% usually lands in a more believable range, though this is entirely subjective and image-dependent. Because you’re working on an isolated layer, you have full real-time control here. Slide it until it reads naturally in context.
This is a good moment to toggle the layer visibility on and off a few times to compare before and after. Fresh eyes catch things that staring at the same pixels for ten minutes will miss.
Step 5: Repeat the Process for Eye Shadow
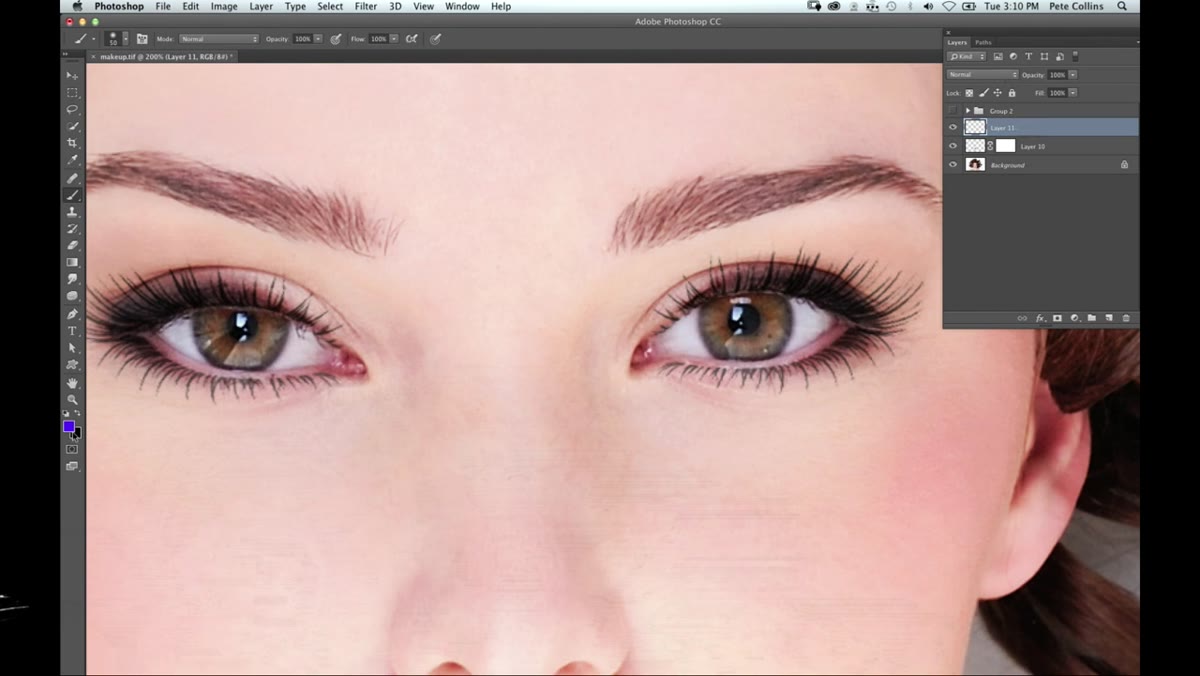 New blank layer created, Soft Light set, painting color across eye area
Create another new blank layer, name it for the eye area, and set its blend mode to Soft Light again before you do anything else. Pete demonstrates this with a bold red, which photographs beautifully, but the same approach works with any color: plums, coppers, cool taupes. The blend mode handles the integration regardless of the hue you choose.
New blank layer created, Soft Light set, painting color across eye area
Create another new blank layer, name it for the eye area, and set its blend mode to Soft Light again before you do anything else. Pete demonstrates this with a bold red, which photographs beautifully, but the same approach works with any color: plums, coppers, cool taupes. The blend mode handles the integration regardless of the hue you choose.
Use a larger, softer brush than you used for the lips and sweep the color across the eyelid area with light pressure. The eye area includes a lot of subtle variation in shadow and highlight, and Soft Light will pick all of that up. Build intensity by painting multiple passes rather than one heavy stroke. Then add a layer mask to that layer as well and trim any overspray above the brow or below the lash line.
What I’d Add from My Own Practice
The technique Pete demonstrates is genuinely solid out of the box, but the one thing I’d layer on top of it is a Hue/Saturation adjustment clipped to each makeup layer. If a client comes back and says the lip color reads too orange on their monitor, you can shift the hue without repainting anything. Just add a Hue/Saturation adjustment layer, hold Alt and click between the two layers to clip it, and you can rotate the color in seconds. I clip a naming-convention action to this step now so I never skip it. It’s saved me more revision rounds than I can count.
It’s also worth noting that this approach pairs naturally with frequency separation if the skin underneath needs work before the color goes on. Smooth the texture pass first, then add your makeup layers on top. The blend mode interacts with whatever is underneath it, so cleaner skin underneath means cleaner-looking makeup on top.
The single biggest thing to take from this technique is that the blend mode is doing the work, not the brush. Soft Light is what separates digital makeup that looks dimensional from digital makeup that looks painted. Once that clicks, you stop being afraid of the technique and start experimenting with colors you wouldn’t have considered. Get into the habit of always painting makeup on its own layer with Soft Light active before the first stroke, and the rest follows naturally.
Watch the full tutorial on YouTube to see Pete walk through the full workflow, including additional retouching steps not covered here.
Comments
Leave a Comment