There’s a specific kind of dread that comes from finishing a retouch, sending it to a client, and then immediately seeing what you should have done differently. Early in my beauty retouching career, I made that mistake with dodge and burn constantly. I’d use Photoshop’s built-in dodge and burn tools, spend twenty minutes sculpting light and shadow across a face, keep editing, and then realize the effect was too heavy-handed with no clean way to walk it back. The only exit was Ctrl+Z, which meant undoing everything that came after it too. It was a workflow trap I kept falling into until I found a smarter approach.
In this Aaron Nace (PHLEARN) tutorial on dodge and burn, Watch the full tutorial on YouTube, Aaron lays out exactly why the native dodge and burn tools create problems and then walks through an adjustment layer method that keeps everything editable and reversible. He covers both approaches, which I appreciate, because understanding why the old way falls short makes the better method click faster. Below is my step-by-step breakdown of what he teaches, with the settings and reasoning you need to follow along without pausing the video every thirty seconds.
Step 1: Understand Where the Dodge and Burn Tools Live (and Why They’re Limited)
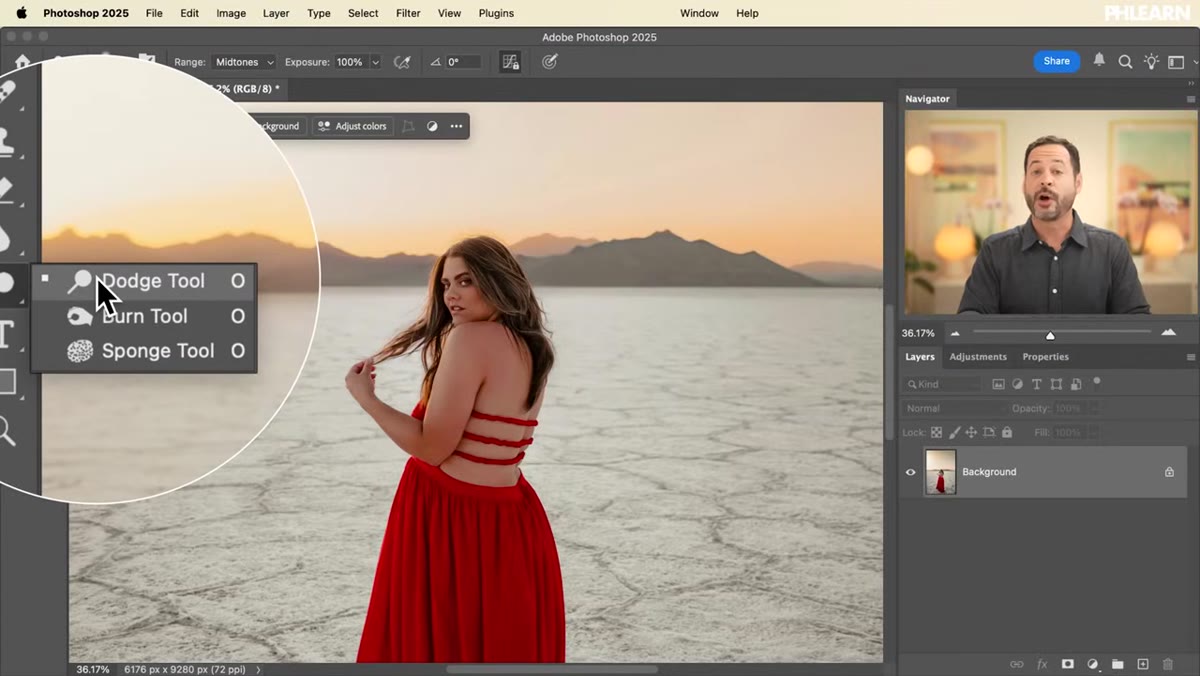 Dodge and burn tools highlighted in the Photoshop toolbar
The dodge tool and burn tool sit in Photoshop’s toolbar, and their job is simple: dodge brightens pixels, burn darkens them. You set a tonal range (shadows, midtones, or highlights) and an exposure percentage, then paint directly on your image. Aaron recommends starting at around 10% exposure so the effect builds gradually rather than blowing out your image in one stroke. For portrait work, midtones is usually the right range to target since that’s where most facial texture and dimension lives.
Dodge and burn tools highlighted in the Photoshop toolbar
The dodge tool and burn tool sit in Photoshop’s toolbar, and their job is simple: dodge brightens pixels, burn darkens them. You set a tonal range (shadows, midtones, or highlights) and an exposure percentage, then paint directly on your image. Aaron recommends starting at around 10% exposure so the effect builds gradually rather than blowing out your image in one stroke. For portrait work, midtones is usually the right range to target since that’s where most facial texture and dimension lives.
The catch is that these tools only work on a layer that already contains pixels, meaning your background layer or a flattened copy. You cannot paint on a blank new layer and get any result at all. More importantly, whatever you paint is baked directly into those pixels. There is no opacity slider to pull back later, no mask to erase a section. The edits are permanent unless you undo your entire history back to that moment.
Step 2: Try It Once, Then Notice the Problem
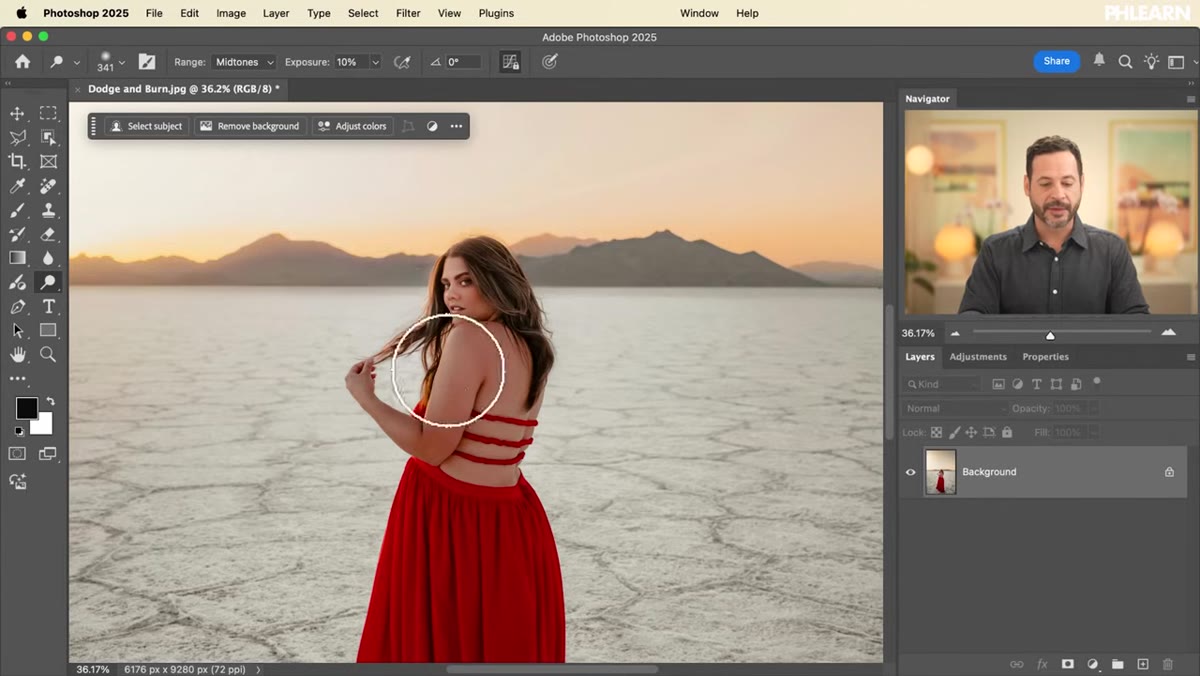 Dodge tool being painted over subject’s face in midtones
Aaron’s approach here is instructive. He actually demonstrates dodging and burning with the default tools so you can see what they produce, not just take his word for it that they’re problematic. Paint lightly over the areas you want to brighten with the dodge tool, then switch to burn and paint the areas you want to darken. The effect is visible and it works. The image genuinely looks better.
Dodge tool being painted over subject’s face in midtones
Aaron’s approach here is instructive. He actually demonstrates dodging and burning with the default tools so you can see what they produce, not just take his word for it that they’re problematic. Paint lightly over the areas you want to brighten with the dodge tool, then switch to burn and paint the areas you want to darken. The effect is visible and it works. The image genuinely looks better.
Then he walks through the history panel to show the problem. If you decide twenty minutes later that your dodge and burn was too aggressive, your only option is to step back through your history to before those strokes were applied. Any color corrections, frequency separation work, or spot healing you did after that point disappears with it. For anyone working on a complex retouch with multiple stages, that’s not a realistic undo strategy. This is why I stopped using these tools for any session work years ago.
Step 3: Create a Brightness and Contrast Adjustment Layer Instead
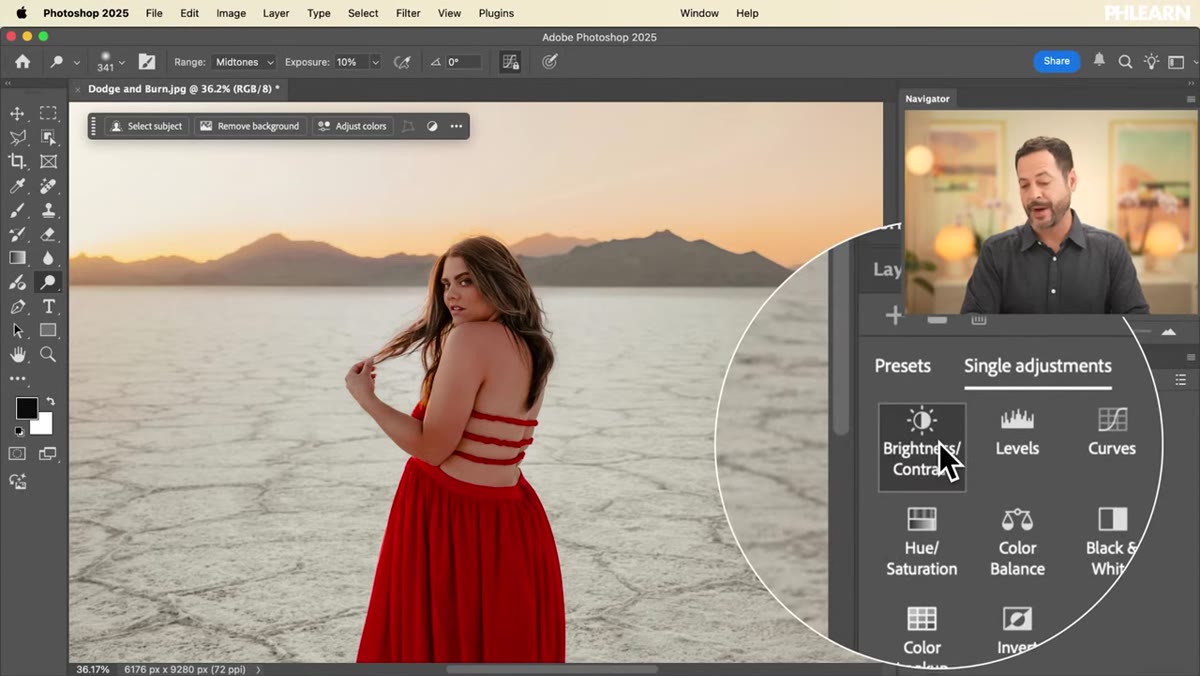 Brightness and Contrast adjustment layer added in Layers panel
Here’s where the technique shifts. Instead of painting directly on pixels, go to your Adjustments panel and add a Brightness and Contrast layer. Aaron bumps the brightness up and brings contrast down slightly for a soft, luminous lift. The specific values matter less than the principle: set the adjustment to produce the effect you want for the dodge pass, knowing you can refine it later.
Brightness and Contrast adjustment layer added in Layers panel
Here’s where the technique shifts. Instead of painting directly on pixels, go to your Adjustments panel and add a Brightness and Contrast layer. Aaron bumps the brightness up and brings contrast down slightly for a soft, luminous lift. The specific values matter less than the principle: set the adjustment to produce the effect you want for the dodge pass, knowing you can refine it later.
What makes this immediately better is that the adjustment layer sits separately from your image. You can toggle it off and on with the eye icon. You can double-click the layer thumbnail at any point, even days later, and slide the brightness to a different value. The edit is live and non-destructive from the moment you create it.
Step 4: Invert the Layer Mask to Hide the Effect Completely
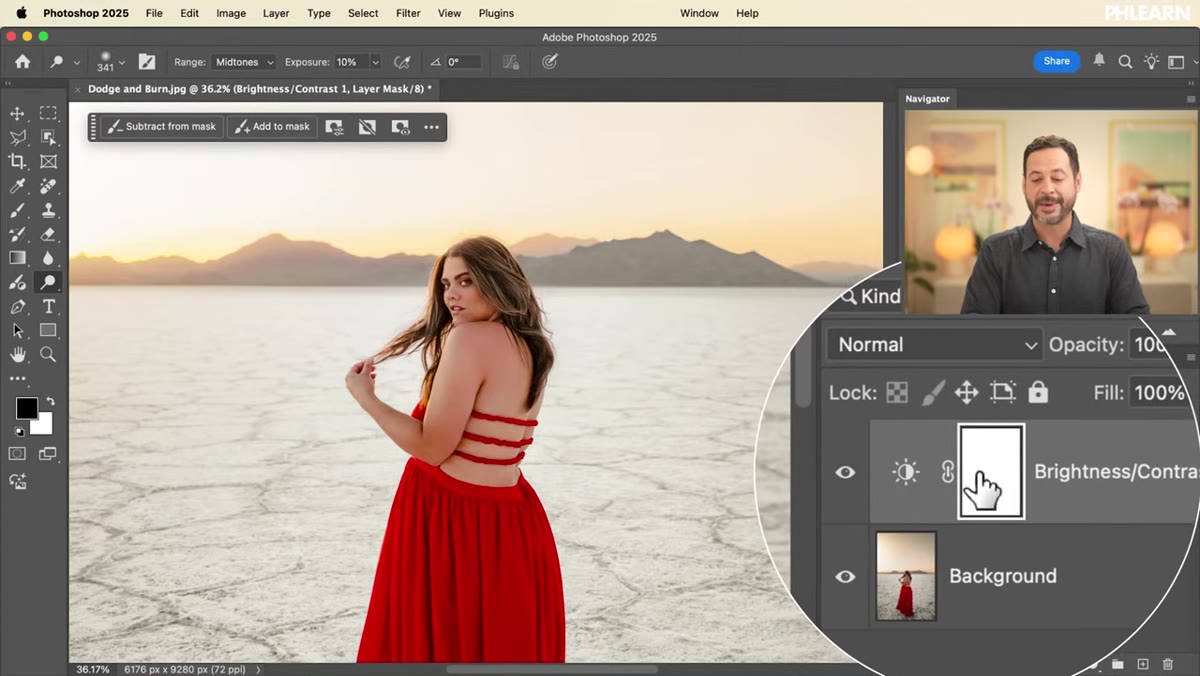 Layer mask inverted to black, hiding the adjustment
Every adjustment layer in Photoshop comes with a white layer mask by default, which means the effect is visible everywhere. For dodge and burn, that’s not what we want. We want to paint the lightening or darkening precisely where it belongs on the face, not apply it globally.
Layer mask inverted to black, hiding the adjustment
Every adjustment layer in Photoshop comes with a white layer mask by default, which means the effect is visible everywhere. For dodge and burn, that’s not what we want. We want to paint the lightening or darkening precisely where it belongs on the face, not apply it globally.
Click on the white mask thumbnail in the Layers panel, then press Ctrl+I (Command+I on Mac) to invert it to black. The adjustment disappears entirely from your image. Now you have a brightening effect that is ready to be revealed exactly where you paint it, rather than an effect you have to paint away.
Step 5: Brush White onto the Mask to Reveal Dodging Where You Need It
 White brush painting on black mask to reveal brightening
With your brush tool selected, a white foreground color set, and the mask (not the layer thumbnail) active, paint over the areas of the face you want to lighten. Cheekbones, the brow bone, the bridge of the nose, the cupid’s bow. These are the high planes that catch light naturally, and painting white on the mask reveals the brightness adjustment only in those zones.
White brush painting on black mask to reveal brightening
With your brush tool selected, a white foreground color set, and the mask (not the layer thumbnail) active, paint over the areas of the face you want to lighten. Cheekbones, the brow bone, the bridge of the nose, the cupid’s bow. These are the high planes that catch light naturally, and painting white on the mask reveals the brightness adjustment only in those zones.
Keep your brush opacity low, around 10 to 20 percent, and build up the effect with multiple passes. Because the adjustment is live, you can always go back to the layer properties and dial the overall brightness up or down after you’ve painted the mask. The mask controls where it applies; the adjustment controls how strongly it applies. Having both levers independently is the whole point.
What I Add to This Workflow in Practice
Aaron’s method is solid as taught, and I use a version of it in almost every beauty retouch I deliver. The one thing I layer on top is using separate adjustment layers for dodging and burning rather than combining them. One curves layer set to brighten with an inverted black mask handles all my highlights. A second curves layer set to darken handles my shadow work. Curves give me a bit more control over the tonal response compared to Brightness and Contrast, particularly for skin that’s already been color-graded.
I also name these layers clearly. Something like “DODGE - cheekbones” and “BURN - jaw transition” so when a client requests a revision a week later, I’m not decoding my own layer stack from scratch. The non-destructive approach only pays dividends if your file is organized enough to actually revisit.
The single most important takeaway from this tutorial is that dodge and burn should never be a one-way door. The adjustment layer method keeps the effect adjustable at every stage of your edit, which means you can make bold choices without committing to them permanently. For anyone doing client work where revision requests are just part of the job, that flexibility is worth far more than the slightly faster setup of the native tools.
Watch the full tutorial on YouTube to see Aaron walk through each stage in real time, including the contextual task bar workflow he introduces toward the end.
Comments (3)
Quality content like this is rare. Keep it up.
The tip about dodge burn done right why i di was the missing piece for me. Thank you.
The before and after really sells it. Incredible difference.
Leave a Comment