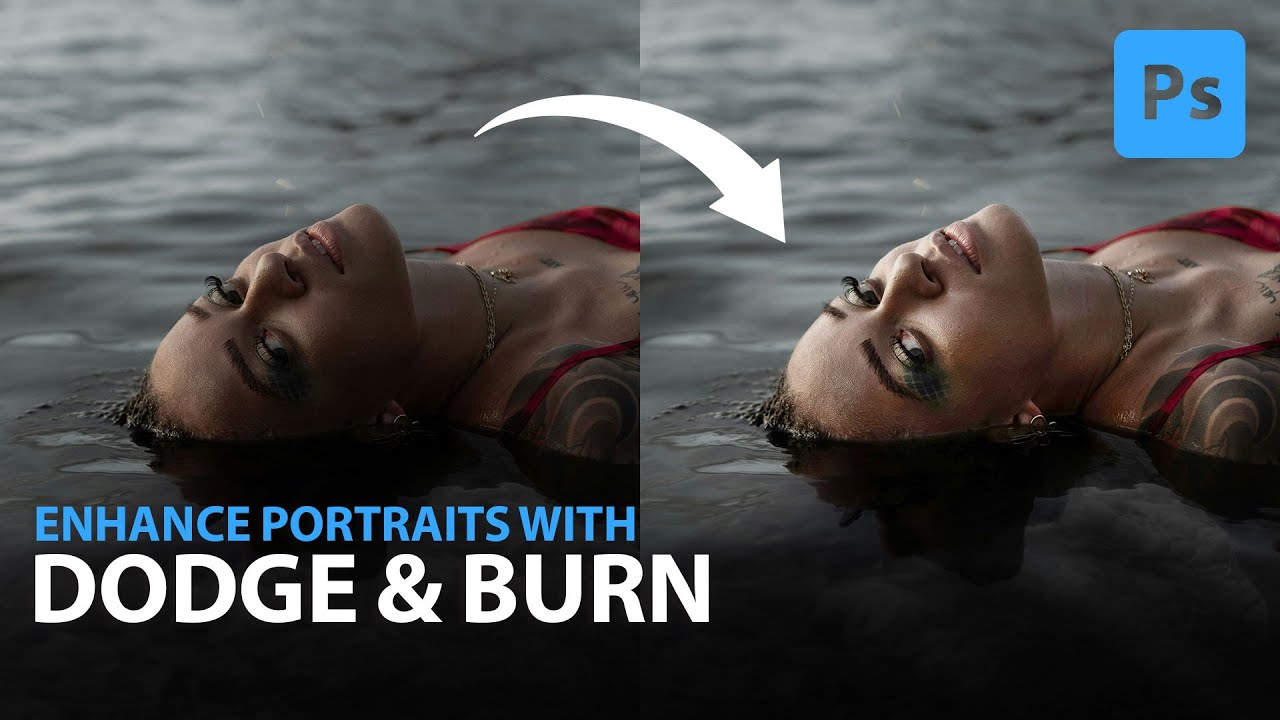
For a long time, my dodge and burn work looked exactly like what it was: painted-on light that had no business being on a human face. I’d grab the Dodge tool, scrub it across a highlight, and end up with something chalky and flat. A client once described my edits as “a little too perfect,” which is a polite way of saying they looked fake. It took me longer than I’d like to admit to realize the problem wasn’t my eye for light. It was my tools.
That’s why this tutorial from Aaron Nace over at PHLEARN stopped me mid-green-tea when I first watched it. Watch the full tutorial on YouTube - it’s one of those rare technique videos where the core idea is simple enough to understand in five minutes but deep enough to change how you work permanently. The method replaces Photoshop’s native Dodge and Burn tools entirely, swapping them for Curves adjustment layers with inverted masks. The result is a non-destructive workflow where every stroke is reversible, adjustable, and far more natural-looking than anything the standard tools can produce.
Here’s a full breakdown of exactly how to do it, with every setting you need.
Step 1: Understand Why the Native Tools Fall Short
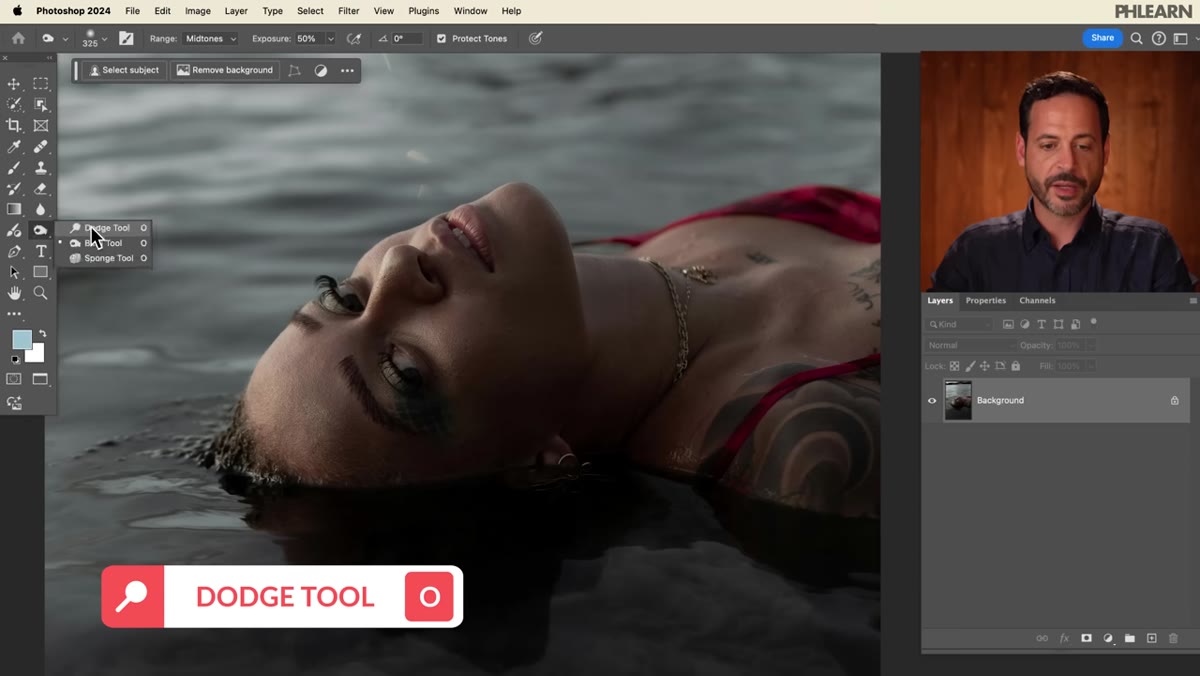 Dodge tool active, brightening a patch on the background layer
Before we build anything new, it’s worth understanding what we’re leaving behind. The Dodge and Burn tools in Photoshop work directly on the pixel layer beneath them. Once you’ve painted over your image with those tools, the original data is altered. There’s no clean way to reduce the effect, adjust its intensity later, or isolate it to specific tonal ranges without starting over. For retouching work where a client might request changes weeks after delivery, that inflexibility is a real liability. Curves adjustment layers solve all of this by keeping the effect completely separate from your image data.
Dodge tool active, brightening a patch on the background layer
Before we build anything new, it’s worth understanding what we’re leaving behind. The Dodge and Burn tools in Photoshop work directly on the pixel layer beneath them. Once you’ve painted over your image with those tools, the original data is altered. There’s no clean way to reduce the effect, adjust its intensity later, or isolate it to specific tonal ranges without starting over. For retouching work where a client might request changes weeks after delivery, that inflexibility is a real liability. Curves adjustment layers solve all of this by keeping the effect completely separate from your image data.
Step 2: Create a Brightening Curves Adjustment Layer
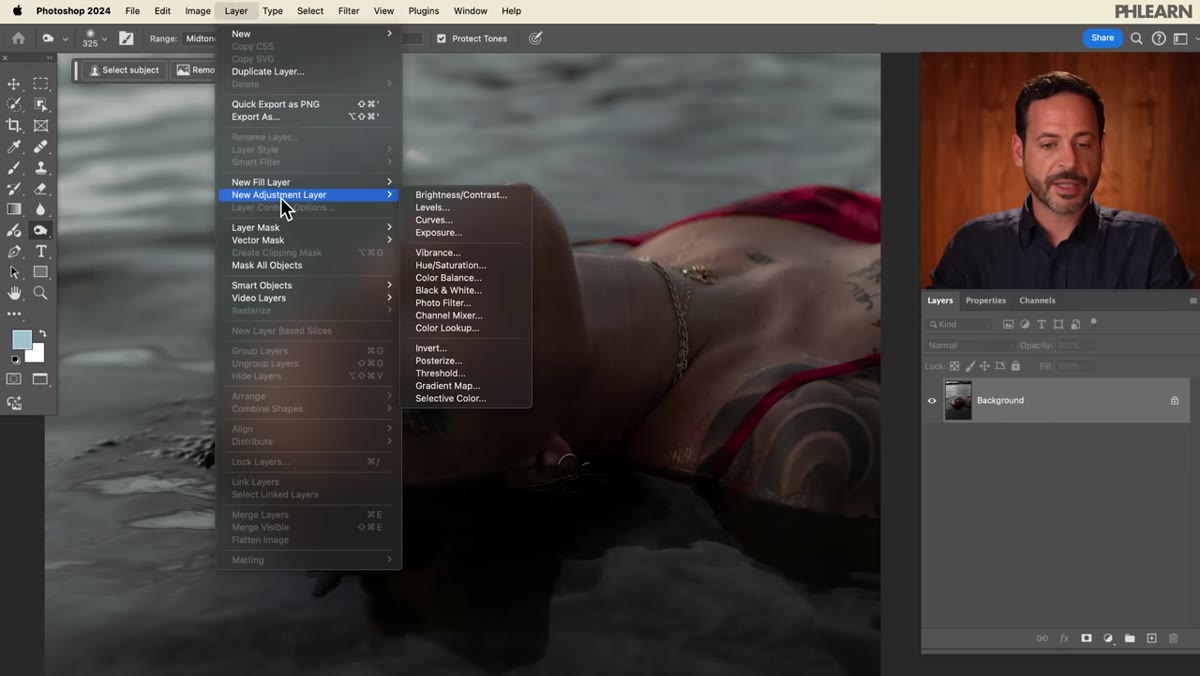 New Curves adjustment layer dialog open in Photoshop
Go to the Layer menu, choose New Adjustment Layer, and select Curves. When the dialog opens, click directly on the center of the curve line and drag upward. You want a noticeable brightening effect - something that looks too strong when applied to the whole image. Don’t be shy here. A subtle curve will produce a subtle dodge, and you’ll want room to work with. The point of this step is to define your maximum brightness, which you’ll then paint in selectively.
New Curves adjustment layer dialog open in Photoshop
Go to the Layer menu, choose New Adjustment Layer, and select Curves. When the dialog opens, click directly on the center of the curve line and drag upward. You want a noticeable brightening effect - something that looks too strong when applied to the whole image. Don’t be shy here. A subtle curve will produce a subtle dodge, and you’ll want room to work with. The point of this step is to define your maximum brightness, which you’ll then paint in selectively.
Step 3: Invert the Layer Mask to Hide Everything
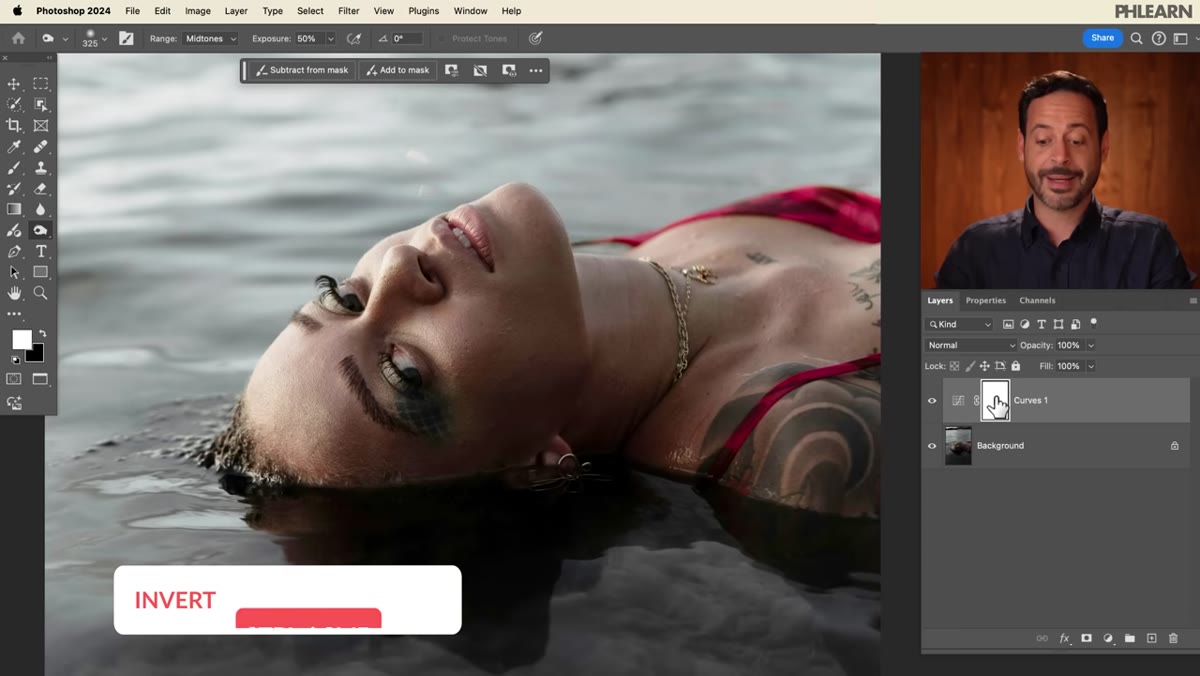 Layer mask thumbnail selected, about to be inverted to black
When Photoshop creates a Curves adjustment layer, it automatically adds a white layer mask, which means your brightening effect is immediately visible across the entire image. To fix that, click the white mask thumbnail in the Layers panel to make sure it’s selected, then press Ctrl+I on Windows or Command+I on Mac. This inverts the mask from white to black, hiding the effect completely. Now your image looks unchanged, but the brightening is ready to be revealed anywhere you choose to paint.
Layer mask thumbnail selected, about to be inverted to black
When Photoshop creates a Curves adjustment layer, it automatically adds a white layer mask, which means your brightening effect is immediately visible across the entire image. To fix that, click the white mask thumbnail in the Layers panel to make sure it’s selected, then press Ctrl+I on Windows or Command+I on Mac. This inverts the mask from white to black, hiding the effect completely. Now your image looks unchanged, but the brightening is ready to be revealed anywhere you choose to paint.
Step 4: Select the Brush Tool and Set Hardness to Zero
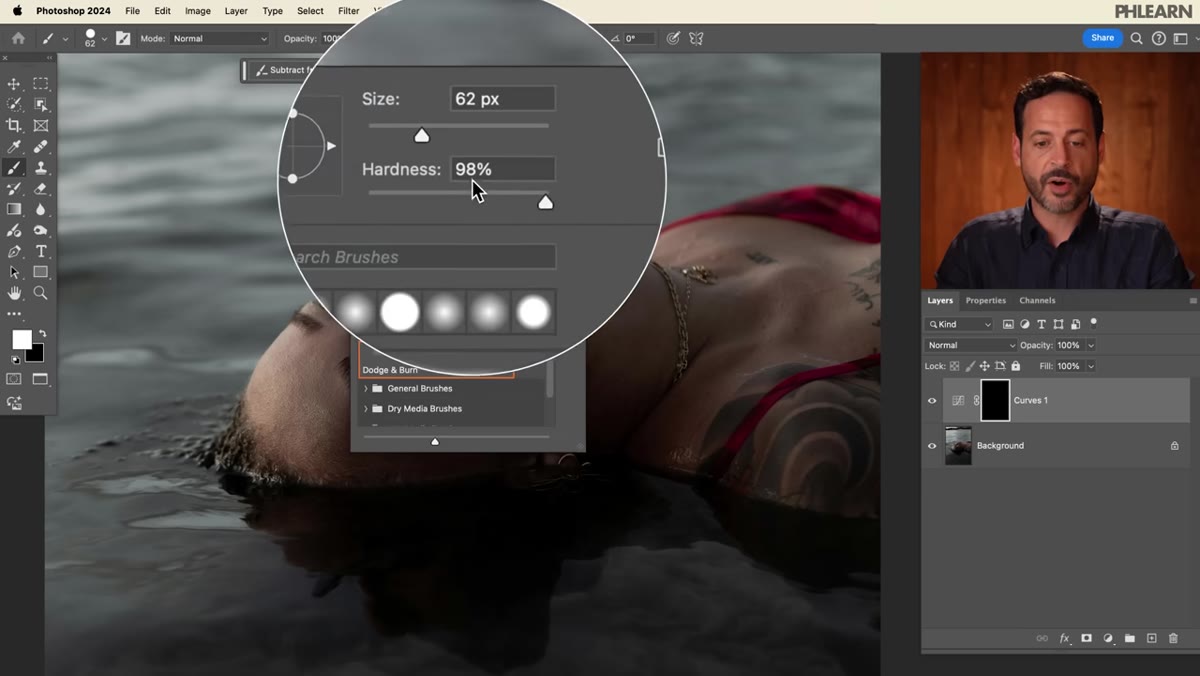 Right-click brush menu open, hardness slider set to 0%
Press B to activate the Brush tool, then right-click anywhere on your canvas to bring up the brush settings panel. Drag the Hardness slider all the way to zero. A hard-edged brush will leave visible circles on your mask, and those edges will read as obviously retouched on the final image. A fully soft brush feathers the effect so gradually that it blends into the surrounding areas without a seam. Make your brush large enough to cover a generous area - think cheekbone-sized or larger, depending on the portrait.
Right-click brush menu open, hardness slider set to 0%
Press B to activate the Brush tool, then right-click anywhere on your canvas to bring up the brush settings panel. Drag the Hardness slider all the way to zero. A hard-edged brush will leave visible circles on your mask, and those edges will read as obviously retouched on the final image. A fully soft brush feathers the effect so gradually that it blends into the surrounding areas without a seam. Make your brush large enough to cover a generous area - think cheekbone-sized or larger, depending on the portrait.
Step 5: Drop Your Flow to 10 Percent
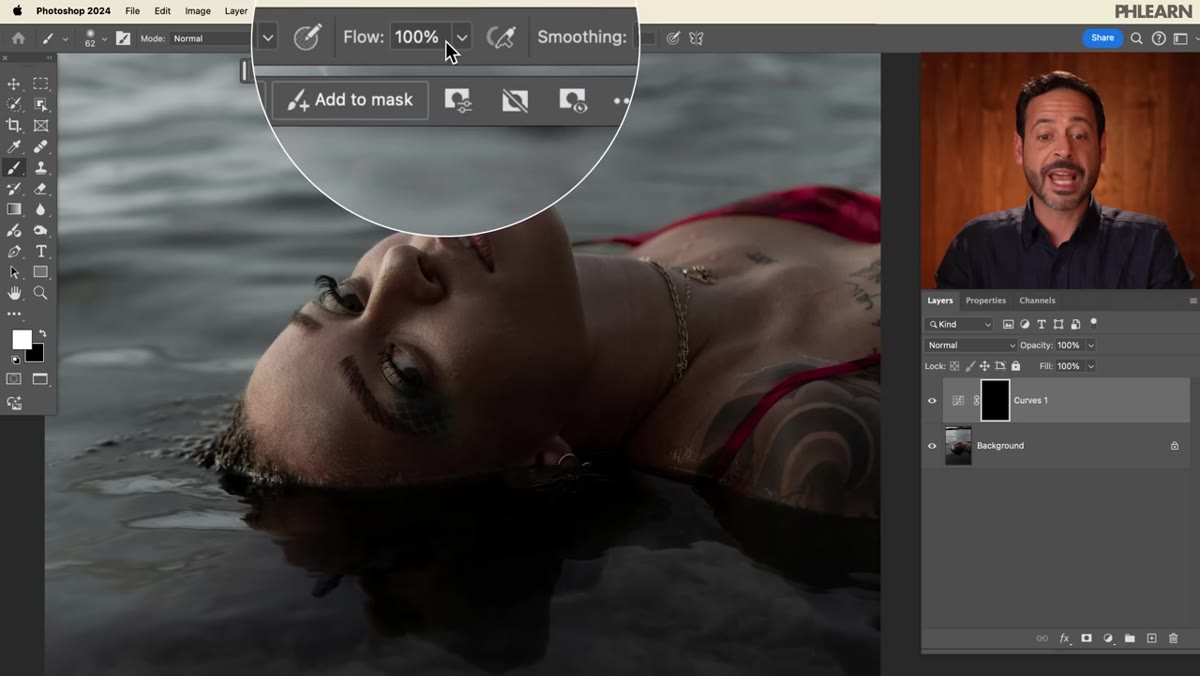 Flow setting in the top toolbar reduced to 10%
This is the setting that most people overlook, and it’s honestly the one that makes the biggest difference. In the options bar at the top of the screen, find the Flow percentage and type in 10, then hit Enter. Flow controls how much paint is deposited per pass. At 100 percent, a single stroke completely reveals the effect beneath, which looks harsh and unnatural. At 10 percent, each pass adds only a thin layer of the effect. To build intensity somewhere, you simply paint over that area more times. To keep it subtle, you pass over it once and move on. This gives you proportional, organic control that mimics the way light actually falls across a face.
Flow setting in the top toolbar reduced to 10%
This is the setting that most people overlook, and it’s honestly the one that makes the biggest difference. In the options bar at the top of the screen, find the Flow percentage and type in 10, then hit Enter. Flow controls how much paint is deposited per pass. At 100 percent, a single stroke completely reveals the effect beneath, which looks harsh and unnatural. At 10 percent, each pass adds only a thin layer of the effect. To build intensity somewhere, you simply paint over that area more times. To keep it subtle, you pass over it once and move on. This gives you proportional, organic control that mimics the way light actually falls across a face.
Step 6: Paint the Dodge Effect Into the Mask
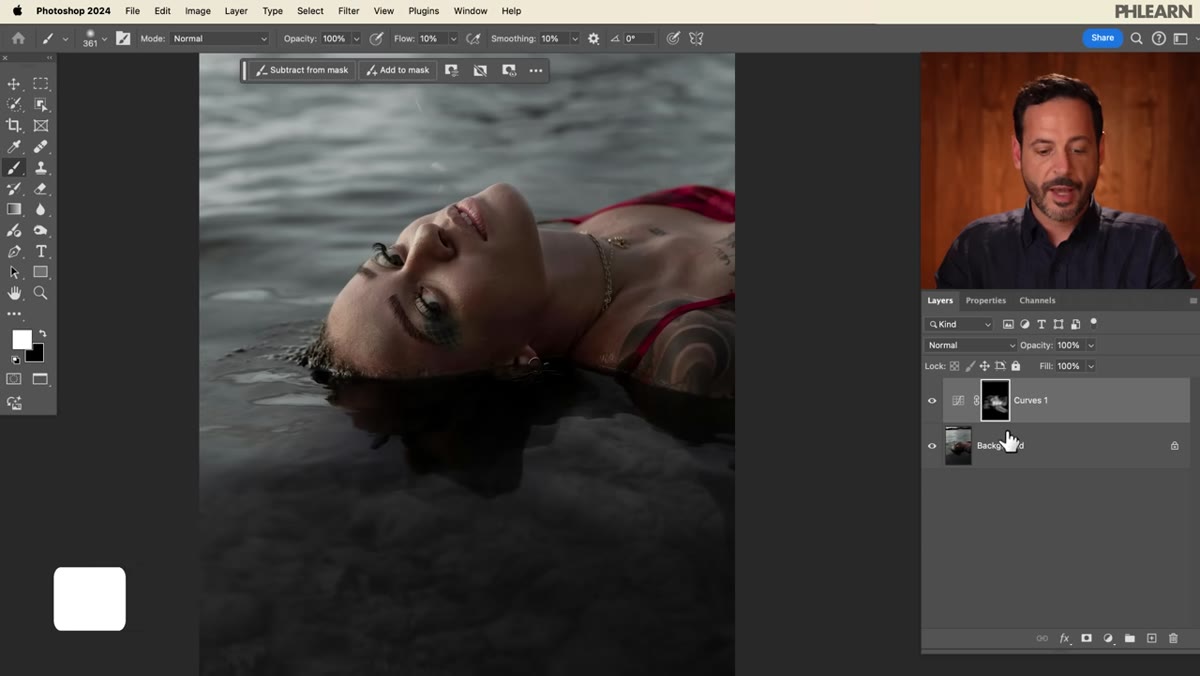
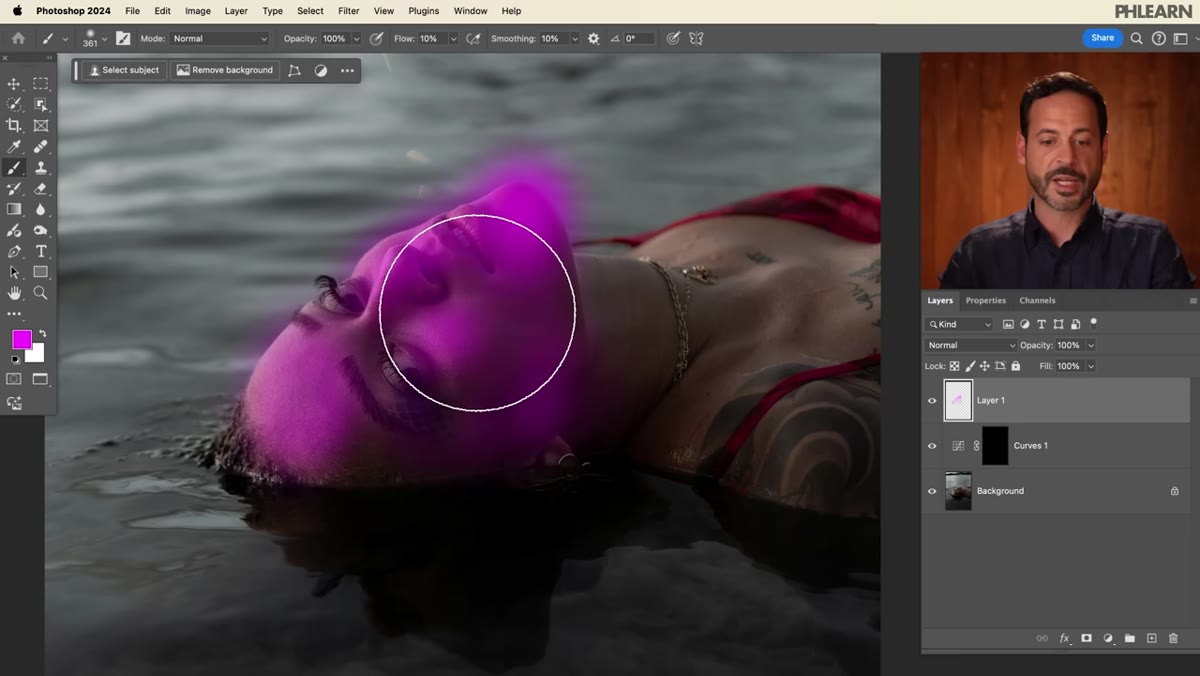 White brush strokes visible on black layer mask thumbnail
Make sure white is set as your foreground color - press D to reset to defaults, then X to swap if needed, so white is on top. Now paint over the areas you want to brighten. Forehead, the high points of the cheekbones, the bridge of the nose, the cupid’s bow. Don’t lift the brush constantly. A single long, continuous stroke lets the flow buildup accumulate naturally. Go back over areas where you want more light, and skip past areas where you want less. Toggle the layer on and off with the eye icon to compare your before and after as you work.
White brush strokes visible on black layer mask thumbnail
Make sure white is set as your foreground color - press D to reset to defaults, then X to swap if needed, so white is on top. Now paint over the areas you want to brighten. Forehead, the high points of the cheekbones, the bridge of the nose, the cupid’s bow. Don’t lift the brush constantly. A single long, continuous stroke lets the flow buildup accumulate naturally. Go back over areas where you want more light, and skip past areas where you want less. Toggle the layer on and off with the eye icon to compare your before and after as you work.
Step 7: Duplicate the Process for Burning
 Second Curves adjustment layer added, curve pulled downward
Once your dodge layer is complete, repeat the entire process with a new Curves adjustment layer. This time, drag the curve downward to create a darkening effect. Invert the mask again to black, keep the same soft brush and 10 percent flow, but now switch your foreground color to white and paint into the shadows. Under the cheekbones, along the jaw, beside the nose, around the edges of the forehead. The same logic applies: more passes mean more depth. Toggle both layers on and off to see the cumulative shaping effect.
Second Curves adjustment layer added, curve pulled downward
Once your dodge layer is complete, repeat the entire process with a new Curves adjustment layer. This time, drag the curve downward to create a darkening effect. Invert the mask again to black, keep the same soft brush and 10 percent flow, but now switch your foreground color to white and paint into the shadows. Under the cheekbones, along the jaw, beside the nose, around the edges of the forehead. The same logic applies: more passes mean more depth. Toggle both layers on and off to see the cumulative shaping effect.
A Note From My Own Retouching Practice
One thing I add to this workflow that the tutorial doesn’t cover is naming the layers clearly from the start, something like “DODGE - highlights” and “BURN - contour.” When you’re working on a high-volume project or returning to a file after a few weeks, unlabeled adjustment layers become genuinely confusing. I also keep my curve adjustments moderate rather than extreme. If you push the curve too far in either direction, the effect can shift the color temperature of the brightened or darkened areas, introducing a subtle warm or cool cast that’s harder to correct later. A gentle curve, painted in carefully with low flow, almost always produces cleaner results than an aggressive one painted sparingly.
The single most important idea here is that low flow plus a soft brush plus a fully inverted mask is the combination that makes this work. Get any one of those three wrong and the technique loses most of its power. Get all three right and you have a dodge and burn workflow that’s entirely reversible, infinitely adjustable, and indistinguishable from natural light when done well.
Watch the full tutorial on YouTube to see Aaron demonstrate the brush strokes in real time - watching the mask build up as he paints is genuinely clarifying in a way that screenshots can’t fully capture.
Comments (3)
Been doing this wrong for years apparently. Thanks for the wake-up call.
Love how you break down complex stuff into manageable steps.
Would love to see a follow-up going deeper into this topic.
Leave a Comment