Before Face-Aware Liquify existed, reshaping a face in Photoshop meant dragging the standard Liquify brush around like you were trying to ice a cake with a spatula. You’d nudge a jawline, overshoot it, pull it back, and end up with something that looked vaguely melted. I burned through a lot of hours that way early in my retouching career, and more than one client politely described my results as “a little off.” That feedback stings, but it also teaches you to pay attention when a better tool comes along.
When Photoshop CC 2015.5 introduced Face-Aware Liquify, it genuinely changed how quickly and precisely I could handle facial adjustments for beauty clients. Instead of manual brushwork, the tool uses facial recognition to map eyes, nose, mouth, and face shape, then hands you a set of sliders for each region. The results are far more controlled and, critically, far more natural-looking. In this KelbyOne tutorial, Scott Kelby walks through every major control in the panel, and it’s one of those videos I still recommend to photographers who are making the jump into dedicated retouching work. Watch the full tutorial on YouTube alongside this walkthrough for the clearest picture.
Step 1: Open Liquify from the Filter Menu
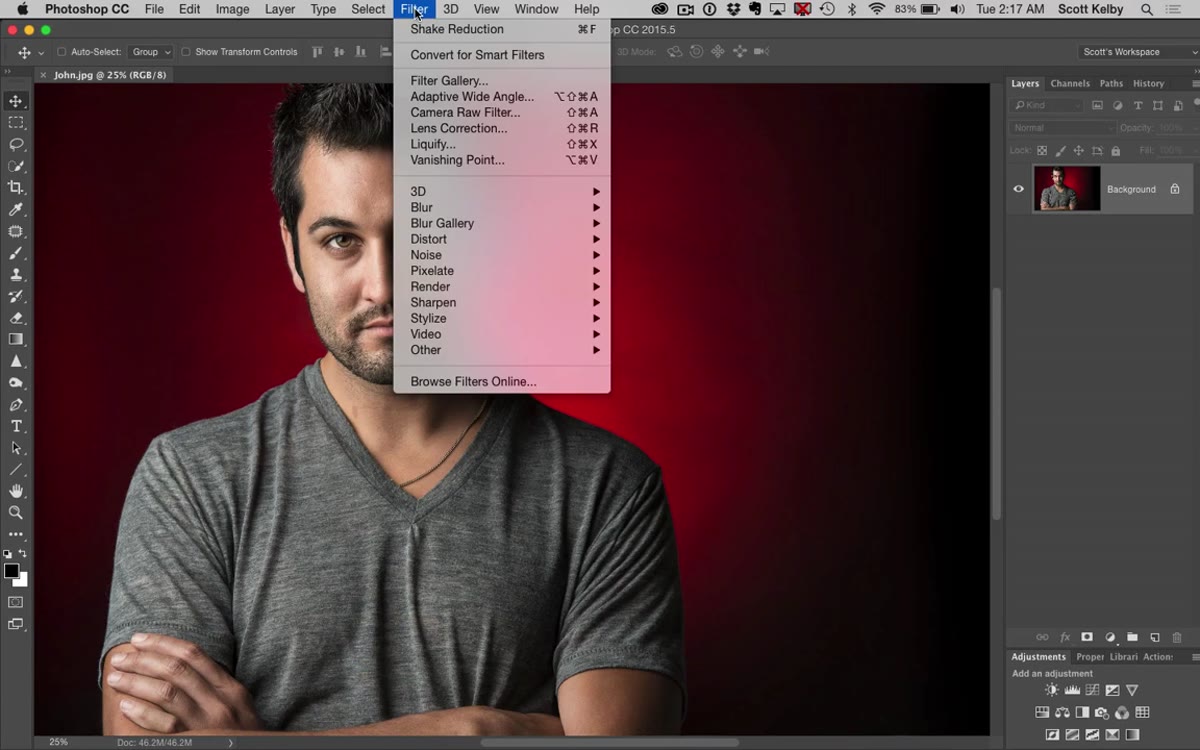 Filter menu open with Liquify option highlighted
With your portrait open and your working layer selected, go to Filter and choose Liquify. If you’ve used Liquify before, the workspace will look familiar at first glance. But don’t reach for the brush tools yet. On the right side of the panel, scroll down past the standard brush options and you’ll find the Face-Aware Liquify section sitting below the Properties panel. This is where the real work happens.
Filter menu open with Liquify option highlighted
With your portrait open and your working layer selected, go to Filter and choose Liquify. If you’ve used Liquify before, the workspace will look familiar at first glance. But don’t reach for the brush tools yet. On the right side of the panel, scroll down past the standard brush options and you’ll find the Face-Aware Liquify section sitting below the Properties panel. This is where the real work happens.
Step 2: Let the Facial Recognition Do Its Job
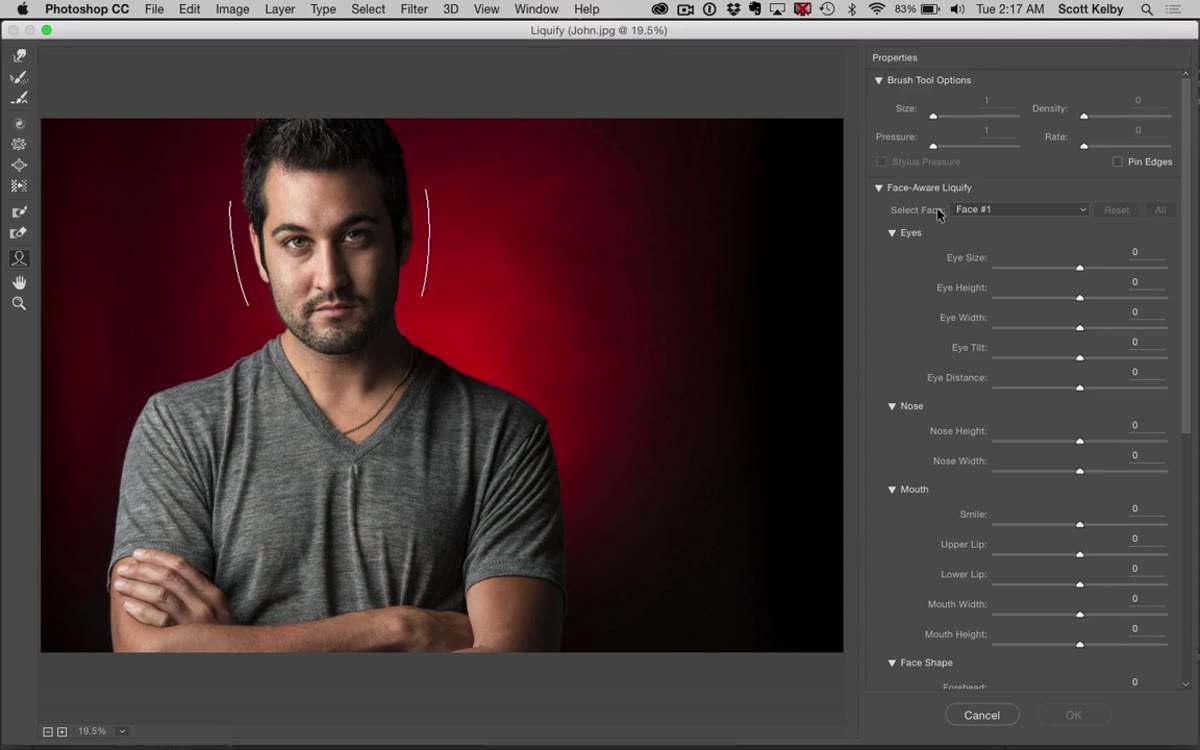 Face-Aware Liquify panel open with facial tracking lines visible on portrait
When the Liquify window opens with a portrait, Photoshop automatically scans the image and maps the face. You’ll see a set of overlay lines on the subject’s face showing you exactly what the tool has detected: the eye regions, the nose, the mouth, and the overall face outline. For a single-subject portrait, this happens without any input from you. If you’re working with a group shot, a “Select Face” dropdown appears at the top of the panel, letting you switch between individuals and adjust each one separately. Take a moment to confirm the detection looks accurate before you start moving anything.
Face-Aware Liquify panel open with facial tracking lines visible on portrait
When the Liquify window opens with a portrait, Photoshop automatically scans the image and maps the face. You’ll see a set of overlay lines on the subject’s face showing you exactly what the tool has detected: the eye regions, the nose, the mouth, and the overall face outline. For a single-subject portrait, this happens without any input from you. If you’re working with a group shot, a “Select Face” dropdown appears at the top of the panel, letting you switch between individuals and adjust each one separately. Take a moment to confirm the detection looks accurate before you start moving anything.
Step 3: Adjust the Mouth and Smile
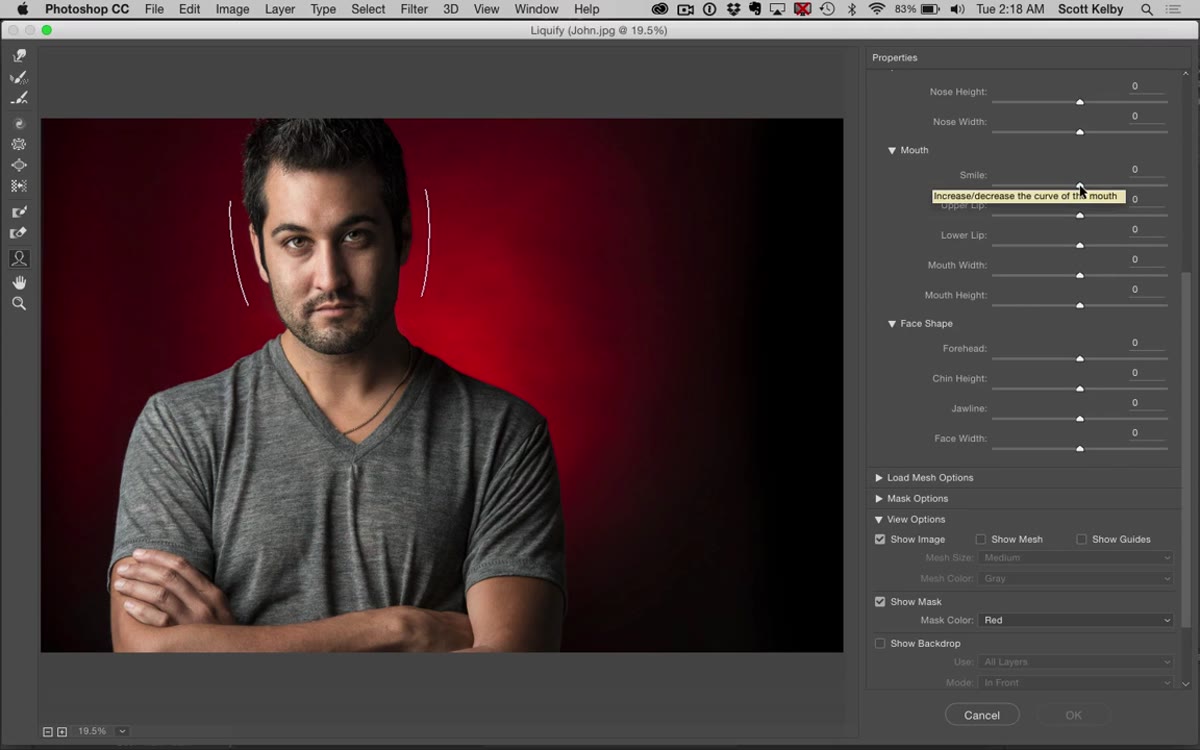 Smile slider being dragged with subtle upward curve visible on subject’s mouth
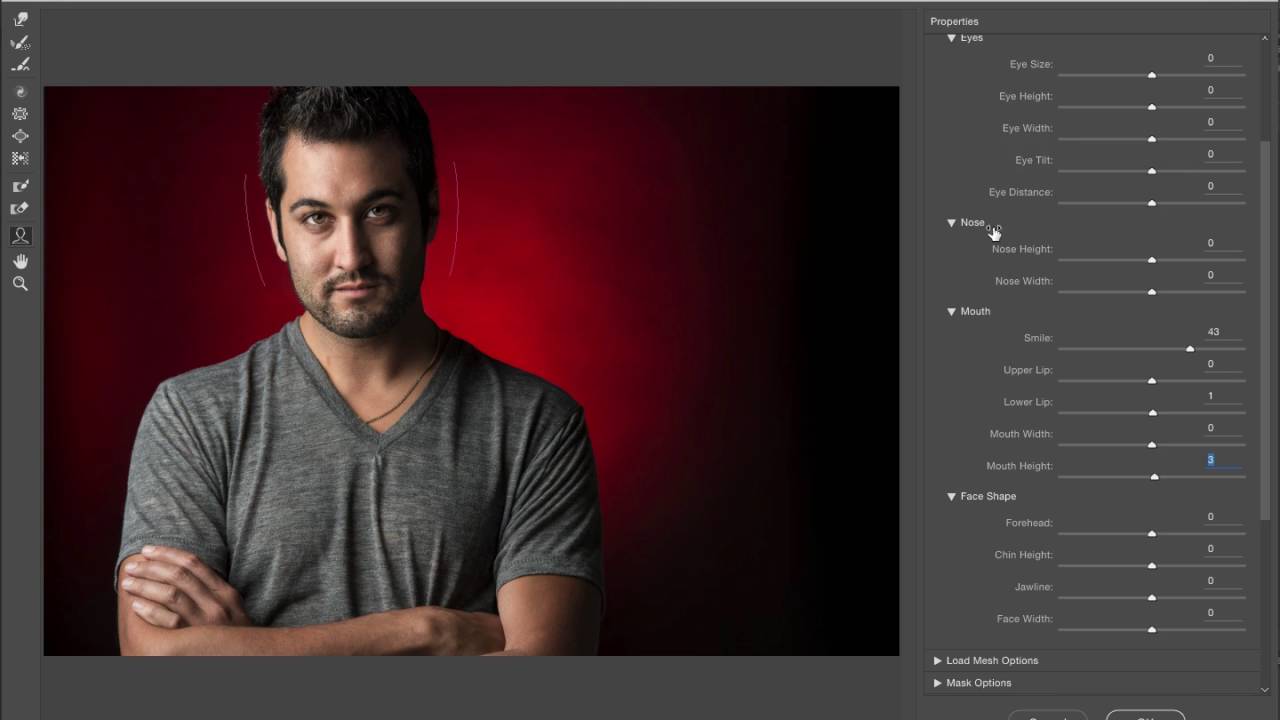
The Mouth section contains several sliders: Smile, Upper Lip, Lower Lip, Mouth Width, and Mouth Height. The Smile slider is the one you’ll reach for most often. A small positive value, somewhere in the range of 10 to 25, creates a natural, relaxed expression without veering into the uncanny territory of a forced grin. Push it too far and it reads as artificial immediately. The Upper Lip and Lower Lip sliders let you refine the shape independently, which is useful when a subject’s resting expression involves tension in one area more than the other. Mouth Width and Height are more situational but come in handy when proportion adjustments are needed for composites or specific beauty looks.
Smile slider being dragged with subtle upward curve visible on subject’s mouth
The Mouth section contains several sliders: Smile, Upper Lip, Lower Lip, Mouth Width, and Mouth Height. The Smile slider is the one you’ll reach for most often. A small positive value, somewhere in the range of 10 to 25, creates a natural, relaxed expression without veering into the uncanny territory of a forced grin. Push it too far and it reads as artificial immediately. The Upper Lip and Lower Lip sliders let you refine the shape independently, which is useful when a subject’s resting expression involves tension in one area more than the other. Mouth Width and Height are more situational but come in handy when proportion adjustments are needed for composites or specific beauty looks.
Step 4: Reshape the Nose
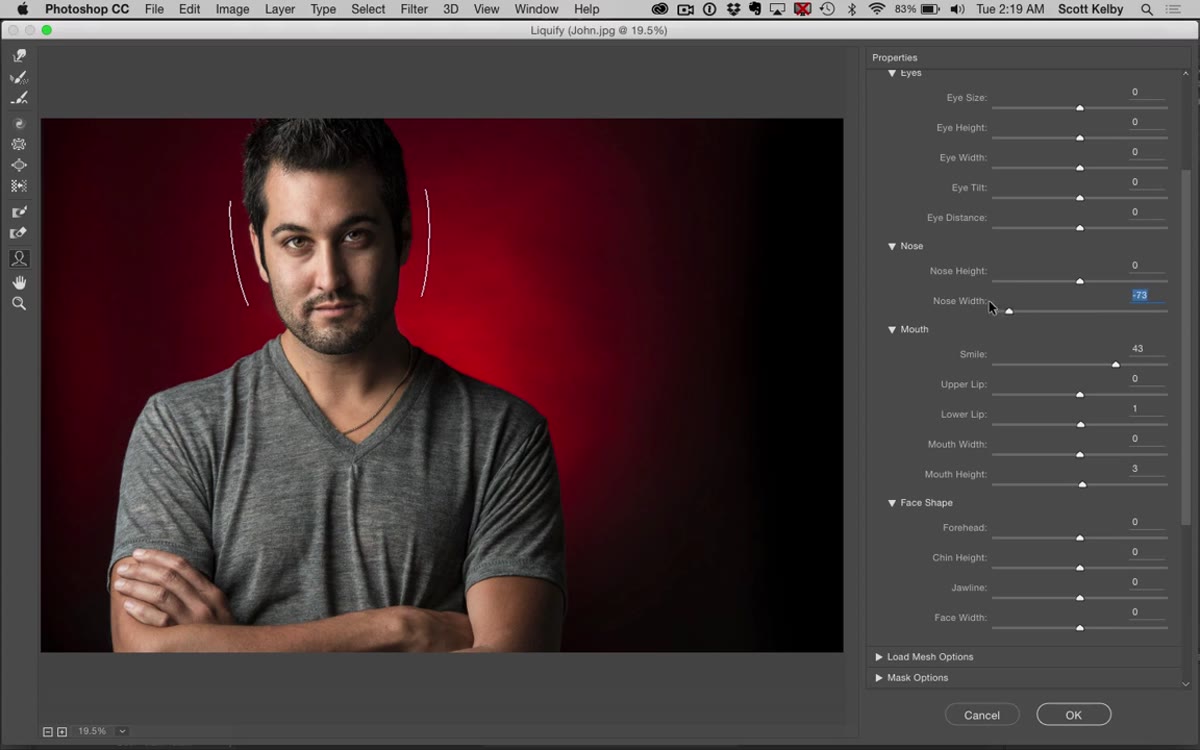 Nose Width slider being adjusted with side-by-side nose change visible
Under the Nose section you get two controls: Nose Width and Nose Height. Nose Width is the one I use most carefully, because it’s one of the first places clients notice if something looks “done.” Small movements matter here. A value of negative 5 to negative 15 on the width can slim the appearance of the nose without distorting surrounding features. Nose Height adjusts the vertical proportions. Both sliders are worth testing in both directions before committing, because the right adjustment depends entirely on the individual face and the angle of the shot.
Nose Width slider being adjusted with side-by-side nose change visible
Under the Nose section you get two controls: Nose Width and Nose Height. Nose Width is the one I use most carefully, because it’s one of the first places clients notice if something looks “done.” Small movements matter here. A value of negative 5 to negative 15 on the width can slim the appearance of the nose without distorting surrounding features. Nose Height adjusts the vertical proportions. Both sliders are worth testing in both directions before committing, because the right adjustment depends entirely on the individual face and the angle of the shot.
Step 5: Fine-Tune the Eyes
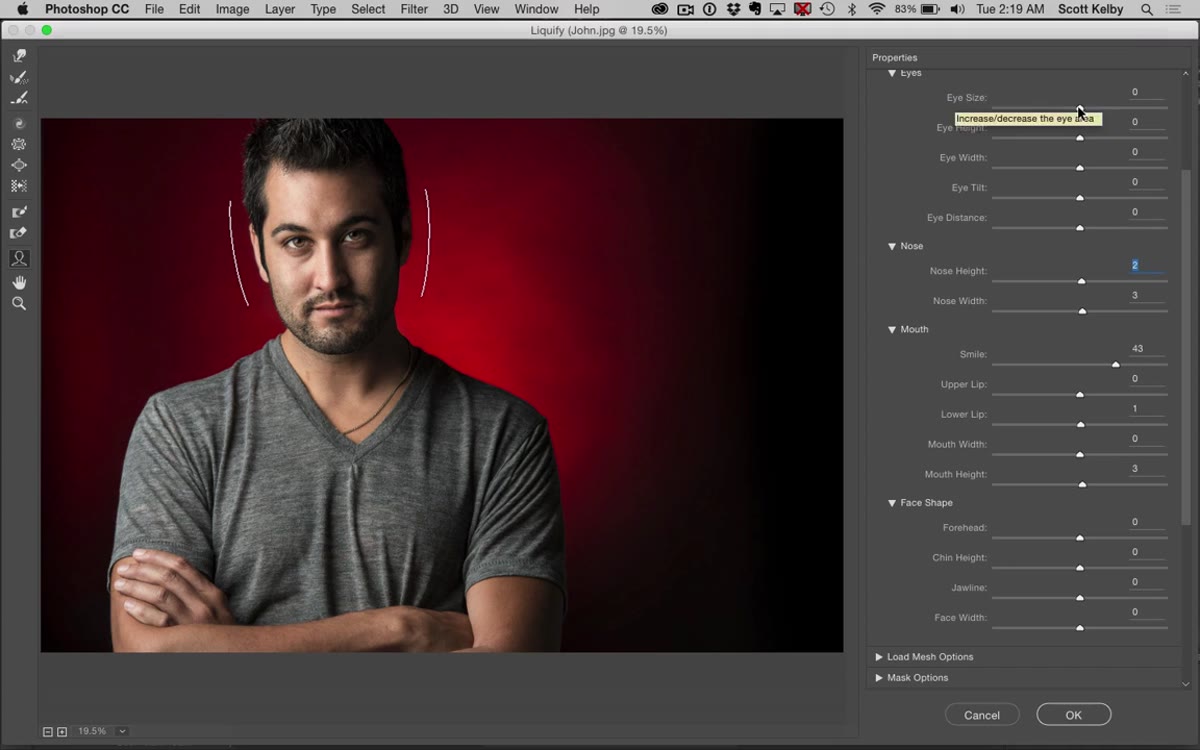 Eye Size and Eye Distance sliders with eye region highlighted on subject’s face
The Eyes section is probably the most feature-rich in the panel. You have independent controls for each eye: Eye Size, Eye Height, Eye Width, Eye Tilt, and Eye Distance, which shifts both eyes closer together or further apart simultaneously. In beauty retouching, Eye Size gets used gently to balance asymmetry between eyes rather than to make them dramatically larger. Eye Tilt can correct a slight droop on one side. The ability to adjust each eye independently is what makes this so much faster than manual Liquify work, where matching two sides by hand was a constant exercise in patience.
Eye Size and Eye Distance sliders with eye region highlighted on subject’s face
The Eyes section is probably the most feature-rich in the panel. You have independent controls for each eye: Eye Size, Eye Height, Eye Width, Eye Tilt, and Eye Distance, which shifts both eyes closer together or further apart simultaneously. In beauty retouching, Eye Size gets used gently to balance asymmetry between eyes rather than to make them dramatically larger. Eye Tilt can correct a slight droop on one side. The ability to adjust each eye independently is what makes this so much faster than manual Liquify work, where matching two sides by hand was a constant exercise in patience.
Step 6: Refine the Face Shape
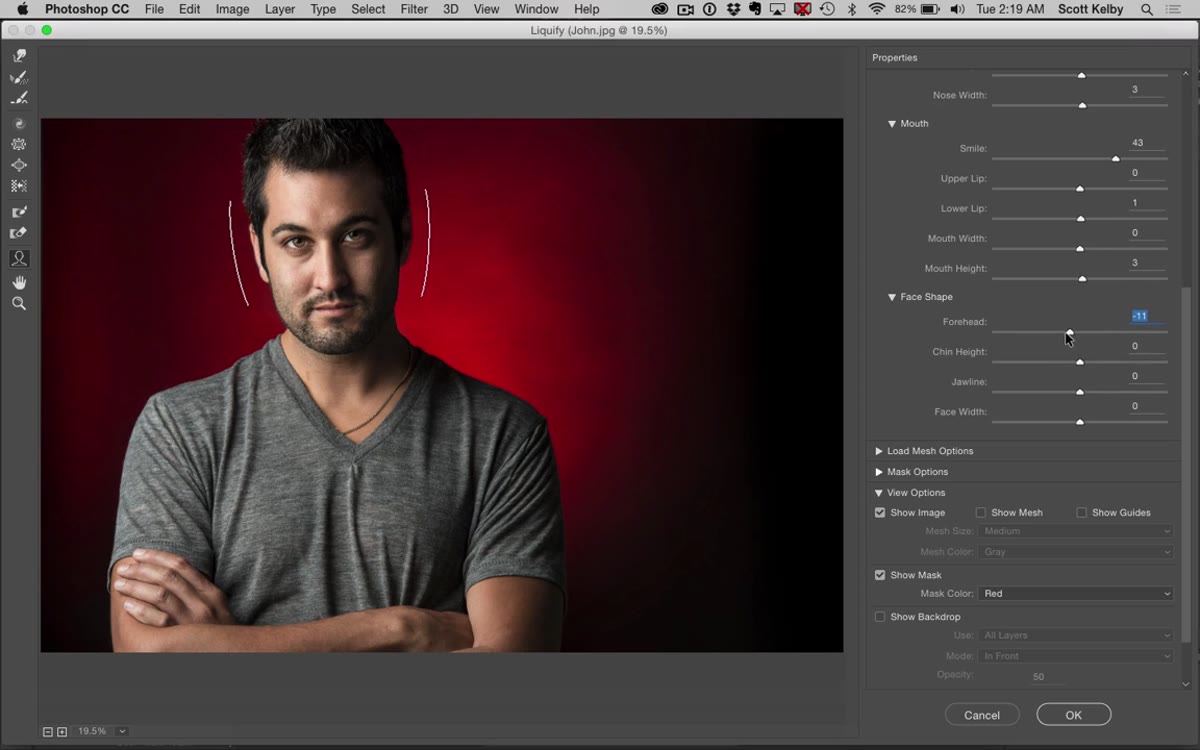 Face Shape sliders showing forehead, chin, jawline, and face width controls
The Face Shape section covers four areas: Forehead, Chin Height, Jawline, and Face Width. These are the controls that overlap most with what retouchers used to do entirely with the warp brush. Jawline is particularly useful for softening a strong angle without losing definition entirely. Face Width can bring in the sides of the face subtly, though it’s worth using a light hand here because it affects a wide area and can interact with hair and background if overdone. Chin Height lets you lengthen or shorten the lower face, which affects how a face reads in terms of proportion.
Face Shape sliders showing forehead, chin, jawline, and face width controls
The Face Shape section covers four areas: Forehead, Chin Height, Jawline, and Face Width. These are the controls that overlap most with what retouchers used to do entirely with the warp brush. Jawline is particularly useful for softening a strong angle without losing definition entirely. Face Width can bring in the sides of the face subtly, though it’s worth using a light hand here because it affects a wide area and can interact with hair and background if overdone. Chin Height lets you lengthen or shorten the lower face, which affects how a face reads in terms of proportion.
Step 7: Click OK and Evaluate
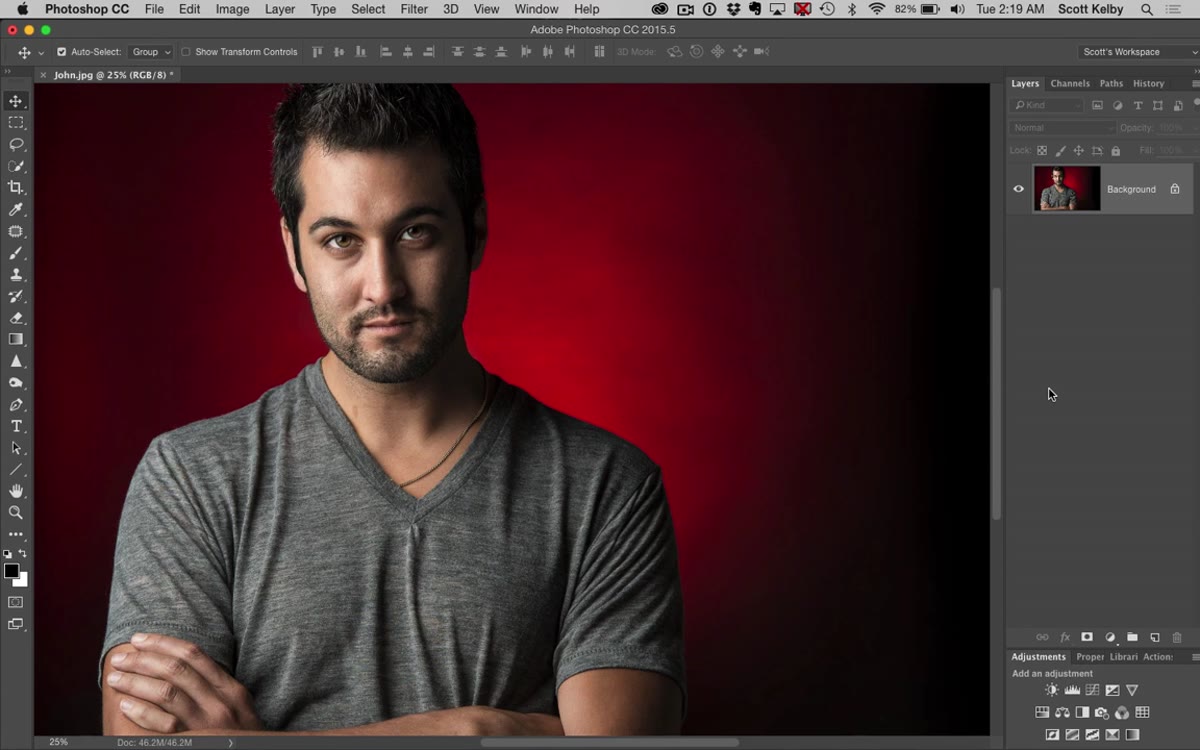 Before and after view of portrait with subtle facial adjustments applied
Once you’ve worked through the sliders, click OK to apply. The changes land on your selected layer as a standard Liquify adjustment. Toggle visibility to compare before and after, and pay particular attention to transitions at the hairline and jaw where distortion is most likely to appear if any slider was pushed too far. At this stage the classic Liquify brush tools are still available within the same session if you need to address anything the sliders couldn’t reach, like a flyaway or an edge that needs a small manual nudge.
Before and after view of portrait with subtle facial adjustments applied
Once you’ve worked through the sliders, click OK to apply. The changes land on your selected layer as a standard Liquify adjustment. Toggle visibility to compare before and after, and pay particular attention to transitions at the hairline and jaw where distortion is most likely to appear if any slider was pushed too far. At this stage the classic Liquify brush tools are still available within the same session if you need to address anything the sliders couldn’t reach, like a flyaway or an edge that needs a small manual nudge.
One Thing I’d Add from My Own Practice
Face-Aware Liquify works best when you treat it as a second pass, not a first one. My workflow runs frequency separation and skin work before I ever open Liquify, because once you’ve adjusted proportions it becomes harder to judge texture corrections accurately. I also always duplicate my flattened composite layer before running Liquify so I can mask the adjustment selectively afterward. On commercial beauty work especially, clients sometimes want a revision that pulls back one specific change, and having that original layer underneath makes the conversation much easier.
The technology behind Face-Aware Liquify actually started in Photoshop Fix, Adobe’s mobile retouching app, before it was brought into the desktop version. That context matters because it was designed from the start to be fast and accessible, not buried in technical complexity. For photographers crossing over into beauty retouching, that accessibility is a genuine advantage during the learning curve.
The single most important thing this tool offers is precision without the guesswork. Sliders with numerical values mean you can reproduce a specific look across a series of images, which matters enormously for beauty campaigns where consistency is part of the brief. If you work with faces regularly and you haven’t explored this panel fully, set aside thirty minutes with a test portrait and work through every slider once. You’ll come away with a much clearer sense of what’s possible. Watch the full tutorial on YouTube to see Scott demonstrate each control in real time.
Comments
Leave a Comment