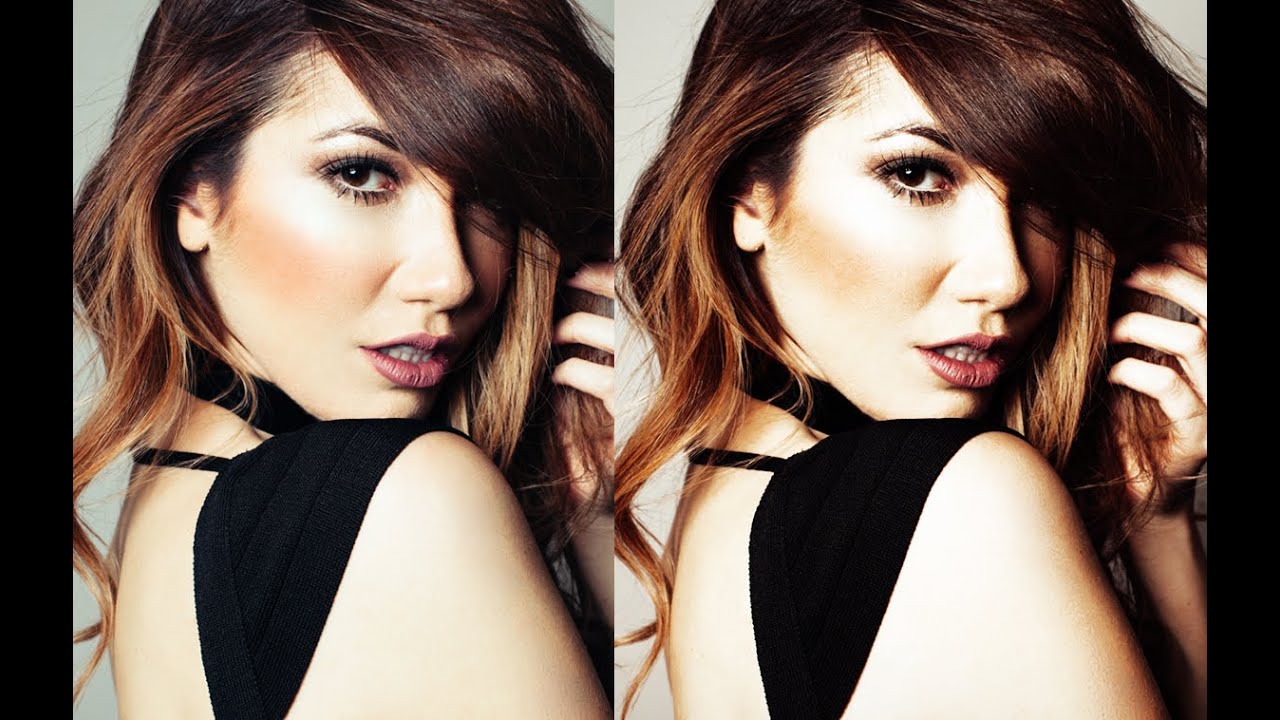
There’s a specific kind of client portrait that used to trip me up constantly: the studio shot where the hair falls flat, the lighting creates shadows that feel muddy instead of dramatic, and the overall image just needs a lift without looking like it’s been through a filter factory. For years, I’d either over-edit my way out of the problem or leave too much on the table. What I needed was a cleaner workflow that addressed these issues in the right order, with the right tools. In this Jessica Kobeissi tutorial, she walks through exactly that kind of edit on a studio portrait shot with a 50mm f/1.2 and a beauty dish angled to one side of the subject’s face. Watch the full tutorial on YouTube
What I appreciate about Jessica’s approach is that she’s not hiding behind presets or dramatic before-and-afters. She’s working through real decisions: how much volume is too much, when to protect areas you don’t want distorted, how to paint light onto skin without it reading as fake. I’ve been retouching beauty work long enough to know that the difference between “polished” and “plastic” often comes down to a few small judgment calls. This walkthrough surfaces a lot of those calls clearly.
The edit covers two main techniques: using Liquify to add hair volume, and using a soft-light painting method to sculpt the lighting on the face. Both are approachable even if you’re newer to portrait retouching, and both reward a careful hand more than a heavy one.
Step 1: Duplicate the Background Layer
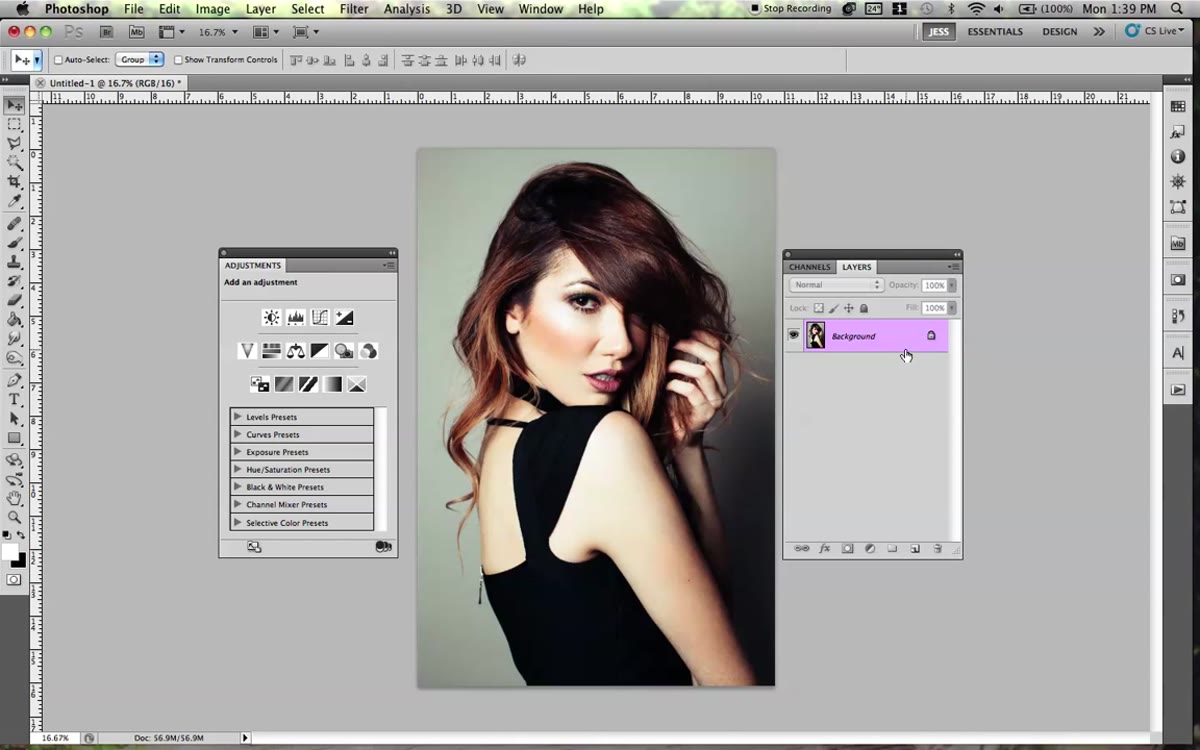 Pressing Command J to duplicate background layer in Photoshop
Before touching anything, duplicate your background layer by pressing Command+J (Ctrl+J on Windows). This is non-negotiable habit. Every destructive edit you make in this workflow, including Liquify, happens on this duplicate. Your original stays untouched underneath. If something goes wrong or a client asks for a revision three weeks later, you’ll thank yourself for this one-second step.
Pressing Command J to duplicate background layer in Photoshop
Before touching anything, duplicate your background layer by pressing Command+J (Ctrl+J on Windows). This is non-negotiable habit. Every destructive edit you make in this workflow, including Liquify, happens on this duplicate. Your original stays untouched underneath. If something goes wrong or a client asks for a revision three weeks later, you’ll thank yourself for this one-second step.
Step 2: Protect the Face with Liquify’s Freeze Mask Tool
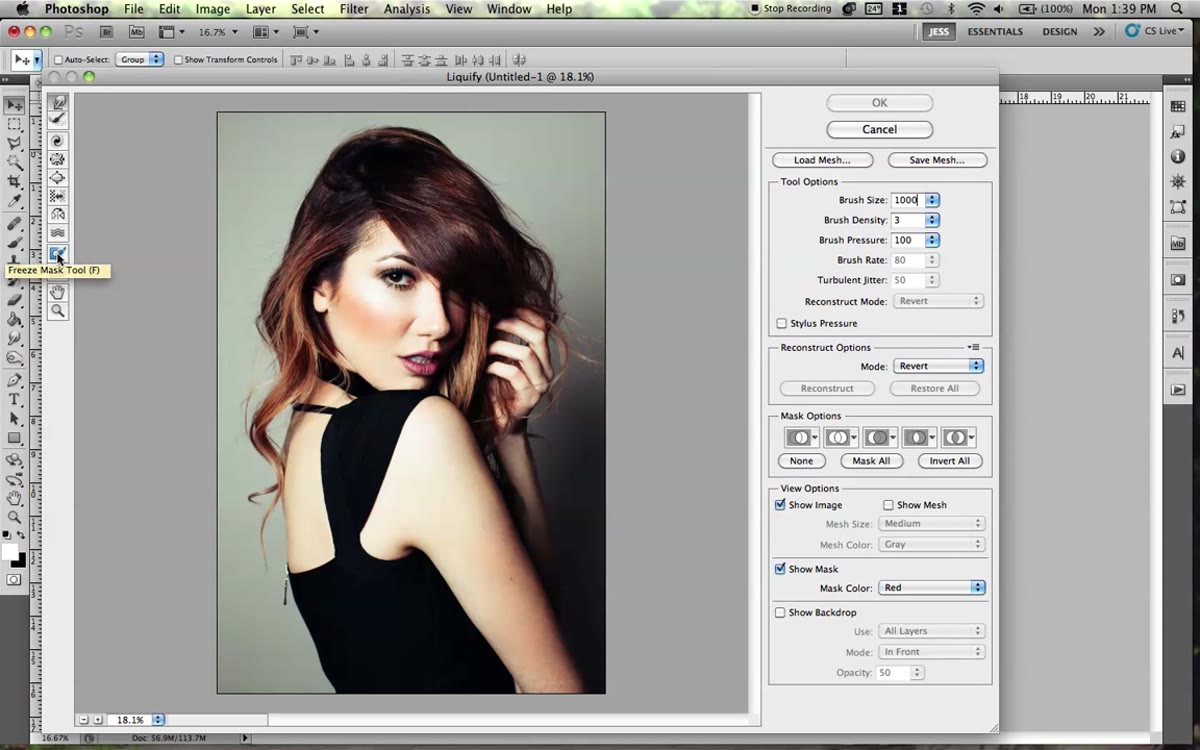 Using freeze mask tool to paint over the face in Liquify
Open Liquify by going to Filter, then Liquify. Once you’re inside the dialog, your first move isn’t to start warping anything. It’s to protect what you don’t want to accidentally distort. Select the Freeze Mask tool (it paints a red overlay) and paint over the face, neck, and any areas with clean edges like the arms or hands. The freeze mask acts as a lock. Even if your warp brush drifts over those regions, the pixels won’t move.
Using freeze mask tool to paint over the face in Liquify
Open Liquify by going to Filter, then Liquify. Once you’re inside the dialog, your first move isn’t to start warping anything. It’s to protect what you don’t want to accidentally distort. Select the Freeze Mask tool (it paints a red overlay) and paint over the face, neck, and any areas with clean edges like the arms or hands. The freeze mask acts as a lock. Even if your warp brush drifts over those regions, the pixels won’t move.
This step matters more than people realize. When you’re pushing hair outward to add volume, the warp brush can easily catch the edge of a shoulder or drag the hairline in a way that looks unnatural. Painting the freeze mask takes maybe 30 seconds and saves you from a lot of careful undoing later.
Step 3: Use the Forward Warp Tool to Add Hair Volume
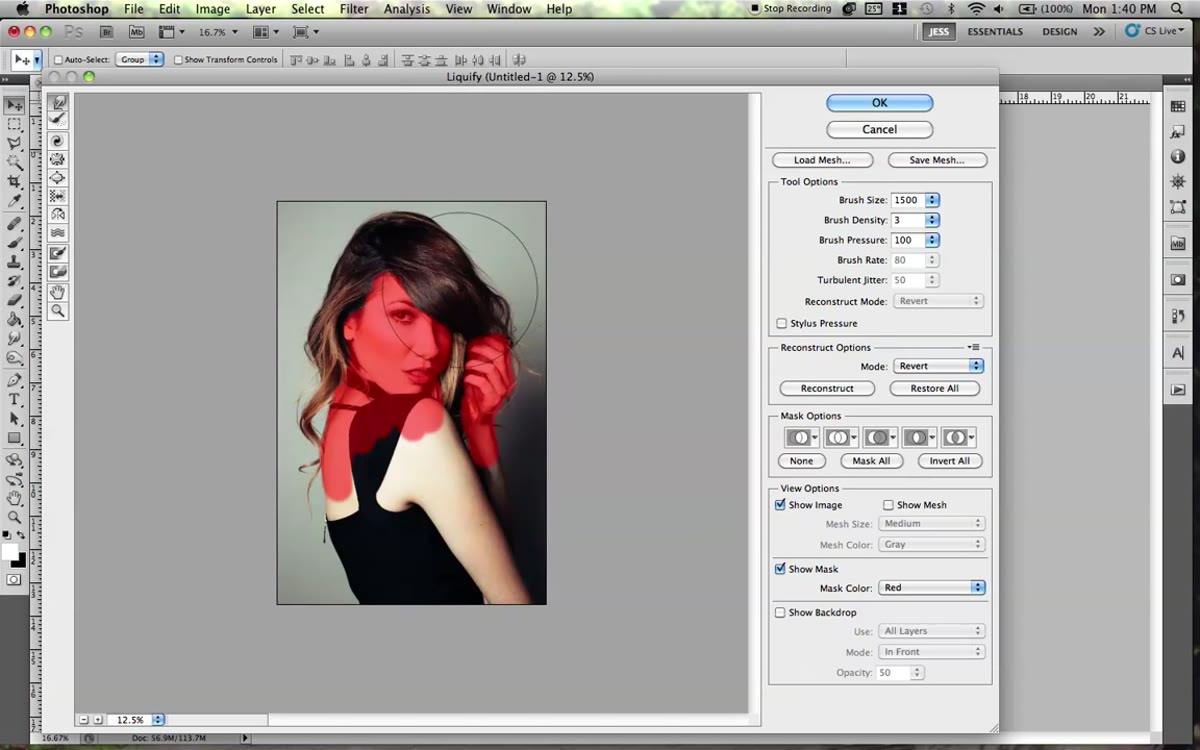 Forward warp tool pushing hair outward to add volume
With the face protected, switch to the Forward Warp tool. Jessica settles on a brush size of around 1000 for this image, which gives enough coverage to move hair in broad, gentle strokes rather than in tight, obvious clumps. The key word here is subtle. You’re not sculpting a new silhouette. You’re nudging the existing hair slightly outward, especially at the crown and sides, to give it the fullness that studio lighting and fine hair can work against.
Forward warp tool pushing hair outward to add volume
With the face protected, switch to the Forward Warp tool. Jessica settles on a brush size of around 1000 for this image, which gives enough coverage to move hair in broad, gentle strokes rather than in tight, obvious clumps. The key word here is subtle. You’re not sculpting a new silhouette. You’re nudging the existing hair slightly outward, especially at the crown and sides, to give it the fullness that studio lighting and fine hair can work against.
Use short, upward or outward strokes rather than long drags. Long drags create that telltale smeared look that screams “liquified.” Short strokes that you repeat gradually give a much more natural result. Check your work by toggling the preview on and off. If you can immediately tell the hair has been edited, pull back.
Step 4: Create a New Raster Layer for Face Highlighting
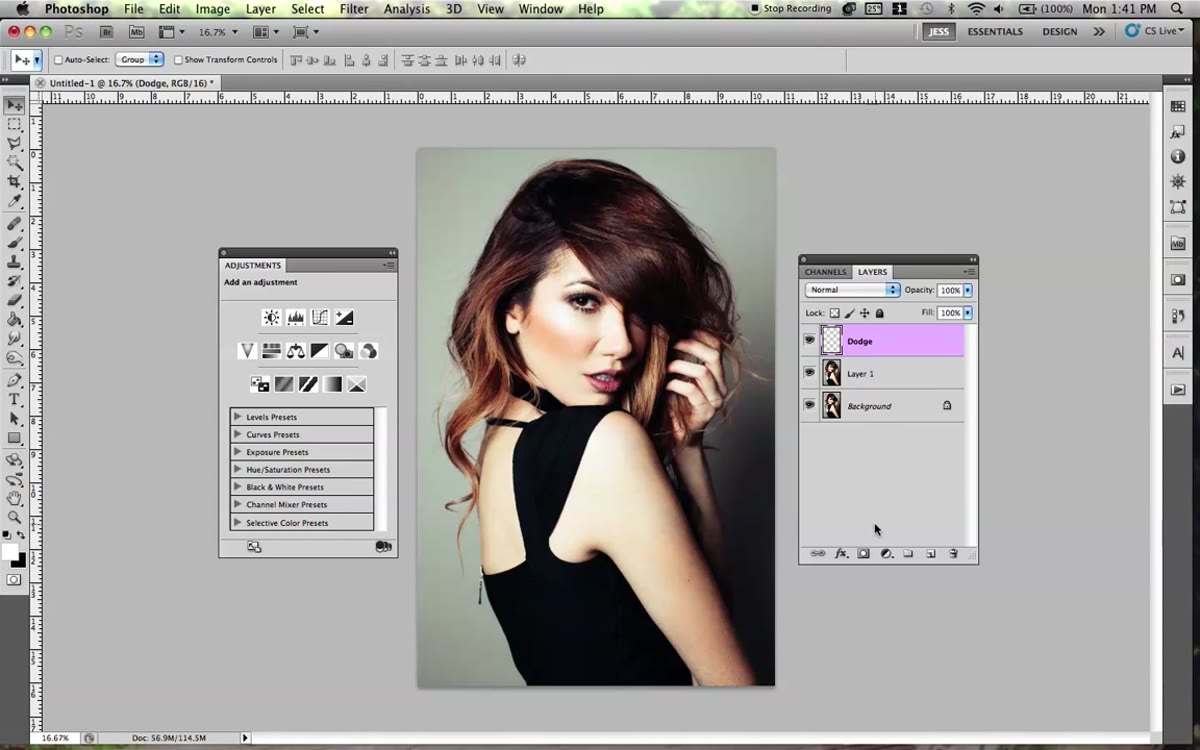 Creating a new raster layer above the liquify layer
Once you’re happy with the hair, click OK to apply the Liquify changes, then create a new blank raster layer above everything. You can do this with Command+Shift+N or by clicking the new layer icon at the bottom of the Layers panel. This layer is where you’ll paint the face highlights and shadow emphasis, and keeping it separate means you can adjust its opacity or blend mode independently at any point.
Creating a new raster layer above the liquify layer
Once you’re happy with the hair, click OK to apply the Liquify changes, then create a new blank raster layer above everything. You can do this with Command+Shift+N or by clicking the new layer icon at the bottom of the Layers panel. This layer is where you’ll paint the face highlights and shadow emphasis, and keeping it separate means you can adjust its opacity or blend mode independently at any point.
Make sure your foreground and background colors are set to their defaults: white foreground, black background. If they’ve drifted, just press the letter D to reset them instantly.
Step 5: Set the Layer to Soft Light and Paint the Shadows
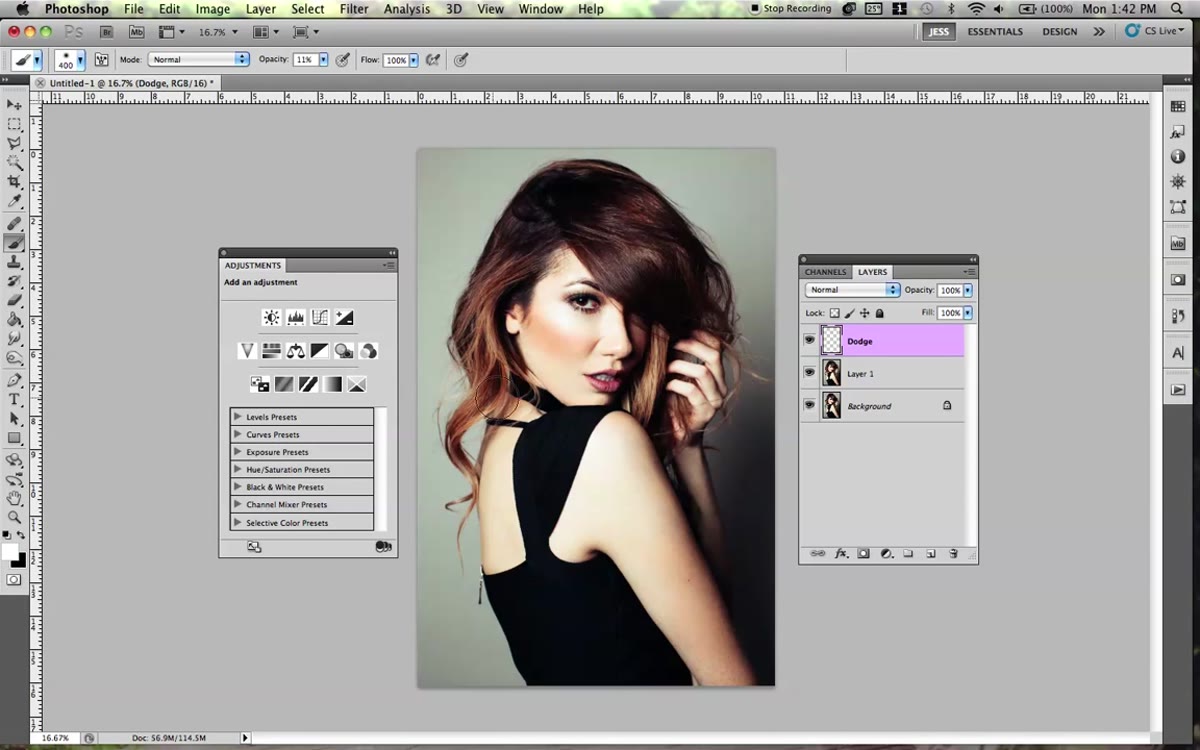 Changing new layer blend mode to Soft Light in Layers panel
Change the blend mode of this new layer from Normal to Soft Light. This is the move that makes the whole technique work. In Soft Light mode, painting with black deepens and enriches shadows without making them look painted on. Painting with white lifts and brightens highlights with a natural luminosity. Neither color adds flat, opaque paint the way Normal mode would.
Changing new layer blend mode to Soft Light in Layers panel
Change the blend mode of this new layer from Normal to Soft Light. This is the move that makes the whole technique work. In Soft Light mode, painting with black deepens and enriches shadows without making them look painted on. Painting with white lifts and brightens highlights with a natural luminosity. Neither color adds flat, opaque paint the way Normal mode would.
Set your brush to 0% hardness and bring the opacity down low. Jessica keeps hers quite low, and that restraint is intentional. You’re going to build this effect in multiple light passes rather than one heavy one. Select black as your foreground color and trace over the shadow areas on the face that the angled beauty dish created. You’re not creating new shadows. You’re following the ones that already exist and giving them a little more presence. The goal is to make the lighting feel more deliberate, not more dramatic.
A Note from My Own Retouching Practice
The soft-light painting technique Jessica demonstrates is one I come back to constantly in beauty work, but I want to add one thing she doesn’t cover here: it’s worth keeping your shadow and highlight painting on separate layers. So one layer set to Soft Light for your shadow work with black, and a second layer set to Soft Light for your highlights with white.
When I first learned this method, I painted everything onto one layer and then realized I’d gone too heavy on the shadows but the highlights were perfect. Because they were combined, I couldn’t adjust one without affecting the other. Splitting them takes an extra five seconds and gives you independent control over each dimension of the lighting. For client work especially, where you might be asked to “soften the shadows just a little,” that separation is a lifesaver.
The biggest thing I take away from Jessica’s approach is the underlying philosophy: work with what the light is already doing, don’t fight it. The beauty dish created directional shadows. The edit leans into those shadows rather than trying to correct them away. That kind of edit ages well. It looks intentional five years from now in a way that heavy skin smoothing or aggressive dodging never does.
If you’re working on studio portraits and want to see the full technique in action, including how Jessica handles the color grading that follows these steps, watch the full tutorial on YouTube. It’s one of the more honest and practical portrait walkthroughs I’ve come across.
Comments (1)
I keep coming back to this article. It's that useful.
Leave a Comment