There’s a particular kind of creative paralysis that hits when a client asks for something outside your usual workflow. I’ve been retouching beauty portraits long enough that smooth skin, even tone, and light sculpting feel automatic. But “make him look like a creature” is a different assignment entirely. That’s why I keep a folder of tutorials that push me outside the clean, polished world of beauty work, and this Halloween-themed episode from KelbyOne landed in that folder immediately. Watch the full tutorial on YouTube before diving in, or follow along here and go back to the video for reference.
What I love about this particular tutorial is that the core skill it teaches, warping a texture layer to conform to the contours of a face, is genuinely useful beyond Halloween season. Anytime you’re blending a surface texture onto skin, whether for editorial beauty work, fantasy compositing, or aging effects, the same logic applies. The workflow is straightforward, but the decisions inside each step are where the craft lives. Instructor Cory Barker walks through the whole thing with a relaxed clarity that makes it easy to follow, and I’ve added a few details below from my own time working through the technique.
Step 1: Source Your Texture (A Phone Photo Works Fine)
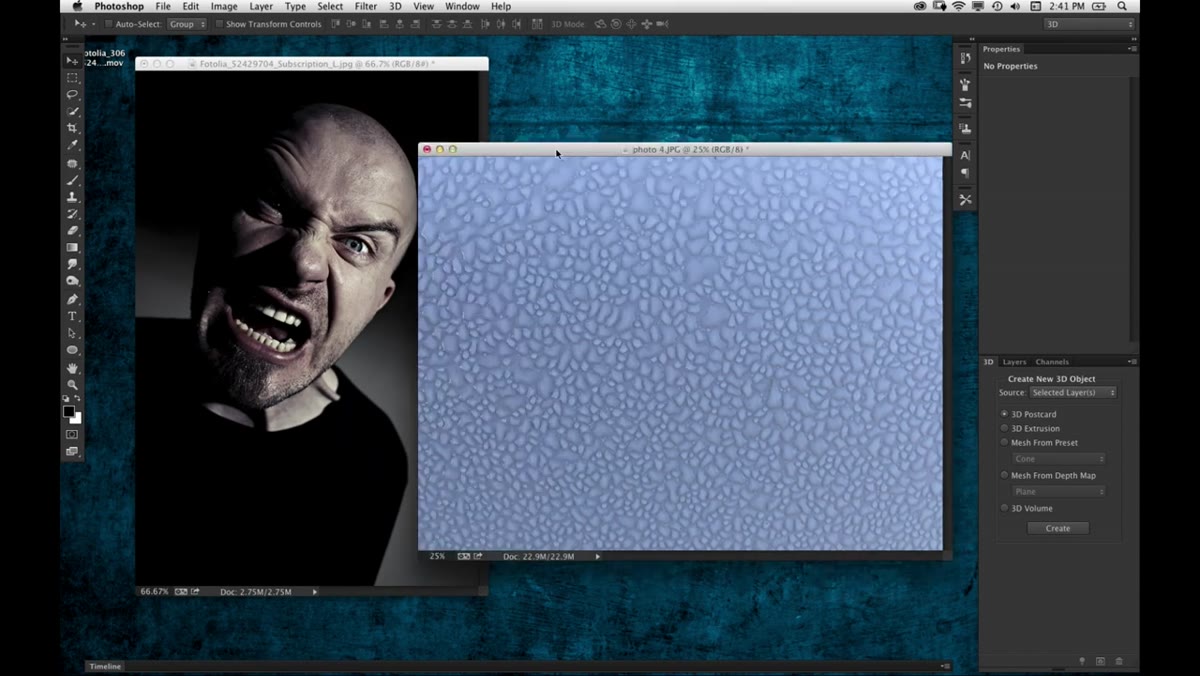 Close-up phone photo of water droplets on a car door
The texture used in this tutorial isn’t a premium stock image or a specialty brush set. It’s a photo of dew drops on the side of a car, taken on a phone. That detail matters, because it reframes how you look at the world around you. I’ve started doing the same thing when something catches my eye: rust on a gate, cracked concrete, peeling paint on a window frame. The rule is simple. If the texture is interesting, photograph it. You won’t always know what you’re going to use it for, and that’s fine.
Close-up phone photo of water droplets on a car door
The texture used in this tutorial isn’t a premium stock image or a specialty brush set. It’s a photo of dew drops on the side of a car, taken on a phone. That detail matters, because it reframes how you look at the world around you. I’ve started doing the same thing when something catches my eye: rust on a gate, cracked concrete, peeling paint on a window frame. The rule is simple. If the texture is interesting, photograph it. You won’t always know what you’re going to use it for, and that’s fine.
The key to a usable texture photo is getting close enough that the pattern fills the frame, and shooting in decent light so you have real tonal range to work with. You don’t need a macro lens. A steady hand and your phone’s native camera app are enough to get started.
Step 2: Desaturate and Add Contrast With Levels
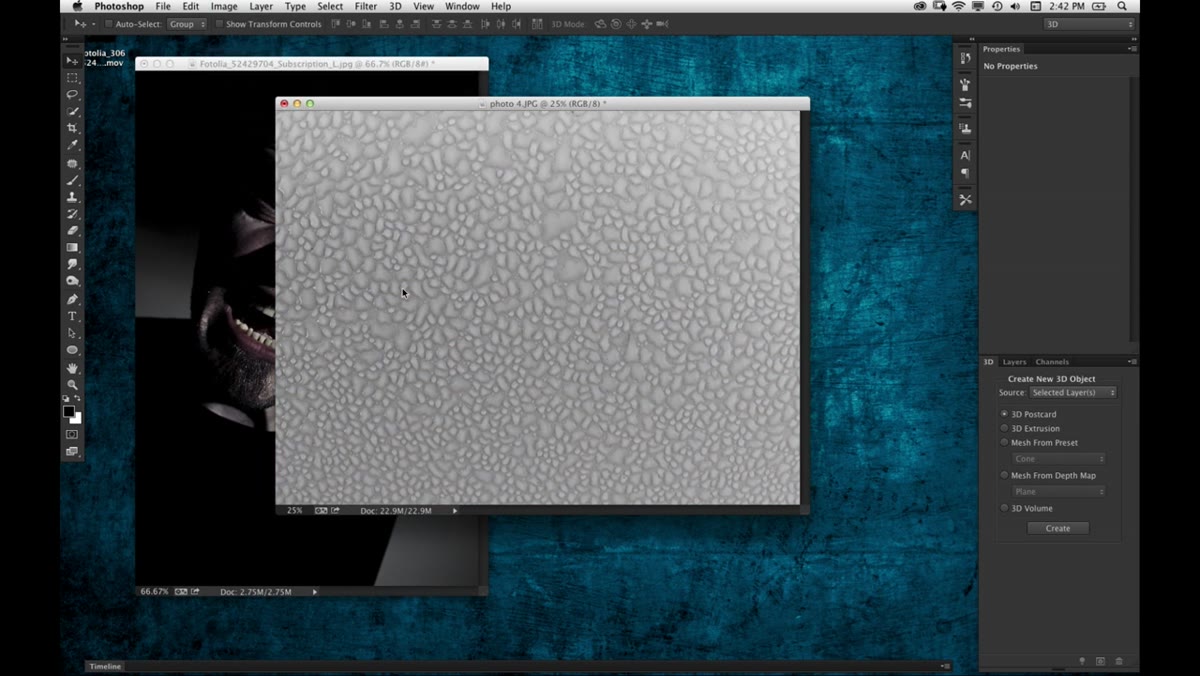 Desaturated texture image with Levels dialog open
Once the texture is open in Photoshop, the color needs to go. This particular photo had a blue-grey cast from daylight reflecting off a white car, and that color would fight with whatever skin tone you’re working over. Go to Image, Adjustments, Desaturate. One click removes the color entirely and leaves you with a clean greyscale surface to work with.
Desaturated texture image with Levels dialog open
Once the texture is open in Photoshop, the color needs to go. This particular photo had a blue-grey cast from daylight reflecting off a white car, and that color would fight with whatever skin tone you’re working over. Go to Image, Adjustments, Desaturate. One click removes the color entirely and leaves you with a clean greyscale surface to work with.
From there, open a Levels adjustment directly on the layer. Pull the shadow input slider inward to deepen the darks, and nudge the highlight slider slightly left to punch up the brights. You’re not trying to create drama, just to clarify the detail in the texture so it reads clearly once it’s blended. A little contrast goes a long way here. Overcook it and you’ll lose the subtle mid-tones that make the texture feel organic on skin.
Step 3: Drag the Texture Into Your Portrait Document and Scale It Down
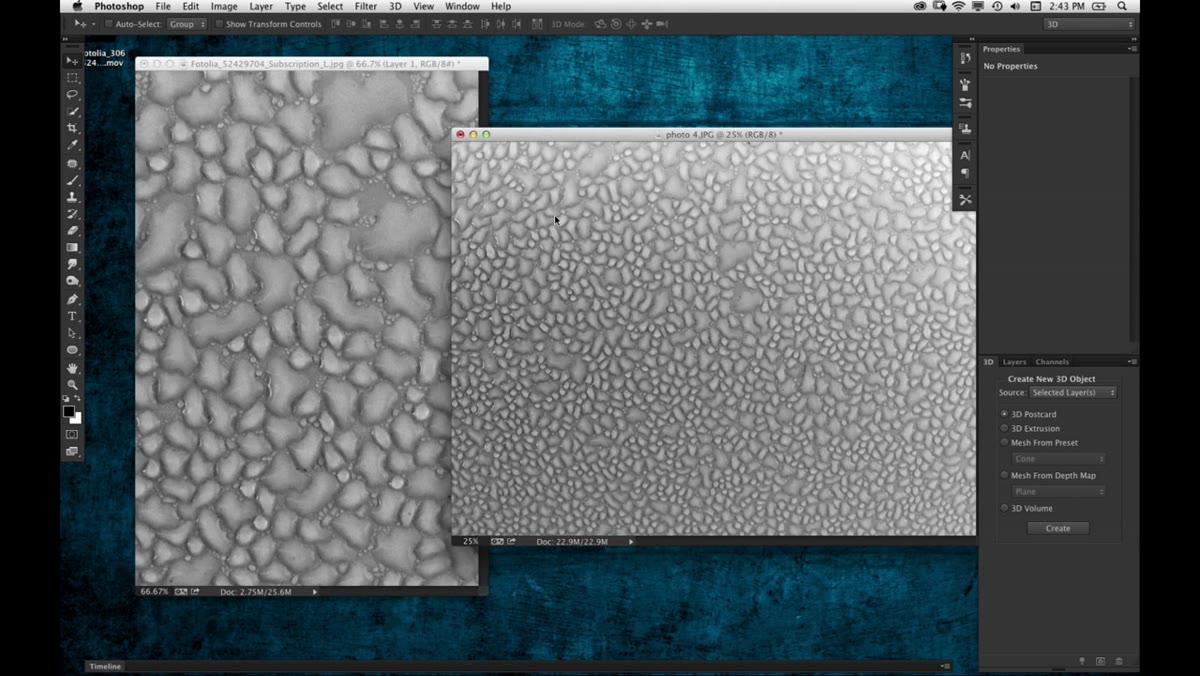 Texture layer dragged onto portrait, covering the face
With your texture prepped, drag it into the portrait document. It will almost certainly be too large. Use Free Transform (Command+T on Mac, Ctrl+T on PC) to scale it down to roughly the size of the area you want to cover. Don’t commit to a final size yet. At this stage you’re just getting it into the right neighborhood.
Texture layer dragged onto portrait, covering the face
With your texture prepped, drag it into the portrait document. It will almost certainly be too large. Use Free Transform (Command+T on Mac, Ctrl+T on PC) to scale it down to roughly the size of the area you want to cover. Don’t commit to a final size yet. At this stage you’re just getting it into the right neighborhood.
Because you’ll likely need the texture in more than one area of the face, duplicate the layer now before you do anything else. Press Command+J (Ctrl+J on PC) to create a copy, then toggle the duplicate off in the layers panel and set it aside. Work on the original. Having that reserve copy means you can come back later to cover the cheeks, jaw, or neck without starting over.
Step 4: Drop Opacity to 50% So You Can See Through the Layer
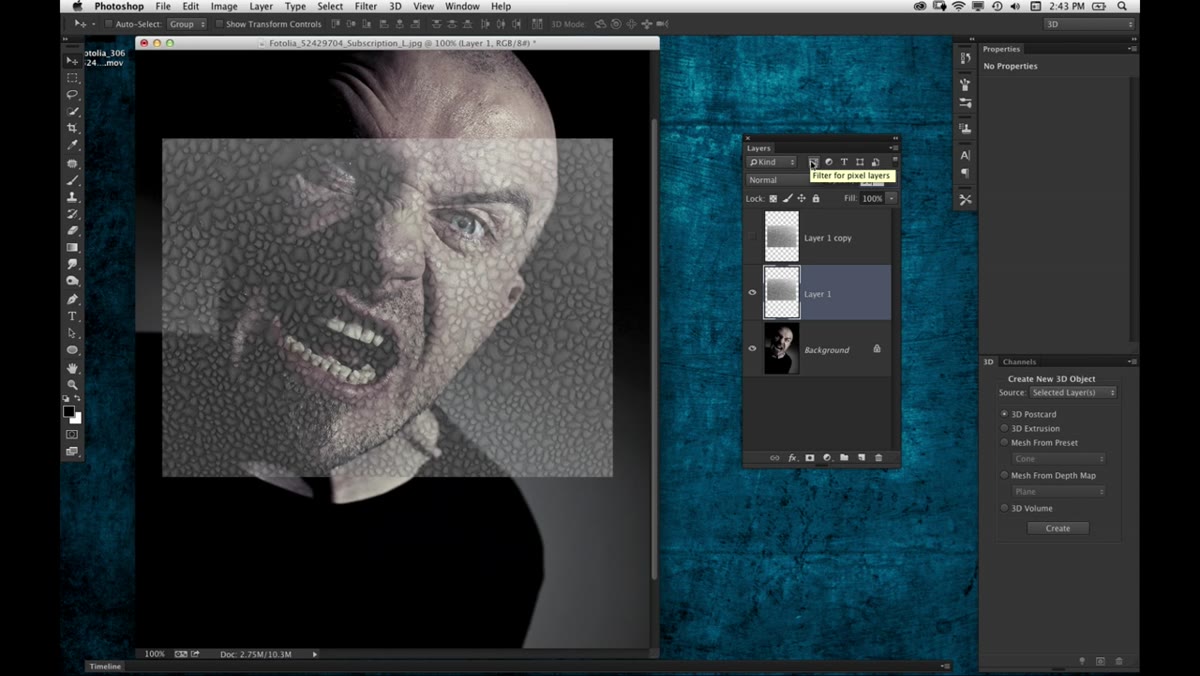 Texture layer at 50% opacity revealing face beneath
This is a small step that makes a big difference in accuracy. Lower the opacity of your texture layer to 50% in the Layers panel. The texture stays visible, but you can now see the underlying face clearly enough to make informed placement decisions. Trying to warp a layer you can’t see through is like sculpting with your eyes closed. You’ll get there eventually, but you’ll waste a lot of time.
Texture layer at 50% opacity revealing face beneath
This is a small step that makes a big difference in accuracy. Lower the opacity of your texture layer to 50% in the Layers panel. The texture stays visible, but you can now see the underlying face clearly enough to make informed placement decisions. Trying to warp a layer you can’t see through is like sculpting with your eyes closed. You’ll get there eventually, but you’ll waste a lot of time.
Position the layer roughly over the forehead, or whichever region you’re starting with. A slight rotation can help the texture feel more natural against the contours of the face rather than sitting flat and geometric on top.
Step 5: Use Free Transform’s Warp Mode to Conform the Texture to the Skin
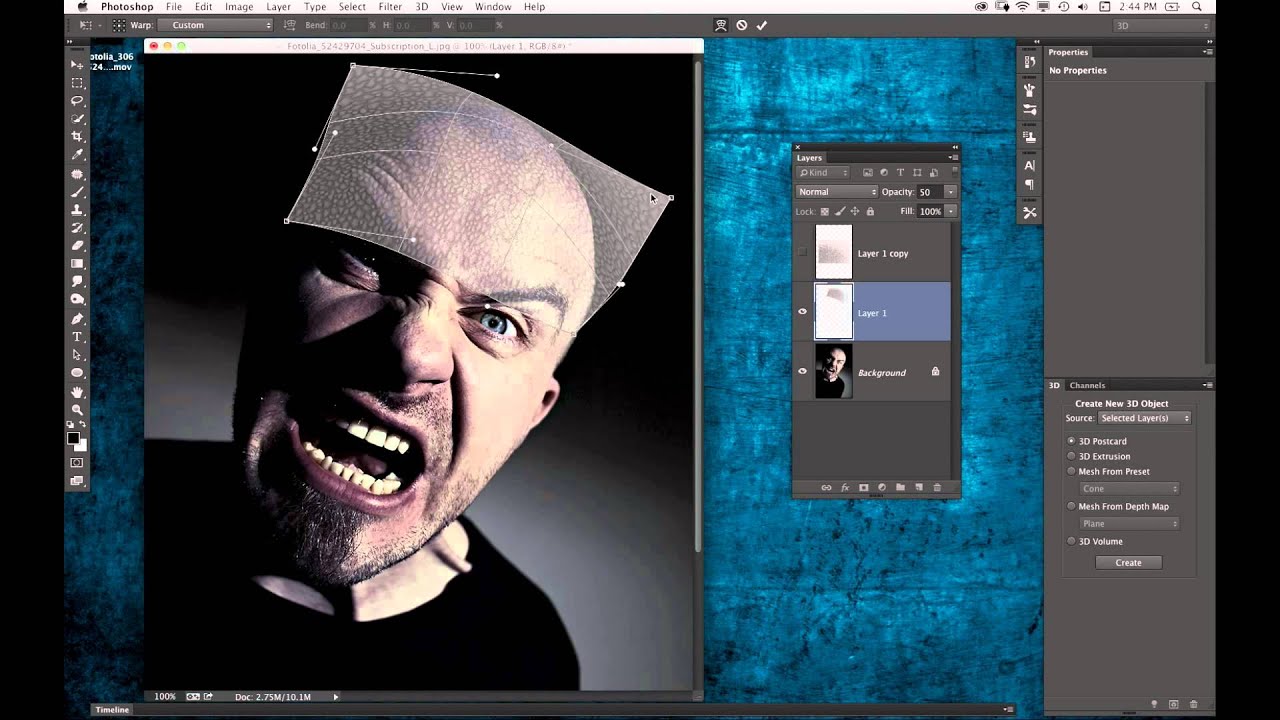
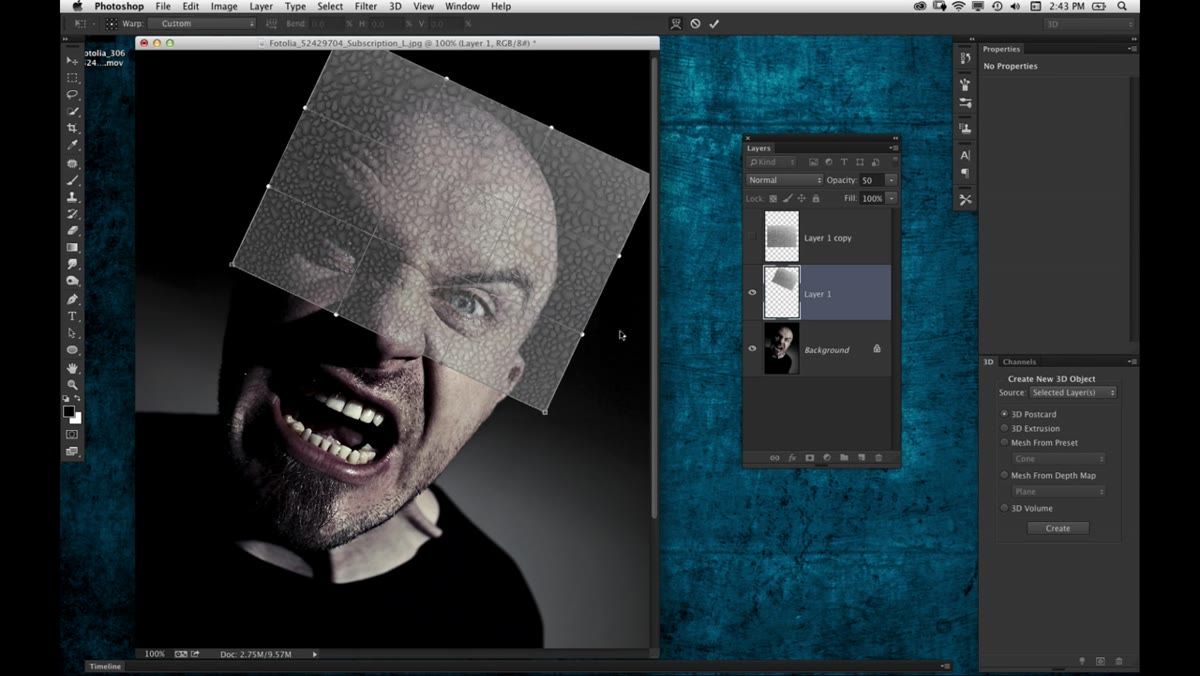 Warp grid applied to texture layer on forehead area
This is the step where the technique really comes alive. While still in Free Transform, right-click and choose Warp. A grid of control points appears over the texture. Your job now is to pull those points so the texture bends and wraps around the three-dimensional shape of the head.
Warp grid applied to texture layer on forehead area
This is the step where the technique really comes alive. While still in Free Transform, right-click and choose Warp. A grid of control points appears over the texture. Your job now is to pull those points so the texture bends and wraps around the three-dimensional shape of the head.
Think about perspective. Areas of the forehead that curve away from the viewer should have the texture “squashed” slightly, because that surface is turning away from the camera. The top and sides of the head have more extreme foreshortening than the central, camera-facing plane. Nudge the top portion of the grid inward and flatten it slightly. The result should feel like the texture is clinging to the head rather than floating on it. Take your time with this. The warp tool rewards patience and small, deliberate adjustments over aggressive dragging.
Step 6: Blend the Layer With a Blend Mode and a Layer Mask
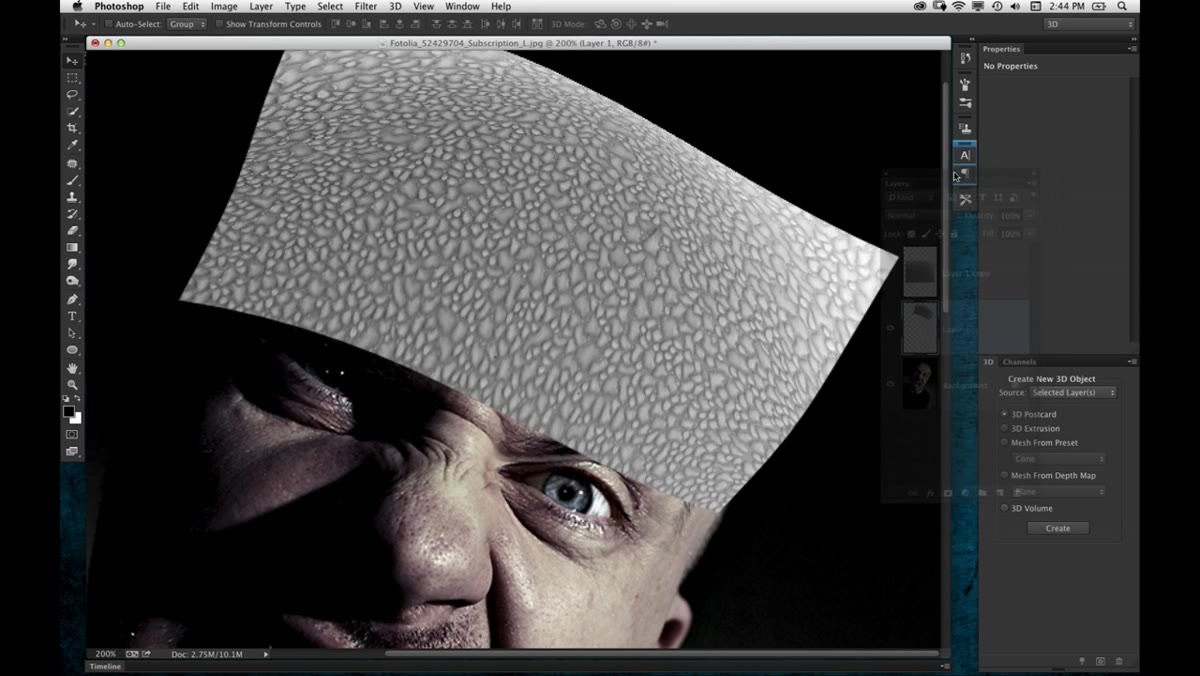 Layer blend mode dropdown and mask applied to texture layer
Once the warp is committed, restore the opacity to 100% and experiment with blend modes. Overlay and Soft Light are usually the starting point for texture blending because they interact with the luminosity of the layer beneath rather than covering it completely. Multiply can work if you want the texture to read darker and more dramatic. The right choice depends on the look you’re after, so click through a few before settling.
Layer blend mode dropdown and mask applied to texture layer
Once the warp is committed, restore the opacity to 100% and experiment with blend modes. Overlay and Soft Light are usually the starting point for texture blending because they interact with the luminosity of the layer beneath rather than covering it completely. Multiply can work if you want the texture to read darker and more dramatic. The right choice depends on the look you’re after, so click through a few before settling.
Then add a layer mask and paint away the texture from areas where it shouldn’t appear: eyes, lips, nostrils, any place where the underlying detail needs to stay clear. Use a soft brush at around 50 to 70% opacity and build the mask gradually. The goal is a seamless edge where the texture fades into natural skin rather than a hard cutout.
A Note From My Own Workflow
The biggest mistake I made the first time I worked through a technique like this was treating the texture layer as a one-time placement. In practice, you almost always need to repeat the process with the duplicate you saved earlier, covering adjacent areas of the face with fresh, slightly rotated and re-warped versions of the same texture. Skin isn’t uniform, and a single texture patch tiled across an entire face will look repeated. Rotate each instance differently. Warp each one to fit its specific region. The variety between patches is what sells the illusion that the texture is actually part of the skin.
The single most important takeaway from this tutorial is that convincing texture work is about conformation, not just coverage. Any texture can sit on top of a face. Only a carefully warped one will look like it belongs there. The warp tool is your best tool for that job, and the more time you spend with it, the more intuitive it becomes across every kind of compositing work you do.
Watch the full tutorial on YouTube to see Cory’s complete walkthrough, including how he applies the texture across multiple regions of the face for a full creature effect.
Comments
Leave a Comment