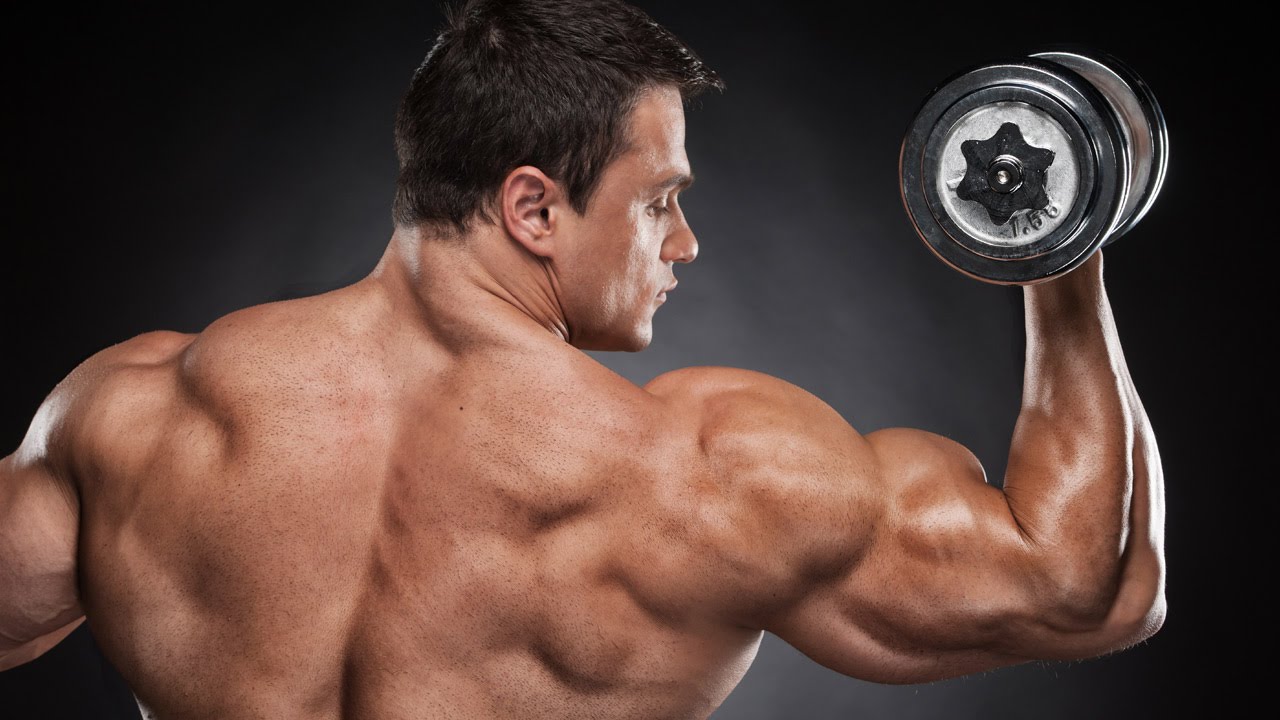
Dodge and burn is one of those techniques that separates a flat edit from a photograph that actually breathes. I came to it the long way, spending months painting on Curves adjustment layers with a soft brush, trying to coax dimension out of skin that just looked… dull. It worked, eventually, but it was slow, fiddly, and not something I could realistically fit into a commercial retouching workflow where a client is waiting on 40 beauty shots. So when I came across this approach from Aaron Nace over at PHLEARN, I stopped what I was doing and watched it twice. Watch the full tutorial on YouTube — it’s worth every minute.
The core idea is elegant: instead of manually painting light and shadow from scratch, you use a High Pass filter at a large radius to extract the broad tonal structure that already exists in your image, then blend it back in a way that amplifies highlights and deepens shadows. It’s a close cousin of the sharpening trick most of us already know, just pushed further. For beauty work, fitness shots, or any image where you want to emphasize form and structure without it looking overdone, this method is fast enough to become a genuine part of your everyday process.
What I especially appreciate is how non-destructive it is. Everything lives on a separate layer with a mask, so you’re never touching the original pixels. You can dial the intensity up or down, paint it in selectively, or throw the whole layer away if the client changes their mind. That kind of flexibility matters when you’re working with real deadlines.
Step 1: Duplicate the Background Layer
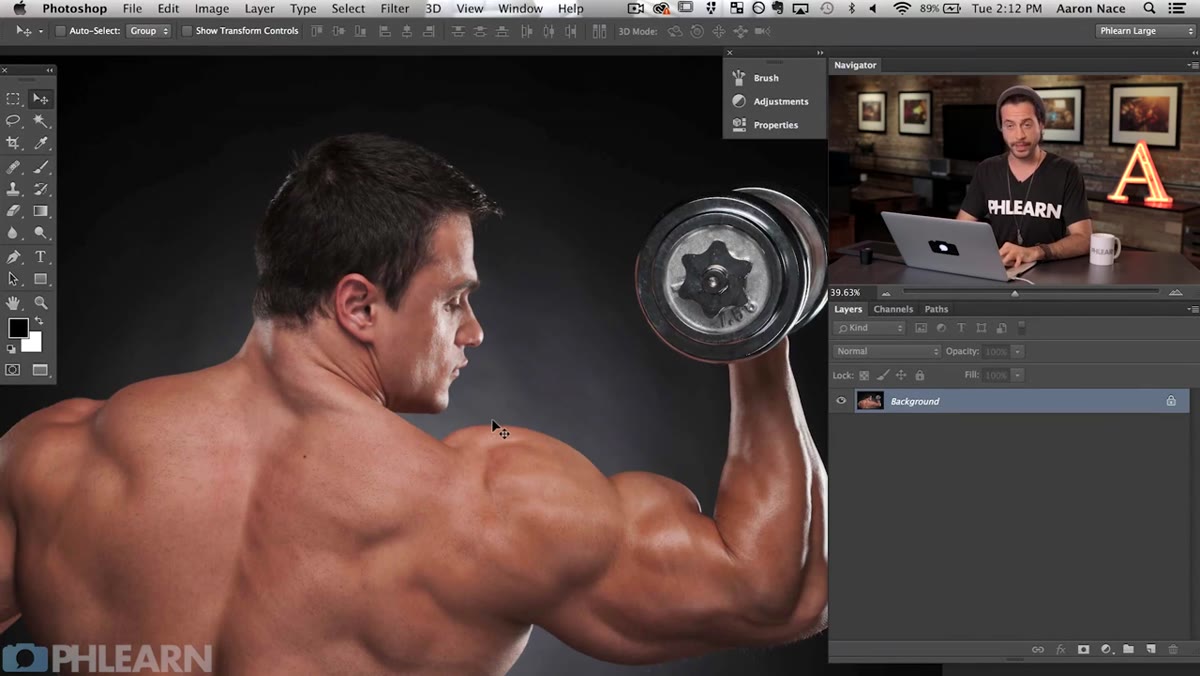 Duplicating background layer in Photoshop layers panel
Start by selecting your background layer and pressing Ctrl+J (Cmd+J on Mac) to create a duplicate. Everything we’re about to do happens on this copy, leaving the original completely untouched. If you’re already working in a layered document, just make sure you duplicate a flattened version of your composite so the High Pass filter has something consistent to read.
Duplicating background layer in Photoshop layers panel
Start by selecting your background layer and pressing Ctrl+J (Cmd+J on Mac) to create a duplicate. Everything we’re about to do happens on this copy, leaving the original completely untouched. If you’re already working in a layered document, just make sure you duplicate a flattened version of your composite so the High Pass filter has something consistent to read.
Step 2: Desaturate the Duplicate
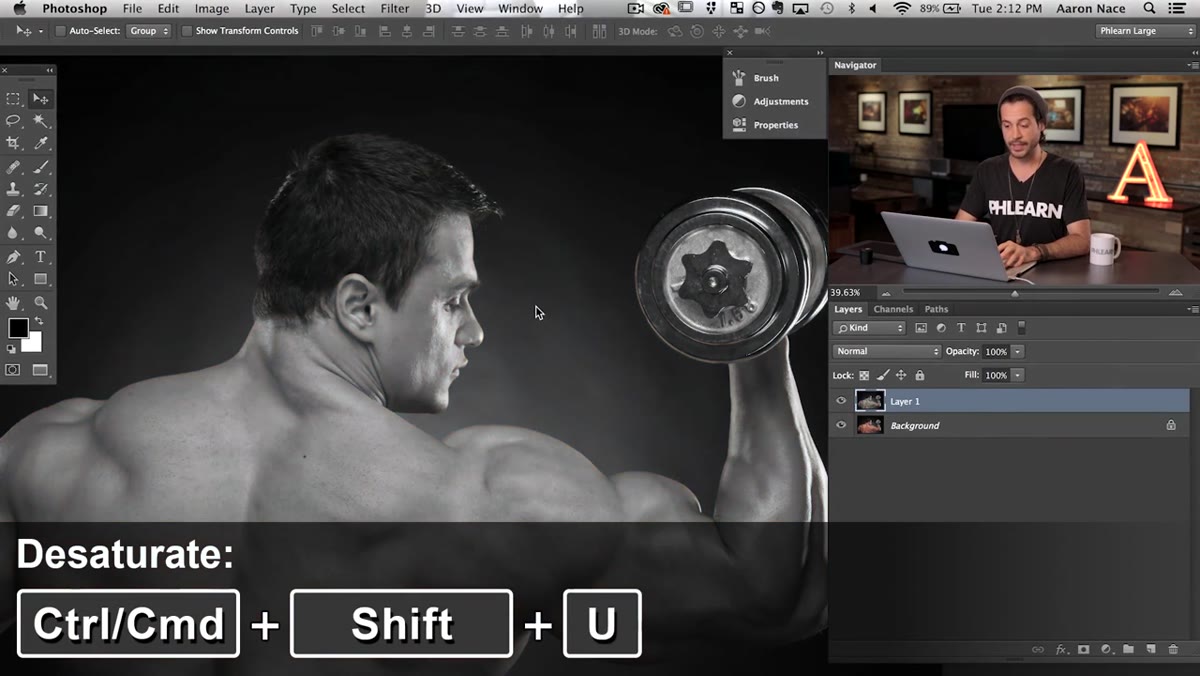 Desaturated layer shown in Photoshop, grey tones visible
With the duplicate layer selected, press Shift+Cmd+U (Shift+Ctrl+U on PC) to desaturate it completely. This strips out all the color information, leaving you with a greyscale version of the image. The reason this step matters: the Vivid Light blend mode we’re about to use is sensitive to color, and working in greyscale keeps the effect from introducing any unwanted color shifts or hue contamination into your image. It’s a small step that saves you a headache later.
Desaturated layer shown in Photoshop, grey tones visible
With the duplicate layer selected, press Shift+Cmd+U (Shift+Ctrl+U on PC) to desaturate it completely. This strips out all the color information, leaving you with a greyscale version of the image. The reason this step matters: the Vivid Light blend mode we’re about to use is sensitive to color, and working in greyscale keeps the effect from introducing any unwanted color shifts or hue contamination into your image. It’s a small step that saves you a headache later.
Step 3: Set the Blend Mode to Vivid Light
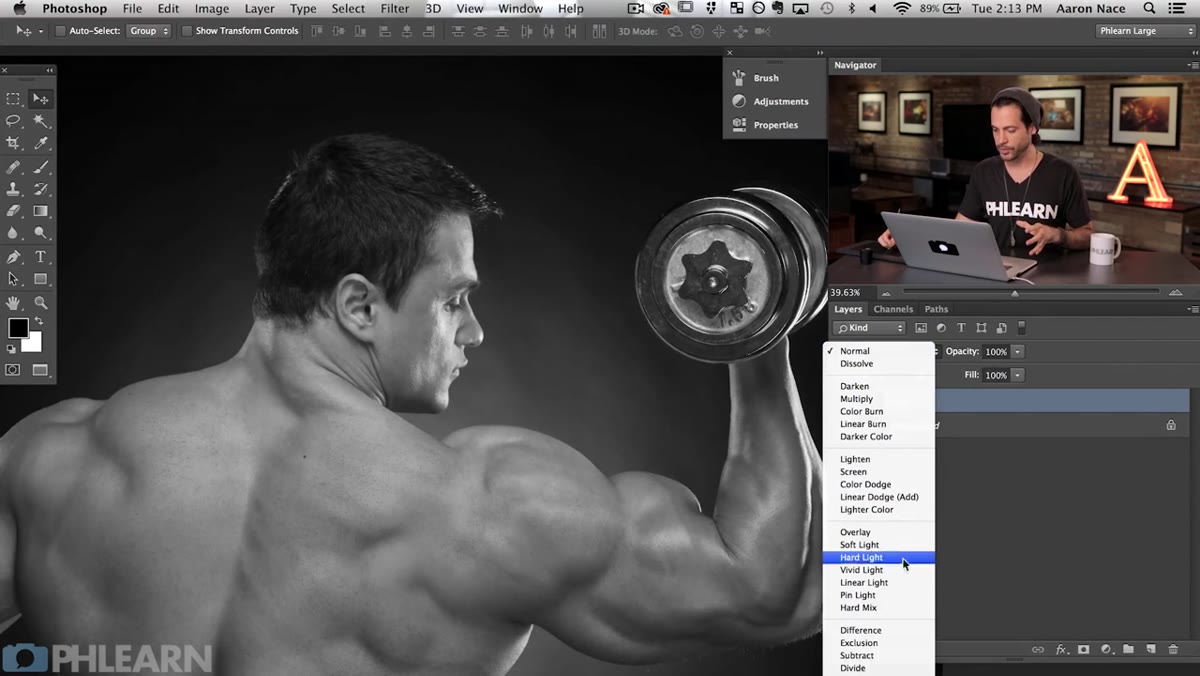 Blend mode dropdown showing Vivid Light selected in layers panel
Open the blend mode dropdown in the Layers panel and choose Vivid Light. Your image is going to look genuinely terrible at this point, all blown-out contrast and strange tones. That’s expected. Vivid Light works by burning colors below 50% grey and dodging colors above it, which is exactly the mathematical behavior we’re going to exploit once the High Pass filter is applied. Think of this step as setting the stage rather than getting a result.
Blend mode dropdown showing Vivid Light selected in layers panel
Open the blend mode dropdown in the Layers panel and choose Vivid Light. Your image is going to look genuinely terrible at this point, all blown-out contrast and strange tones. That’s expected. Vivid Light works by burning colors below 50% grey and dodging colors above it, which is exactly the mathematical behavior we’re going to exploit once the High Pass filter is applied. Think of this step as setting the stage rather than getting a result.
Step 4: Apply the High Pass Filter at a Large Radius
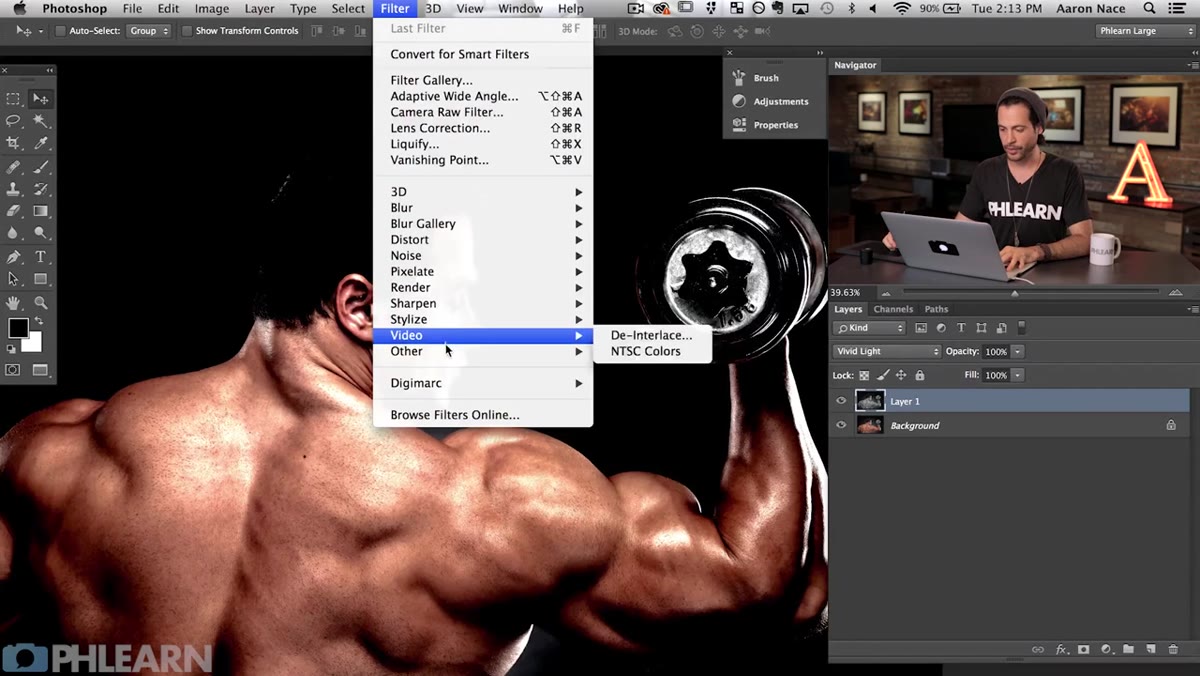 High Pass filter dialog box open, radius slider visible
Go to Filter, then Other, then High Pass. In the dialogue box, you’ll see a radius slider. Here’s where this technique diverges from standard sharpening. For sharpening, you’d typically keep the radius low, somewhere between 3 and 10 pixels, to pick out fine edge detail. For dodge and burn, you want to drag that radius all the way up, Aaron uses around 170 pixels in the tutorial, so the filter captures broad tonal shapes rather than tiny surface details. You’ll see the preview shift from sharp edge halos to something that resembles a soft, glowing relief map of your subject. Click OK when it looks like the highlights and shadows are being outlined in a broad, smooth way.
High Pass filter dialog box open, radius slider visible
Go to Filter, then Other, then High Pass. In the dialogue box, you’ll see a radius slider. Here’s where this technique diverges from standard sharpening. For sharpening, you’d typically keep the radius low, somewhere between 3 and 10 pixels, to pick out fine edge detail. For dodge and burn, you want to drag that radius all the way up, Aaron uses around 170 pixels in the tutorial, so the filter captures broad tonal shapes rather than tiny surface details. You’ll see the preview shift from sharp edge halos to something that resembles a soft, glowing relief map of your subject. Click OK when it looks like the highlights and shadows are being outlined in a broad, smooth way.
Step 5: Reduce the Opacity
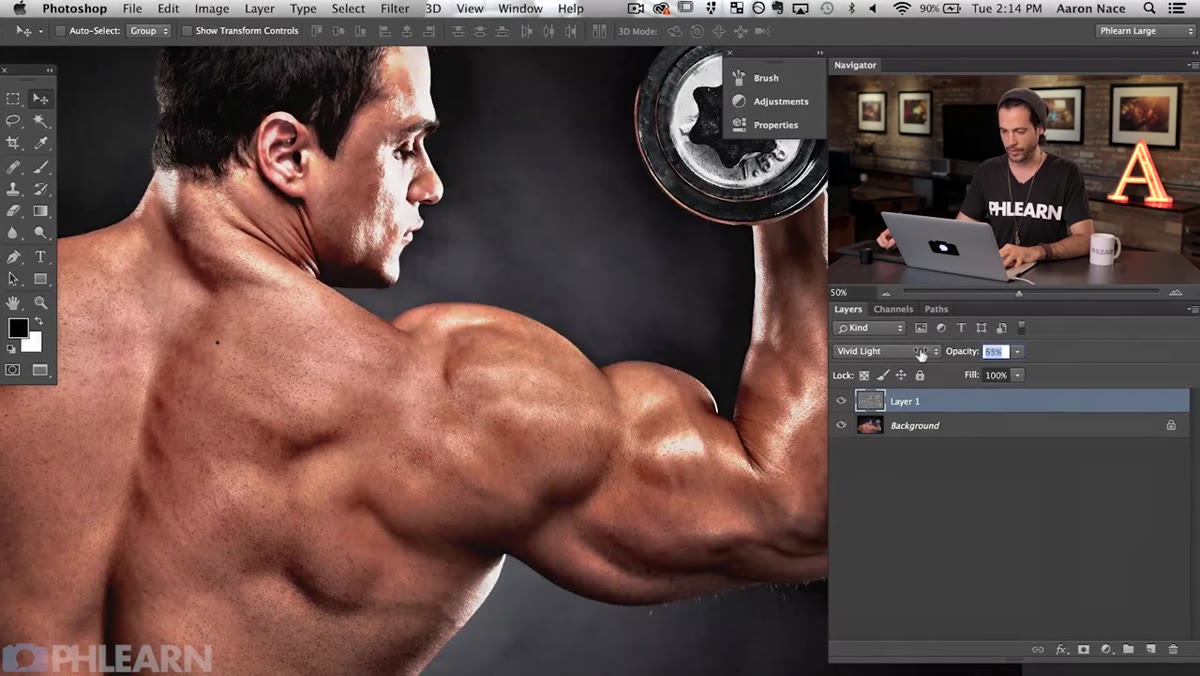 Layers panel showing opacity slider being reduced on effect layer
At full strength, the effect will be overwhelming. Crank it to 100% opacity and your subject looks like they’ve been aggressively sculpted in a way that reads as fake. Bring the opacity down gradually until the added dimension feels like it was always there. The right number depends on your image, but somewhere between 20% and 50% is usually the working range for beauty and portrait work. I tend to stay on the conservative side for skin and push a little higher for fitness or bodywork where dramatic shaping is actually part of the brief.
Layers panel showing opacity slider being reduced on effect layer
At full strength, the effect will be overwhelming. Crank it to 100% opacity and your subject looks like they’ve been aggressively sculpted in a way that reads as fake. Bring the opacity down gradually until the added dimension feels like it was always there. The right number depends on your image, but somewhere between 20% and 50% is usually the working range for beauty and portrait work. I tend to stay on the conservative side for skin and push a little higher for fitness or bodywork where dramatic shaping is actually part of the brief.
Step 6: Add a Black Layer Mask and Paint In Selectively
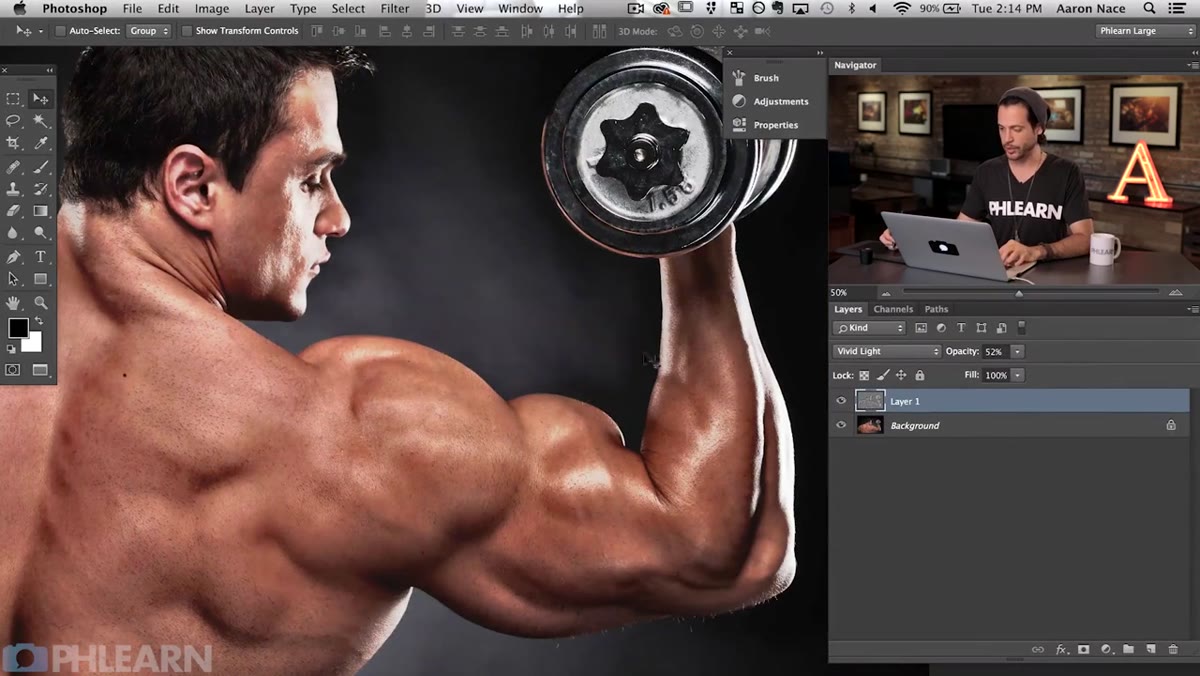 Black layer mask added, white brush painting over subject
Hold Alt (Option on Mac) and click the Add Layer Mask button at the bottom of the Layers panel. Holding Alt creates a black mask, which hides the effect entirely by default. Now pick a large, soft white brush at around 70-80% opacity and paint over the areas where you want the dodge and burn effect to appear. This is where you get control. You can brush over the entire subject for a general lift, or be more precise and build up the effect only on the areas that need it most. The mask means you can always paint black to pull the effect back if you go too far.
Black layer mask added, white brush painting over subject
Hold Alt (Option on Mac) and click the Add Layer Mask button at the bottom of the Layers panel. Holding Alt creates a black mask, which hides the effect entirely by default. Now pick a large, soft white brush at around 70-80% opacity and paint over the areas where you want the dodge and burn effect to appear. This is where you get control. You can brush over the entire subject for a general lift, or be more precise and build up the effect only on the areas that need it most. The mask means you can always paint black to pull the effect back if you go too far.
How I Adapt This for Beauty and Skin Work
The tutorial demonstrates this technique on a muscular back, where the contrast between highlight and shadow is already pronounced, so the effect is immediately obvious. For beauty retouching, the same method works beautifully, but I dial the opacity down significantly, often as low as 15-25%, and I’m more deliberate with the mask. On faces, I’ll paint the effect gently across cheekbones, the bridge of the nose, and the brow bone, and avoid flat areas like the forehead or under-eye zones where extra contrast draws attention to texture.
One adjustment I’ve started making: after I get the High Pass layer set up, I’ll duplicate it and set one copy to Soft Light instead of Vivid Light. Soft Light gives a gentler, more flattering result on skin, and I’ll often use the Vivid Light version at very low opacity for structure while the Soft Light version does the heavy lifting for overall luminosity. It adds maybe two minutes to the process and gives you much finer control over the balance between depth and glow.
The single most important thing this technique teaches you is that dodge and burn doesn’t have to be a long, manual slog. When the tonal information is already in the photograph, your job is to find a smart way to surface it, not repaint it from scratch. This High Pass approach does exactly that, in a fraction of the time.
Watch the full tutorial on YouTube and see Aaron walk through the settings in real time. Watching his radius adjustments live makes the logic click in a way that’s hard to fully capture in text.
Comments (5)
The tip about high pass dodge and burn the p was the missing piece for me. Thank you.
My workflow just got 10x faster. Not even kidding.
Shared this with my photography group. Everyone loved it.
This saved me so much time on my last edit. Wish I'd found this sooner.
Love this. I referenced a similar technique in one of my recent posts. Always good to see other perspectives.
Leave a Comment