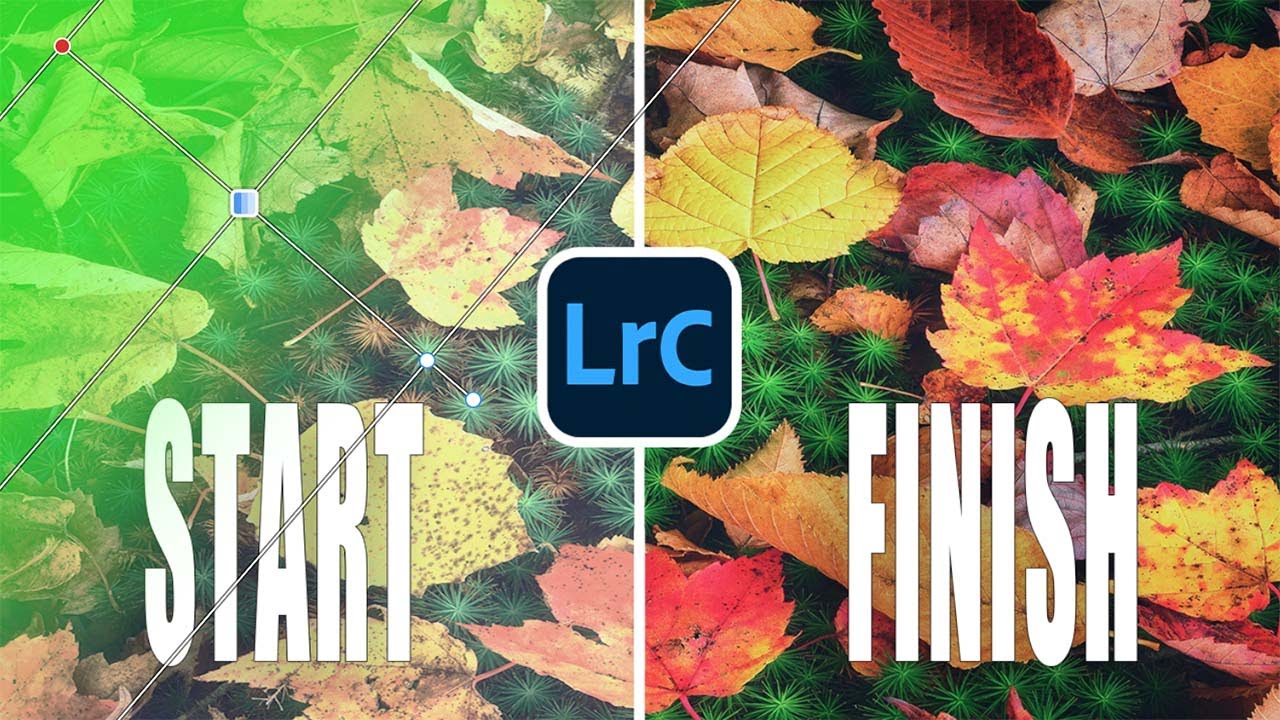
There’s a moment in almost every retouching session where I think: if I could just isolate that one thing without painting around it for ten minutes, this would be perfect. For portrait work, that’s usually a sky blowing out behind a subject, or a background that needs to be cooled down while the skin stays warm. For years, Lightroom’s local adjustment tools were a workaround at best, and I’d end up hopping over to Photoshop just to grab a clean mask. That changed with Lightroom’s latest update, and this tutorial from landscape photographer Mark Denney is the clearest walkthrough I’ve found for understanding how the new masking panel actually works in practice.
Watch the full tutorial on YouTube
Mark shoots landscapes, not faces, but the underlying logic of what he demonstrates here applies directly to beauty editing. Selecting a sky automatically, isolating tones by luminance, combining masks with range controls: these are techniques we can pull straight into portrait work. I’ve been running through this workflow all week with a green tea in hand, and I want to walk you through exactly what he covers so you can put it to use right away.
Step 1: Find the New Masking Panel
 The updated Lightroom masking panel open in Develop module
The first thing you’ll notice after updating Lightroom is that your familiar tools have moved. The brush, linear gradient, and radial gradient are no longer scattered across the top bar. They’re now grouped together inside a single masking panel, which you access from one icon in the Develop module. Click it, and you’ll see all your local adjustment tools in one place.
The updated Lightroom masking panel open in Develop module
The first thing you’ll notice after updating Lightroom is that your familiar tools have moved. The brush, linear gradient, and radial gradient are no longer scattered across the top bar. They’re now grouped together inside a single masking panel, which you access from one icon in the Develop module. Click it, and you’ll see all your local adjustment tools in one place.
What makes this more than a cosmetic reorganization is what sits at the top of the panel: Select Subject and Select Sky, plus standalone color range and luminance range mask options. Previously, you could only access a range mask after you had already applied a gradient or brush. Now they work independently, which opens up a completely different set of creative possibilities.
Step 2: Use Select Sky to Build Your First Mask Automatically
 Lightroom automatically generating a sky selection mask
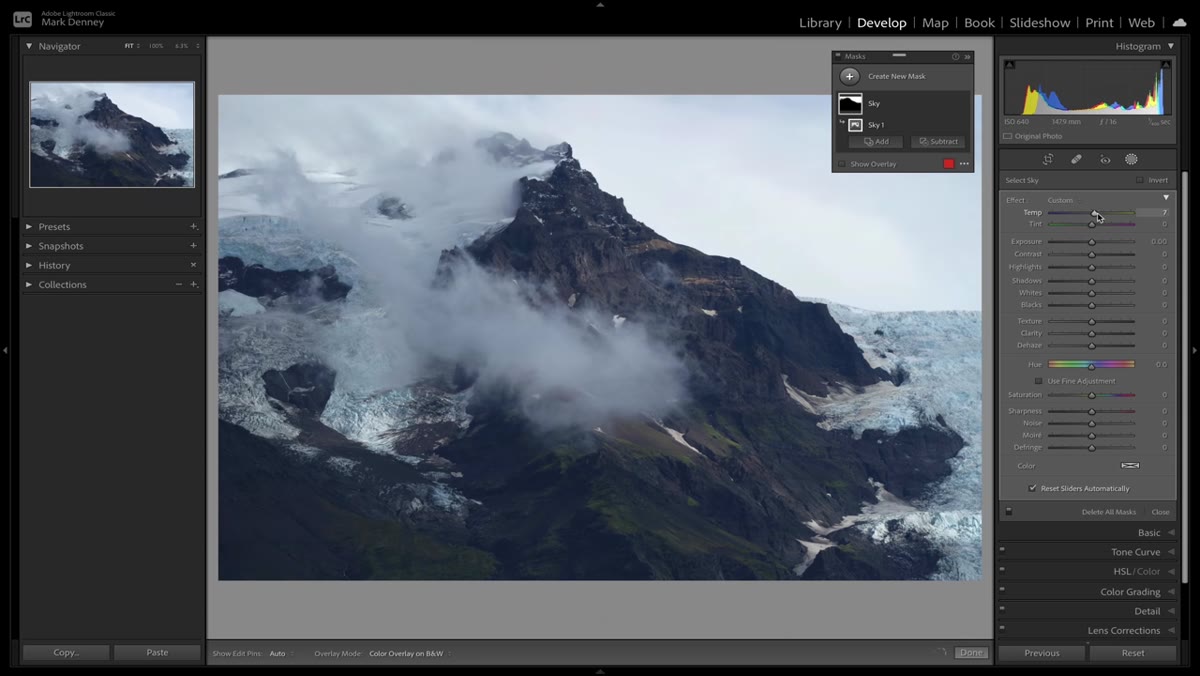
Mark clicks Select Sky on a moody landscape shot, and Lightroom builds an accurate mask in seconds. The overlay shows you exactly which pixels are included. For the image he’s working with, it does a genuinely impressive job tracing the horizon line without any manual painting.
Lightroom automatically generating a sky selection mask
Mark clicks Select Sky on a moody landscape shot, and Lightroom builds an accurate mask in seconds. The overlay shows you exactly which pixels are included. For the image he’s working with, it does a genuinely impressive job tracing the horizon line without any manual painting.
For portrait photographers, Select Subject is the equivalent move. It isolates your person from the background with AI-assisted precision that would have taken a careful brush pass just a year ago. Once the mask is built, double-click the mask name in the panel to label it something useful (“sky,” “background,” “skin”) so your workflow stays organized when you’re managing multiple masks on a single image.
Step 3: Make Targeted Adjustments Inside the Mask
 Exposure and highlight sliders being adjusted within the sky mask
With the sky mask active, Mark brings down the exposure noticeably, pulls the highlights lower, and nudges the shadows up slightly. He also warms the temperature a touch and then deliberately reduces saturation to pull out some of the blue, pushing the image toward a darker, more atmospheric feel.
Exposure and highlight sliders being adjusted within the sky mask
With the sky mask active, Mark brings down the exposure noticeably, pulls the highlights lower, and nudges the shadows up slightly. He also warms the temperature a touch and then deliberately reduces saturation to pull out some of the blue, pushing the image toward a darker, more atmospheric feel.
The key habit to build here is resisting the urge to do everything globally first. Start with a base exposure pass on the overall image if you need it, but let these masked adjustments carry the tonal heavy lifting. In beauty retouching, the same logic applies: a luminance mask targeting only the brightest highlights in a background lets you bring it down without touching your subject’s skin at all.
Step 4: Understand Why Standalone Range Masks Change Everything
 Color range and luminance range mask options shown separately in panel
Before this update, if you wanted to use a luminance range mask, you had to first lay down a gradient or brush, then refine it with the range control underneath. They were tied together. Now, luminance and color range masks are their own independent tools in the panel.
Color range and luminance range mask options shown separately in panel
Before this update, if you wanted to use a luminance range mask, you had to first lay down a gradient or brush, then refine it with the range control underneath. They were tied together. Now, luminance and color range masks are their own independent tools in the panel.
This separation is significant. You can now build a mask that selects only the shadows across your entire image, or only a specific color range, without first constraining yourself to a gradient shape. In practice, this means targeting the warm midtones in a subject’s skin independently of everything else in the frame, something that used to require a round trip to Photoshop or a lot of careful brushwork.
Step 5: Name and Organize Every Mask You Create
 Mask panel showing renamed sky mask in the list
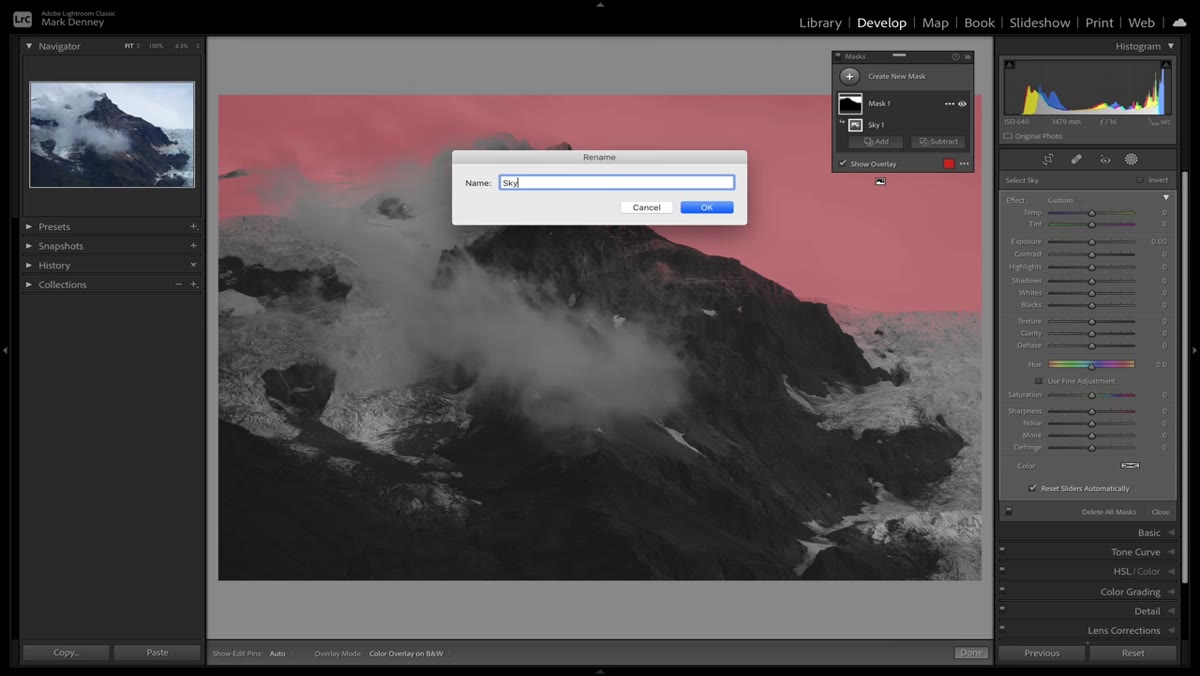
This one is easy to skip when you’re in flow, but Mark makes a point of naming his mask immediately after creating it, and I’ve started doing the same thing. When you’re three or four masks deep into an edit, unlabeled entries like “Mask 1” and “Mask 3” will slow you down every time you need to go back and adjust something.
Mask panel showing renamed sky mask in the list
This one is easy to skip when you’re in flow, but Mark makes a point of naming his mask immediately after creating it, and I’ve started doing the same thing. When you’re three or four masks deep into an edit, unlabeled entries like “Mask 1” and “Mask 3” will slow you down every time you need to go back and adjust something.
Double-click the mask name directly in the panel and type something descriptive. Keep it short: “sky,” “shadows,” “subject,” “bg warm.” On a portrait edit, I’ll often end up with masks for the background, the subject overall, just the skin, and sometimes a separate one for the eyes or lips if I’m doing beauty work. The panel handles all of them cleanly as long as you label as you go.
Step 6: Combine Global Edits With Masked Adjustments for a Complete Edit
 Before and after comparison of the landscape photo in Develop module
Mark shows the before-and-after for his image and notes that roughly 90 percent of the visual difference came from inside the new masking tools rather than the global sliders. That ratio surprised me the first time I heard it, but it tracks. Precise local control produces more believable results than pushing global sliders hard.
Before and after comparison of the landscape photo in Develop module
Mark shows the before-and-after for his image and notes that roughly 90 percent of the visual difference came from inside the new masking tools rather than the global sliders. That ratio surprised me the first time I heard it, but it tracks. Precise local control produces more believable results than pushing global sliders hard.
The workflow rhythm he establishes is worth adopting directly: build a mask, make your adjustments, label it, move to the next area. Repeat. The global panel handles broad corrections like white balance and lens corrections. The masks handle everything that makes the image feel right.
What I’d Add From Beauty Retouching Work
The Select Subject tool Mark demonstrates on a landscape works just as well when there’s a person in the frame, but for close beauty crops where the background is minimal, I’ve found the luminance range mask more precise than subject selection alone. If you’re targeting a specific tonal zone, like the brightest highlights on a cheekbone or the deep shadows under a jaw, dialing in the luminance range slider gives you control that a brush approximation simply can’t match. Build the luminance mask first, then layer a brush refinement over it to catch any edges the algorithm missed. The combination is faster and cleaner than either tool on its own.
The single most important takeaway from this tutorial is that the new masking panel rewards organization. The tools are powerful enough that a disorganized approach will actually slow you down more than the old system did. Name every mask, build them in logical order, and let the AI selection tools do the rough work before you refine. Mark Denney demonstrates this sequence clearly and calmly from start to finish, and it’s worth watching the full edit play out.
Watch the full tutorial on YouTube
Comments
Leave a Comment