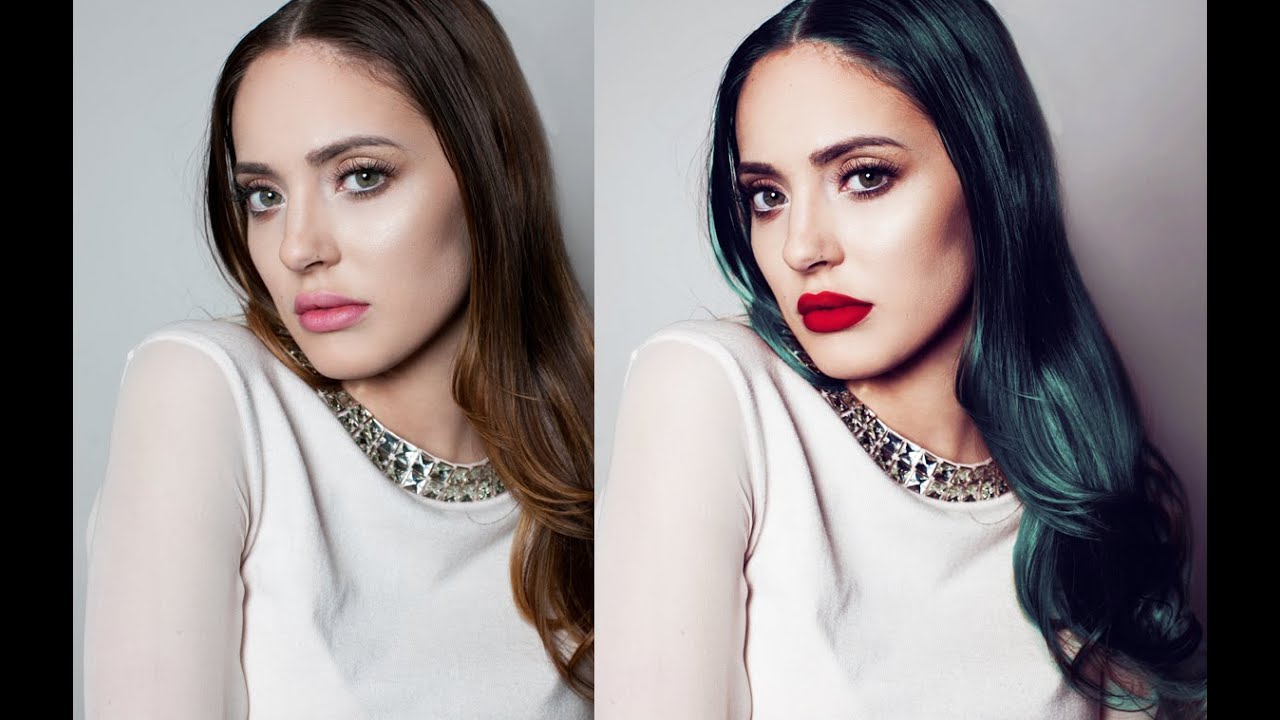
One of the trickiest requests I get from beauty clients is changing or enhancing hair color without it looking like someone ran a filter over a stock photo. For a long time, my go-to was Hue/Saturation on a clipped layer, and it worked fine, until a client pointed out that the color looked “painted on.” That one comment sent me deep into researching better workflows, and I’ve never fully recovered. What I’ve landed on is a combination of Quick Mask selection, Curves for contrast and base color, and a clipped Hue/Saturation layer on top. It’s a cleaner, more controllable pipeline than anything I was doing before.
In this Jessica Kobeissi tutorial on professional portrait retouching, Watch the full tutorial on YouTube, she walks through exactly this approach using a studio beauty shot she photographed herself with a beauty dish. The result is a dramatic transformation, different skin tone, different hair color, completely different mood. What I want to do here is slow that process down and explain what’s actually happening at each stage, so you can replicate it on your own images without getting lost in the why behind each tool.
The reason I keep coming back to this method is that every adjustment stays editable. Nothing is baked in. If a client comes back three days later and wants the hair more violet and less teal, I’m not starting over. That alone is worth learning this workflow properly.
Step 1: Enter Quick Mask Mode to Paint Your Hair Selection
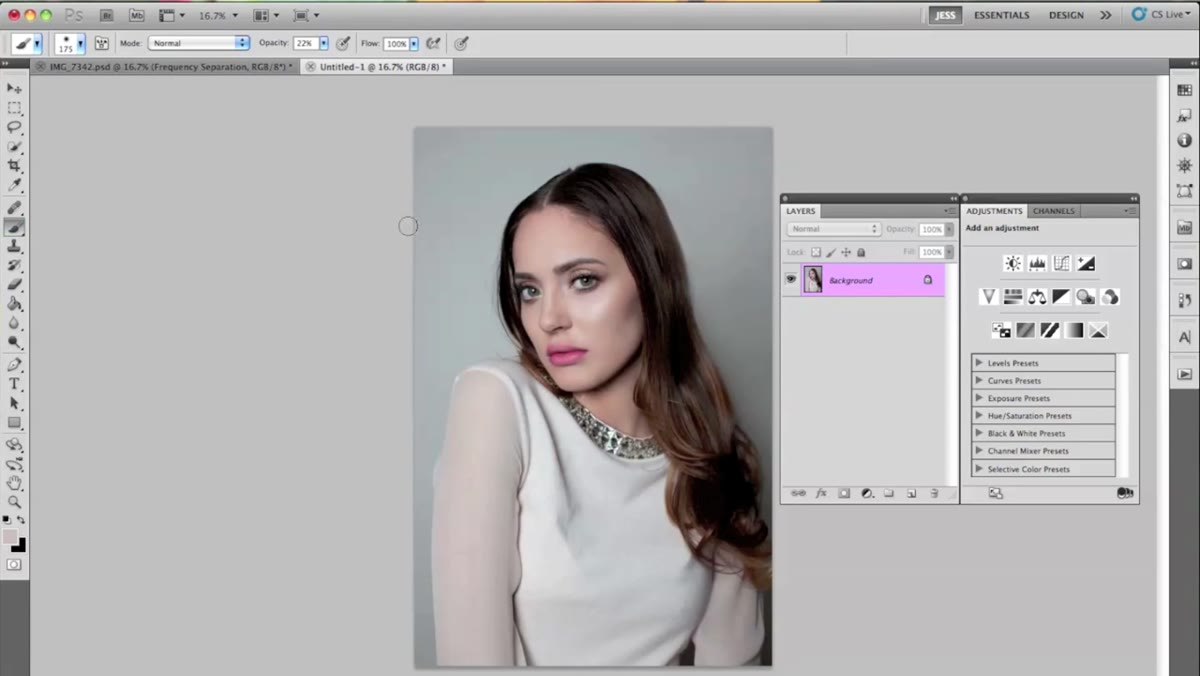 Brush tool active, Quick Mask mode turned on
Start with your original image layer selected, no duplicating needed at this stage. Grab the Brush tool and press the letter Q on your keyboard to enter Quick Mask mode. You’ll notice a red overlay appears as you paint. This red area is not your selection yet. It’s actually the inverse of what you want, which matters in the next step.
Brush tool active, Quick Mask mode turned on
Start with your original image layer selected, no duplicating needed at this stage. Grab the Brush tool and press the letter Q on your keyboard to enter Quick Mask mode. You’ll notice a red overlay appears as you paint. This red area is not your selection yet. It’s actually the inverse of what you want, which matters in the next step.
Set your brush opacity to 100% and hardness around 78-79%. Jessica uses a tablet here, which gives her smoother control on the curves of the hair, but a mouse works too if you slow down on the edges. Paint over the entire hair area, getting reasonably close to the hairline. Don’t stress about absolute perfection right now because the mask is editable later.
Step 2: Invert the Selection and Convert It to a Live Mask
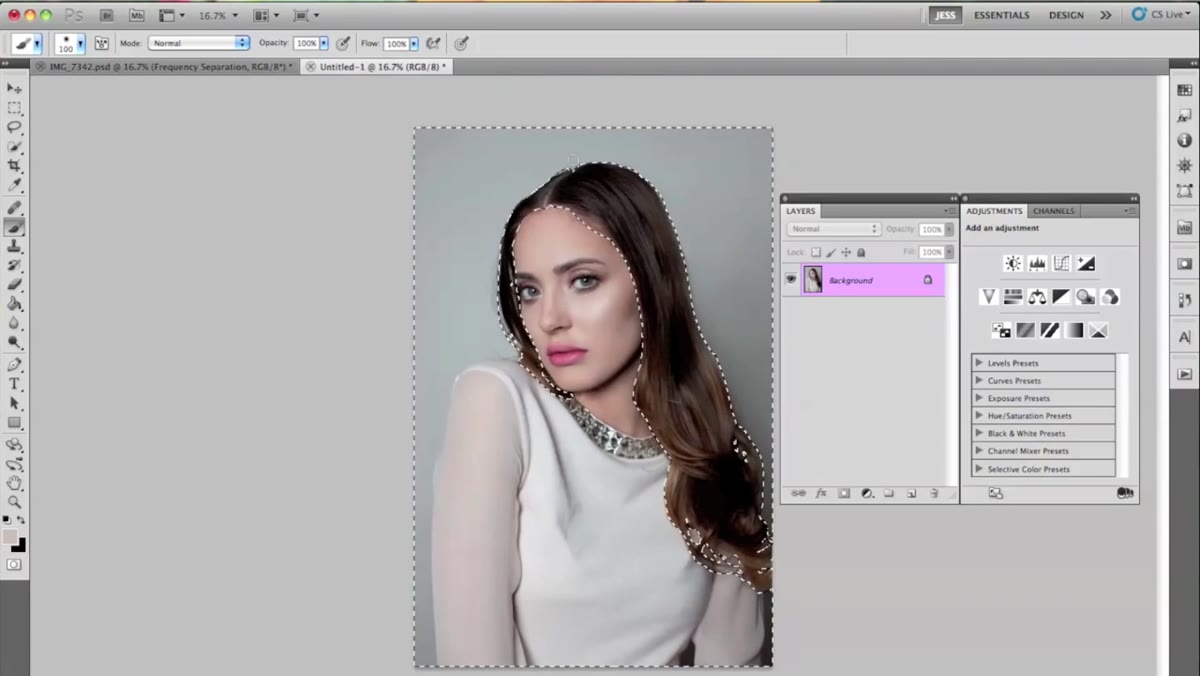 Quick Mask painted red over hair, ready to invert
Once your hair is fully painted in red, press Q again to exit Quick Mask mode. What you’ll see is a selection, but it’s selecting everything except the hair, because Quick Mask works in reverse by default. Fix this immediately by pressing Command + Shift + I (or Control + Shift + I on Windows) to invert the selection. Now only the hair is selected.
Quick Mask painted red over hair, ready to invert
Once your hair is fully painted in red, press Q again to exit Quick Mask mode. What you’ll see is a selection, but it’s selecting everything except the hair, because Quick Mask works in reverse by default. Fix this immediately by pressing Command + Shift + I (or Control + Shift + I on Windows) to invert the selection. Now only the hair is selected.
This is a small step that’s easy to skip mentally, but if you forget the inversion you’ll end up applying all your adjustments to the background and skin instead of the hair. It’s the kind of thing that costs you ten minutes of confusion, so just make it muscle memory.
Step 3: Add a Curves Adjustment Layer to Lock In the Hair Mask
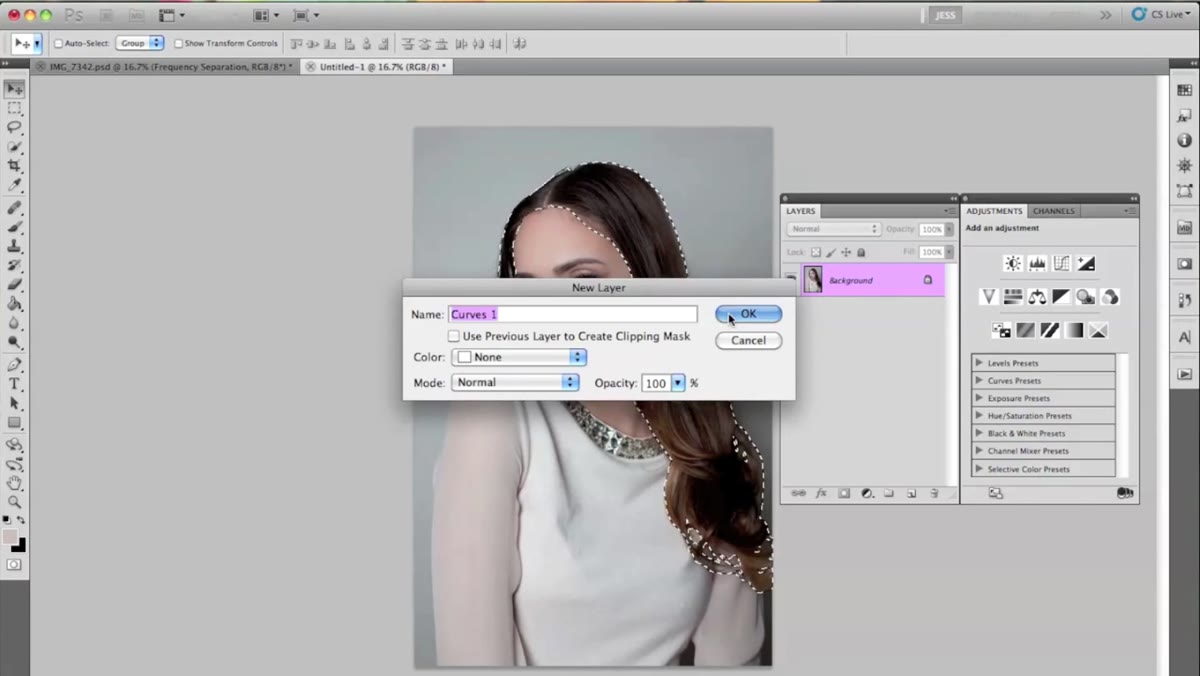 New Curves adjustment layer added with hair selection active
With your hair selection still active, go to Layer, then New Adjustment Layer, then Curves. Photoshop will automatically use your active selection as a mask on this new layer. You’ll see a black-and-white mask thumbnail in the Layers panel that matches the shape of the hair. This is your anchor point for everything that follows.
New Curves adjustment layer added with hair selection active
With your hair selection still active, go to Layer, then New Adjustment Layer, then Curves. Photoshop will automatically use your active selection as a mask on this new layer. You’ll see a black-and-white mask thumbnail in the Layers panel that matches the shape of the hair. This is your anchor point for everything that follows.
If you over-selected somewhere, like catching a bit of the forehead or shoulder, don’t panic. Click into the mask thumbnail, switch your foreground color to black, and paint over the error area with a soft brush. Black hides, white reveals. That simple rule keeps your mask clean without starting over.
Step 4: Adjust the RGB Curve for Contrast
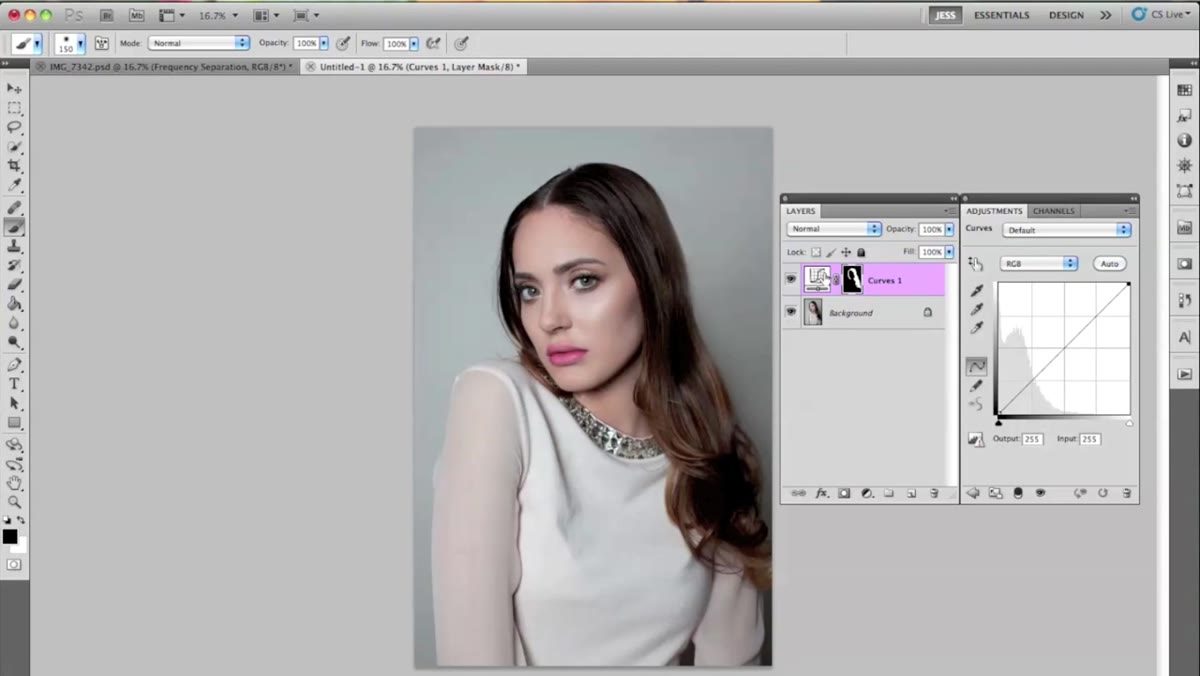 Curves panel open, RGB channel being adjusted
Now that your Curves layer is in place with the hair mask attached, click on the curve itself and make a subtle S-curve to add a little contrast. Jessica keeps this gentle. The goal isn’t dramatic contrast, just enough to give the hair some life and depth before the color goes on. Think of it as waking the hair up before you dress it.
Curves panel open, RGB channel being adjusted
Now that your Curves layer is in place with the hair mask attached, click on the curve itself and make a subtle S-curve to add a little contrast. Jessica keeps this gentle. The goal isn’t dramatic contrast, just enough to give the hair some life and depth before the color goes on. Think of it as waking the hair up before you dress it.
After the RGB adjustment, move into the individual color channels, Red, Green, and Blue, and start introducing your base color. Jessica leans into the blue channel here to begin building a teal foundation. This base color will look garish by itself, almost fake, but that’s expected. You’re building in layers, and the Hue/Saturation layer on top will pull everything together.
Step 5: Clip a Hue/Saturation Layer to Your Curves Layer
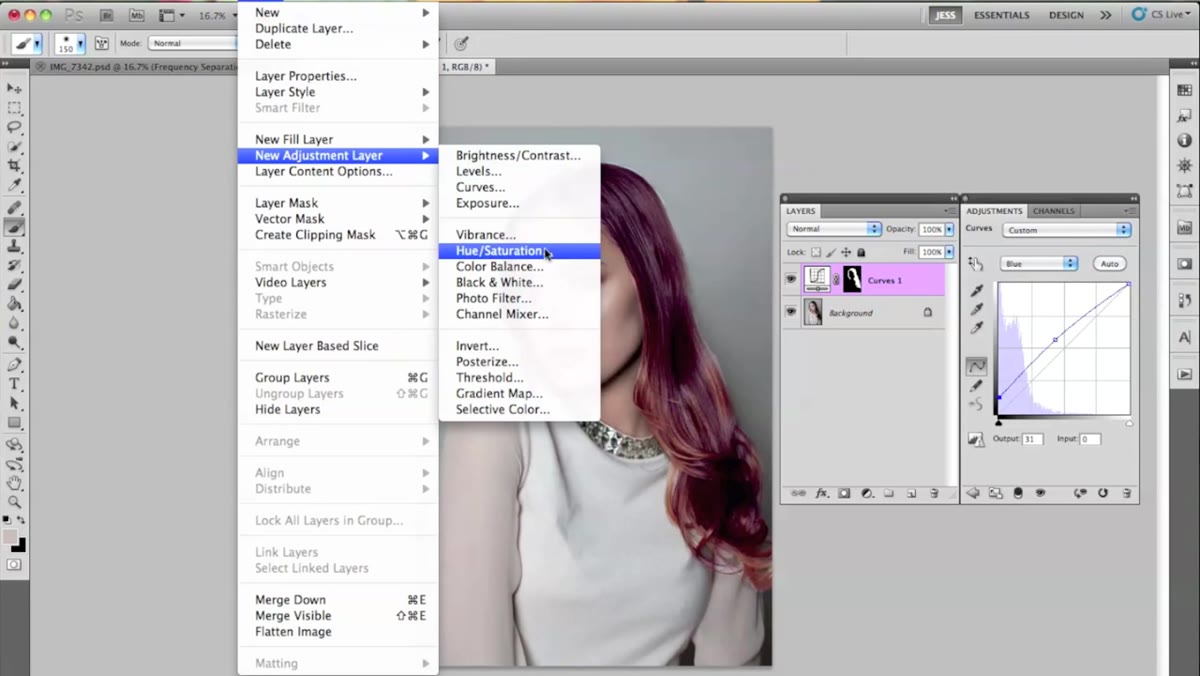 Hue/Saturation layer being clipped to Curves layer
Go to Layer, New Adjustment Layer, Hue/Saturation. Before you do anything in the panel, hold down your Alt key (Option on Mac) and hover your cursor between the new Hue/Saturation layer and the Curves layer below it. You’ll see your cursor change to a small arrow icon. Click once to create a clipping mask.
Hue/Saturation layer being clipped to Curves layer
Go to Layer, New Adjustment Layer, Hue/Saturation. Before you do anything in the panel, hold down your Alt key (Option on Mac) and hover your cursor between the new Hue/Saturation layer and the Curves layer below it. You’ll see your cursor change to a small arrow icon. Click once to create a clipping mask.
What this does is confine the Hue/Saturation adjustments to only affect the Curves layer beneath it, which already has the hair mask. So you have a stack where the mask governs the hair selection, the Curves layer adds contrast and color base, and the Hue/Saturation layer sits on top of that refining the final color. Everything is isolated and nothing bleeds onto the skin or background.
Step 6: Colorize and Choose Your Final Hue
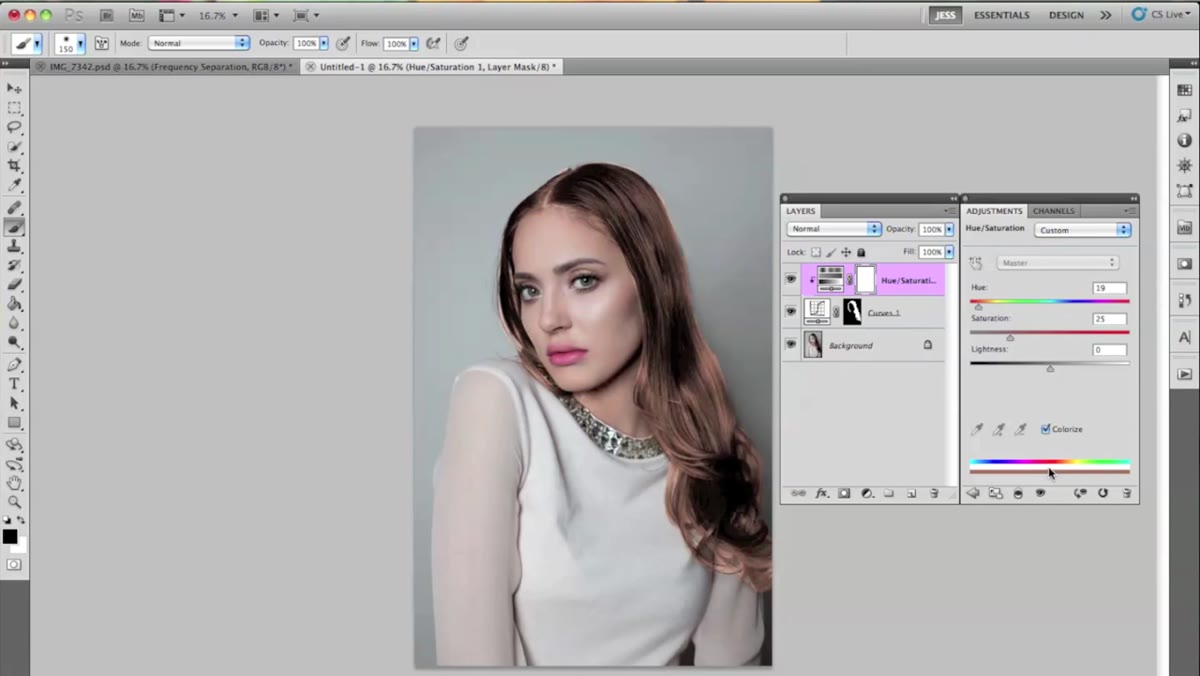 Hue/Saturation panel with Colorize checked, teal hue selected
Inside the Hue/Saturation panel, check the Colorize box. This replaces whatever color is in the hair with a unified hue, which gives you a clean canvas to work from. Lower the Saturation slider first so the color doesn’t look neon, then use the Hue slider to dial in your target color. Jessica lands on a deep teal, but the same process works for pastels, coppers, or any fantasy color.
Hue/Saturation panel with Colorize checked, teal hue selected
Inside the Hue/Saturation panel, check the Colorize box. This replaces whatever color is in the hair with a unified hue, which gives you a clean canvas to work from. Lower the Saturation slider first so the color doesn’t look neon, then use the Hue slider to dial in your target color. Jessica lands on a deep teal, but the same process works for pastels, coppers, or any fantasy color.
The Colorize approach works especially well for dark hair because it overrides the existing pigment rather than blending with it. If you’re working with very light or blonde hair, you may get a more natural result by skipping Colorize and just nudging the individual sliders instead.
A Note From My Own Workflow
The one thing I’d add to this technique, especially for client work, is naming your layer groups clearly and saving the Curves base color as a separate action so you can swap palettes quickly. I have an action I named “Ariel” (yes, after The Little Mermaid, which feels appropriate given the teal) that applies a starting Curves state for cool hair tones. It saves a few minutes per image, and across a full beauty shoot that adds up.
I’d also suggest testing this method on a duplicate of your file the first time. Not because the technique is destructive, it isn’t, but because seeing the before and after side by side on your first attempt helps you understand how much each layer is actually contributing. It’s a confidence thing. Once you see how much the base Curves color matters before the Hue/Saturation even touches it, you’ll understand why the order of operations here is intentional and not arbitrary.
The biggest thing I took from this tutorial is that believable hair color comes from building it in stages, not from a single adjustment. A Curves layer that adds contrast and a color lean, followed by a clipped Hue/Saturation to refine, gives you depth that a single Hue/Saturation layer just can’t replicate on its own.
Watch the full tutorial on YouTube to see Jessica’s complete edit, including the skin retouching that comes after the hair work. It’s worth watching start to finish at least once before you follow along in your own file.
Comments (4)
Simple but effective. Sometimes that's all you need.
Quality content like this is rare. Keep it up.
Applied this to my portfolio shots and the improvement is noticeable.
Really solid breakdown. This pairs perfectly with the lighting work I've been writing about.
Leave a Comment