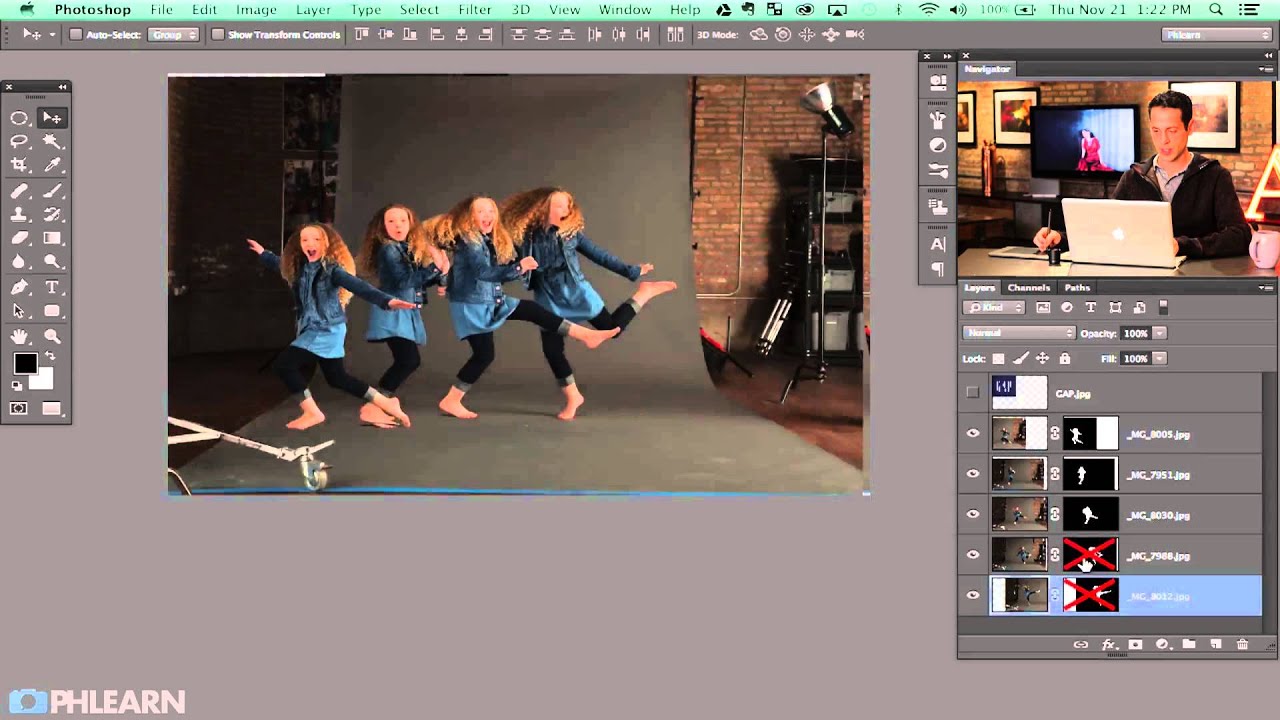
Composite work used to be the thing I’d quietly dread on a brief. Not because the retouching itself was hard, but because my early approach was so disorganized. I’d start painting, masking, and color-matching before I’d even decided where each element was going to live in the final image. The result was hours of rework and a file full of layers named “copy of copy of final FINAL.” It wasn’t pretty.
That’s exactly why this tutorial stopped me mid-scroll. In this Aaron Nace (PHLEARN) tutorial on building a Gap-inspired fashion composite from scratch, Aaron walks through something deceptively simple: how to cut the same subject out of multiple shots quickly and cleanly, so you have everything ready before you start arranging. Watch the full tutorial on YouTube. It’s Part 1 of a two-parter, and it’s entirely about setting up your composite foundation the right way. The techniques here are ones I now build into every multi-figure layout I do for clients.
What makes Aaron’s approach so transferable is the philosophy underneath it: do your extraction work up front, all of it, before you start making placement decisions. It sounds obvious. It isn’t how most of us actually work when we’re eager to see the image come together. Let’s break it down step by step.
Step 1: Load All Your Source Images Into a Single Stack
 File menu open showing Scripts and Load Files Into Stack
The first thing Aaron does is bring every source image into one Photoshop document using a script most people forget exists. Go to File, then Scripts, then Load Files Into Stack. Hit Browse, select your images, and click OK. Photoshop stacks them all as individual layers in one document. No dragging files in one at a time, no mismatched canvas sizes to troubleshoot later.
File menu open showing Scripts and Load Files Into Stack
The first thing Aaron does is bring every source image into one Photoshop document using a script most people forget exists. Go to File, then Scripts, then Load Files Into Stack. Hit Browse, select your images, and click OK. Photoshop stacks them all as individual layers in one document. No dragging files in one at a time, no mismatched canvas sizes to troubleshoot later.
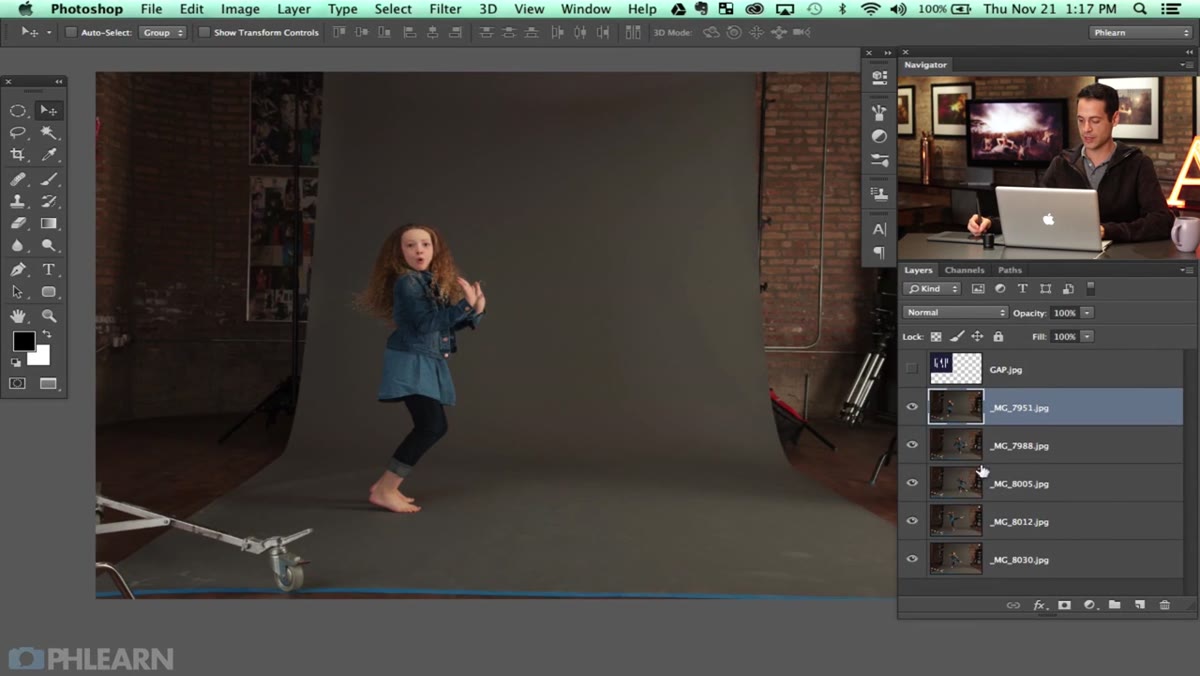
For a composite like this, where the same model was photographed in multiple poses against the same backdrop, this script is a genuine time-saver. You end up with a clean, organized starting point where every layer is already in the same space and ready to mask.
Step 2: Start Your Selection From the Background, Not the Subject
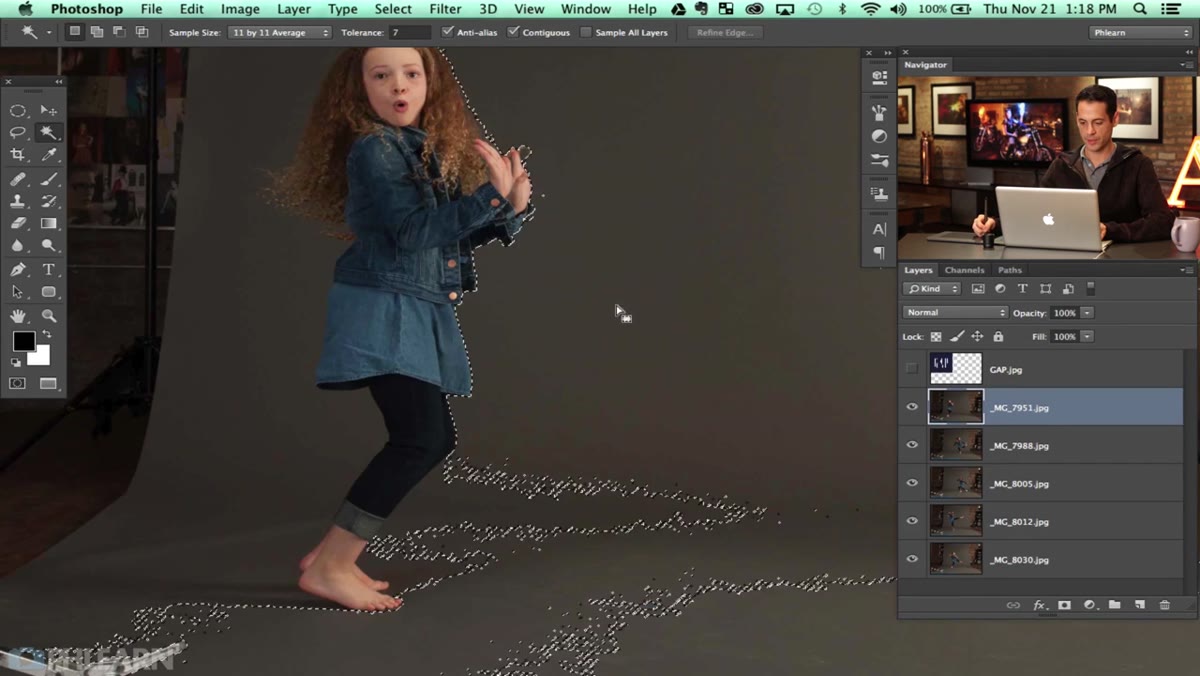 Magic Wand tool active, clicking gray backdrop outside subject
Here’s the mindset shift that changed how I approach extractions: instead of trying to trace around the person, click on the background first. Aaron uses the Magic Wand tool (keyboard shortcut W) and clicks on the gray seamless backdrop surrounding the subject. Because the backdrop is a consistent, neutral tone, the tool grabs it in one or two clicks.
Magic Wand tool active, clicking gray backdrop outside subject
Here’s the mindset shift that changed how I approach extractions: instead of trying to trace around the person, click on the background first. Aaron uses the Magic Wand tool (keyboard shortcut W) and clicks on the gray seamless backdrop surrounding the subject. Because the backdrop is a consistent, neutral tone, the tool grabs it in one or two clicks.
Shooting on gray seamless is doing most of the technical lifting here. If you’re working with your own images and the background is even remotely consistent in tone, this approach will save you significant time compared to manually drawing a selection around hair and clothing edges.
Step 3: Refine the Selection With Shift-Clicks and the Lasso Tool
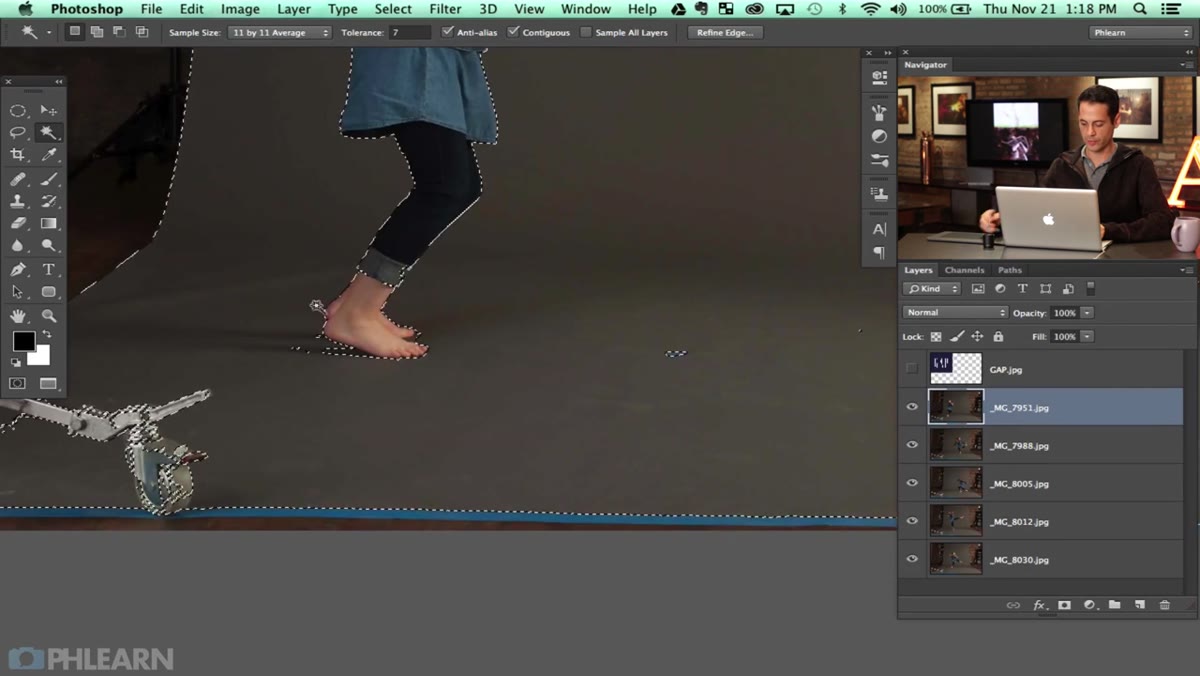 Shift-clicking additional background areas to expand selection
A single Magic Wand click rarely captures every corner of the background. Aaron refines by holding Shift and clicking the remaining unselected background areas, which adds those regions to the existing selection. For any irregular patches the wand misses, he switches to the Lasso tool, holds Shift again to stay in “add to selection” mode, and draws around those areas manually.
Shift-clicking additional background areas to expand selection
A single Magic Wand click rarely captures every corner of the background. Aaron refines by holding Shift and clicking the remaining unselected background areas, which adds those regions to the existing selection. For any irregular patches the wand misses, he switches to the Lasso tool, holds Shift again to stay in “add to selection” mode, and draws around those areas manually.
The key discipline here is patience with the cleanup pass. You don’t need a perfect pixel-level selection at this stage. You need to capture all the background so the inversion in the next step gives you a clean subject cutout. Good enough is genuinely good enough when the backdrop is flat gray.
Step 4: Invert and Apply as a Layer Mask
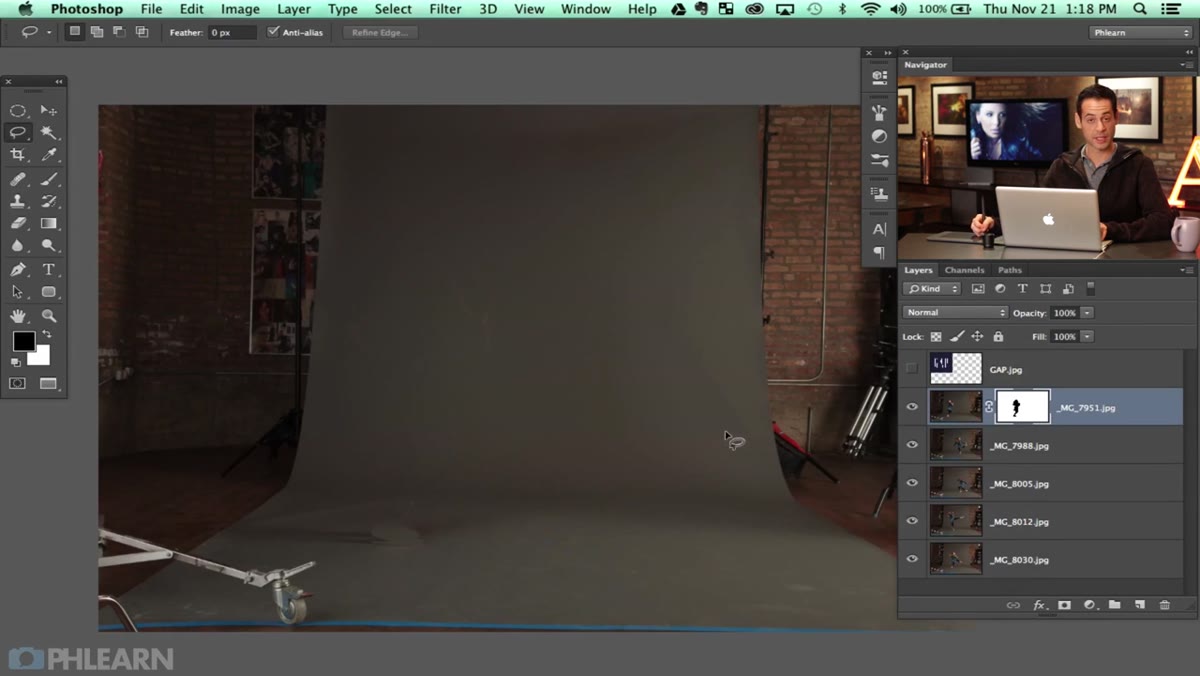 Layer mask applied, then Command-I inverting it to reveal subject
Once the background selection is solid, Aaron adds a layer mask directly. Because the selection covers the background rather than the subject, the mask initially hides her instead of the backdrop. The fix is one keyboard shortcut: Command-I (Ctrl-I on Windows) inverts the layer mask, making the background transparent and the subject visible.
Layer mask applied, then Command-I inverting it to reveal subject
Once the background selection is solid, Aaron adds a layer mask directly. Because the selection covers the background rather than the subject, the mask initially hides her instead of the backdrop. The fix is one keyboard shortcut: Command-I (Ctrl-I on Windows) inverts the layer mask, making the background transparent and the subject visible.
Alternatively, Aaron mentions a faster route he uses on subsequent layers: hold Alt (or Option on Mac) when clicking the Add Layer Mask button. This automatically adds an inverted mask, skipping the Command-I step entirely. Either method works. The Alt-click approach is the one I’ve added to my own workflow because it cuts out one extra action every single time.
Step 5: Repeat the Extraction for Every Pose
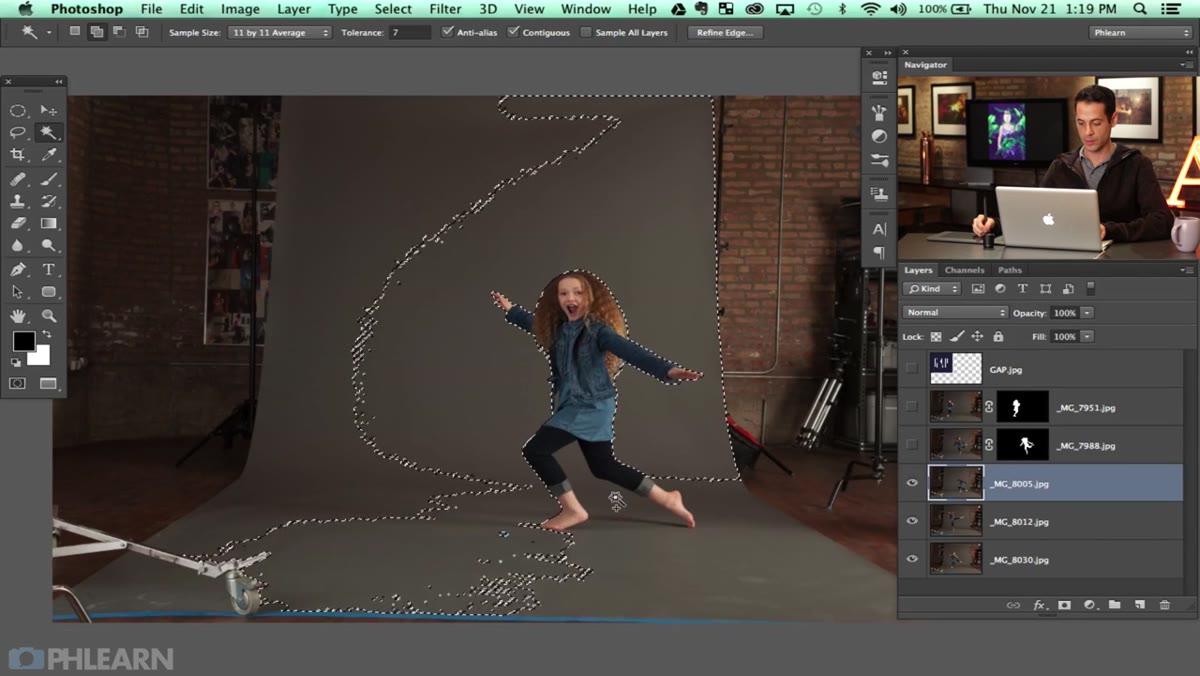 Second layer being selected with Magic Wand, same backdrop process
Aaron repeats the exact same process across all the source layers, one by one. Same tool, same background-first selection logic, same inversion trick. Because every shot was photographed on the same gray seamless, the Magic Wand settings don’t even need adjusting between layers. The consistency of the shooting setup is what makes this batch approach work.
Second layer being selected with Magic Wand, same backdrop process
Aaron repeats the exact same process across all the source layers, one by one. Same tool, same background-first selection logic, same inversion trick. Because every shot was photographed on the same gray seamless, the Magic Wand settings don’t even need adjusting between layers. The consistency of the shooting setup is what makes this batch approach work.
This is the step where most retouchers rush, and it’s where I used to rush too. But getting clean masks on every layer before you touch arrangement or color means you’re working with accurate information later. You won’t be second-guessing whether a color mismatch is a masking issue or a grading issue.
Step 6: Get All Extractions Done Before You Touch Composition
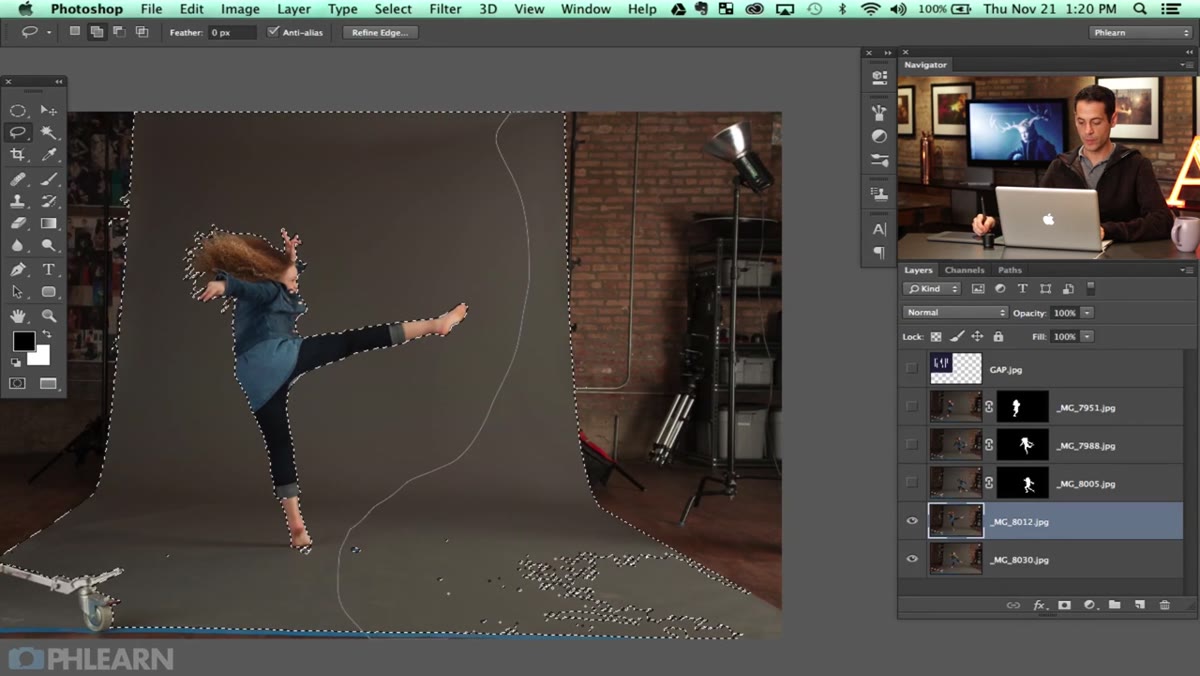 Multiple masked layers visible in Layers panel, all isolated subjects
Aaron is deliberate about sequencing: finish all extractions first, then start placing elements. He explicitly says to get your composite “relatively close” to where you want it before diving into detailed retouching. It’s a production mindset rather than a creative one at this stage, and it’s exactly the right call.
Multiple masked layers visible in Layers panel, all isolated subjects
Aaron is deliberate about sequencing: finish all extractions first, then start placing elements. He explicitly says to get your composite “relatively close” to where you want it before diving into detailed retouching. It’s a production mindset rather than a creative one at this stage, and it’s exactly the right call.
With every subject already cleanly masked and sitting on its own transparent layer, you can drag, scale, and reorder without re-doing masking work. The whole document is modular. That modularity is what lets Part 2 of his series focus entirely on the design and finishing work.
One Thing I’d Add From My Own Experience
Aaron shoots on gray seamless specifically because it makes extraction fast. But in beauty and brand retouching, we don’t always get to control the shoot. When I’m handed images with graduated backgrounds or environmental texture, I use the same background-first logic but switch to Select and Mask (under the Select menu) to clean up any fringing around hair before I finalize the layer mask. It adds maybe three minutes per layer, but it means I’m not chasing halo artifacts in the compositing stage when fixing them is ten times more painful.
The underlying principle is identical: select what you don’t want, invert, refine. The tool changes; the logic doesn’t.
The single most important idea in this tutorial is something Aaron says almost in passing: do your composite work up front. Extract everything before you arrange anything. It sounds like a small workflow preference, but it completely changes how a complex multi-figure layout comes together. Clean inputs make every decision downstream faster and cleaner.
Watch the full tutorial on YouTube to see Aaron work through the extractions in real time, and keep an eye out for Part 2, where the whole composite gets assembled and finished.
Comments (2)
This should be required reading for anyone starting out.
This should be required reading for anyone starting out.
Leave a Comment