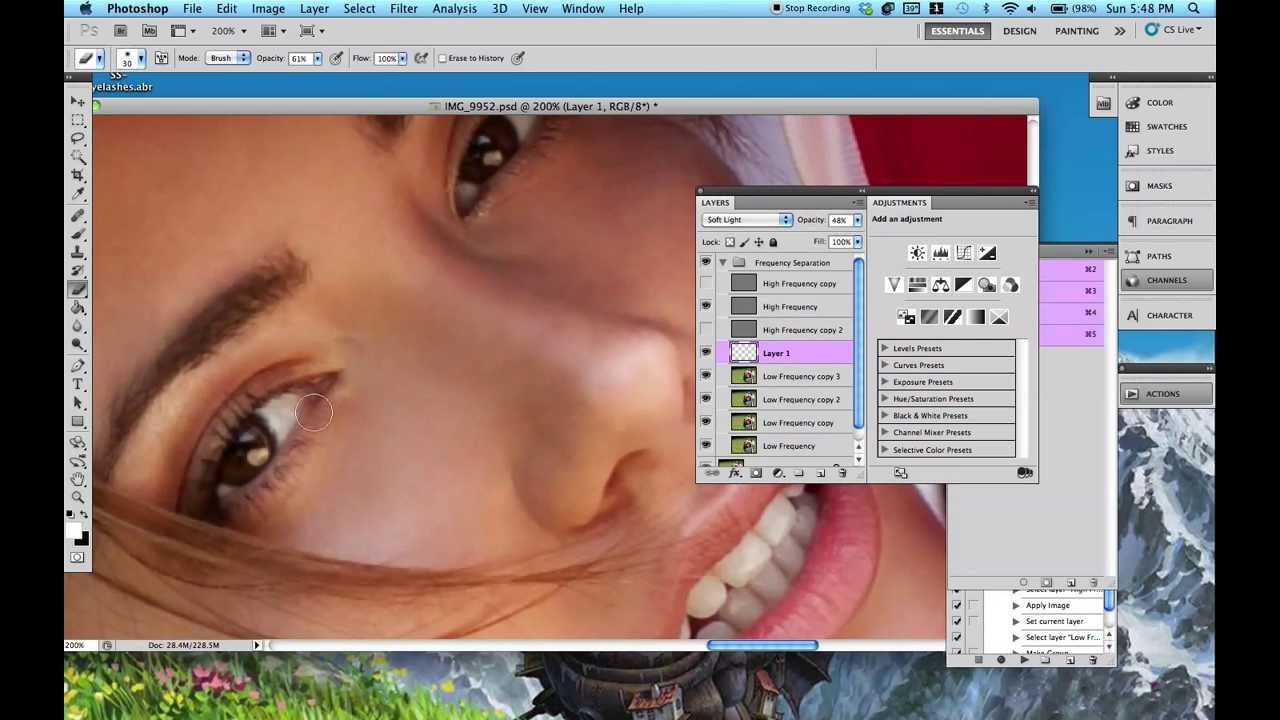
Eyes are the first place a viewer’s attention lands in a portrait, and they’re also the first place where clumsy retouching gets noticed. Early in my retouching career, I had a client tell me her eyes looked “painted on” in a set of beauty headshots I delivered. She wasn’t wrong. I had been dodging and burning directly on the image, and the result looked stiff and artificial. That experience sent me down a long road of learning how to add depth and luminosity to eyes in a way that feels like the light was just there, not like someone dragged a brush over a screen.
This technique from Jessica Kobeissi does exactly that. In Watch the full tutorial on YouTube, she walks through a multi-layer approach to eye enhancement using soft light and overlay blend modes on separate, purpose-built layers. What I appreciate about her method is the discipline of keeping each element isolated. Iris color, pupil depth, and the outer rim of the eye each get their own layer, which means you can dial each one back independently without starting over. That kind of non-destructive thinking is the difference between a workflow that scales and one that has you flattening and re-editing at midnight.
Below is my breakdown of her process, with the settings and logic spelled out so you can follow along in Photoshop without pausing and rewinding every thirty seconds.
Step 1: Create a New Layer for the Iris Color
 New layer button highlighted in the Layers panel
Start by adding a blank layer above your image. You can do this by clicking the new layer icon at the bottom of the Layers panel, or by using Command+Shift+N on a Mac (Ctrl+Shift+N on Windows). Keeping this work off your original image is non-negotiable. If anything goes sideways, you want to be able to delete or reduce this layer without touching the underlying photo.
New layer button highlighted in the Layers panel
Start by adding a blank layer above your image. You can do this by clicking the new layer icon at the bottom of the Layers panel, or by using Command+Shift+N on a Mac (Ctrl+Shift+N on Windows). Keeping this work off your original image is non-negotiable. If anything goes sideways, you want to be able to delete or reduce this layer without touching the underlying photo.
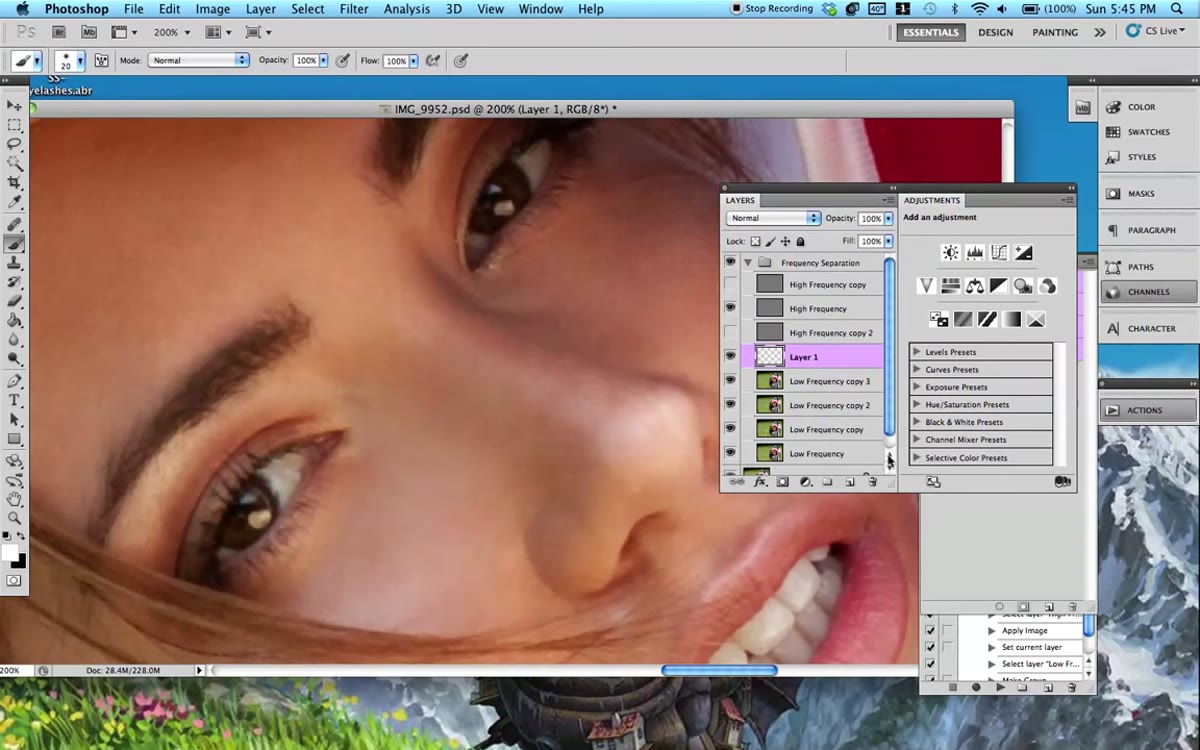
Select your brush tool and set the hardness to zero. A soft-edged brush is essential here because hard edges around the iris will look unnatural at any opacity. Start with a brush size around 20 pixels for a standard portrait, though you’ll adjust this depending on how large the eyes appear in your frame. Choose a color that complements or slightly enhances the subject’s natural eye color rather than replacing it entirely.
Step 2: Paint Lightly Over the Iris
 Soft brush painting color over the eye area
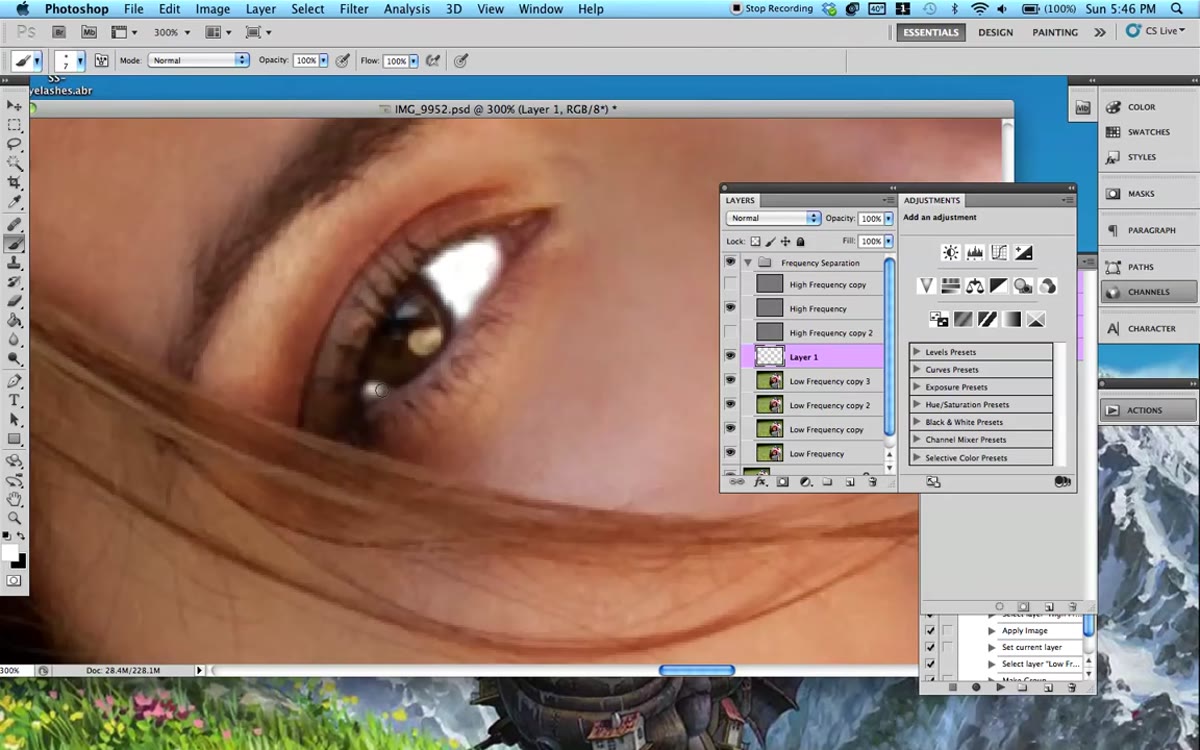
With a graphics tablet if you have one (pressure sensitivity makes a real difference here), lightly paint over the iris in loose strokes. Don’t worry about staying perfectly inside the lines on this pass. The goal is coverage, not precision. You’ll clean up the edges in the next step.
Soft brush painting color over the eye area
With a graphics tablet if you have one (pressure sensitivity makes a real difference here), lightly paint over the iris in loose strokes. Don’t worry about staying perfectly inside the lines on this pass. The goal is coverage, not precision. You’ll clean up the edges in the next step.
Once you’ve laid down the color, switch to your eraser tool. Set its hardness to zero percent and bring the opacity down to around 60 percent. Use it to gently clean up any color that spilled onto the whites of the eye or onto skin. The soft eraser at reduced opacity lets you feather the edges of the color naturally rather than cutting them off abruptly. Take your time here. This layer sets the foundation for everything that follows.
Step 3: Set the Iris Layer to Soft Light
 Blend mode dropdown showing Soft Light selected
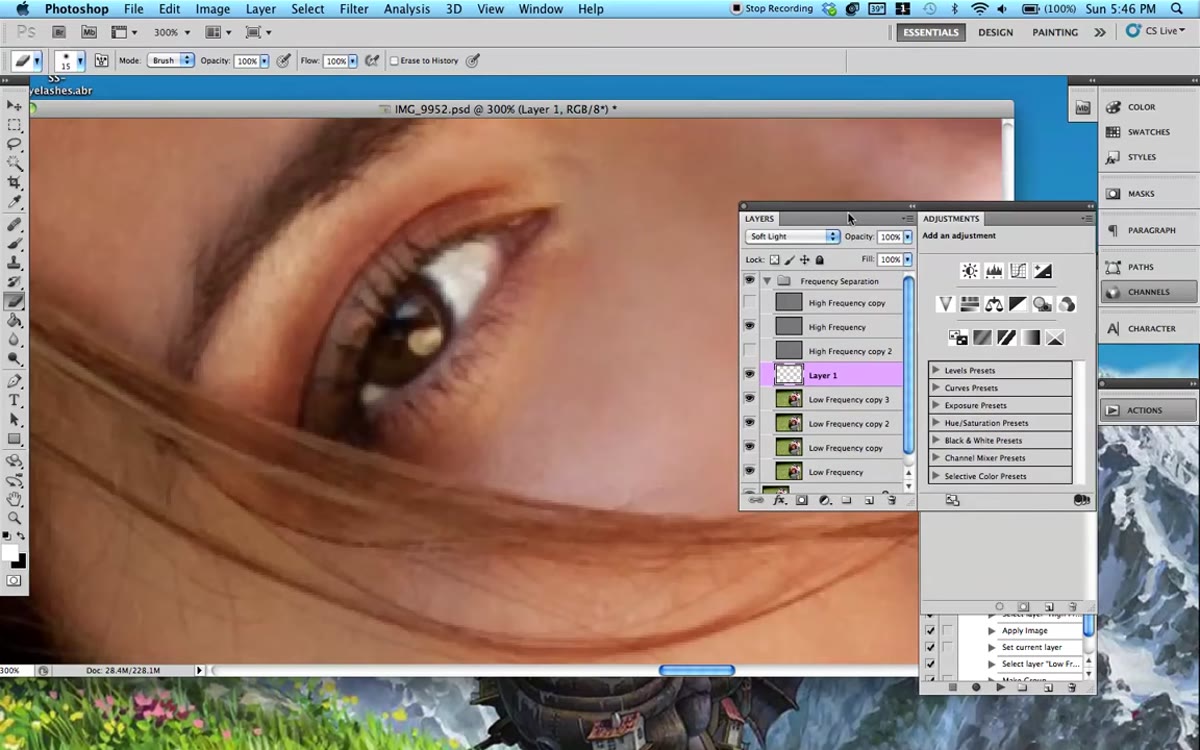
Change the blend mode of this iris color layer from Normal to Soft Light. This is where the technique earns its keep. Soft Light interacts with the luminosity already present in the eye, so instead of sitting on top of the image like a flat color, it integrates with the existing tones and appears to come from within. Toggle the layer on and off to compare. The effect should read as a subtle enhancement, not a replacement.
Blend mode dropdown showing Soft Light selected
Change the blend mode of this iris color layer from Normal to Soft Light. This is where the technique earns its keep. Soft Light interacts with the luminosity already present in the eye, so instead of sitting on top of the image like a flat color, it integrates with the existing tones and appears to come from within. Toggle the layer on and off to compare. The effect should read as a subtle enhancement, not a replacement.
Set the layer opacity between 60 and 70 percent. Kobeissi is clear that 100 percent is almost always too much. If you zoom out and the color is immediately obvious, reduce the opacity further. The benchmark is whether the eyes look more alive, not more painted.
Step 4: Add a Separate Layer for the Pupils
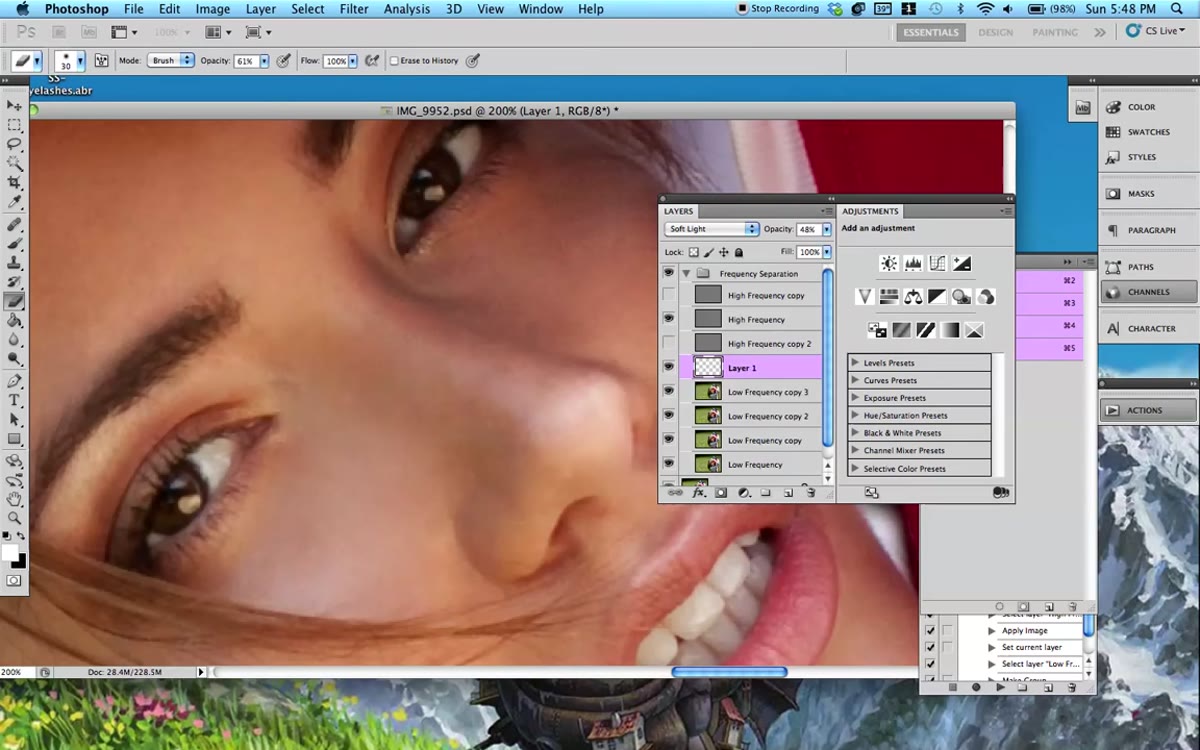 New layer named ‘pupils’ added above iris layer
Create another new layer and label it “pupils.” Working on a separate layer for the pupil means you can adjust the center of the eye independently from the iris, which matters more than it sounds once you start comparing the two at different opacities.
New layer named ‘pupils’ added above iris layer
Create another new layer and label it “pupils.” Working on a separate layer for the pupil means you can adjust the center of the eye independently from the iris, which matters more than it sounds once you start comparing the two at different opacities.
This time, switch the blend mode to Overlay instead of Soft Light. Overlay produces a more contrast-heavy result, which works well for the dark, dense center of the eye. Use black as your paint color and a small brush, sized to match the pupil itself. Paint directly over the pupil area to deepen and define it. Reduce the layer opacity until the pupil looks richer without looking artificial. Somewhere around 50 to 70 percent is typically the right range.
Step 5: Define the Outer Edge of the Iris
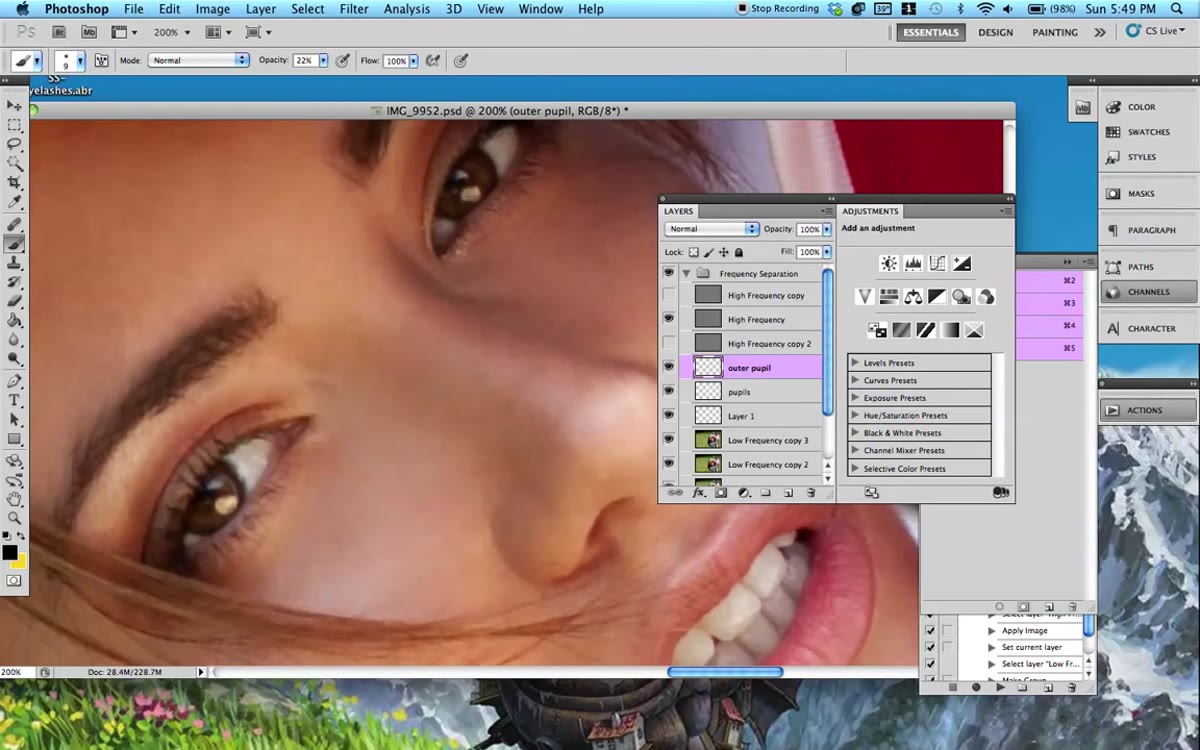 Black soft brush outlining the outer iris ring
Add one more layer, this one for the outer rim of the iris. Set it to Soft Light. Using a small brush, around 9 pixels, at zero hardness and low opacity (roughly 20 to 25 percent), trace along the outer edge of the iris with black. This creates a subtle limbal ring effect, the dark border between the iris and the white of the eye that is naturally associated with youth and eye health. Even a very faint version of this makes a portrait feel sharper and more present.
Black soft brush outlining the outer iris ring
Add one more layer, this one for the outer rim of the iris. Set it to Soft Light. Using a small brush, around 9 pixels, at zero hardness and low opacity (roughly 20 to 25 percent), trace along the outer edge of the iris with black. This creates a subtle limbal ring effect, the dark border between the iris and the white of the eye that is naturally associated with youth and eye health. Even a very faint version of this makes a portrait feel sharper and more present.
Keep the layer opacity low. The cumulative effect of all three layers together is what produces the final result, and each individual layer should look almost underwhelming on its own. Reduce the opacity of this outer edge layer until it’s barely noticeable in isolation, then evaluate it in context with the other layers active.
Step 6: Evaluate the Whole Stack Together
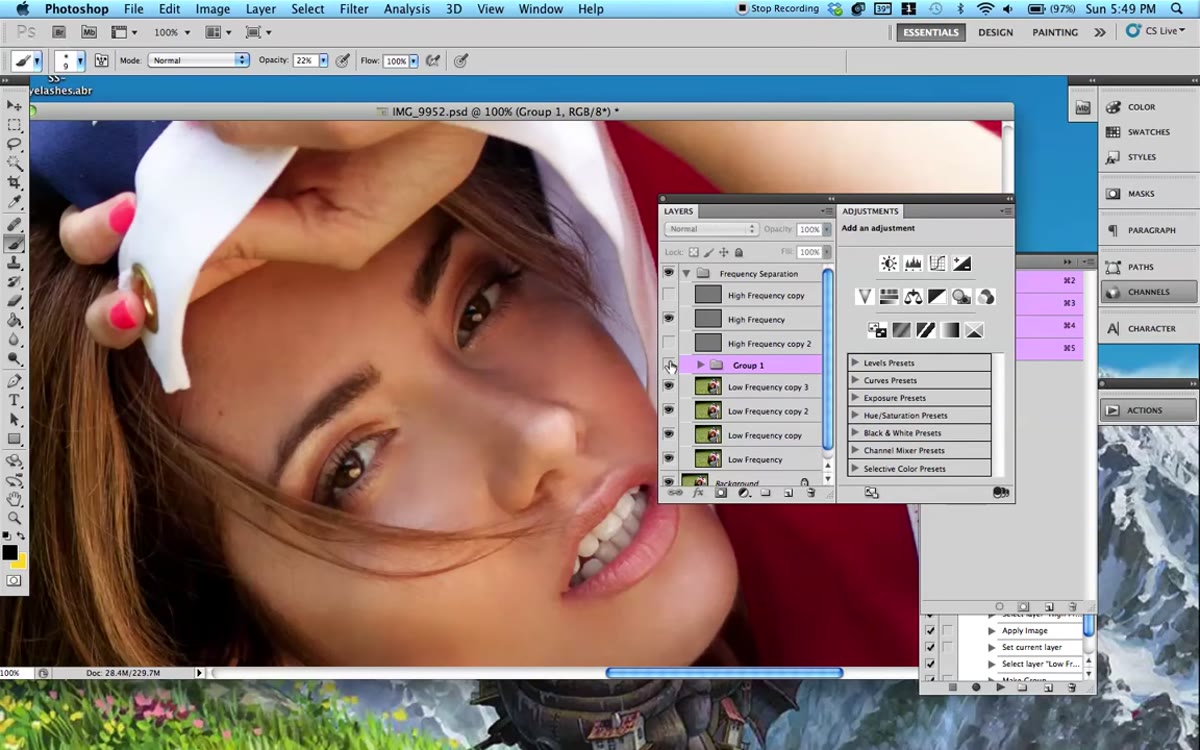 Before and after eye comparison with layers toggled
Toggle all three layers on and off together to compare against the original. At this point you’re looking for overall balance. Are the eyes brighter and more defined, or do they look digitally altered? The goal is the former. If any single layer is pulling too much attention, reduce its opacity before touching the others.
Before and after eye comparison with layers toggled
Toggle all three layers on and off together to compare against the original. At this point you’re looking for overall balance. Are the eyes brighter and more defined, or do they look digitally altered? The goal is the former. If any single layer is pulling too much attention, reduce its opacity before touching the others.
This is also the moment to check both eyes against each other. If you’ve been working on one eye at a time, the two layers stacks may not match. Adjust opacities per-eye as needed.
A Note From My Own Practice
One thing I’d add to Kobeissi’s approach: I keep a masked adjustment layer (specifically a Curves layer clipped to the eye area) parked above this entire stack. After I’ve built out the color and depth layers, I use a gentle S-curve to add a last pass of contrast and brightness directly to the eye. It takes thirty seconds and brings a crispness that the paint layers alone don’t quite deliver. Think of it as a finish coat on top of the foundation work.
I’d also suggest naming your layers as you go, not just for organization but because coming back to a file days later with three unnamed layers is genuinely disorienting. I name mine after whatever I’m actually doing: “iris warm,” “pupil depth,” “limbal ring.” Simple, searchable, and your future self will thank you.
The single most important thing this tutorial reinforces is that eye retouching lives or dies by restraint. Multiple low-opacity layers, each doing one small job, add up to something that looks like the light just caught perfectly. One heavy-handed pass looks like exactly what it is. Build up gradually, evaluate constantly, and when in doubt, reduce.
Watch the full tutorial on YouTube to see Jessica Kobeissi walk through this in real time. Watching her toggle layers and make opacity adjustments on the fly is genuinely useful for understanding the pacing of this technique.
Comments
Leave a Comment