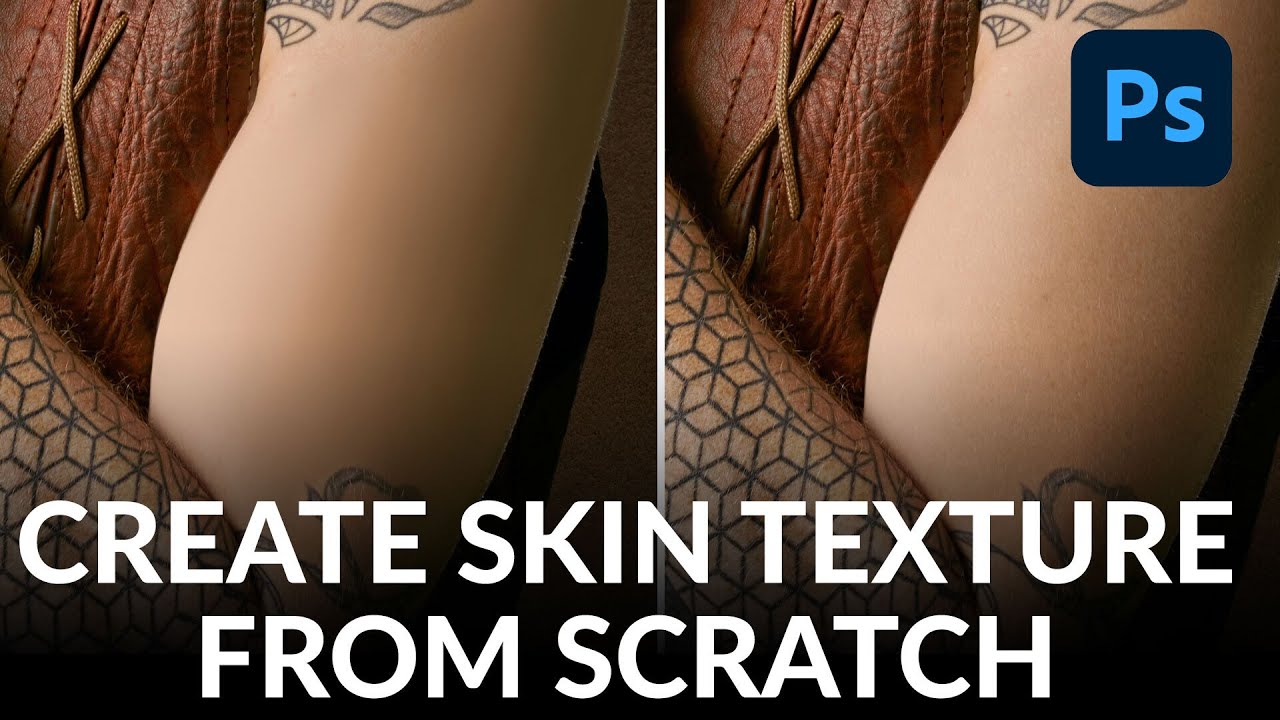
There is a specific kind of panic that sets in when a client asks you to remove a large tattoo and you realize the skin underneath is, essentially, gone. Not damaged, not blemished. Just… absent. Early in my retouching career, I would have reached for the Clone Stamp tool, crossed my fingers, and produced something that looked more like a blurry knee than a human forearm. These days, I build the skin from the ground up, and the results are dramatically better. This technique is one I keep returning to, and it got significantly cleaner after I worked through this Aaron Nace tutorial from PHLEARN. Watch the full tutorial on YouTube
The core idea Aaron teaches is deceptively simple: human skin is not one flat color. It is a layered system of tones, shadows, and micro-texture, and if you want to reconstruct it convincingly, you have to paint it the same way light actually falls on a body. The process he walks through, covering a large floral tattoo on a subject’s arm, translates directly to any situation where skin needs to be rebuilt: heavy blemish work, scar concealment, or major compositing.
What I appreciate most about his approach is that it resists the temptation to over-complicate. No frequency separation at this stage, no luminosity masks. Just intentional brush work, smart color sampling, and a clear understanding of how light wraps around a limb.
Step 1: Set Up Your Brush for Large-Area Painting
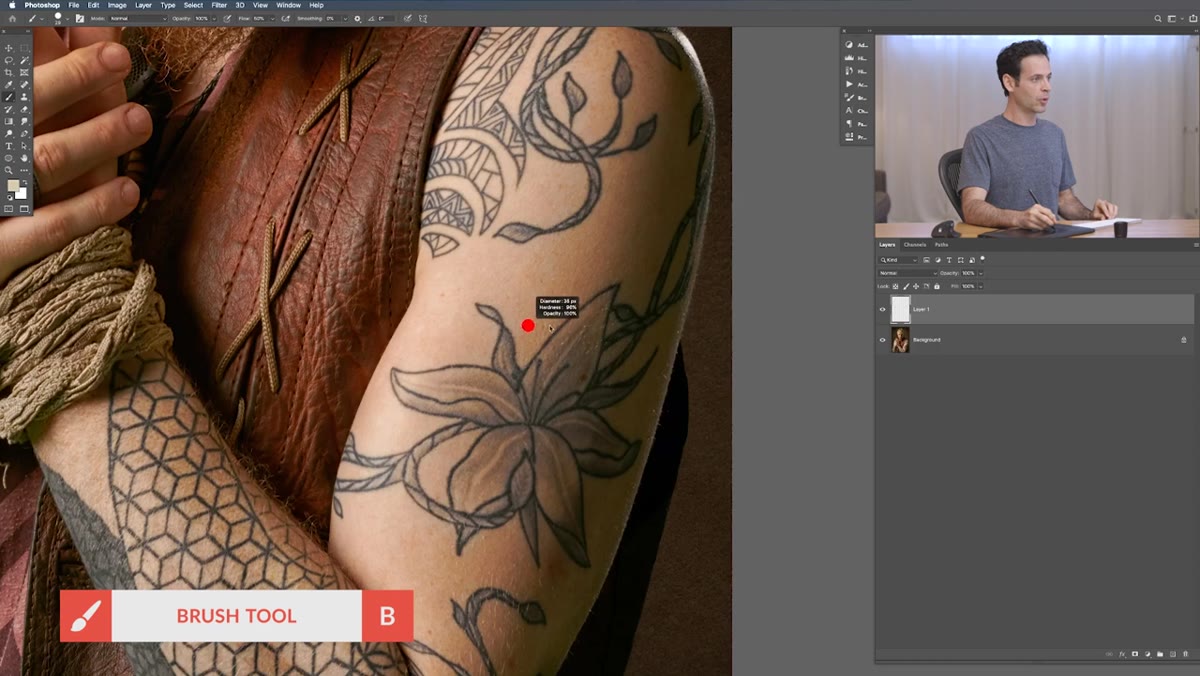 Brush tool selected with flow set to 30 percent
Before painting a single pixel, the brush settings need to be right. Aaron works with a large, soft-edged brush and drops the flow down to 30 percent using Shift+3. He keeps opacity locked at 100 and adjusts only the flow. This distinction matters: flow controls how much paint builds up with each pass, which gives you gradual, controllable coverage. Opacity cuts the whole stroke at once, which tends to produce hard-edged blobs at low settings.
Brush tool selected with flow set to 30 percent
Before painting a single pixel, the brush settings need to be right. Aaron works with a large, soft-edged brush and drops the flow down to 30 percent using Shift+3. He keeps opacity locked at 100 and adjusts only the flow. This distinction matters: flow controls how much paint builds up with each pass, which gives you gradual, controllable coverage. Opacity cuts the whole stroke at once, which tends to produce hard-edged blobs at low settings.
For brush size, he uses Ctrl+Option+drag on Mac (Ctrl+Alt+Right-click+drag on PC) to resize on the fly. The brush should feel almost comically large for this kind of work. If you are painting inside neat little lines, your brush is too small.
Step 2: Sample Skin Color Accurately with the Eyedropper
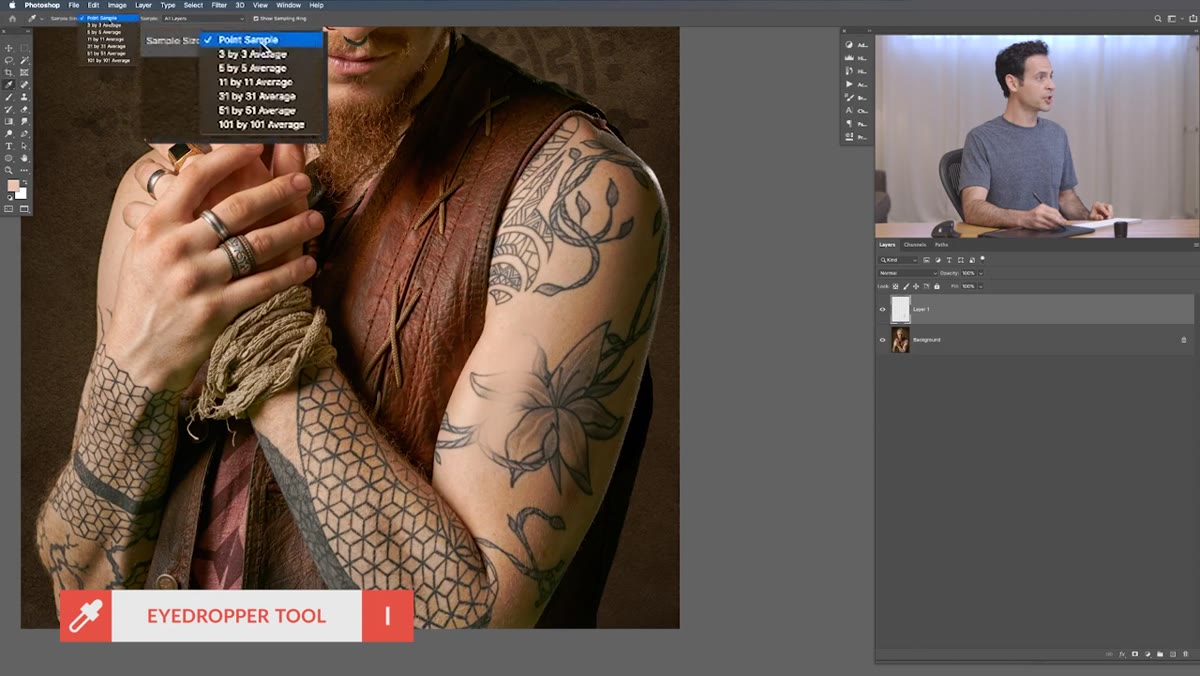 Eyedropper tool open with 11x11 average sample size selected
Before you can paint skin, you have to pull the right colors from the image. Aaron switches to the Eyedropper tool and changes the sample size to an 11x11 pixel average. Sampling a single pixel gives you noise. An 11x11 average gives you a truer reading of the actual tone in that region.
Eyedropper tool open with 11x11 average sample size selected
Before you can paint skin, you have to pull the right colors from the image. Aaron switches to the Eyedropper tool and changes the sample size to an 11x11 pixel average. Sampling a single pixel gives you noise. An 11x11 average gives you a truer reading of the actual tone in that region.
While painting, he holds Alt (Option on Mac) to temporarily switch to the Eyedropper without leaving the Brush tool. This lets him resample constantly as he moves across the arm, picking up the cooler shadow tones along the back edge and the warmer, lighter tones along the front where the light hits. Resample often. Every few strokes, check that your color still matches the area you are moving into.
Step 3: Block In the Base Tones, Dark to Light
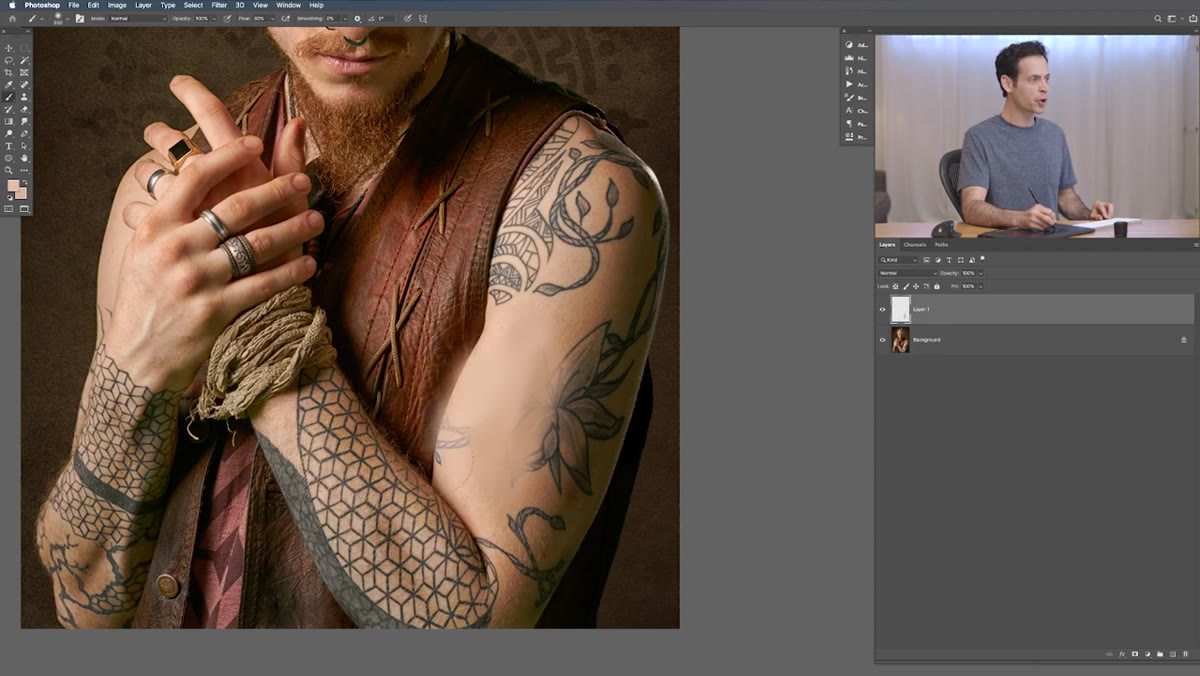 Soft brush strokes covering tattoo area with sampled skin tones
The actual painting begins here, and the instruction Aaron gives that changed how I work is this: do not try to be neat. Paint outside the arm. Let strokes overlap the background. You are not coloring inside lines; you are laying down large, soft shapes of color that will blend together into a seamless tone field.
Soft brush strokes covering tattoo area with sampled skin tones
The actual painting begins here, and the instruction Aaron gives that changed how I work is this: do not try to be neat. Paint outside the arm. Let strokes overlap the background. You are not coloring inside lines; you are laying down large, soft shapes of color that will blend together into a seamless tone field.
He works from the darker edge of the arm inward toward the highlight, sampling new colors as the tone shifts. The back of the arm reads darker because it catches less light, and that transition has to be painted deliberately. Think of it less like retouching and more like digital painting. You are sculpting a three-dimensional object with tone.
Step 4: Build Up Coverage with Multiple Passes
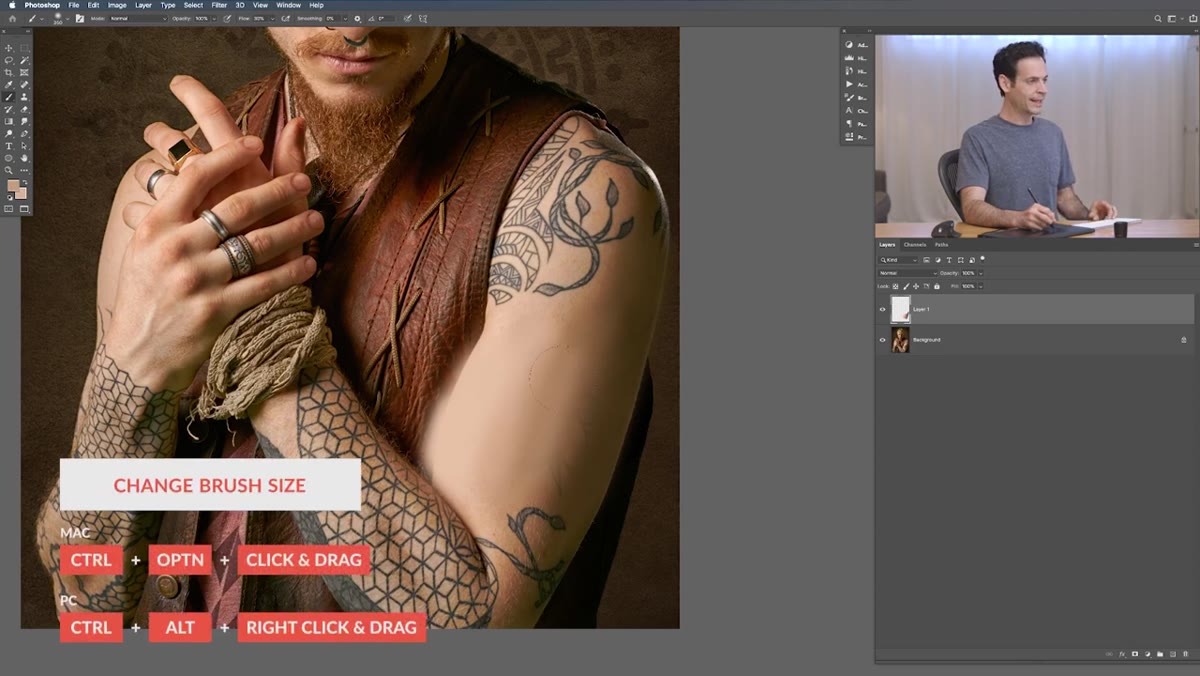 Multiple overlapping brush strokes blending across arm surface
With flow at 30 percent, one pass is never enough. Aaron layers multiple strokes in the same area, letting the color build gradually. This is how you avoid the telltale flatness that makes painted skin look fake. Each pass adds a little more density, and the overlapping soft edges create a natural-looking gradation.
Multiple overlapping brush strokes blending across arm surface
With flow at 30 percent, one pass is never enough. Aaron layers multiple strokes in the same area, letting the color build gradually. This is how you avoid the telltale flatness that makes painted skin look fake. Each pass adds a little more density, and the overlapping soft edges create a natural-looking gradation.
Resist the urge to crank flow up to get faster coverage. The slower build is exactly what creates the smooth tonal shift that reads as real skin. If you are moving too quickly and the result looks blotchy, slow down and work in more, lighter passes.
Step 5: Refine Edge Transitions Along the Arm’s Contour
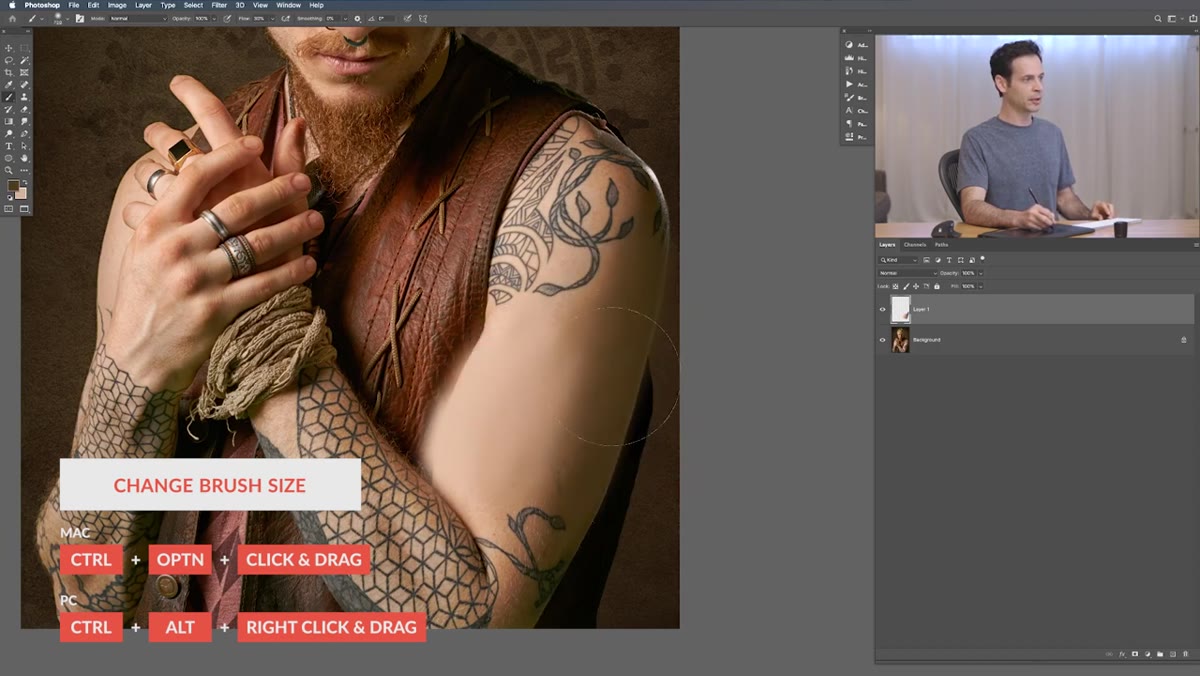 Large brush strokes extending deliberately beyond arm edge
One of the more counterintuitive points Aaron makes is that painting over the edge of the arm actually helps. When your soft brush extends beyond the contour, the falloff of the stroke mimics the way skin loses saturation and value as it curves away from the light. It reinforces the three-dimensional read of the limb.
Large brush strokes extending deliberately beyond arm edge
One of the more counterintuitive points Aaron makes is that painting over the edge of the arm actually helps. When your soft brush extends beyond the contour, the falloff of the stroke mimics the way skin loses saturation and value as it curves away from the light. It reinforces the three-dimensional read of the limb.
This is also where the large brush size pays off structurally. A small brush used along an edge creates a hard, obvious line. A large brush naturally feathers the transition so it blends with the existing skin around the painted area. Let the brush do the geometric work for you.
What I Add to This Workflow
Aaron’s tutorial ends with the tonal foundation in place, which is exactly the right stopping point for what he is teaching. In my own workflow, after the base painting is done, I add one more pass specifically for texture.
I keep a set of high-frequency skin texture brushes, some downloaded from PHLEARN and some I built from cropped skin details using Edit > Define Brush Preset. Over the painted area, on a new layer set to Overlay or Soft Light at low opacity, I stamp these texture brushes using a sampled color from the image. This breaks up the smoothness that even the best tonal painting leaves behind. It is the difference between skin that looks retouched and skin that looks like it was always there.
For large tattoo removal specifically, I also run a quick Liquify pass at the very end to match any subtle surface contour bumps from the surrounding skin. The painted area can look slightly too smooth compared to real skin that has natural ridges and pores. A gentle Liquify nudge with the Forward Warp tool, almost imperceptible, closes that gap.
The single most important thing this tutorial reinforced for me is that realistic skin is a painting problem, not a cloning problem. When there is nothing left to clone from, your brush, your color awareness, and your patience are the only tools that will save you. Large brushes, low flow, constant resampling, and the willingness to paint past the edges. That combination will get you further than any automated tool.
Watch the full tutorial on YouTube to see Aaron walk through the complete process, and download the free custom brushes and sample PSD from PHLEARN while you are there.
Comments (2)
Finally someone explains this in a way that actually makes sense.
The before and after really sells it. Incredible difference.
Leave a Comment