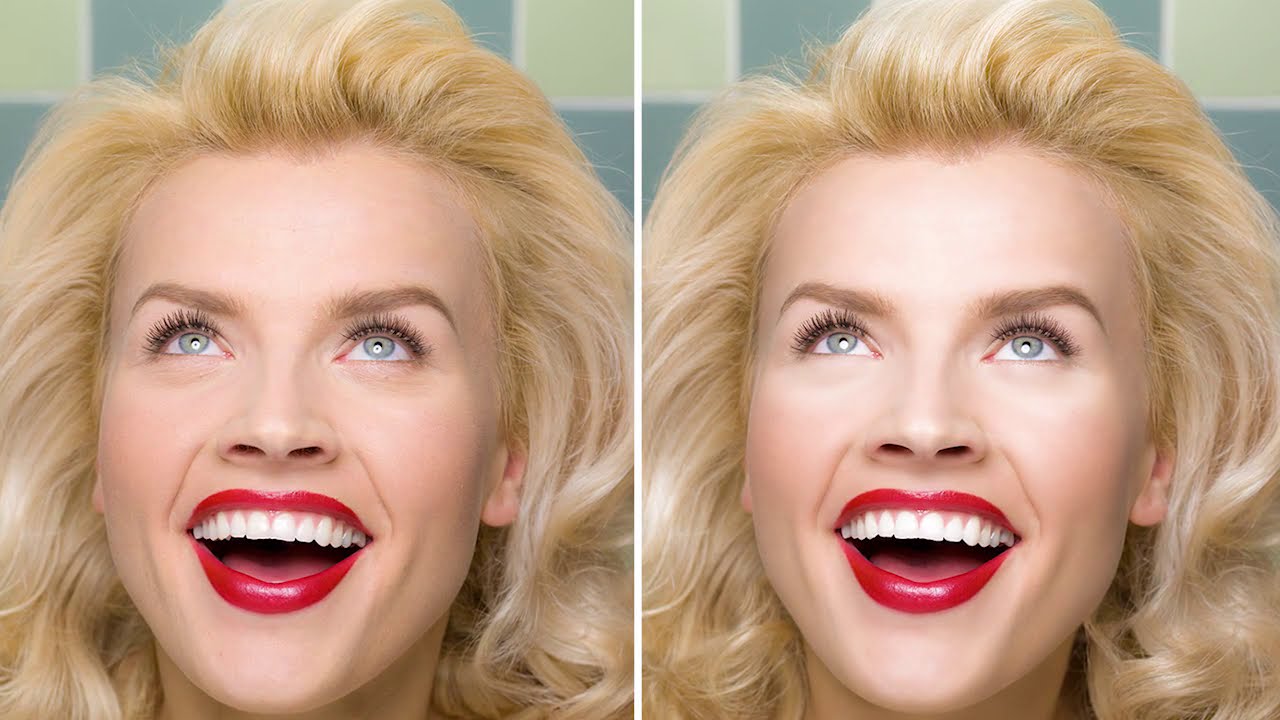
There’s a specific kind of defeat that comes from delivering a gallery and hearing back that the edits look “a little flat.” I’ve been there. Early in my beauty retouching career, I was so focused on removing things, smoothing, erasing, fixing, that I forgot skin has actual shape. It catches light on a nose bridge. It has shadow under a cheekbone. When you retouch that dimension away, even a perfectly exposed photo can start to look like a wax figure. The fix isn’t a filter. It’s painting.
In this CreativeLive tutorial, the instructor walks through a method for manually painting tone and volume back into skin using a layered approach in Photoshop. It’s not a one-click solution and that’s exactly why I keep coming back to it. The technique gives you granular control over where light falls on a face, without ever touching your original pixel data. Here’s how it works, broken into steps you can follow alongside your own image.
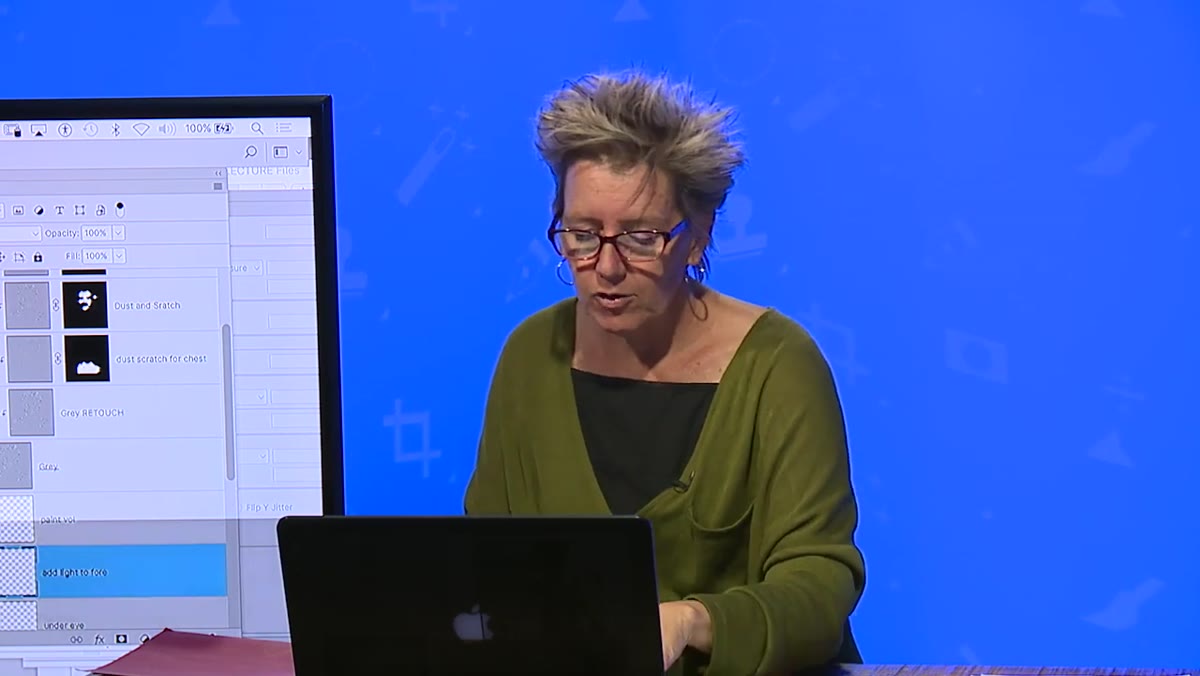
Step 1: Create a Dedicated Volume Layer
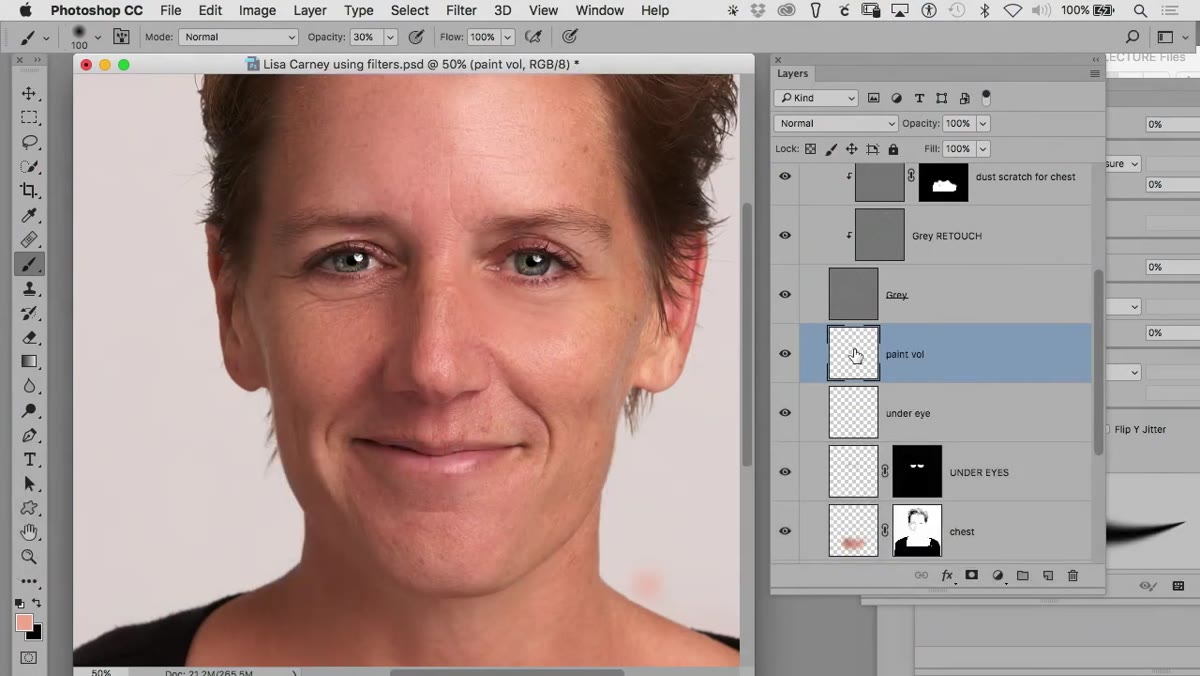 New blank layer named ‘volume’ created above the stack
Before touching a brush, make a new blank layer above your retouching stack and name it something clear. “Volume” works. “Painting-light” works. What doesn’t work is leaving it as “Layer 47” and wondering three days later why your subject’s nose looks like it has a spotlight on it. Label it immediately. This layer is where all your tonal painting will live, completely separate from your blur work and texture layers.
New blank layer named ‘volume’ created above the stack
Before touching a brush, make a new blank layer above your retouching stack and name it something clear. “Volume” works. “Painting-light” works. What doesn’t work is leaving it as “Layer 47” and wondering three days later why your subject’s nose looks like it has a spotlight on it. Label it immediately. This layer is where all your tonal painting will live, completely separate from your blur work and texture layers.
The separation matters more than it sounds. When you inevitably decide the effect is too strong at 2am, you want to be able to reduce a single layer’s opacity rather than undo twenty brush strokes. Future you will be grateful.
Step 2: Set Your Foreground Color to Black or White
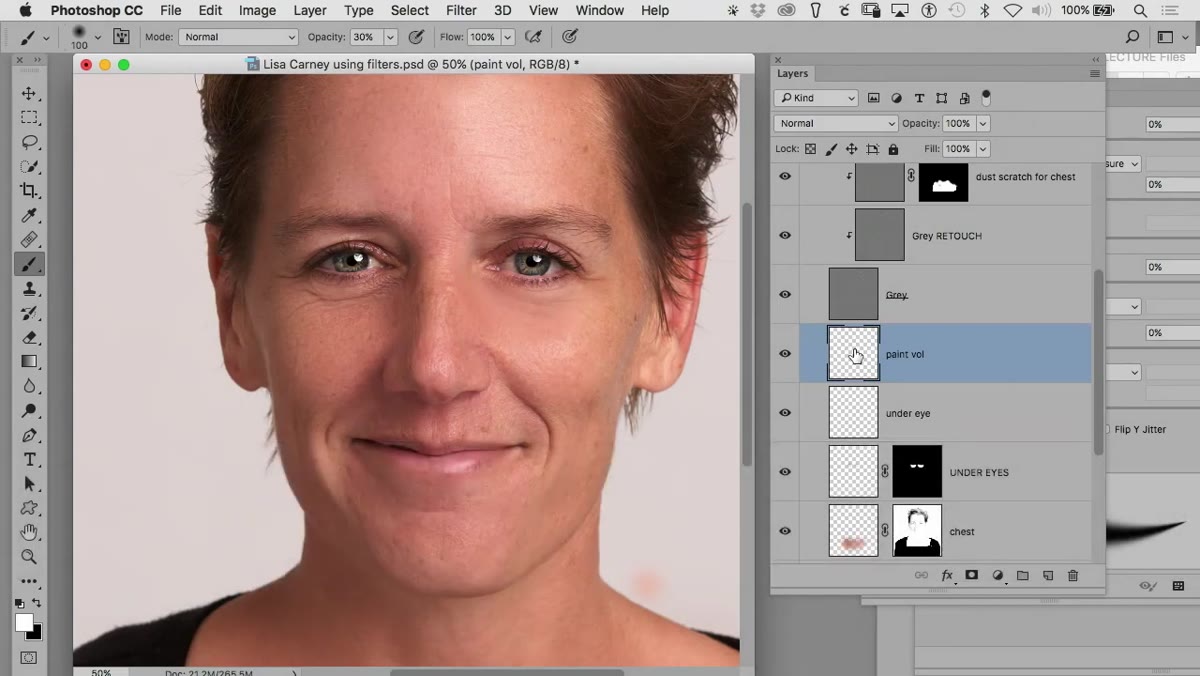 Default black and white swatches selected in the toolbar
Press D to reset your foreground and background colors to the default black and white. Then press X to toggle which color sits on top. For highlights, you want white on top. For shadow and depth, use black. The instructor starts with white to add a highlight to the nose bridge, which is one of the first places direct light hits on most faces.
Default black and white swatches selected in the toolbar
Press D to reset your foreground and background colors to the default black and white. Then press X to toggle which color sits on top. For highlights, you want white on top. For shadow and depth, use black. The instructor starts with white to add a highlight to the nose bridge, which is one of the first places direct light hits on most faces.
This two-key workflow (D then X) is worth making automatic. I’ve named a Photoshop action after it, which tells you how often I use it. The point is to keep your palette clean and your intentions deliberate: you’re not guessing at color, you’re sculpting with light and shadow the same way a painter would block in a portrait.
Step 3: Paint the Highlight with a Soft Brush
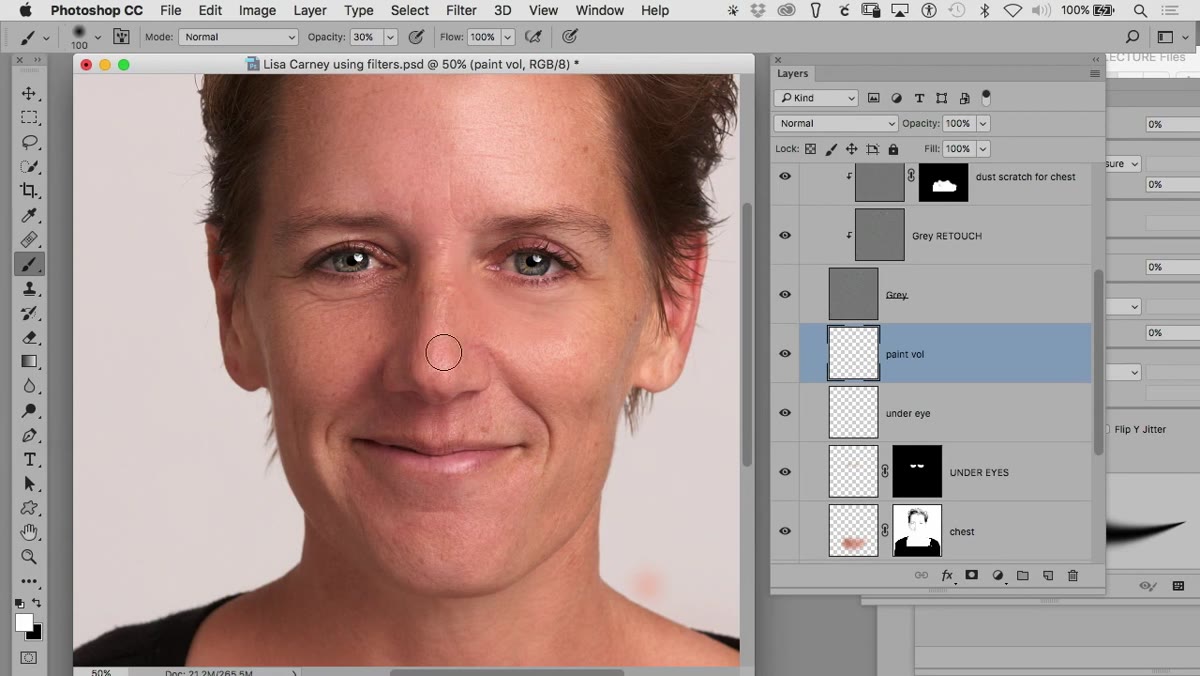 Soft brush painting a white stroke along the nose bridge
Select the Brush tool and use a large, soft-edged brush at full opacity for now. Click at the top of the nose bridge, then at the tip, painting a loose vertical stroke. Don’t stress about precision here. The whole point of working on a separate layer is that you can blur, fade, and adjust freely without consequences. The instructor explicitly describes this as painting, not precision masking, and that mindset shift matters. You’re not tracing an outline. You’re placing light.
Soft brush painting a white stroke along the nose bridge
Select the Brush tool and use a large, soft-edged brush at full opacity for now. Click at the top of the nose bridge, then at the tip, painting a loose vertical stroke. Don’t stress about precision here. The whole point of working on a separate layer is that you can blur, fade, and adjust freely without consequences. The instructor explicitly describes this as painting, not precision masking, and that mindset shift matters. You’re not tracing an outline. You’re placing light.
Once you have a rough stroke, run a Gaussian Blur over it (Filter > Blur > Gaussian Blur). The instructor uses around 5 pixels for a close-up portrait, but there’s no single correct value. Blur until the stroke disappears into the skin and stops looking like a smear. If you can see the edge of your brushwork, blur more.
Step 4: Reduce Layer Opacity to Taste
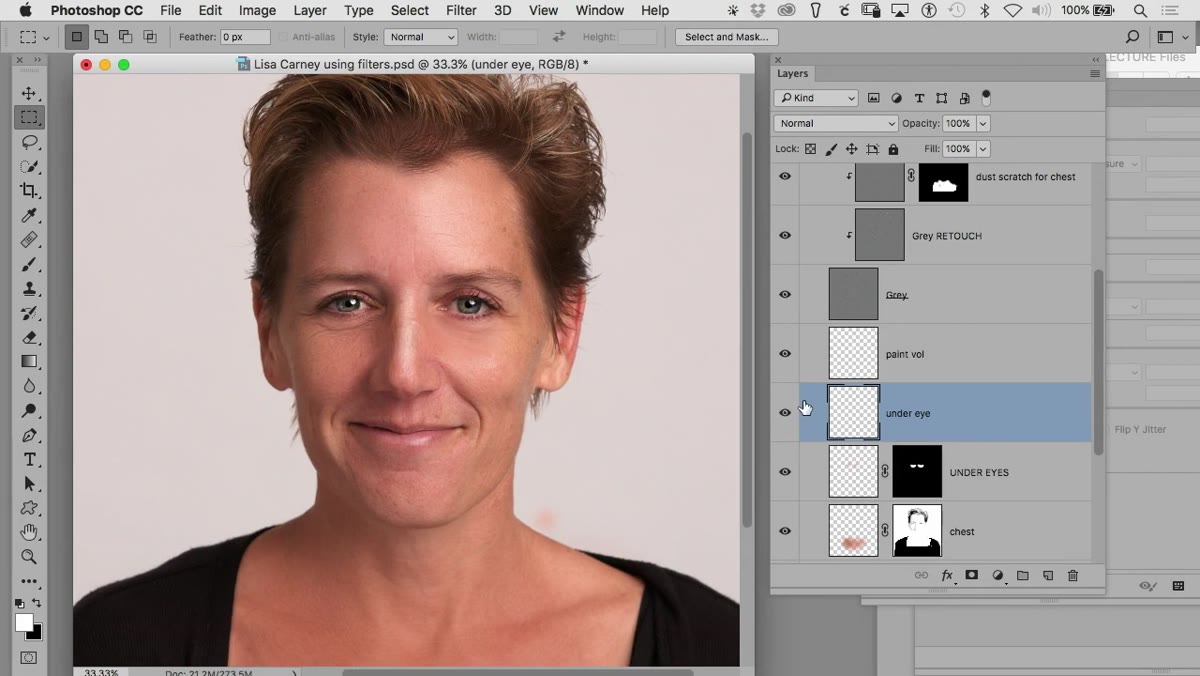 Layer opacity being reduced from 50% down toward 20-30%
New retouchers consistently make the same mistake: they leave the volume layer at 100% opacity and wonder why their subject looks like they walked into a ring light face-first. The instructor reduces the nose highlight layer to around 30 to 50 percent, then revisits it later and brings it down further to around 20 percent. That range, somewhere between 15 and 40 percent depending on your image, is where painted volume starts looking like real light rather than a Photoshop layer.
Layer opacity being reduced from 50% down toward 20-30%
New retouchers consistently make the same mistake: they leave the volume layer at 100% opacity and wonder why their subject looks like they walked into a ring light face-first. The instructor reduces the nose highlight layer to around 30 to 50 percent, then revisits it later and brings it down further to around 20 percent. That range, somewhere between 15 and 40 percent depending on your image, is where painted volume starts looking like real light rather than a Photoshop layer.
Resist the urge to judge opacity while you’re painting. Add the stroke, blur it, then step back and reduce. Your eye calibrates better when you’re not in the middle of creating.
Step 5: Use the Gradient Tool to Add Light to Larger Areas
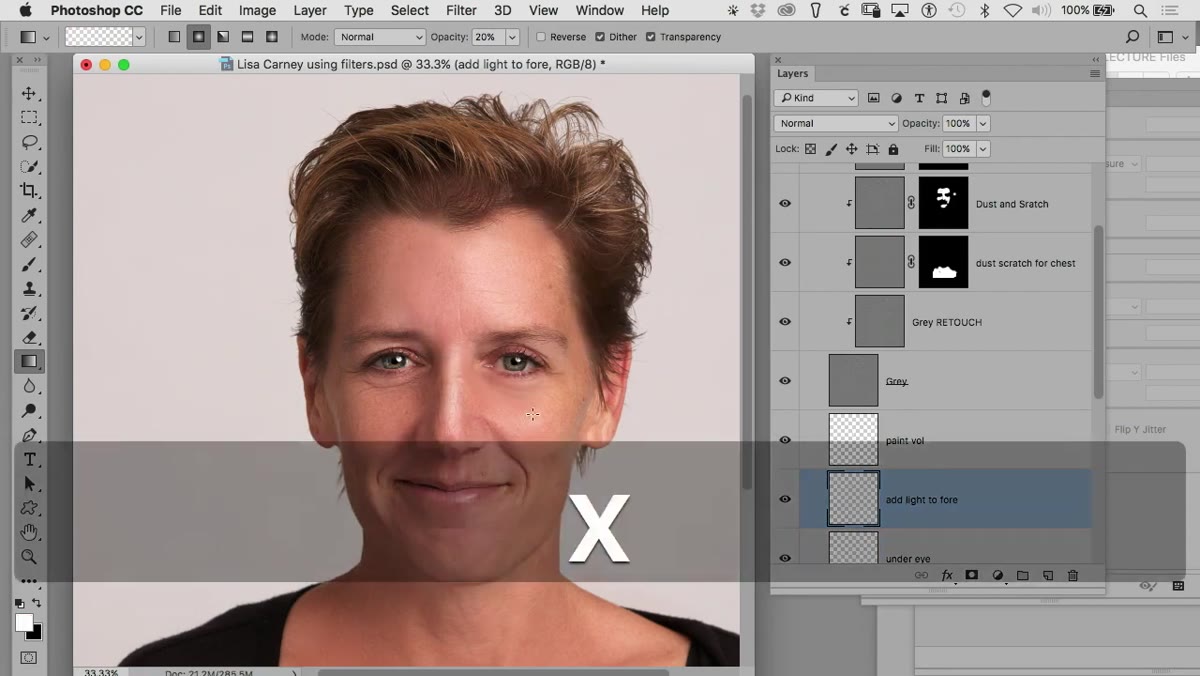
 Gradient tool dragging across the forehead on the volume layer
For broader areas like the forehead, a brush stroke is too localized. The instructor switches to the Gradient tool, which creates a smooth linear transition from white to transparent. This is particularly useful when you have a shot where the lighting was slightly off during the shoot. A soft gradient pulled across one side of the forehead can convincingly suggest that the light source was warmer or stronger on that side, even if it wasn’t.
Gradient tool dragging across the forehead on the volume layer
For broader areas like the forehead, a brush stroke is too localized. The instructor switches to the Gradient tool, which creates a smooth linear transition from white to transparent. This is particularly useful when you have a shot where the lighting was slightly off during the shoot. A soft gradient pulled across one side of the forehead can convincingly suggest that the light source was warmer or stronger on that side, even if it wasn’t.
Keep the gradient on the same volume layer or a new labeled layer if you want independent control. The key is the same as with the brush: blur if needed, and reduce opacity until it reads as natural. A good test is to toggle the layer on and off. If you notice it the moment it turns on, it’s too strong.
Step 6: Add Subtle Volume to Cheeks and Other Facial Planes
 White painted softly onto the cheek area of the portrait
The cheekbones, the chin, the cupid’s bow, the brow bone — these all catch light differently. Work your way across the face with the same brush-and-blur approach, treating each plane separately if you want maximum control. The instructor touches the cheeks here, keeping it minimal. The goal isn’t contouring in the makeup sense. It’s restoring the three-dimensionality that aggressive smoothing can strip out.
White painted softly onto the cheek area of the portrait
The cheekbones, the chin, the cupid’s bow, the brow bone — these all catch light differently. Work your way across the face with the same brush-and-blur approach, treating each plane separately if you want maximum control. The instructor touches the cheeks here, keeping it minimal. The goal isn’t contouring in the makeup sense. It’s restoring the three-dimensionality that aggressive smoothing can strip out.
This is where having multiple small labeled layers starts paying off. If the cheek highlight looks wrong on a particular image, you can delete or reduce just that layer without unwinding everything else.
My Take: Build the Habit Before You Build the Speed
When I first tried this approach, I put everything on one layer because I was in a hurry. I ended up with a face that looked like it had been frosted. The multi-layer method feels slower at first, but the ability to isolate and reduce any single element independently is what actually makes the technique fast in the long run. I now keep a template file with all my standard layers already named and stacked, including a blank “volume” layer sitting in the right position. Opening that template takes two seconds. Rebuilding a collapsed layer stack after you’ve merged everything takes considerably longer and a lot of green tea.
One thing the tutorial doesn’t dwell on but is worth internalizing: this technique works precisely because skin texture is handled on a separate layer above the painting. The volume painting sits underneath the pores and fine detail, which means your light looks like it’s interacting with actual skin rather than floating on top of it. That layering order is what separates edits that read as real from edits that read as digital.
The single most important principle here is restraint. Paint the light. Blur it into the skin. Then cut the opacity in half, and then cut it again. The most convincing volume in a retouched portrait is the kind nobody notices. Watch the full tutorial on YouTube to see the instructor work through this in real time on an actual image.
Comments (2)
Never thought of approaching it this way. Really creative.
Great breakdown. The step-by-step approach really helps.
Leave a Comment