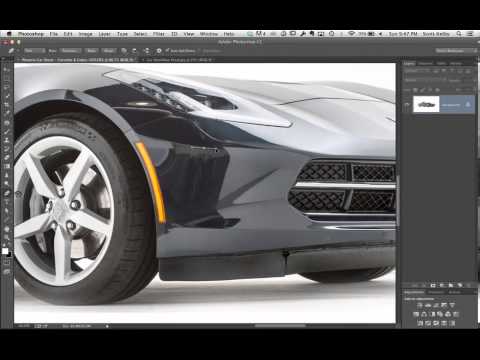
Most of my work lives in faces. Skin texture, under-eye circles, the way light catches a cheekbone. But the principles that make beauty retouching work, cleaning up distracting reflections, creating seamless backgrounds, making an image look inevitable rather than labored, apply everywhere. Including, it turns out, cars.
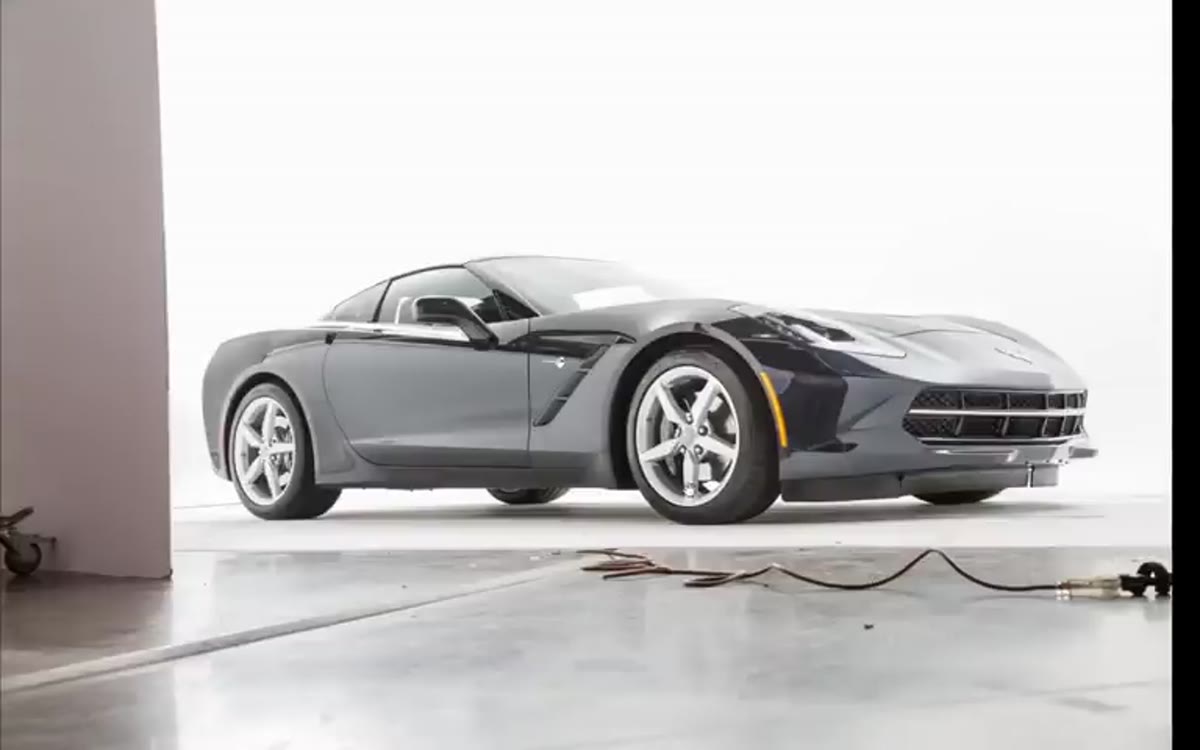
I stumbled onto this tutorial while looking for a cleaner way to handle background reflections in product work, and it genuinely reframed how I think about any kind of studio shot. In this Scott Kelby tutorial on retouching a 2014 Corvette shot in a Phoenix studio, Kelby walks through a real, unpolished raw file and works it into something client-ready. Watch the full tutorial on YouTube if you want to follow along. The original image has everything going wrong at once: a visible bounce card, harsh ceiling light reflections across the body of the car, debris on the studio floor, and a composition that got clipped at the edge. It’s the kind of file that makes you take a slow breath before you open it. Kelby’s approach is calm, methodical, and genuinely fast once you understand the logic behind each move.
Step 1: Remove the Bounce Card with Free Transform
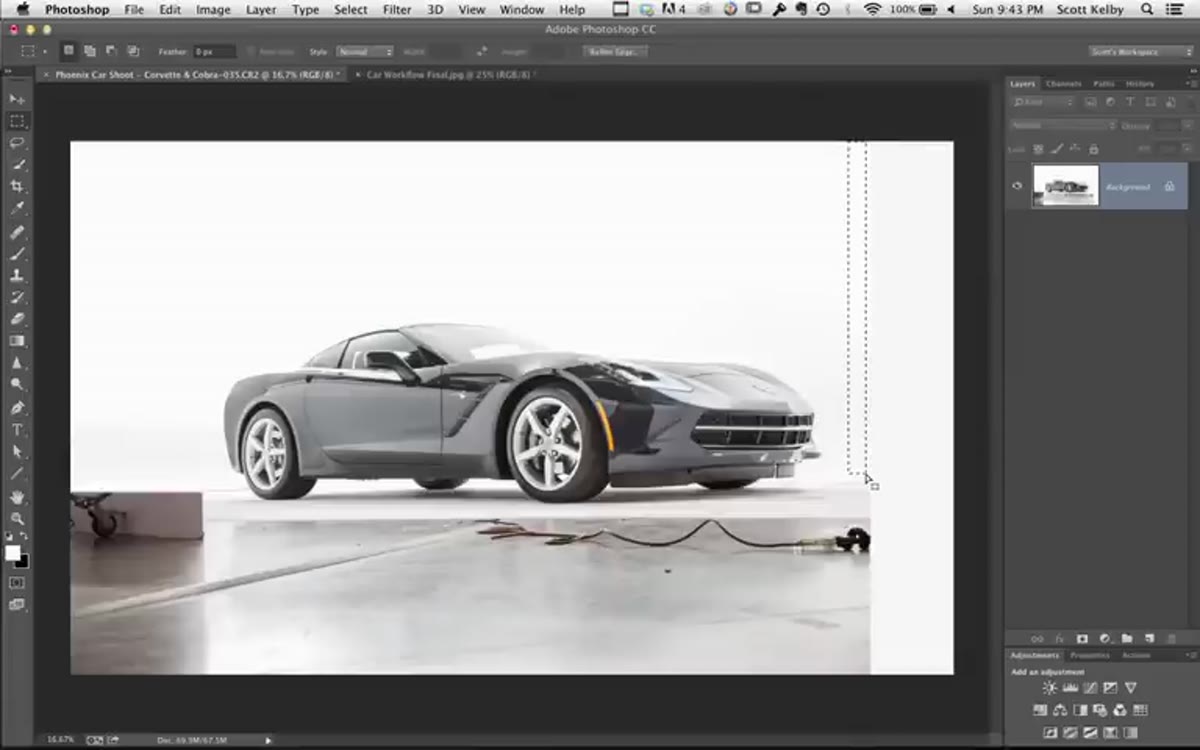
 Thin rectangle selection drawn beside the bounce card
The bounce card is the first thing that has to go. Kelby draws a thin rectangular marquee selection on the part of the background directly adjacent to the bounce card, somewhere the background is clean. He copies that selection, then uses Free Transform (Command+T on Mac, Control+T on PC) to stretch it horizontally over the bounce card until it covers the problem area completely. The logic here is elegant: you’re not inventing new pixels, you’re borrowing a clean slice of the existing background and scaling it to patch the damage. This is something I now do instinctively for any cluttered backdrop.
Thin rectangle selection drawn beside the bounce card
The bounce card is the first thing that has to go. Kelby draws a thin rectangular marquee selection on the part of the background directly adjacent to the bounce card, somewhere the background is clean. He copies that selection, then uses Free Transform (Command+T on Mac, Control+T on PC) to stretch it horizontally over the bounce card until it covers the problem area completely. The logic here is elegant: you’re not inventing new pixels, you’re borrowing a clean slice of the existing background and scaling it to patch the damage. This is something I now do instinctively for any cluttered backdrop.
Step 2: Extend the Canvas to Fix the Composition
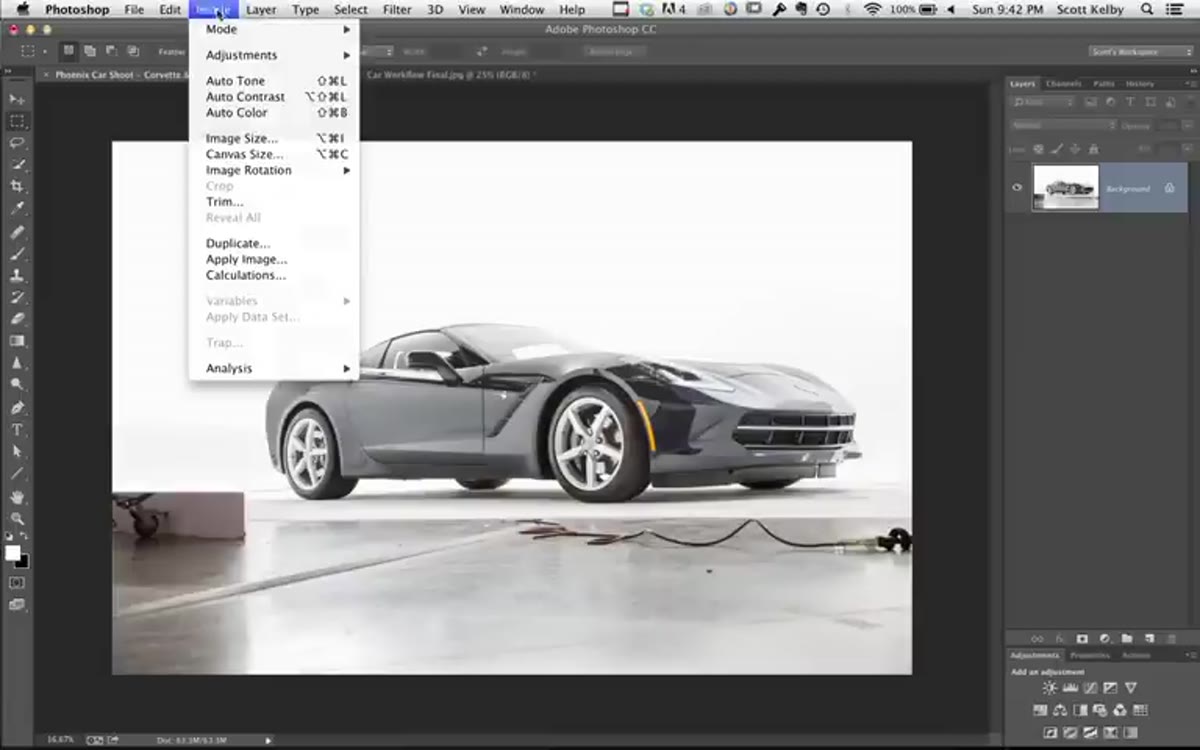 Canvas Size dialog open with anchor grid pointing left
Before Kelby does any serious cleanup, he addresses the fact that the car is cropped too tight on one side. The fix starts with sampling the edge color of the background using the Eyedropper tool, making that sampled tone the foreground color. Then he goes to Image > Canvas Size, uses the anchor grid to specify that the new space should be added only to one side, and adds roughly two inches. Because the foreground color was sampled from the edge, Photoshop fills the new canvas space with a color that is at least in the right neighborhood, even if it does not yet blend perfectly.
Canvas Size dialog open with anchor grid pointing left
Before Kelby does any serious cleanup, he addresses the fact that the car is cropped too tight on one side. The fix starts with sampling the edge color of the background using the Eyedropper tool, making that sampled tone the foreground color. Then he goes to Image > Canvas Size, uses the anchor grid to specify that the new space should be added only to one side, and adds roughly two inches. Because the foreground color was sampled from the edge, Photoshop fills the new canvas space with a color that is at least in the right neighborhood, even if it does not yet blend perfectly.
Step 3: Steal and Flip Background to Fill the Extended Area
 Free Transform stretching background slice over new canvas area
The freshly extended canvas area needs to look like it belongs. Kelby draws a selection around a chunk of the real background, duplicates it to its own layer with Command+J (Control+J on PC), then flips it vertically using Edit > Transform > Flip Vertical. The flip is a small but smart move: because studio floor gradients often mirror themselves top-to-bottom, flipping the borrowed piece makes the tones read more naturally when you drag it into position over the new canvas area. Once it is sitting right, he merges it down with Command+E (Control+E on PC). It takes about thirty seconds and the extended side suddenly looks intentional.
Free Transform stretching background slice over new canvas area
The freshly extended canvas area needs to look like it belongs. Kelby draws a selection around a chunk of the real background, duplicates it to its own layer with Command+J (Control+J on PC), then flips it vertically using Edit > Transform > Flip Vertical. The flip is a small but smart move: because studio floor gradients often mirror themselves top-to-bottom, flipping the borrowed piece makes the tones read more naturally when you drag it into position over the new canvas area. Once it is sitting right, he merges it down with Command+E (Control+E on PC). It takes about thirty seconds and the extended side suddenly looks intentional.
Step 4: Use the Patch Tool to Remove the Bounce Card Remnant
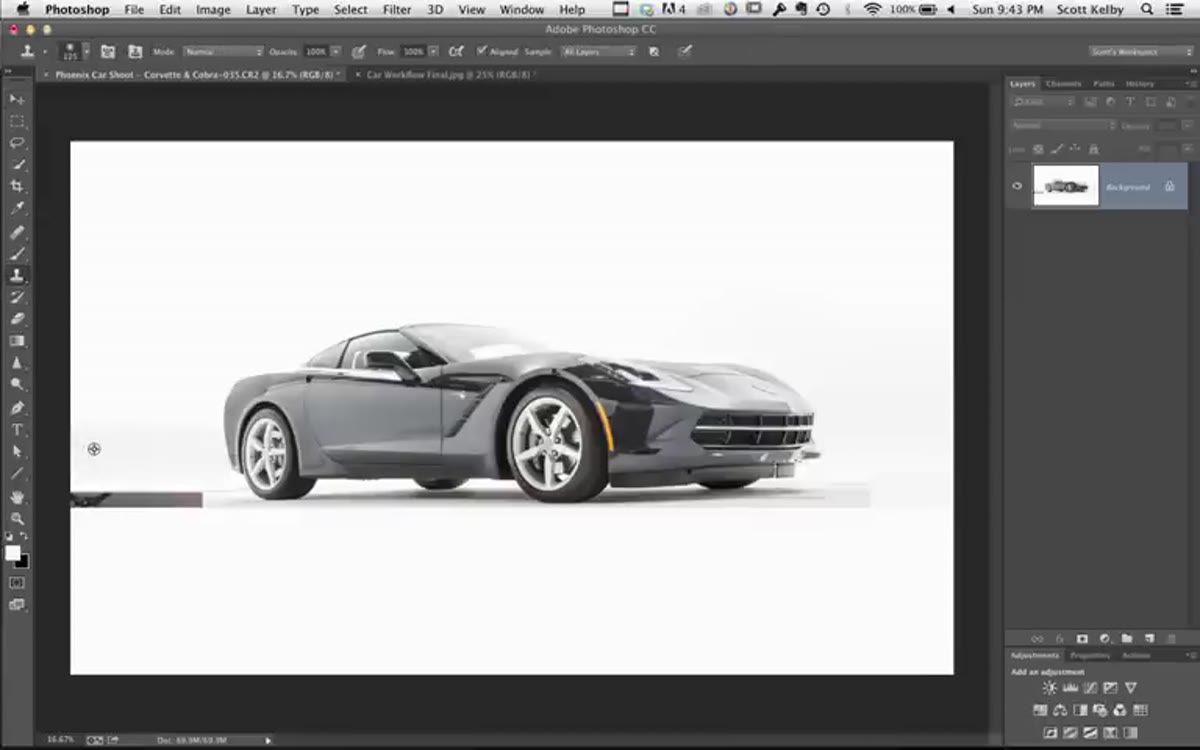 Patch tool selection drawn around isolated bounce card remnant
There is always a leftover artifact once the main patches are in place, and this is where Kelby introduces a technique I had not seen framed this way before. Before using the Patch tool, he uses the Clone Stamp to cut a small hole at each end of the remaining unwanted element, essentially turning it into an isolated island with clean background visible on both sides. This matters because the Patch tool works by blending the edges of your selection into the surrounding pixels. If those edges are still connected to the problem area, Photoshop has nothing clean to blend into and you get smearing. With clean holes at each end, you draw a lasso-style selection around the isolated piece, click inside, and drag it to a clean area of the background. The patch blends in and the remnant is gone.
Patch tool selection drawn around isolated bounce card remnant
There is always a leftover artifact once the main patches are in place, and this is where Kelby introduces a technique I had not seen framed this way before. Before using the Patch tool, he uses the Clone Stamp to cut a small hole at each end of the remaining unwanted element, essentially turning it into an isolated island with clean background visible on both sides. This matters because the Patch tool works by blending the edges of your selection into the surrounding pixels. If those edges are still connected to the problem area, Photoshop has nothing clean to blend into and you get smearing. With clean holes at each end, you draw a lasso-style selection around the isolated piece, click inside, and drag it to a clean area of the background. The patch blends in and the remnant is gone.
Step 5: Soften Hard Edges with the Clone Stamp and a Soft Brush
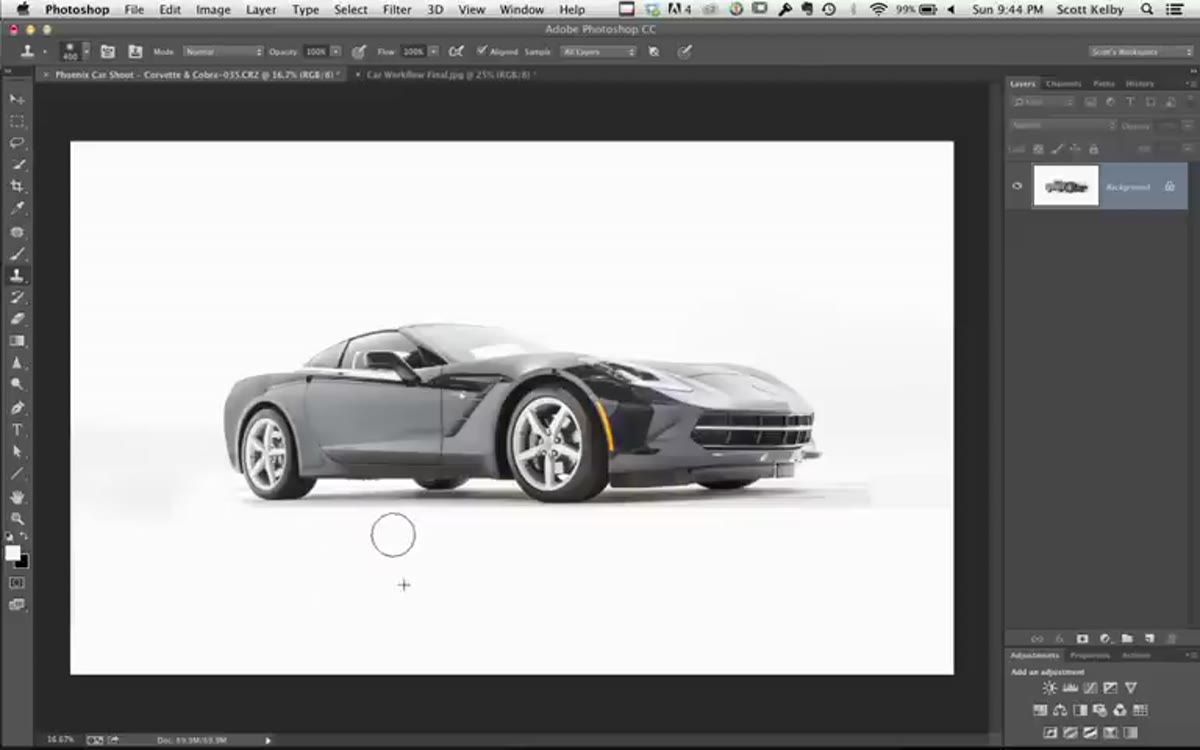 Clone stamp with soft brush lightening patched edge on floor
After the patch, the edges where the repaired areas meet the original image can look a little abrupt. Kelby switches to the Clone Stamp tool with a large, soft-edged brush and paints gently along those seams to feather them out. He is not cloning in dramatic new content here, he is mostly lightening and softening. The key setting is keeping the brush opacity low so the effect builds gradually. One thing he flags himself: watch where the brush is wandering. A soft brush at the edge of a wheel or the car body can accidentally lift detail you want to keep. Short, deliberate strokes beat one sweeping pass every time.
Clone stamp with soft brush lightening patched edge on floor
After the patch, the edges where the repaired areas meet the original image can look a little abrupt. Kelby switches to the Clone Stamp tool with a large, soft-edged brush and paints gently along those seams to feather them out. He is not cloning in dramatic new content here, he is mostly lightening and softening. The key setting is keeping the brush opacity low so the effect builds gradually. One thing he flags himself: watch where the brush is wandering. A soft brush at the edge of a wheel or the car body can accidentally lift detail you want to keep. Short, deliberate strokes beat one sweeping pass every time.
Step 6: Address Ceiling Light Reflections Across the Car Body
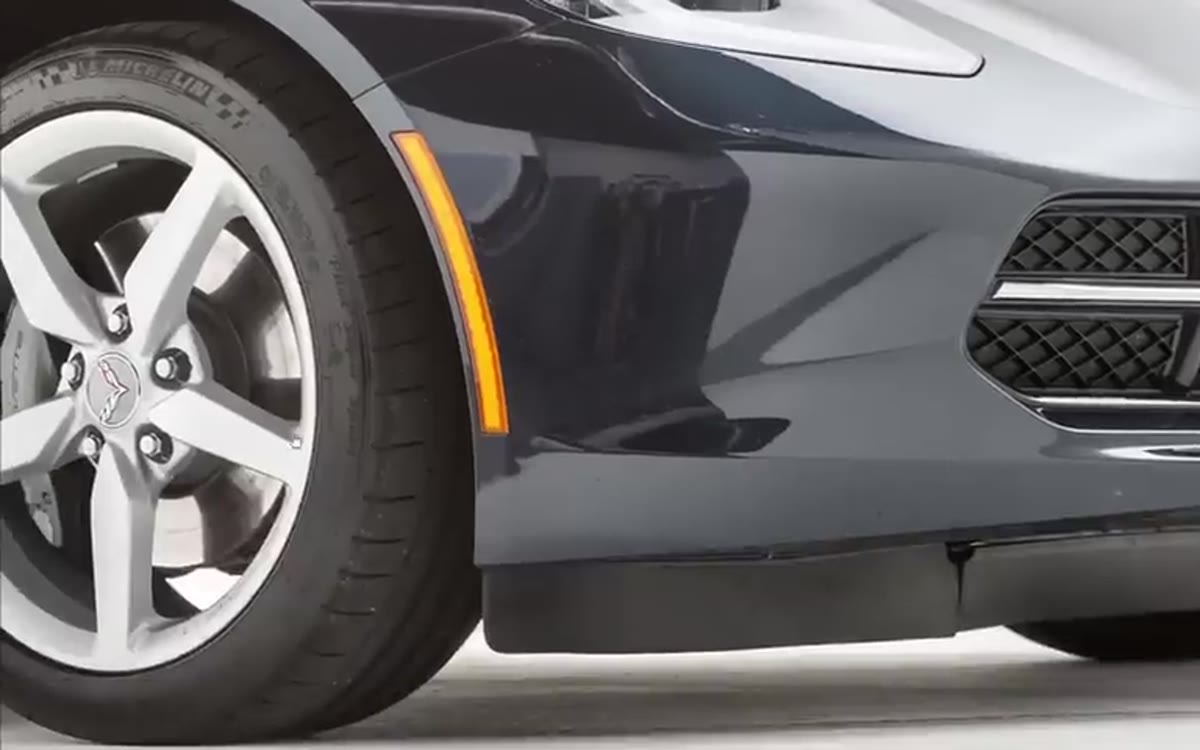 Original image with visible ceiling light reflections on car hood
The reflections from overhead studio lights running across the hood and body panels are the most time-consuming part of any car retouch, which is why Kelby is transparent that the full job takes him thirty to forty-five minutes. The workflow principle is the same as everything above: find a clean area near the problem, borrow pixels from it, and blend them over the reflection. On a curved panel this requires working in small sections because the perspective and tone shift constantly. Kelby treats each reflection as its own small task rather than trying to solve the whole hood at once. That patience is the real technique.
Original image with visible ceiling light reflections on car hood
The reflections from overhead studio lights running across the hood and body panels are the most time-consuming part of any car retouch, which is why Kelby is transparent that the full job takes him thirty to forty-five minutes. The workflow principle is the same as everything above: find a clean area near the problem, borrow pixels from it, and blend them over the reflection. On a curved panel this requires working in small sections because the perspective and tone shift constantly. Kelby treats each reflection as its own small task rather than trying to solve the whole hood at once. That patience is the real technique.
What I’d Add from My Own Experience
Car retouching and beauty retouching share one failure mode: over-smoothing. The same instinct that makes a retoucher reach for a giant healing brush on skin will make them try to erase every single reflection from a car panel. Some reflections are structural. They define the shape of the metal, show the depth of the paint, and tell the viewer the surface is real. When I first started doing product work after years on faces, I flattened things I should have left alone. The discipline Kelby models here, working methodically but knowing when to stop, is worth more than any specific tool setting. Ask yourself with each edit: am I removing a distraction, or am I removing information?
The single most transferable idea in this tutorial is the “make a hole first” patch technique. I have used a version of the Patch tool for years and never thought to pre-isolate the problem element before drawing my selection. It is a small change in sequence that eliminates a whole category of smearing errors. Whether you are working on a car, a product, or a background behind a beauty shot, that logic holds.
Watch the full tutorial on YouTube to see the full retouch in motion, including how Kelby handles the reflections across the car body in real time.
Comments
Leave a Comment