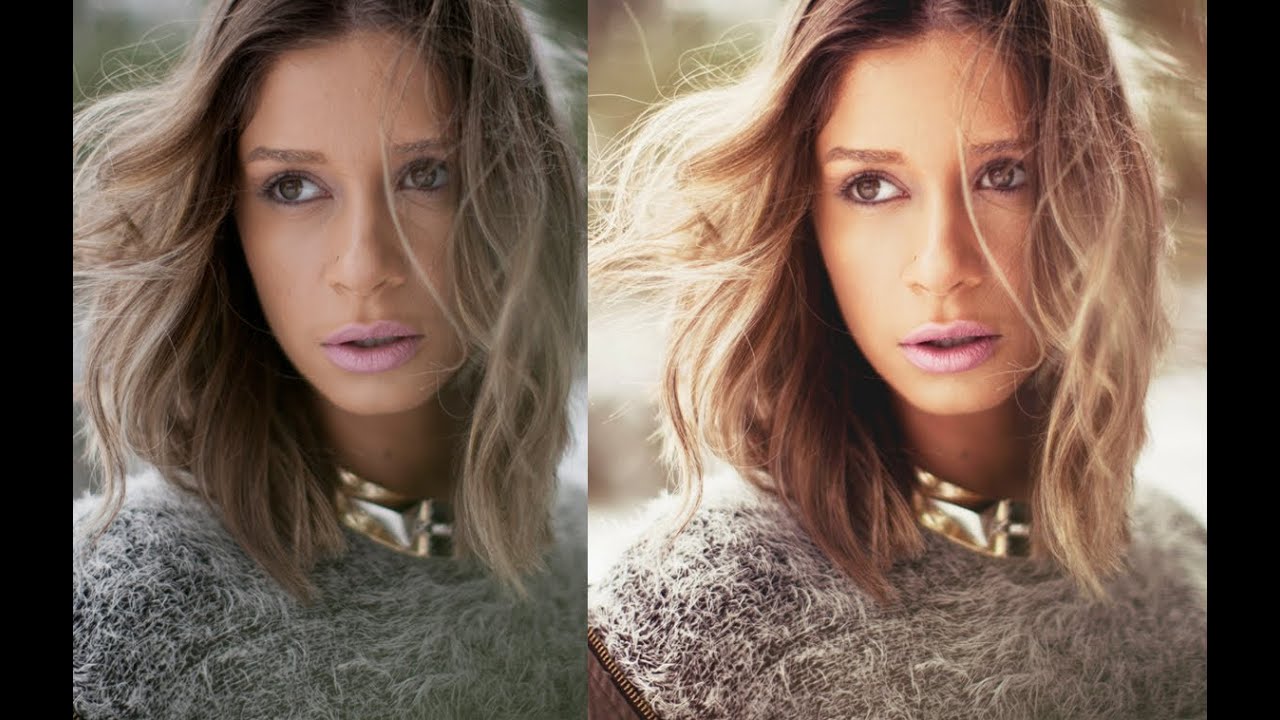
There is a specific kind of dread that comes from opening a portrait file and realizing the skin needs work. Not dramatic work, just the quiet, tedious kind: uneven tone here, a stray hair there, texture that reads fine in person but turns into a problem under studio light. Early in my retouching career I used to bulldoze through those issues with heavy blurring and ended up with subjects who looked like they were made of latex. It took a long time and more than a few uncomfortable client conversations before I understood that good skin retouching is mostly about restraint and working on the right layer at the right time.
That is exactly why I keep coming back to this Watch the full tutorial on YouTube from photographer and retoucher Jessica Kobeissi. Her approach is refreshingly unprecious. She is not chasing magazine-cover perfection. She is cleaning up what needs to be cleaned up, preserving what makes a face look like a real face, and moving on. For anyone who works on beauty or portrait images regularly, that mindset is worth as much as any specific tool setting.
What follows is a step-by-step breakdown of her workflow, written so you can follow along in Photoshop without needing to pause and rewind constantly.
Step 1: Set Up Your Frequency Separation Layers Before You Touch Anything
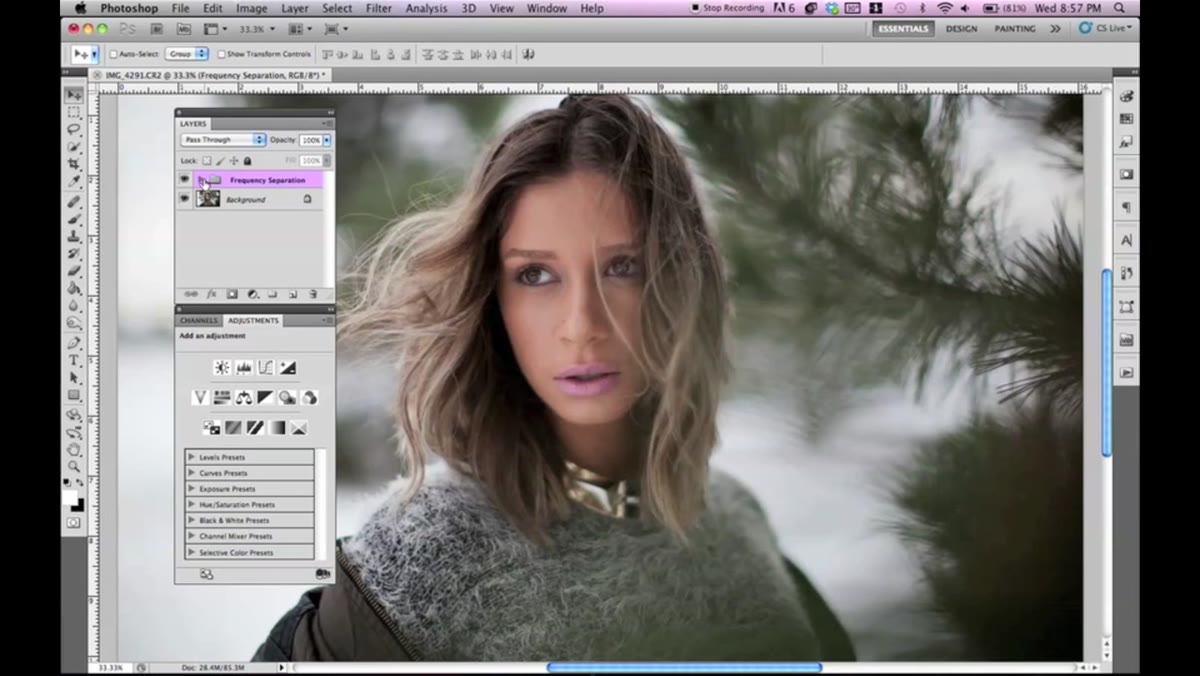 Frequency separation layers already set up in Layers panel
Kobeissi starts every retouch with frequency separation already in place, and she is clear that this is non-negotiable for her. If you are not familiar with the technique, the short version is this: frequency separation splits your image into two layers. The low frequency layer holds color and tone. The high frequency layer holds texture and detail. Working on them independently means you can smooth out blotchy skin without smearing the pores, and you can fix texture without creating color halos.
Frequency separation layers already set up in Layers panel
Kobeissi starts every retouch with frequency separation already in place, and she is clear that this is non-negotiable for her. If you are not familiar with the technique, the short version is this: frequency separation splits your image into two layers. The low frequency layer holds color and tone. The high frequency layer holds texture and detail. Working on them independently means you can smooth out blotchy skin without smearing the pores, and you can fix texture without creating color halos.
She has a separate tutorial dedicated entirely to setting this up, which is worth finding if you are starting from scratch. For this walkthrough, assume those two layers are already in your document before you begin.
Step 2: Duplicate Your Layers Before Every Edit
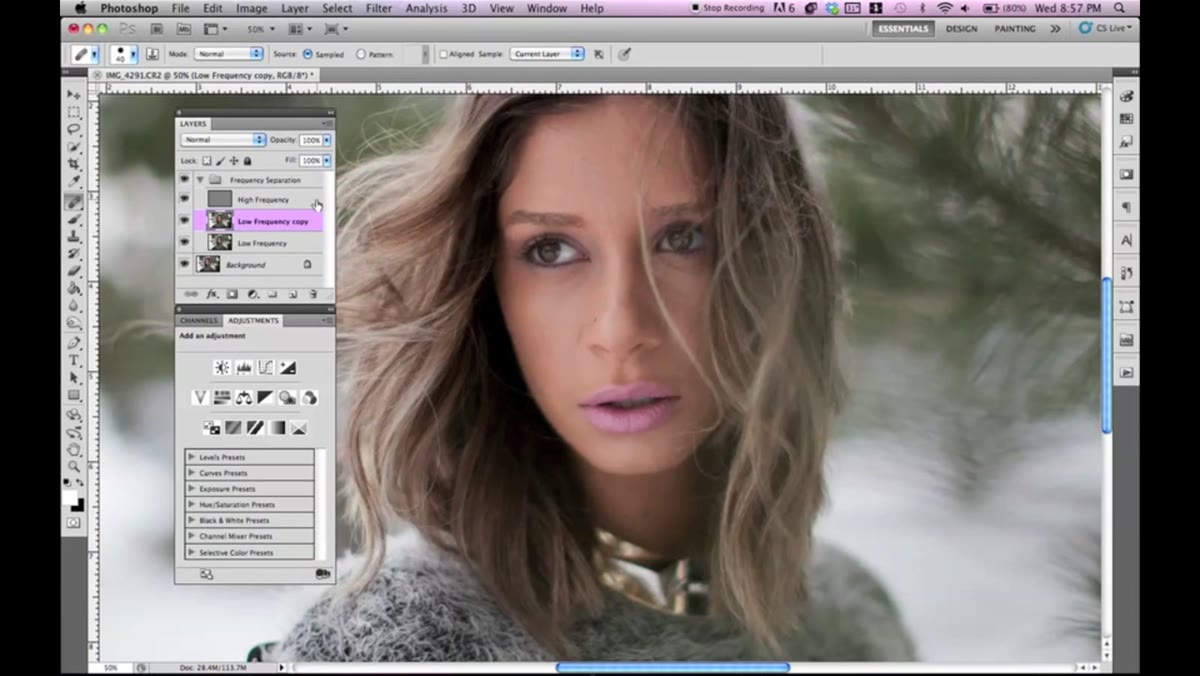 Pressing Command J to duplicate the low frequency layer
Before touching either frequency layer, Kobeissi duplicates it with Command J (Ctrl J on Windows). She does this for both the low and high frequency layers before working on each one. It sounds like a small habit, but it is the kind of thing that saves you from a genuinely bad afternoon. If your healing brush samples the wrong area or you go too far with your corrections, you can delete the duplicate and start that layer fresh without touching the original.
Pressing Command J to duplicate the low frequency layer
Before touching either frequency layer, Kobeissi duplicates it with Command J (Ctrl J on Windows). She does this for both the low and high frequency layers before working on each one. It sounds like a small habit, but it is the kind of thing that saves you from a genuinely bad afternoon. If your healing brush samples the wrong area or you go too far with your corrections, you can delete the duplicate and start that layer fresh without touching the original.
Make this automatic. Duplicate first, work on the copy, never on the original. It costs you two seconds and has saved me more than a few projects.
Step 3: Work the Low Frequency Layer to Even Out Skin Tone
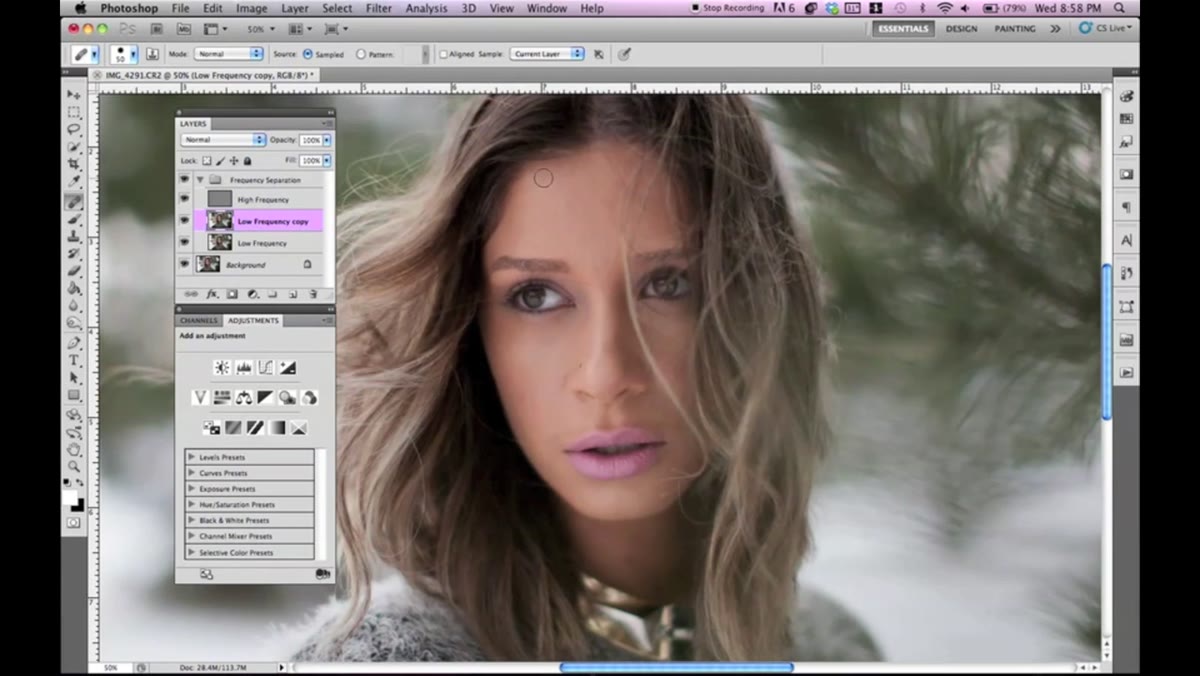 Healing brush sampling clean skin on the low frequency layer
With your duplicated low frequency layer selected, switch to the Healing Brush tool (not the Spot Healing Brush). Hold Alt or Option and click to sample an area of skin that has the tone you want to match. Then paint over the areas that look too dark, too red, or uneven.
Healing brush sampling clean skin on the low frequency layer
With your duplicated low frequency layer selected, switch to the Healing Brush tool (not the Spot Healing Brush). Hold Alt or Option and click to sample an area of skin that has the tone you want to match. Then paint over the areas that look too dark, too red, or uneven.
The critical thing to understand here is what you are and are not changing. On the low frequency layer, you are only affecting color and luminosity. You are not touching texture at all. This means you can go over an area multiple times to get the tone right and the pores will stay exactly where they are. Kobeissi works methodically across the face, paying attention to shadow areas and patches of uneven color, but she is deliberate about not over-correcting. The goal is consistency, not perfection.
Step 4: Switch to the High Frequency Layer to Fix Texture and Detail
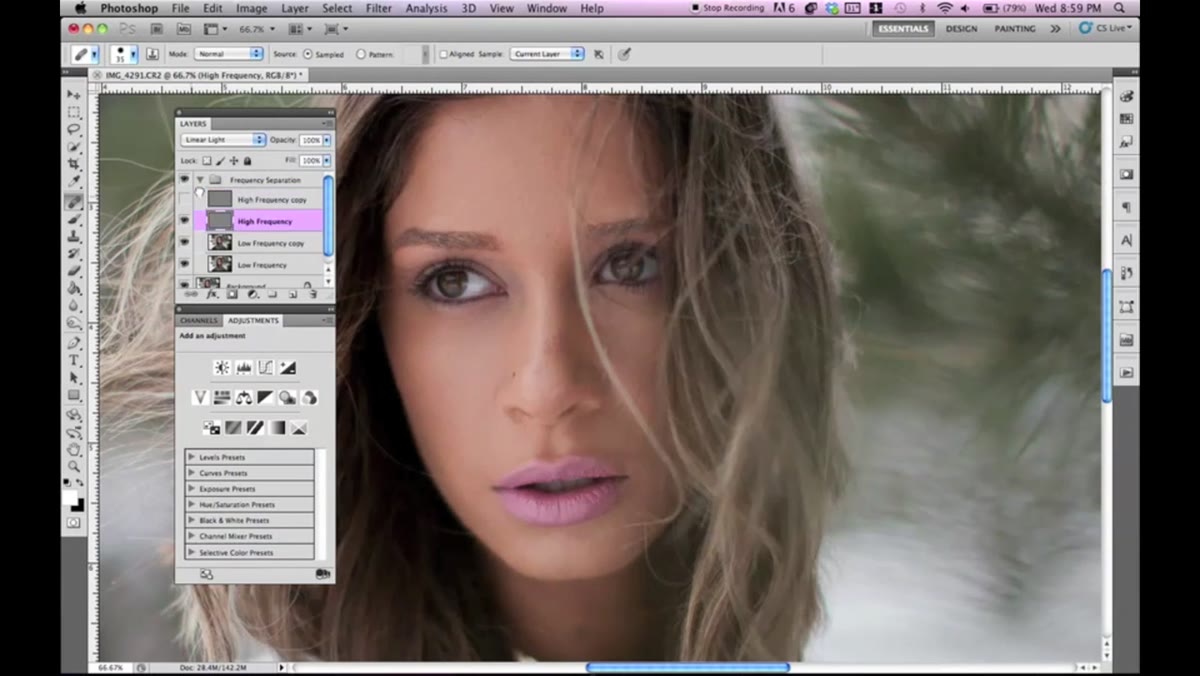 High frequency layer selected, healing brush removing small blemishes
Once the tone work is done, move up to your duplicated high frequency layer. This is where you address the things that live in the texture of the skin: small blemishes, fine hairs that crossed into the frame, dry patches, anything that reads as a disruption in the surface.
High frequency layer selected, healing brush removing small blemishes
Once the tone work is done, move up to your duplicated high frequency layer. This is where you address the things that live in the texture of the skin: small blemishes, fine hairs that crossed into the frame, dry patches, anything that reads as a disruption in the surface.
Kobeissi keeps her Healing Brush small for this work, especially when dealing with fine stray hairs. The technique is precise: find a clean sample area nearby, Alt-click to set it, then paint over the problem in short strokes. Trying to cover a long stray hair in one pass usually creates a smear. Short strokes with fresh samples give you cleaner results. She moves across the face without obsessing over any single area, which is actually faster and produces a more natural result than trying to make each spot invisible before moving to the next.
Step 5: Zoom Out and Do an Honest Before/After Check
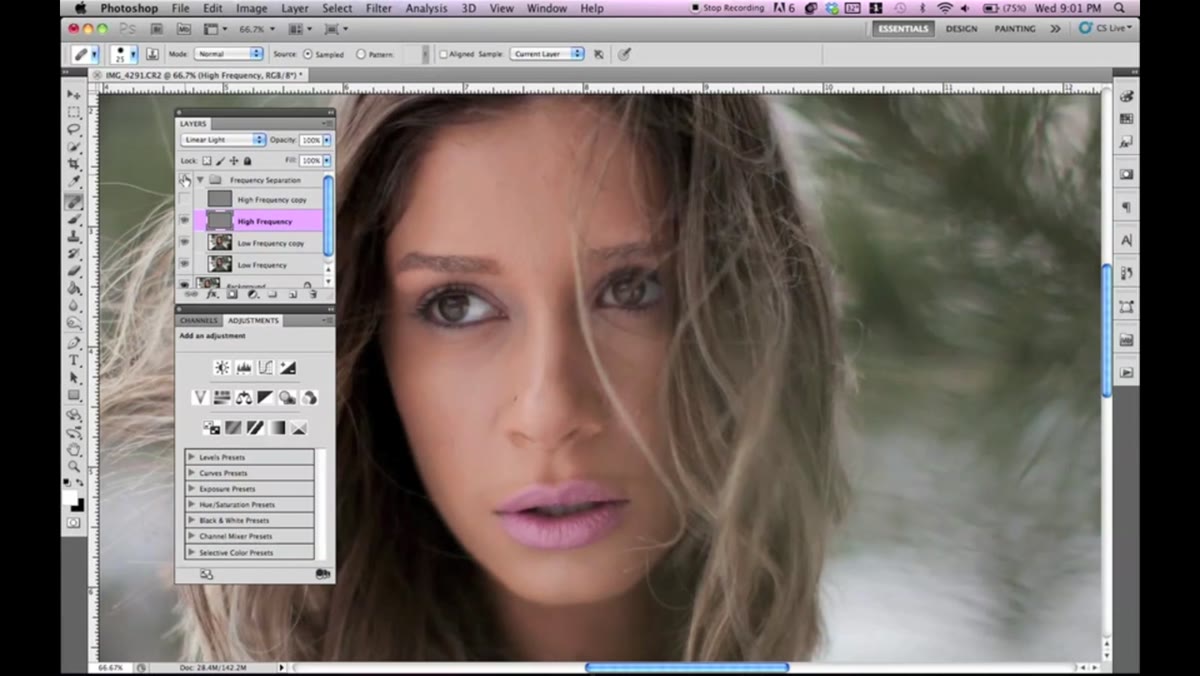 Zooming out to see full portrait after skin cleanup
After working through both layers, Kobeissi zooms out to evaluate the full image and toggles her edited layers on and off to compare. This step is easy to skip when you are deep in pixel-level work, but it is where you catch the things that proximity hides. A correction that looked seamless at 200% zoom sometimes creates a dull, flattened patch when you see the full face.
Zooming out to see full portrait after skin cleanup
After working through both layers, Kobeissi zooms out to evaluate the full image and toggles her edited layers on and off to compare. This step is easy to skip when you are deep in pixel-level work, but it is where you catch the things that proximity hides. A correction that looked seamless at 200% zoom sometimes creates a dull, flattened patch when you see the full face.
If something looks off at full view, go back and address it on whichever layer owns that problem. Color issue, low frequency. Texture issue, high frequency. The separation makes troubleshooting much more direct.
Step 6: Create a Dedicated Layer for Eye Work
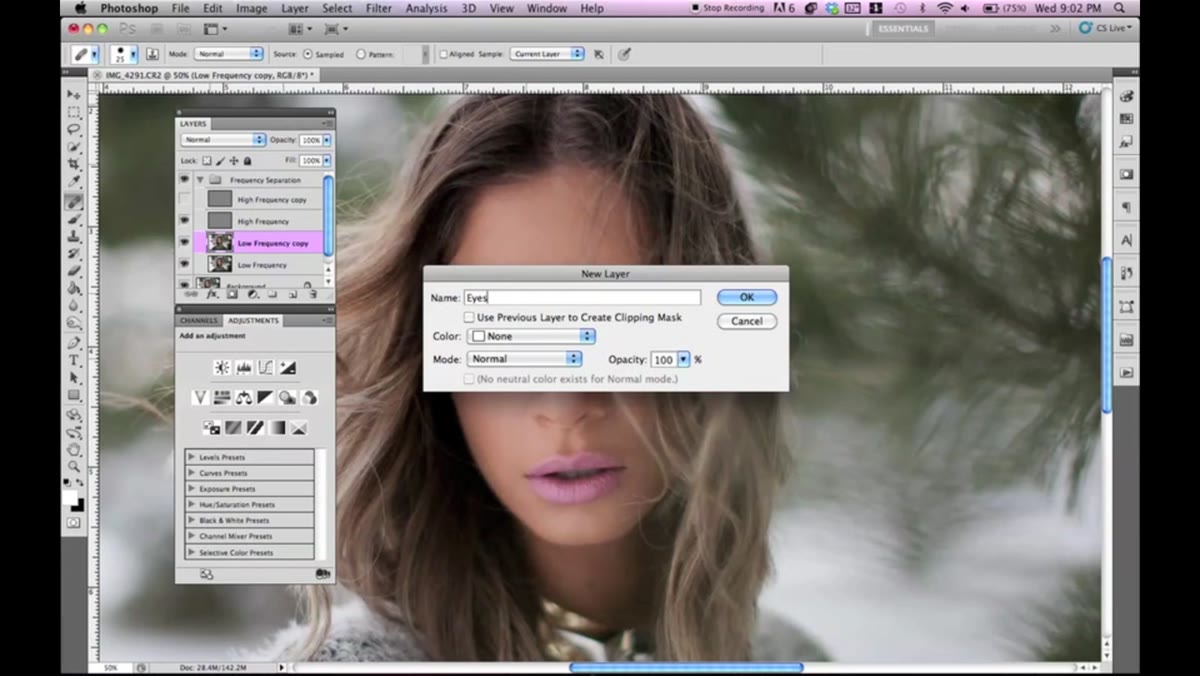 New layer named ’eyes’ created above the low frequency layer
Kobeissi creates a fresh empty layer just above the low frequency layer and names it specifically for eye work. Keeping eye retouching on its own layer gives you control you simply do not have when painting directly into an existing layer. You can lower the opacity of just the eye work, erase only that layer if something goes wrong, or compare it independently.
New layer named ’eyes’ created above the low frequency layer
Kobeissi creates a fresh empty layer just above the low frequency layer and names it specifically for eye work. Keeping eye retouching on its own layer gives you control you simply do not have when painting directly into an existing layer. You can lower the opacity of just the eye work, erase only that layer if something goes wrong, or compare it independently.
She starts eye work near the low frequency layer because much of what she will adjust there, brightening, evening out the whites, refining the color around the iris, is a tonal and color concern rather than a texture concern.
A Note From My Own Workflow
One thing I have added to this general approach after years of working on beauty campaigns: set a hard opacity limit on your Healing Brush before you start. I keep mine at 85% rather than 100%. It sounds like a tiny adjustment but it forces a slight blend between the sample and the target, which means the healed areas integrate more naturally into surrounding skin. At 100% opacity the corrections can look pasted in, especially on high-contrast skin. The low-frequency/high-frequency split does a lot of the work, but that small opacity buffer smooths out the last bit of visible edge.
The broader lesson from Kobeissi’s tutorial is one I wish someone had handed me years ago: the retoucher’s job is to remove distractions, not to redesign a face. She spends maybe 45 minutes on a full portrait and the result looks genuinely cared for rather than processed. That balance, enough work to clean up the image, not so much that the person disappears, is the whole skill.
Watch the full tutorial on YouTube to see every adjustment in real time, including her eye retouching technique which goes further than the transcript above covers.
Comments
Leave a Comment