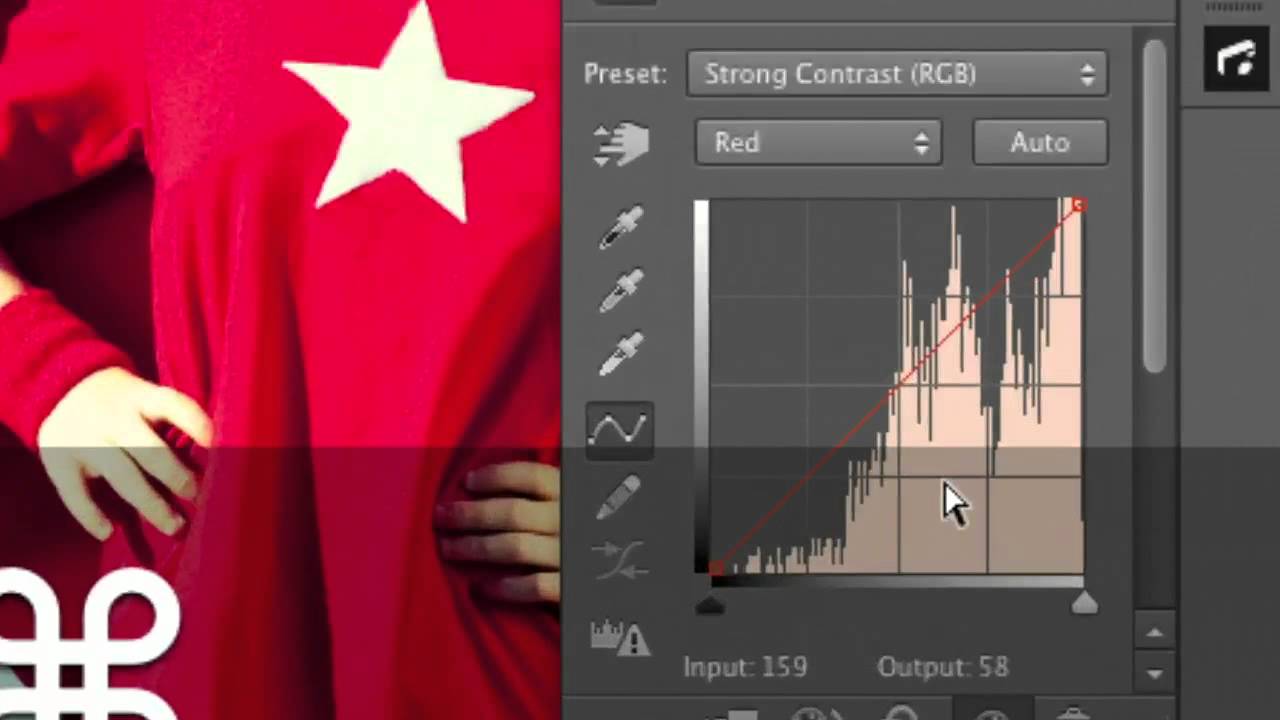
Before I learned to use the Color Range command properly, I was making skin selections the slow way. Lasso tool, refine edge, a lot of swearing. If you’ve spent any time retouching portraits, you know how tedious it is to isolate skin without accidentally grabbing half a background, a strand of hair, or a white t-shirt that happens to share the same luminosity as someone’s forehead. The Color Range command, especially with the skin tones option that Adobe introduced in CS6, cuts that process down dramatically. It’s not perfect, but it’s fast, and in this work, fast matters.
I came across this technique in a CreativeLive tutorial by Lesa Snider, part of her Adobe Photoshop CS6 Intensive series. Watch the full tutorial on YouTube. What I appreciate about Lesa’s teaching is that she doesn’t just show you where to click. She explains the logic behind the tool, so you understand what Photoshop is actually doing and why you’d reach for this command instead of something else. I’ve watched a lot of retouching tutorials over the years, and the ones that stick are the ones that treat you like a thinking professional, not a button-pusher.
The goal demonstrated in the tutorial is targeted skin darkening using a curves adjustment layer and a mask built entirely with Color Range. No manual selection work at all. Here’s how to do it.
Step 1: Set Up Your Document with an Adjustment Layer
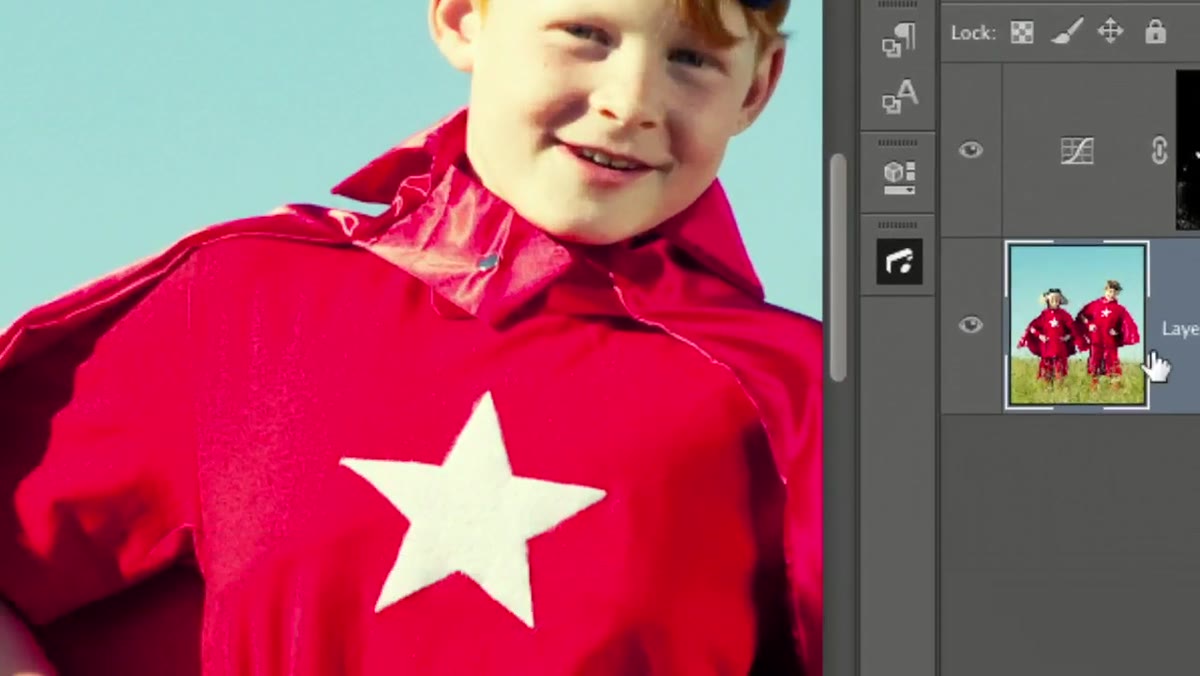 Layers panel showing curves adjustment layer with mask thumbnail
Before you open Color Range, you need a plan for what you’re actually going to do with the selection once you have it. In the tutorial, the end result is a curves adjustment layer that darkens only the skin in the image. Adjustment layers are the right approach here because they’re non-destructive. Your original pixels stay untouched, and if the darkening looks too heavy-handed, you can dial back the layer’s opacity rather than starting over. Think of the adjustment layer as the destination and the Color Range selection as the vehicle to get you there.
Layers panel showing curves adjustment layer with mask thumbnail
Before you open Color Range, you need a plan for what you’re actually going to do with the selection once you have it. In the tutorial, the end result is a curves adjustment layer that darkens only the skin in the image. Adjustment layers are the right approach here because they’re non-destructive. Your original pixels stay untouched, and if the darkening looks too heavy-handed, you can dial back the layer’s opacity rather than starting over. Think of the adjustment layer as the destination and the Color Range selection as the vehicle to get you there.
Step 2: Open the Color Range Dialog
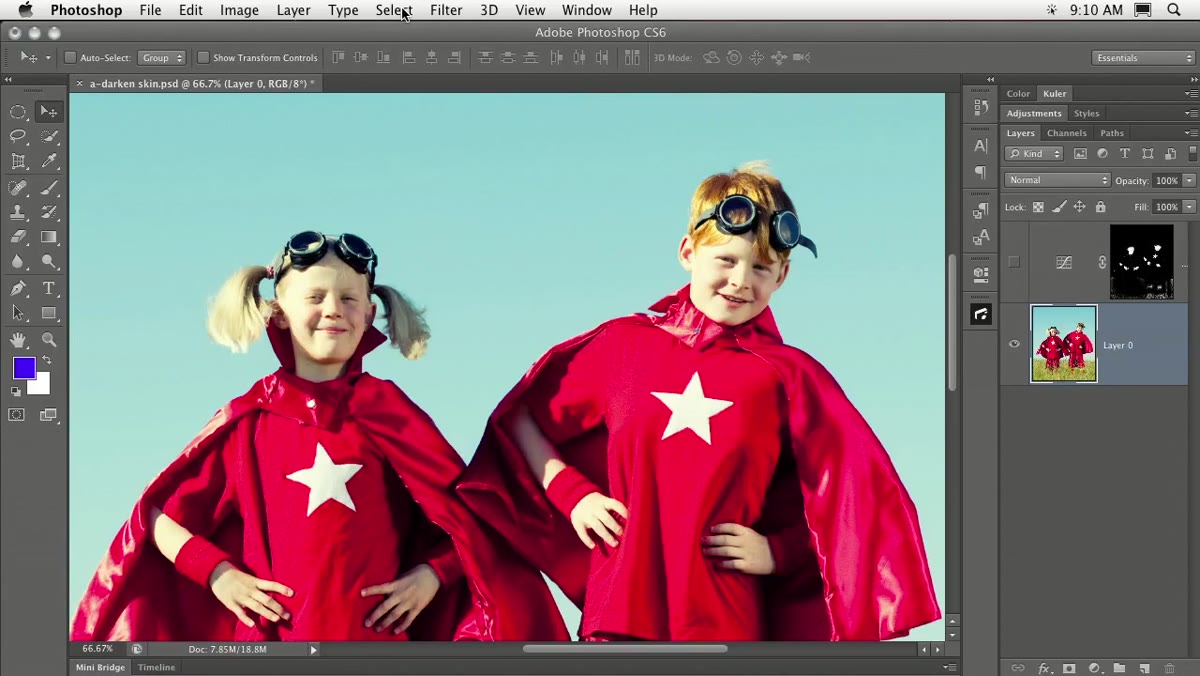 Select menu open with Color Range option visible
Go to the Select menu at the top of the screen and choose Color Range. This dialog box is essentially a smarter, more flexible version of the Magic Wand tool. Where Magic Wand samples a single pixel and grows outward by tolerance, Color Range samples across the entire image and builds a selection based on whatever criteria you set. You’ll see a small grayscale preview inside the dialog where white areas represent what will be selected and black areas represent what will be masked out.
Select menu open with Color Range option visible
Go to the Select menu at the top of the screen and choose Color Range. This dialog box is essentially a smarter, more flexible version of the Magic Wand tool. Where Magic Wand samples a single pixel and grows outward by tolerance, Color Range samples across the entire image and builds a selection based on whatever criteria you set. You’ll see a small grayscale preview inside the dialog where white areas represent what will be selected and black areas represent what will be masked out.
Step 3: Switch the Select Dropdown to Skin Tones
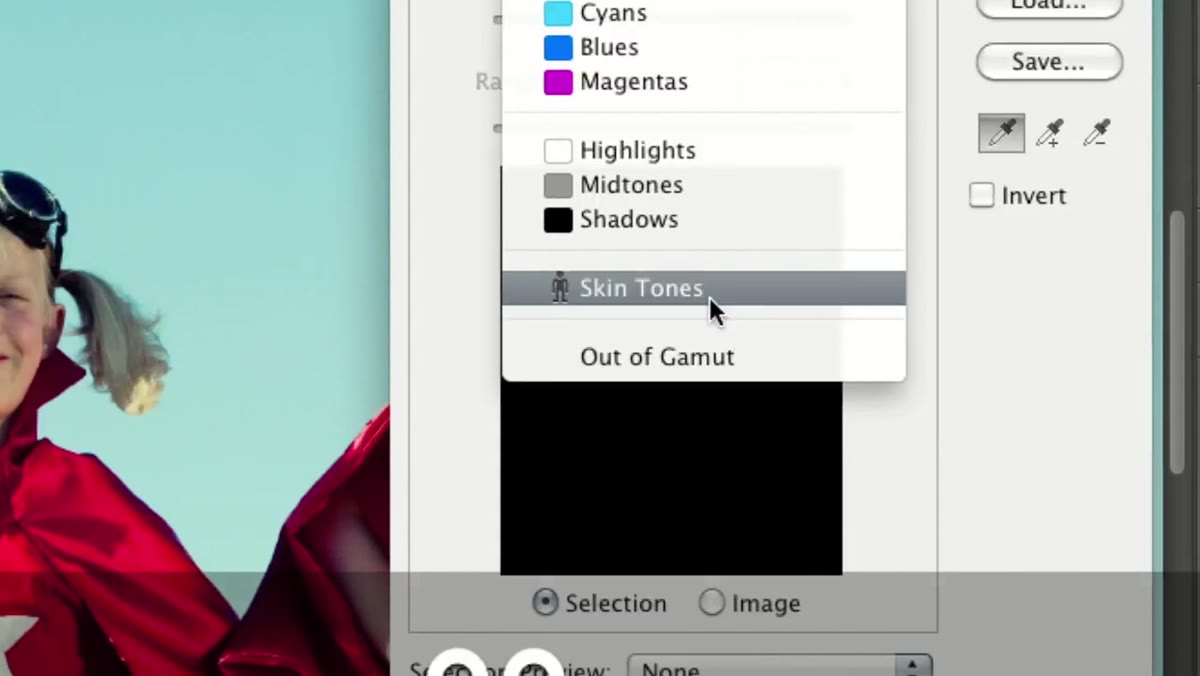 Color Range dialog open with Select dropdown showing Skin Tones option
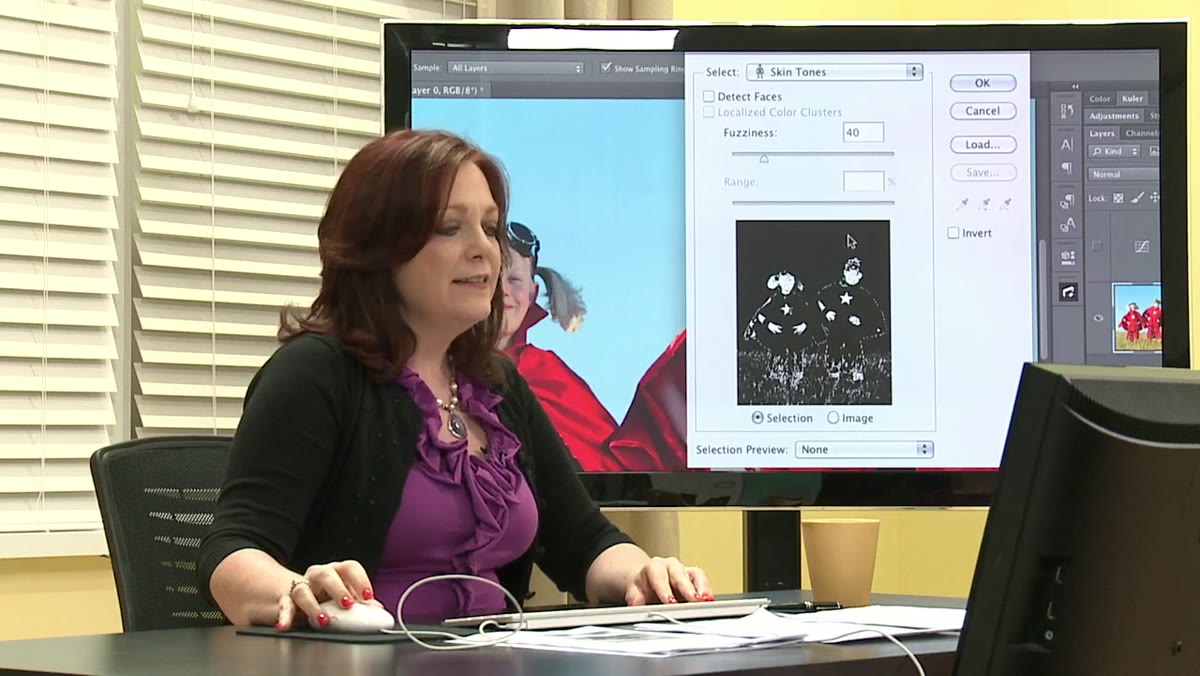
At the top of the Color Range dialog is a dropdown menu labeled “Select.” By default it’s set to Sampled Colors. Click that dropdown and choose Skin Tones. This shifts the tool’s logic entirely. Instead of asking you to click on a pixel to sample, Photoshop uses a built-in definition of what skin tone values look like and starts hunting for them across the image automatically. You’ll see the preview update immediately, with face and hand areas typically turning bright white.
Color Range dialog open with Select dropdown showing Skin Tones option
At the top of the Color Range dialog is a dropdown menu labeled “Select.” By default it’s set to Sampled Colors. Click that dropdown and choose Skin Tones. This shifts the tool’s logic entirely. Instead of asking you to click on a pixel to sample, Photoshop uses a built-in definition of what skin tone values look like and starts hunting for them across the image automatically. You’ll see the preview update immediately, with face and hand areas typically turning bright white.
Step 4: Enable Detect Faces
 Detect Faces checkbox being toggled, showing preview update in dialog
Once you’ve selected Skin Tones, a checkbox appears: Detect Faces. Turn this on. What Photoshop does here is look for rounded clusters of skin-tone pixels, which are likely to be faces, and weights the selection toward those areas. It’s not facial recognition in a sophisticated sense. It’s more like shape-aware sampling. But even that basic spatial logic makes a real difference in the result. Toggle Detect Faces off and on a few times while watching the preview. You’ll see the face areas sharpen up and become more consistently selected when it’s enabled.
Detect Faces checkbox being toggled, showing preview update in dialog
Once you’ve selected Skin Tones, a checkbox appears: Detect Faces. Turn this on. What Photoshop does here is look for rounded clusters of skin-tone pixels, which are likely to be faces, and weights the selection toward those areas. It’s not facial recognition in a sophisticated sense. It’s more like shape-aware sampling. But even that basic spatial logic makes a real difference in the result. Toggle Detect Faces off and on a few times while watching the preview. You’ll see the face areas sharpen up and become more consistently selected when it’s enabled.
Step 5: Adjust the Fuzziness Slider
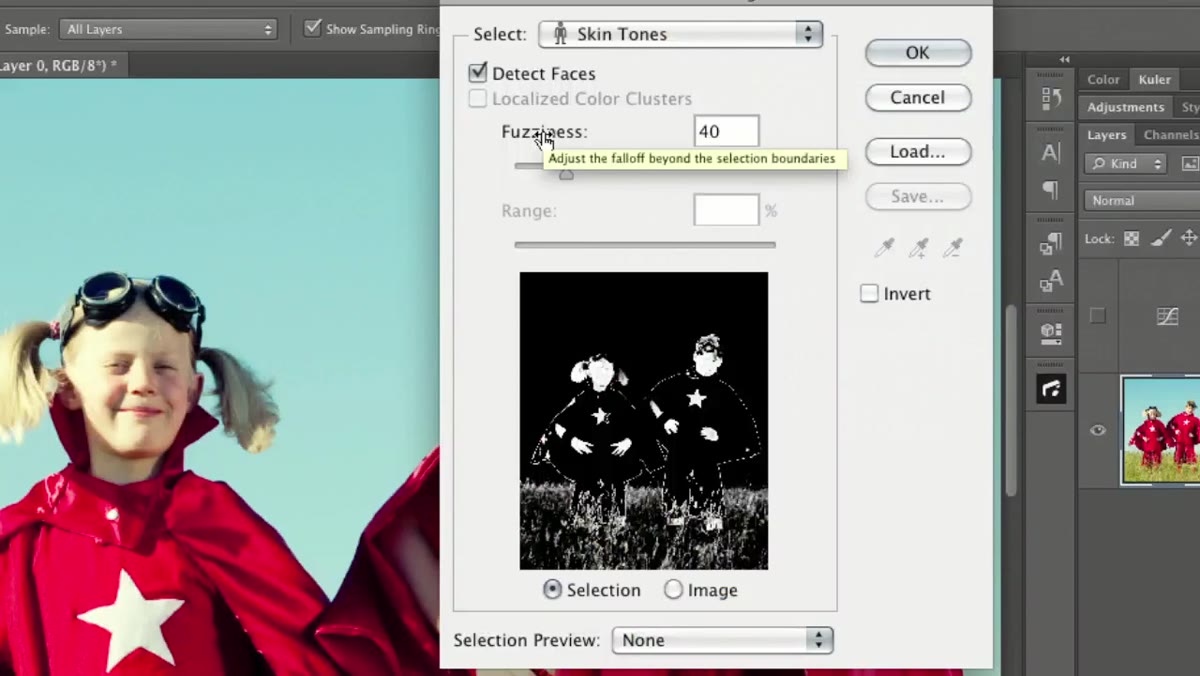 Fuzziness slider being dragged with preview showing selection changes
The Fuzziness slider controls how broadly the tool interprets “skin tone.” Push it higher and you include more pixels that are adjacent in color to your sampled skin range. Pull it lower and the selection becomes tighter and more conservative. There’s no universal right value here. It depends on your specific image, the lighting, the range of skin tones present, and what you’re trying to do with the selection. Start somewhere in the middle and watch the preview. You’re looking for the faces and hands to be cleanly white in the preview without the background or clothing turning grey.
Fuzziness slider being dragged with preview showing selection changes
The Fuzziness slider controls how broadly the tool interprets “skin tone.” Push it higher and you include more pixels that are adjacent in color to your sampled skin range. Pull it lower and the selection becomes tighter and more conservative. There’s no universal right value here. It depends on your specific image, the lighting, the range of skin tones present, and what you’re trying to do with the selection. Start somewhere in the middle and watch the preview. You’re looking for the faces and hands to be cleanly white in the preview without the background or clothing turning grey.
Step 6: Accept the Selection and Apply It as a Mask
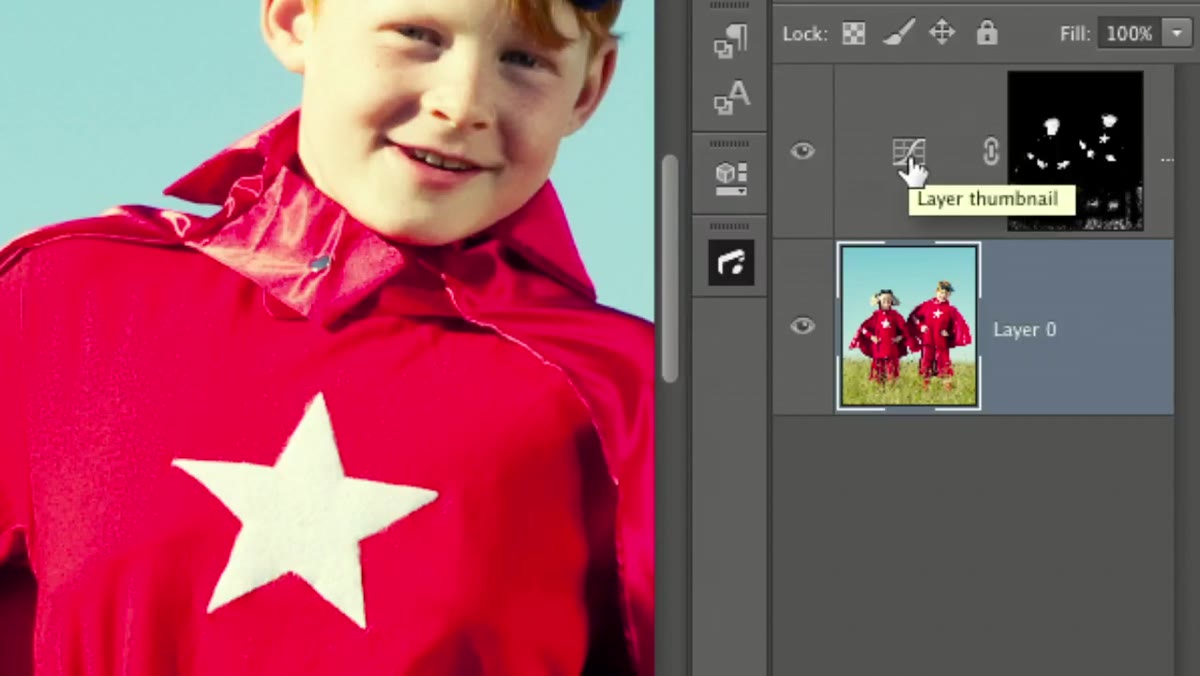 Mask thumbnail on adjustment layer showing white face and hand areas
When the preview looks reasonable, click OK. Photoshop converts that preview into a live selection, with the marching ants you’re used to seeing. From here, with your curves adjustment layer already created, the selection becomes your mask. Click the mask thumbnail on the adjustment layer, and your selection defines exactly where the curves change will appear. The white areas of the mask let the adjustment through; the black areas block it. Because Color Range found the skin tones across the whole image, your mask will naturally cover faces, necks, hands, and any other exposed skin in the shot.
Mask thumbnail on adjustment layer showing white face and hand areas
When the preview looks reasonable, click OK. Photoshop converts that preview into a live selection, with the marching ants you’re used to seeing. From here, with your curves adjustment layer already created, the selection becomes your mask. Click the mask thumbnail on the adjustment layer, and your selection defines exactly where the curves change will appear. The white areas of the mask let the adjustment through; the black areas block it. Because Color Range found the skin tones across the whole image, your mask will naturally cover faces, necks, hands, and any other exposed skin in the shot.
What I’ve Learned Working with This Tool on Real Clients
The honest caveat that Lesa raises in the tutorial is worth sitting with: this tool works best on lighter skin tones. Photoshop’s definition of “skin tone” in this context skews toward a narrow range, and for deeper complexions, the detection is inconsistent. I’ve tested this across a range of portrait work and found that for medium to deep skin tones, the Fuzziness slider needs significant adjustment, and you’ll often need to go back and paint the mask manually to clean up missed areas or false positives. It’s still faster than starting from scratch, but go in with realistic expectations.
One habit I’ve added to this workflow: after accepting the Color Range selection, I refine the mask using the Properties panel’s Density and Feather sliders before doing any curves work. Feathering softens the mask edges so the darkening or brightening blends naturally into the surrounding areas. Without a little feather, the transition between the skin region and everything else can look clipped, especially around hairlines and jawlines.
The single biggest thing this technique gave me was a way to make whole-skin adjustments without the selection work eating half my session time. Color Range with Skin Tones is not magic, but it’s a fast, smart starting point. Pair it with a well-structured adjustment layer and some manual mask cleanup, and you have a workflow that holds up on professional work.
Watch the full tutorial on YouTube to see Lesa walk through the entire process with the dialog open on screen. Her explanation of what’s happening inside the mask is worth your time even if you’ve used Color Range before.
Comments (1)
This is the kind of content that keeps me coming back.
Leave a Comment