There’s a feature sitting inside Lightroom’s masking panel that I ignored for way too long because I assumed I understood it. Intersect. It sounds logical enough, right? Two things overlapping. But every time I tried to use it, the result didn’t behave the way I expected, and I’d fall back on subtracting with a brush like I always had. It wasn’t until I watched Watch the full tutorial on YouTube by Matt Kloskowski that the logic finally clicked for me in a way I could actually apply to client work.
The problem Intersect solves is a specific and frustrating one: what do you do when your best automatic selection tool gets you 80% of the way there, but the remaining 20% is scattered across the image in ways that are tedious to clean up by hand? For beauty work especially, this comes up constantly. Color range selections bleed into skin tones. Subject selections catch background elements. You end up painting out corrections for longer than it took to make them. Intersect gives you a smarter path forward, and once you understand the underlying logic, it changes how you plan your masking from the start.
This tutorial covers Lightroom Classic, the cloud version of Lightroom, and Adobe Camera Raw. You’ll need a version from October 2021 or later to see the Intersect option in the masking panel.
Step 1: Understand What Intersect Actually Does
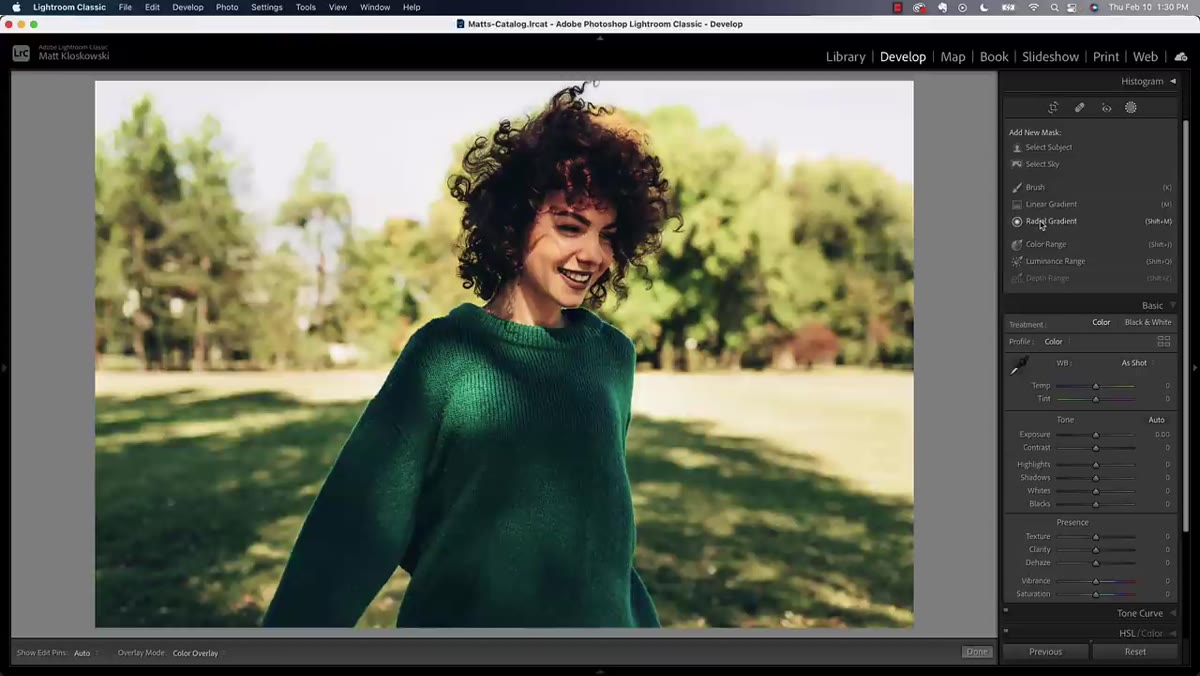
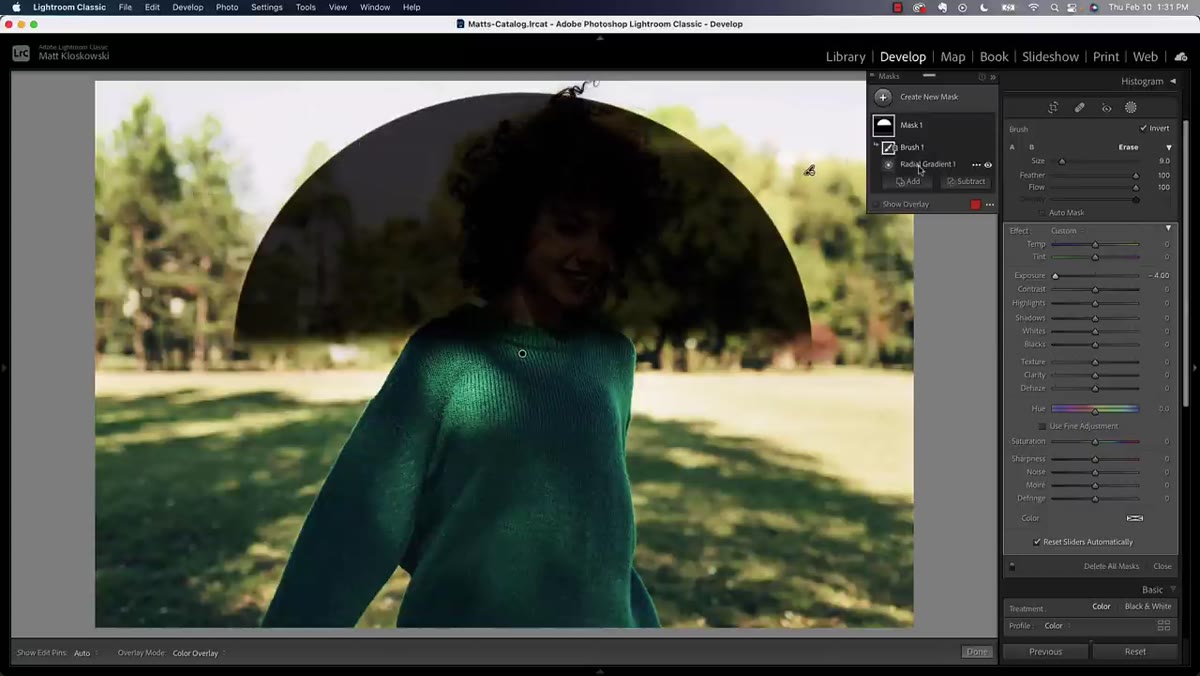
 Radial gradient on portrait showing mask panel options
Before touching any sliders, get the concept locked in. Intersect does not add to your selection or subtract from it. It shows you only the area where two separate masks overlap. Think of two circles drawn on paper: Intersect gives you only the lens-shaped region in the middle where they share space. Everything outside that overlap becomes invisible to the adjustment, even if it was part of your original selection.
Radial gradient on portrait showing mask panel options
Before touching any sliders, get the concept locked in. Intersect does not add to your selection or subtract from it. It shows you only the area where two separate masks overlap. Think of two circles drawn on paper: Intersect gives you only the lens-shaped region in the middle where they share space. Everything outside that overlap becomes invisible to the adjustment, even if it was part of your original selection.
Matt demonstrates this with a radial gradient darkened heavily so the effect is obvious. He paints with a brush outside the gradient circle and nothing changes. He paints inside it and the darkening appears. That’s the whole mechanic. The adjustment lives only where both masks agree.
Step 2: Create Your First Mask as a Rough Selection
 Radial gradient drawn over subject on portrait
The workflow Matt recommends, and the one I’ve adopted, is to think of your first mask as a broad container. It doesn’t need to be perfect. It just needs to define the general territory. In his portrait example, he uses Select Subject to create an initial selection of the person in the frame.
Radial gradient drawn over subject on portrait
The workflow Matt recommends, and the one I’ve adopted, is to think of your first mask as a broad container. It doesn’t need to be perfect. It just needs to define the general territory. In his portrait example, he uses Select Subject to create an initial selection of the person in the frame.
For beauty retouching, this first pass might be a radial gradient centered on the face, a luminance range targeting the skin tones, or a subject selection like he uses here. The point is that you’re drawing a boundary, not a finished selection. Intersect will tighten it up in the next step.
Step 3: Open the Pop-Out Menu on Your Existing Mask
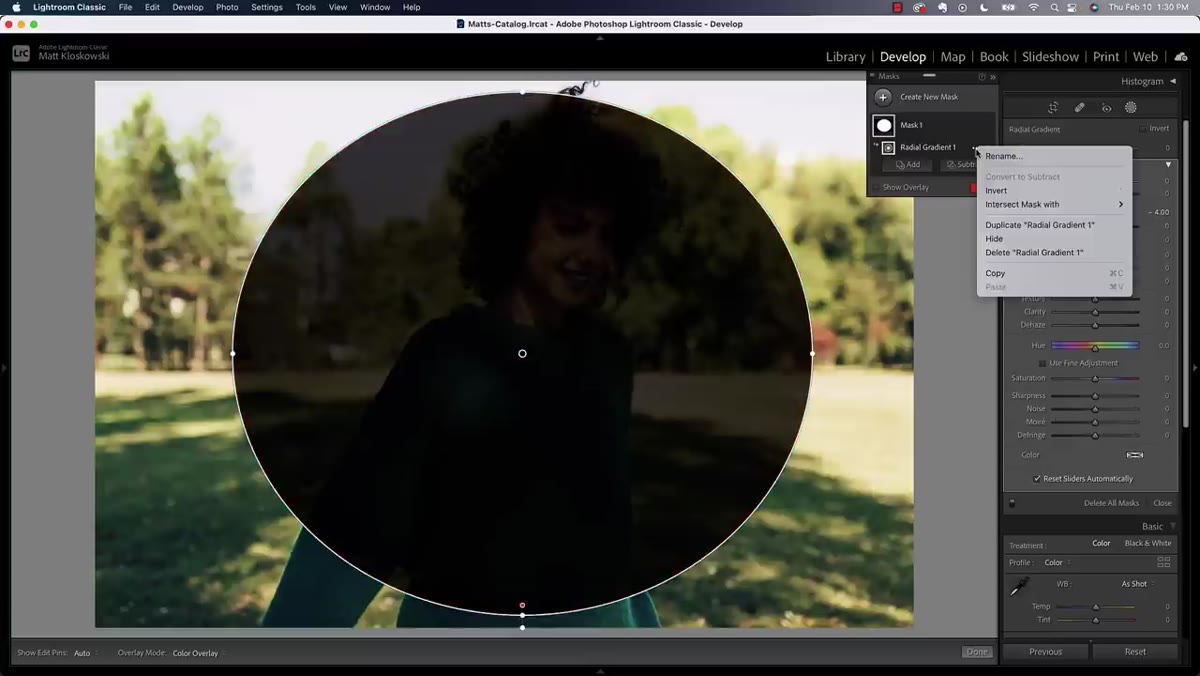 Pop-out menu open on mask panel showing Intersect option
Once your first mask is created, look at the mask layer in the Masks panel. There’s a small icon to the right of the mask name, a three-dot or pop-out menu depending on your version. Click that. You’ll see the same list of tools you’d use to create a new mask: Brush, Color Range, Luminance Range, and so on. But in this context, choosing one of them doesn’t create a separate new mask. It creates an Intersect layer on top of your existing one.
Pop-out menu open on mask panel showing Intersect option
Once your first mask is created, look at the mask layer in the Masks panel. There’s a small icon to the right of the mask name, a three-dot or pop-out menu depending on your version. Click that. You’ll see the same list of tools you’d use to create a new mask: Brush, Color Range, Luminance Range, and so on. But in this context, choosing one of them doesn’t create a separate new mask. It creates an Intersect layer on top of your existing one.
This is the part that tripped me up for a long time. I kept expecting to find a dedicated “Intersect” button somewhere. It’s not a button, it’s a mode. You access it through the pop-out menu on an existing mask, and then you choose what type of second selection to apply.
Step 4: Apply the Second Selection to Intersect With
 Color range picker being applied to subject selection on portrait
In the portrait example, the goal is to isolate a green shirt without affecting the rest of the image. A straight Color Range selection picks up greens everywhere, including in the background and reflected in the hair. So instead, Matt first selects the subject, then uses Intersect with Color Range to sample the shirt’s green.
Color range picker being applied to subject selection on portrait
In the portrait example, the goal is to isolate a green shirt without affecting the rest of the image. A straight Color Range selection picks up greens everywhere, including in the background and reflected in the hair. So instead, Matt first selects the subject, then uses Intersect with Color Range to sample the shirt’s green.
The result is clean: the adjustment only appears where the subject selection and the green color range overlap. Because the subject’s face isn’t green, it stays unaffected. The background greens fall outside the subject selection, so they’re ignored too. You get a tight, logical selection with two clicks rather than twenty minutes of brush work.
Step 5: Make Your Adjustments and Check the Overlap
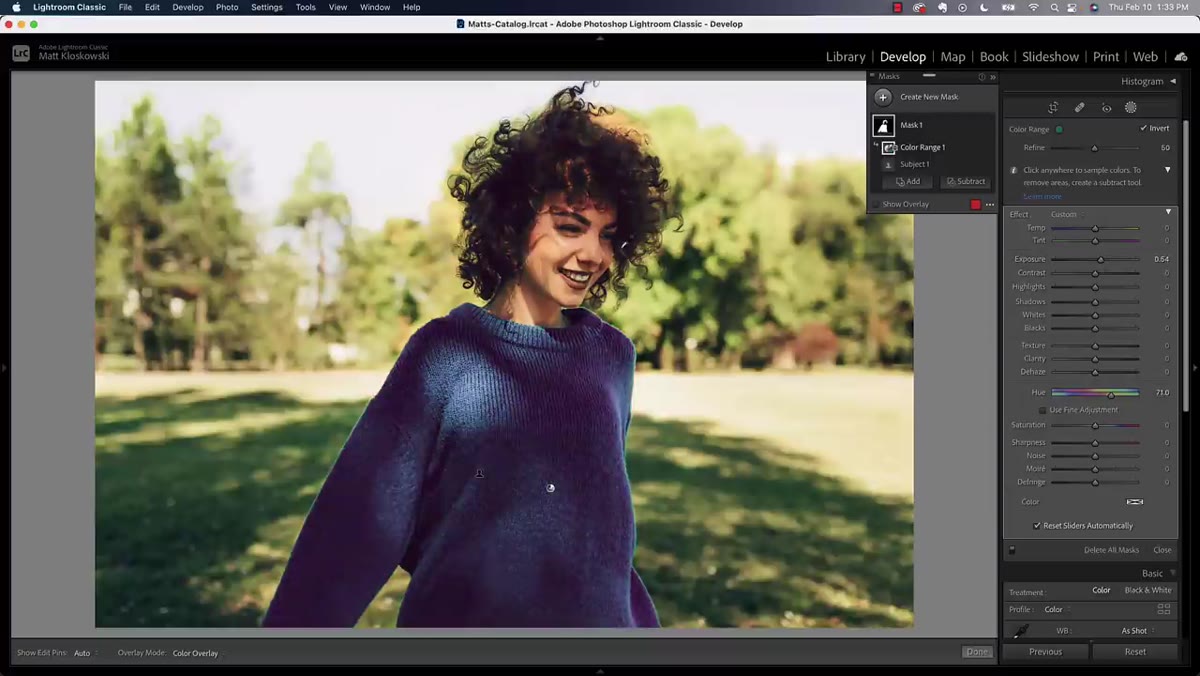 Adjustment sliders moved with mask active showing selective color effect
With the Intersect mask built, go ahead and move your adjustment sliders. Exposure, color grading, saturation, whatever the edit calls for. The effect will only appear inside the intersection zone, so you can push values further than you normally would without worrying about contaminating other parts of the image.
Adjustment sliders moved with mask active showing selective color effect
With the Intersect mask built, go ahead and move your adjustment sliders. Exposure, color grading, saturation, whatever the edit calls for. The effect will only appear inside the intersection zone, so you can push values further than you normally would without worrying about contaminating other parts of the image.
One thing Matt flags here is worth repeating: nothing is ever perfect on the first try. In his example, a little bit of green reflected light in the subject’s hair still catches the adjustment slightly. That’s not a failure of the tool, it’s physics. The hair really does have some green in it. At that point, you can use a Subtract brush to clean up the edge, or simply accept that a small amount of hair shimmer is not what your client is looking at.
Step 6: Adjust, Delete, and Rethink as Needed
 Masks panel with all masks deleted, clean starting state
Intersect masks are fully editable and deletable at any stage. If the overlap isn’t giving you what you want, delete both mask components and try a different combination. Maybe your first pass should be a radial gradient instead of Subject Select. Maybe the second pass should be Luminance Range instead of Color Range. The logic stays the same regardless of which tools you combine.
Masks panel with all masks deleted, clean starting state
Intersect masks are fully editable and deletable at any stage. If the overlap isn’t giving you what you want, delete both mask components and try a different combination. Maybe your first pass should be a radial gradient instead of Subject Select. Maybe the second pass should be Luminance Range instead of Color Range. The logic stays the same regardless of which tools you combine.
The panel keeps each component of the Intersect mask visible as a sublayer, so you can see exactly which two selections are producing the overlap. That transparency makes troubleshooting much faster than trying to diagnose a messy brush selection.
How I Apply This to Beauty Work Specifically
When I’m retouching skin for a beauty client, I run into a version of this problem regularly. I’ll want to brighten a specific tone area, say the highlight on the cheekbone, without lifting the whole face. A luminance range selection gets close but always bleeds into the forehead or the white of the eye. What I do now is create a radial gradient tightly placed over the cheekbone first, then Intersect it with a Luminance Range targeting the highlights. The result is a selection that’s both spatially aware and tonally aware at the same time.
The same logic works for lip color corrections, where you want to shift hue without touching similar colors in the surrounding skin. Subject Select plus Color Range Intersect is a fast starting point, and it takes about thirty seconds to set up.
The deepest lesson from Matt’s tutorial is also the simplest: Intersect rewards you for planning your masks in sequence rather than trying to get everything right in one go. Build a broad selection, then narrow it with a second layer of logic. Once that workflow is in your hands, a lot of the tedious brush cleanup disappears.
Watch the full tutorial on YouTube to see Matt walk through the landscape and wildlife examples as well, which show how Intersect handles completely different masking challenges beyond portraits.
Comments (1)
Finally someone explains this in a way that actually makes sense.
Leave a Comment