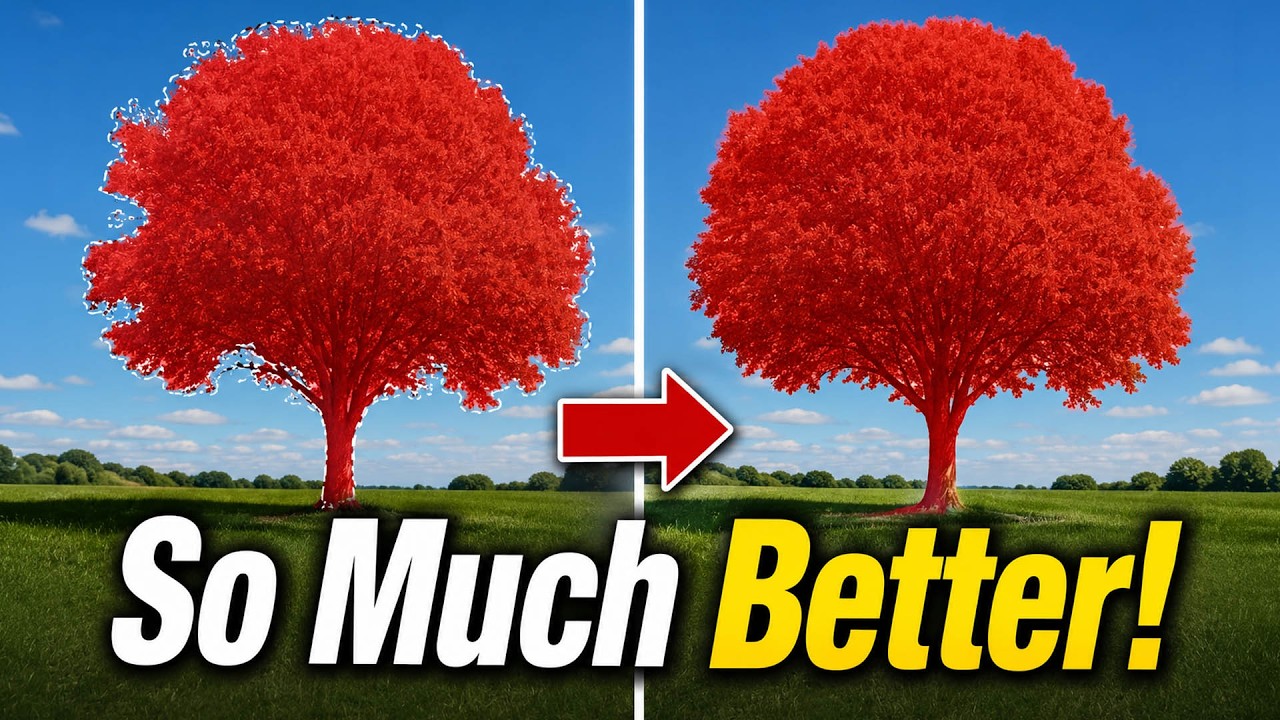
There’s a particular kind of frustration that comes from spending twenty minutes manually refining a mask around flyaway hair or the gap between a subject’s arm and waist, knowing that the automated selection tool almost got it right but not quite. For years, “almost” was the operating word with Lightroom’s Select Subject. It was good enough for a quick rough cut, but for beauty work, where the difference between a clean edge and a halo can make or break a composite, I always ended up doing significant manual cleanup. That changed with the latest Lightroom update, and I want to walk you through exactly what improved and how to put it to use.
Watch the full tutorial on YouTube
In this Matt Kloskowski tutorial, he covers two significant updates that landed in both Lightroom Classic and Lightroom: a meaningfully improved Select Subject masking tool and a duplicate-finding feature for photo organization. For retouchers, the masking improvement is the one that earns the headline. Matt does something smart here, he saved before-screenshots from the old version and ran the same images through the new algorithm so you can do a direct comparison. The difference in edge accuracy, particularly around fine detail, is striking. Here is how to work through these new features yourself.
Step 1: Open the Masking Panel
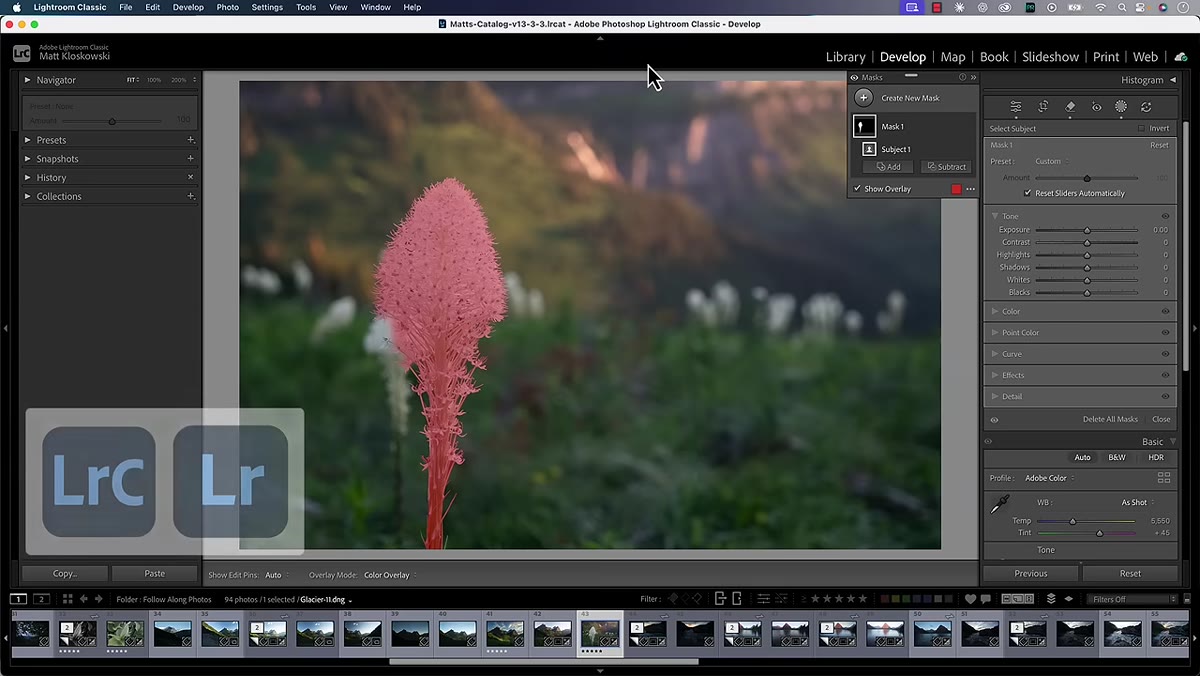 Masking panel open in Lightroom Classic interface
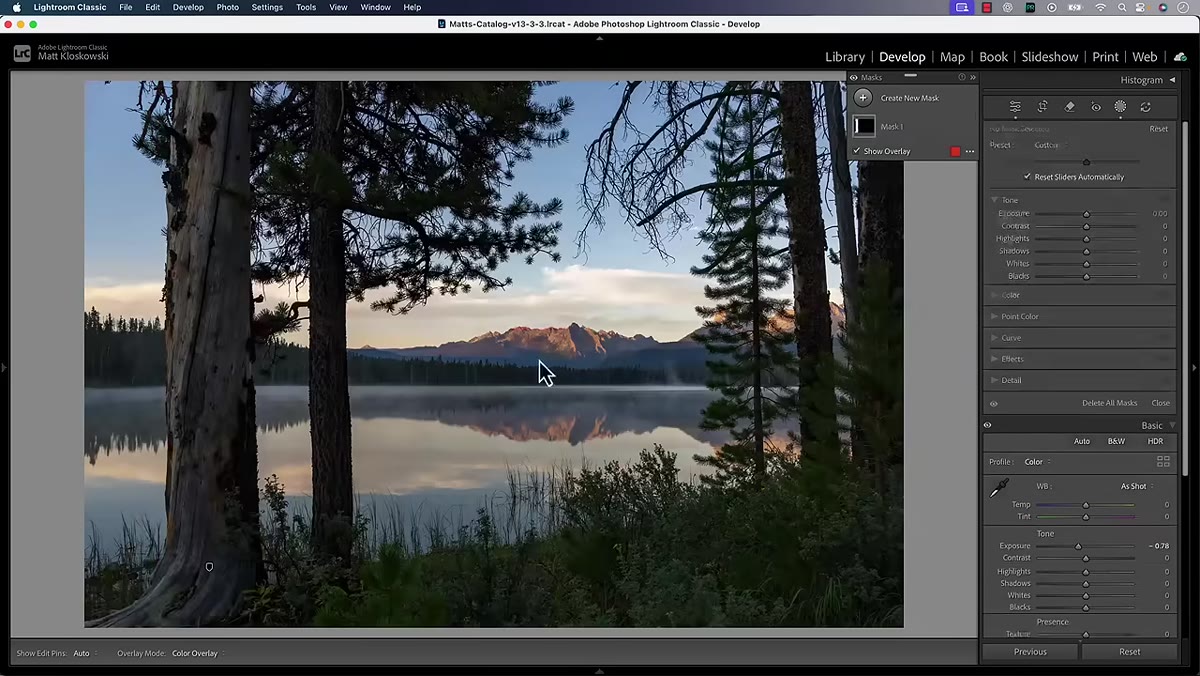
In Lightroom Classic, go to the Develop module and click the masking icon in the toolbar just below the histogram, it looks like a circle with a dotted edge. In the standalone Lightroom app, masking lives in the same area of the Edit panel. Once the masking panel opens, you will see all your selection options listed, including Select Subject, Select Sky, and the brush-based tools. This is your starting point for any targeted adjustment, and it is where the new improvements live.
Masking panel open in Lightroom Classic interface
In Lightroom Classic, go to the Develop module and click the masking icon in the toolbar just below the histogram, it looks like a circle with a dotted edge. In the standalone Lightroom app, masking lives in the same area of the Edit panel. Once the masking panel opens, you will see all your selection options listed, including Select Subject, Select Sky, and the brush-based tools. This is your starting point for any targeted adjustment, and it is where the new improvements live.
Step 2: Run Select Subject on Your Image
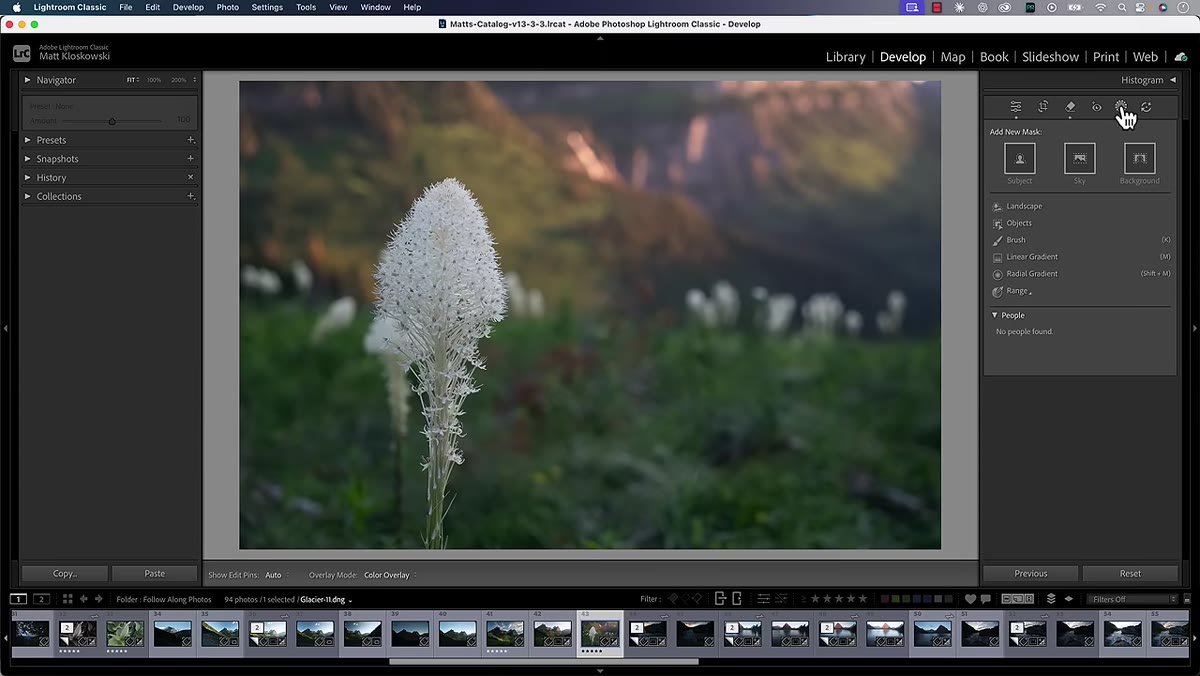 Select Subject option highlighted in the masking menu
Click “Select Subject” and let Lightroom do its analysis. Depending on your image complexity and your machine’s processing speed, this takes anywhere from a couple of seconds to about ten. What you are looking for when the mask overlay appears is how cleanly it handles the difficult zones: hair strands against a bright background, the space between an arm and a torso, fine fabric texture at the edges of clothing. These are the areas where the previous version regularly left behind fringing or missed entirely. The new algorithm is noticeably more accurate in these spots, and for beauty work where I am often masking a subject to apply a luminosity or color shift, that edge quality matters enormously.
Select Subject option highlighted in the masking menu
Click “Select Subject” and let Lightroom do its analysis. Depending on your image complexity and your machine’s processing speed, this takes anywhere from a couple of seconds to about ten. What you are looking for when the mask overlay appears is how cleanly it handles the difficult zones: hair strands against a bright background, the space between an arm and a torso, fine fabric texture at the edges of clothing. These are the areas where the previous version regularly left behind fringing or missed entirely. The new algorithm is noticeably more accurate in these spots, and for beauty work where I am often masking a subject to apply a luminosity or color shift, that edge quality matters enormously.
Step 3: Evaluate the Mask Overlay at 100%
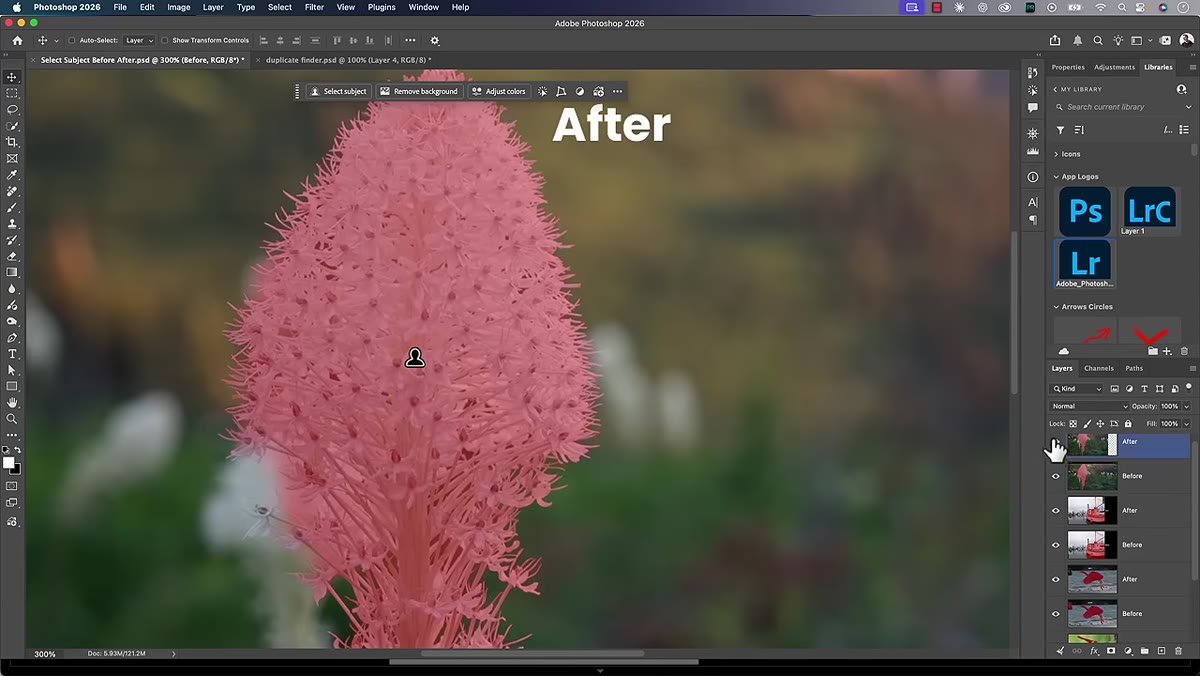
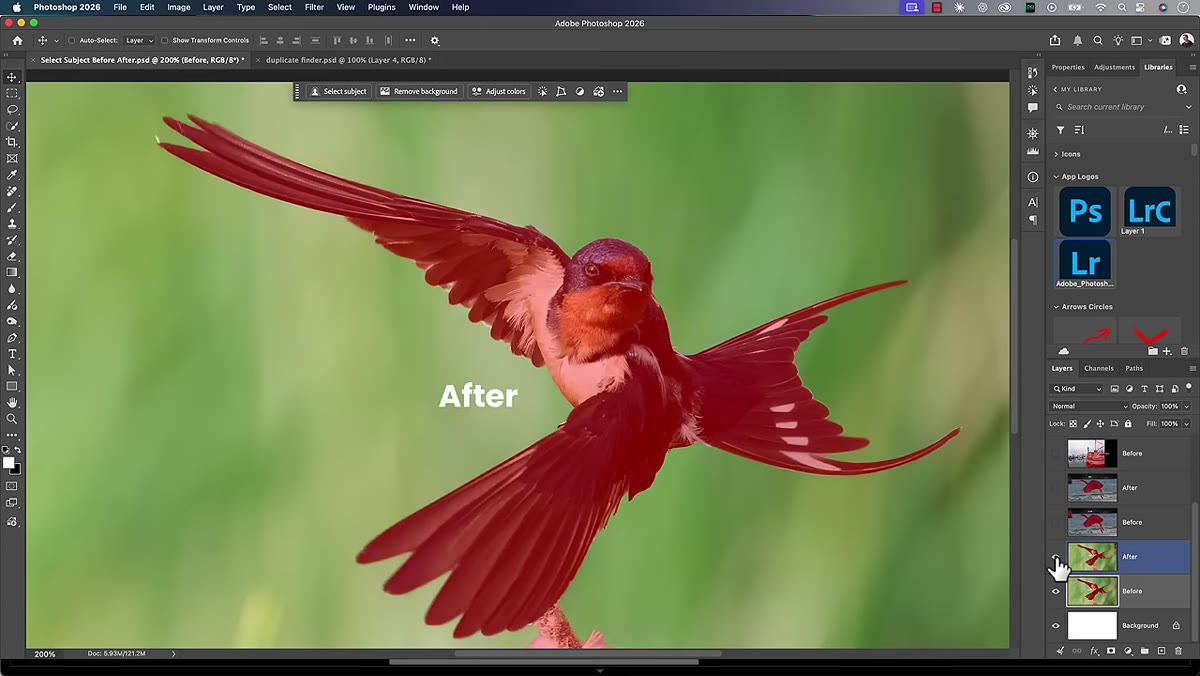 Before and after mask comparison showing improved wing-tip edges
Zoom into 100% and toggle the mask overlay on and off using the shortcut key (O by default) to compare what was selected against the actual subject edges. Pay special attention to any areas where you see the red overlay bleeding onto the background, or conversely, where background pixels were accidentally included inside the selection. In the tutorial, Matt highlights a before-and-after showing the old algorithm missing the space between a subject’s legs and leaving rough fringing along fine detail areas. The new version closes those gaps with noticeably less cleanup required. Getting into the habit of checking at 100% means you catch problems before they show up as artifacts in your final export.
Before and after mask comparison showing improved wing-tip edges
Zoom into 100% and toggle the mask overlay on and off using the shortcut key (O by default) to compare what was selected against the actual subject edges. Pay special attention to any areas where you see the red overlay bleeding onto the background, or conversely, where background pixels were accidentally included inside the selection. In the tutorial, Matt highlights a before-and-after showing the old algorithm missing the space between a subject’s legs and leaving rough fringing along fine detail areas. The new version closes those gaps with noticeably less cleanup required. Getting into the habit of checking at 100% means you catch problems before they show up as artifacts in your final export.
Step 4: Refine with Add or Subtract Brush If Needed
 Mask refinement brush being used around subject edges
Even with the improved accuracy, no automated selection is perfect on every image. If you spot areas that need correction, click “Subtract” at the top of the mask panel and choose the Brush tool, then paint over any background areas that were accidentally included. Likewise, use “Add” with the Brush to recover any subject areas that got dropped from the selection. Keep your brush feathering moderate, around 50, so you blend the corrections into the existing mask rather than creating a hard new edge. The goal is surgical corrections, not rebuilding the selection from scratch. The new Select Subject gets you close enough that most images need only a minute or two of this kind of cleanup, which is a real workflow win when you are moving through a full beauty shoot.
Mask refinement brush being used around subject edges
Even with the improved accuracy, no automated selection is perfect on every image. If you spot areas that need correction, click “Subtract” at the top of the mask panel and choose the Brush tool, then paint over any background areas that were accidentally included. Likewise, use “Add” with the Brush to recover any subject areas that got dropped from the selection. Keep your brush feathering moderate, around 50, so you blend the corrections into the existing mask rather than creating a hard new edge. The goal is surgical corrections, not rebuilding the selection from scratch. The new Select Subject gets you close enough that most images need only a minute or two of this kind of cleanup, which is a real workflow win when you are moving through a full beauty shoot.
Step 5: Apply Your Targeted Adjustment
 Adjustment sliders active on isolated subject mask
With your mask refined, now apply the actual edit. For beauty retouching this might be a slight Exposure lift to separate your subject from a darker background, a Texture or Clarity reduction for a softer skin rendering, or a targeted Color Grading shift to warm the skin tones without shifting the background. The mask you just built is doing all the heavy lifting of containing that adjustment to the subject only. Because the edges are cleaner with the new algorithm, your adjustments will look more natural at the boundaries, less like a cutout, more like a seamless edit. Dial your adjustments in gradually and check the edges at 100% one more time before moving on.
Adjustment sliders active on isolated subject mask
With your mask refined, now apply the actual edit. For beauty retouching this might be a slight Exposure lift to separate your subject from a darker background, a Texture or Clarity reduction for a softer skin rendering, or a targeted Color Grading shift to warm the skin tones without shifting the background. The mask you just built is doing all the heavy lifting of containing that adjustment to the subject only. Because the edges are cleaner with the new algorithm, your adjustments will look more natural at the boundaries, less like a cutout, more like a seamless edit. Dial your adjustments in gradually and check the edges at 100% one more time before moving on.
Step 6: Use the Duplicate Finder to Clean Up Your Culling Pass
 Lightroom library panel showing duplicate photo detection feature
The second major update covered in the tutorial is a duplicate-finding tool in the Library module of Lightroom Classic and in the Lightroom app’s browse view. After a beauty or portrait shoot you often end up with near-identical frames, especially if you were bracketing expressions or testing small lighting adjustments. The duplicate finder surfaces these groupings so you can make a single keep decision and clear out the rest without manually scrubbing through every frame. This is not a glamorous feature, but it genuinely reduces the time between card import and getting into the actual retouching work, which is where I want to spend my energy anyway.
Lightroom library panel showing duplicate photo detection feature
The second major update covered in the tutorial is a duplicate-finding tool in the Library module of Lightroom Classic and in the Lightroom app’s browse view. After a beauty or portrait shoot you often end up with near-identical frames, especially if you were bracketing expressions or testing small lighting adjustments. The duplicate finder surfaces these groupings so you can make a single keep decision and clear out the rest without manually scrubbing through every frame. This is not a glamorous feature, but it genuinely reduces the time between card import and getting into the actual retouching work, which is where I want to spend my energy anyway.
A Note from My Own Workflow: Don’t Stop at Select Subject
The improved Select Subject is excellent for isolating a full figure or face, but where I have been getting the most mileage is using it as a starting mask and then intersecting it with a Luminance Range mask. Select your subject first, then hold down the Option key (Alt on PC) and add a Luminance Range selection inside that existing mask. This lets you target, say, only the shadow areas of your subject’s skin, or only the brightest skin tones, without affecting hair or clothing. The improved edge quality of the new Select Subject makes this combination far more reliable than it used to be, because any luminance bleed at the edges of a rough selection compounds quickly when you start layering masks.
The single most important takeaway here is that better automated selections mean less time on the mechanical parts of masking and more time on the actual creative decisions. That ratio shift matters whether you are retouching one hero image for a beauty campaign or moving through fifty portraits from a shoot.
Watch the full tutorial on YouTube to see Matt’s direct before-and-after comparisons and his walkthrough of the organization features, both are worth your time.
Comments (6)
Simple but effective. Sometimes that's all you need.
I keep coming back to this article. It's that useful.
Would love to see a follow-up going deeper into this topic.
This is exactly what I needed today. Been struggling with this for weeks.
Been doing this wrong for years apparently. Thanks for the wake-up call.
Excellent tutorial. I'd add that from a business standpoint, this technique is incredibly versatile.
Leave a Comment