There’s a particular kind of frustration that comes from knowing exactly what you need to do to a photo and not having the right tool to do it cleanly. I’ve felt it dozens of times working on beauty campaigns where the light hits a subject’s face in a long, narrow band, and I want to enhance just that band without blowing out the edges or dragging a complicated luminosity mask into the mix. My workaround for years was stacking two separate linear gradients pointing toward each other and hoping the transition looked natural. It almost never did on the first try.
That’s why I stopped what I was doing when I came across Watch the full tutorial on YouTube from Matt Kloskowski covering the new features in Adobe Camera Raw 18.4. Matt is one of those educators who explains tools in terms of actual photographic problems rather than feature lists, and this update, specifically the addition of bidirectional gradients, solves a real problem I’ve had for years. If you’re a Lightroom user, fair warning: as of this writing, this feature lives only in Camera Raw. Matt says he’d expect it to arrive in Lightroom eventually based on how Adobe has rolled out similar updates in the past, but for now, you’ll need to work through Photoshop’s Camera Raw filter to access it.
For beauty retouching especially, where so much of the work is about shaping light on skin, this is a quiet but meaningful addition. Here’s how it works.
Step 1: Open Your Image in Adobe Camera Raw
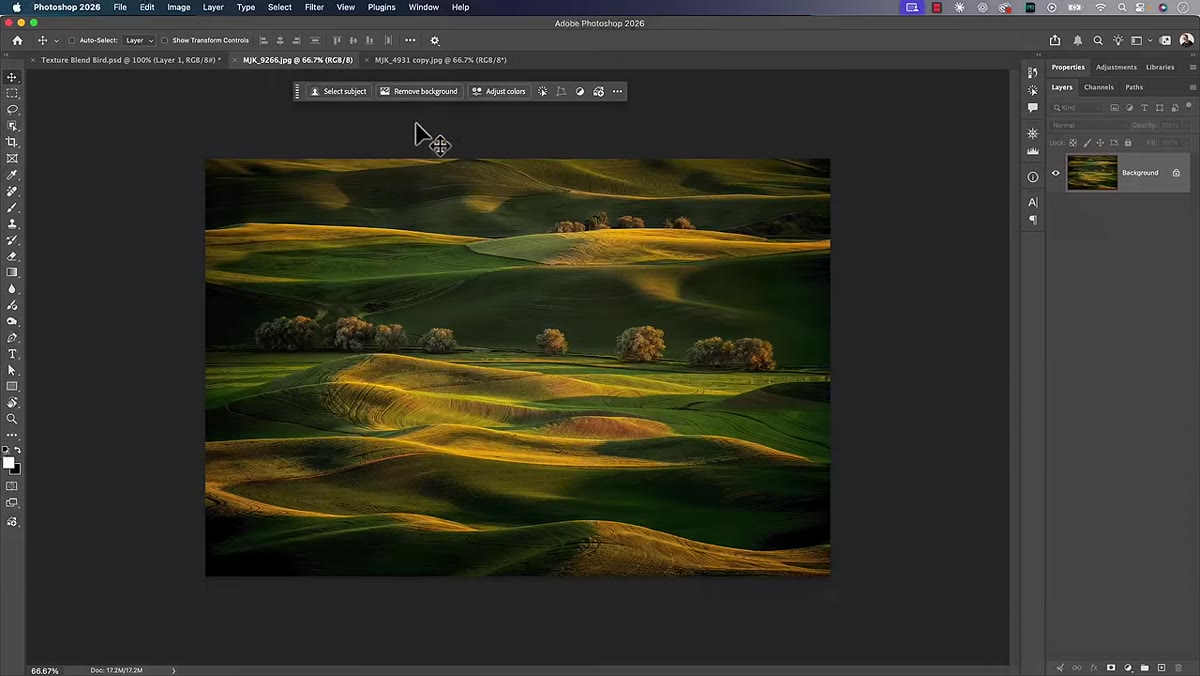 Photoshop Filter menu with Camera Raw filter highlighted
If you’re working with a raw file, Photoshop will drop you straight into Camera Raw when you open it. If you’re working with a JPEG or a layered file, go to Filter and choose Camera Raw Filter. Before you do anything else, check that you’re running version 18.4 or later. You’ll see the version number in the top right corner of the Camera Raw window. If it’s not there yet, open your Creative Cloud desktop app and run updates. The bidirectional gradient option simply won’t appear in older versions.
Photoshop Filter menu with Camera Raw filter highlighted
If you’re working with a raw file, Photoshop will drop you straight into Camera Raw when you open it. If you’re working with a JPEG or a layered file, go to Filter and choose Camera Raw Filter. Before you do anything else, check that you’re running version 18.4 or later. You’ll see the version number in the top right corner of the Camera Raw window. If it’s not there yet, open your Creative Cloud desktop app and run updates. The bidirectional gradient option simply won’t appear in older versions.
Step 2: Open the Masking Panel and Add a Linear Gradient
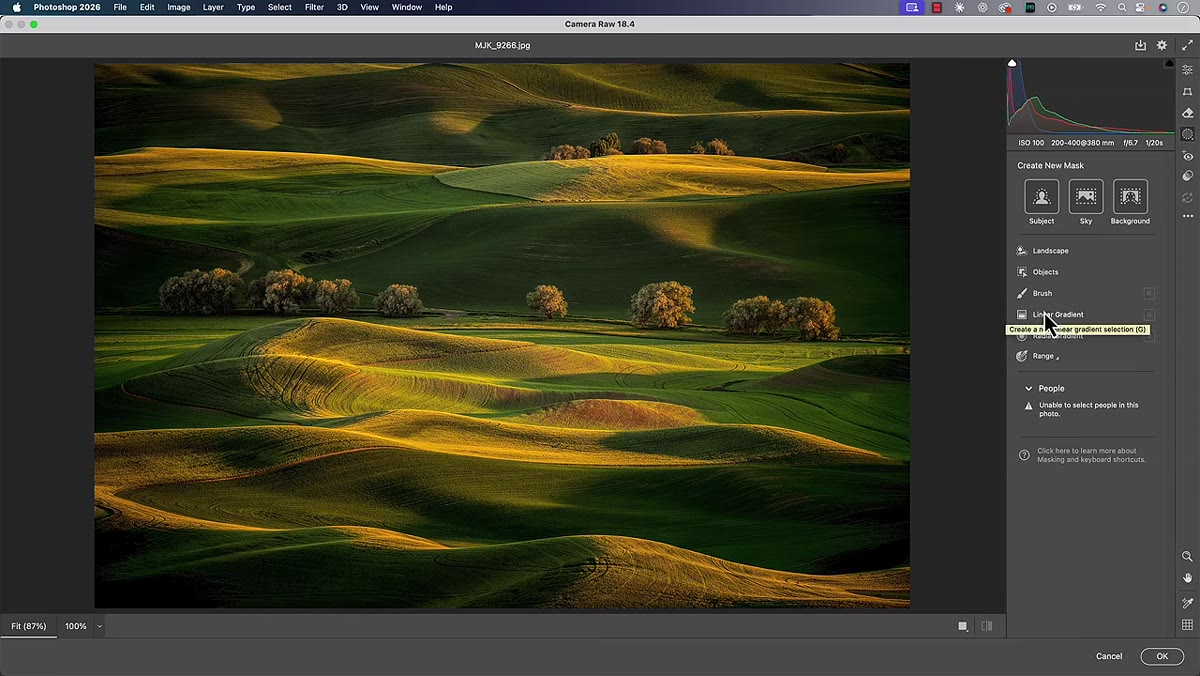 Masking panel open with Linear Gradient option visible
Click the masking icon (it looks like a circle with a dotted edge) to open the masking panel. From the available mask types, choose Linear Gradient. This is the only mask type that currently supports the new bidirectional option, so don’t go looking for it under Radial Gradient or elsewhere. Draw your gradient across the area of the image you want to affect. At this point it behaves exactly the way it always has, a single directional fade from full effect to no effect.
Masking panel open with Linear Gradient option visible
Click the masking icon (it looks like a circle with a dotted edge) to open the masking panel. From the available mask types, choose Linear Gradient. This is the only mask type that currently supports the new bidirectional option, so don’t go looking for it under Radial Gradient or elsewhere. Draw your gradient across the area of the image you want to affect. At this point it behaves exactly the way it always has, a single directional fade from full effect to no effect.
Step 3: Switch the Overlay to White on Black
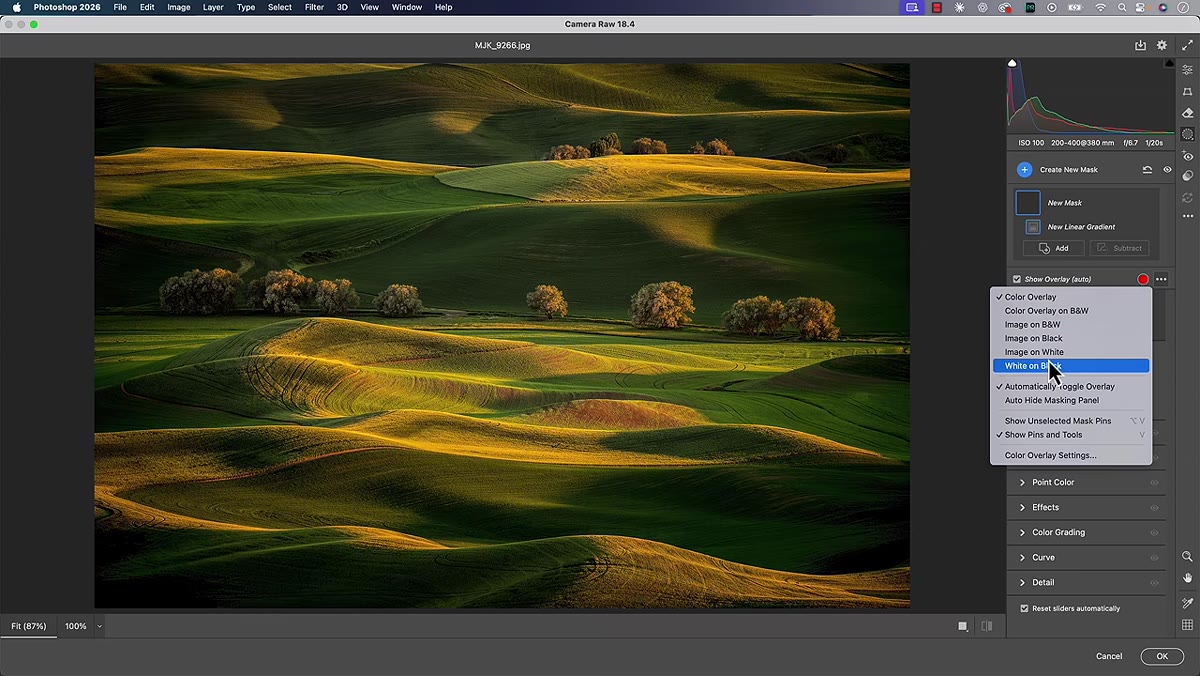 Overlay dropdown set to White on Black showing gradient mask
Before enabling bidirectional mode, change your mask overlay from the default color overlay to White on Black. You’ll find this in the small overlay dropdown at the bottom of the image. This view makes the gradient’s structure much easier to read: pure white shows where your adjustments will be applied at full strength, gray shows the transition zone, and black shows where nothing happens. Having this visual clarity matters when you’re about to change the gradient’s entire behavior.
Overlay dropdown set to White on Black showing gradient mask
Before enabling bidirectional mode, change your mask overlay from the default color overlay to White on Black. You’ll find this in the small overlay dropdown at the bottom of the image. This view makes the gradient’s structure much easier to read: pure white shows where your adjustments will be applied at full strength, gray shows the transition zone, and black shows where nothing happens. Having this visual clarity matters when you’re about to change the gradient’s entire behavior.
Step 4: Enable the Bidirectional Checkbox
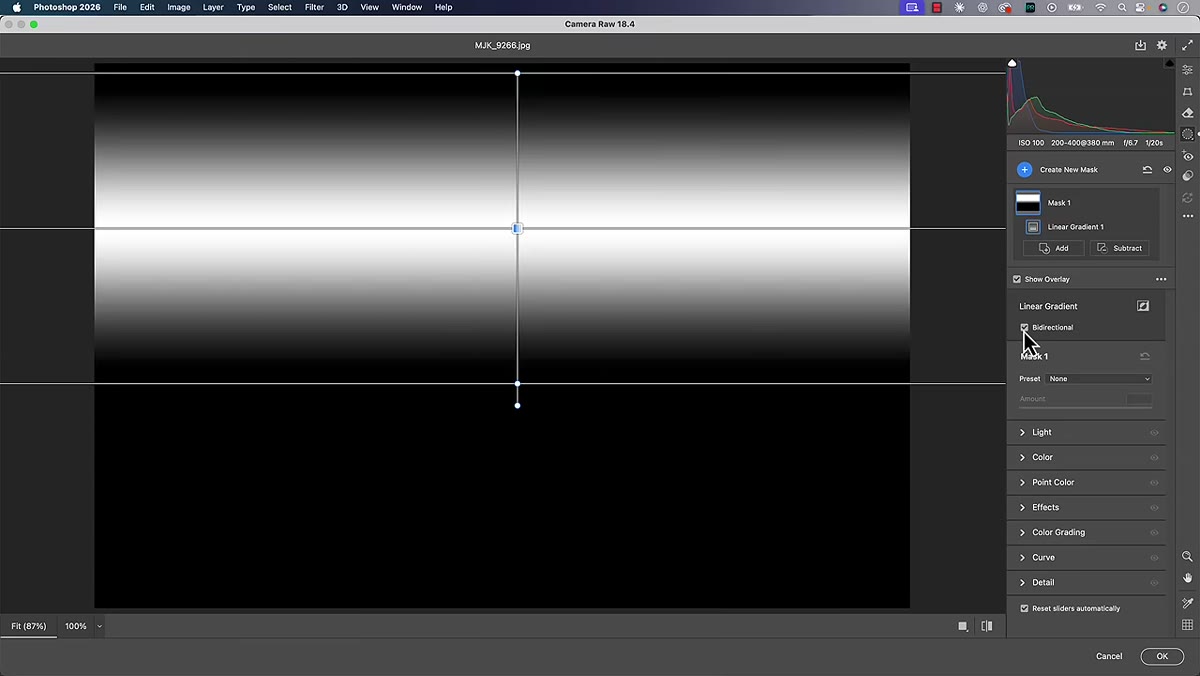 Bidirectional checkbox being enabled showing two-sided gradient
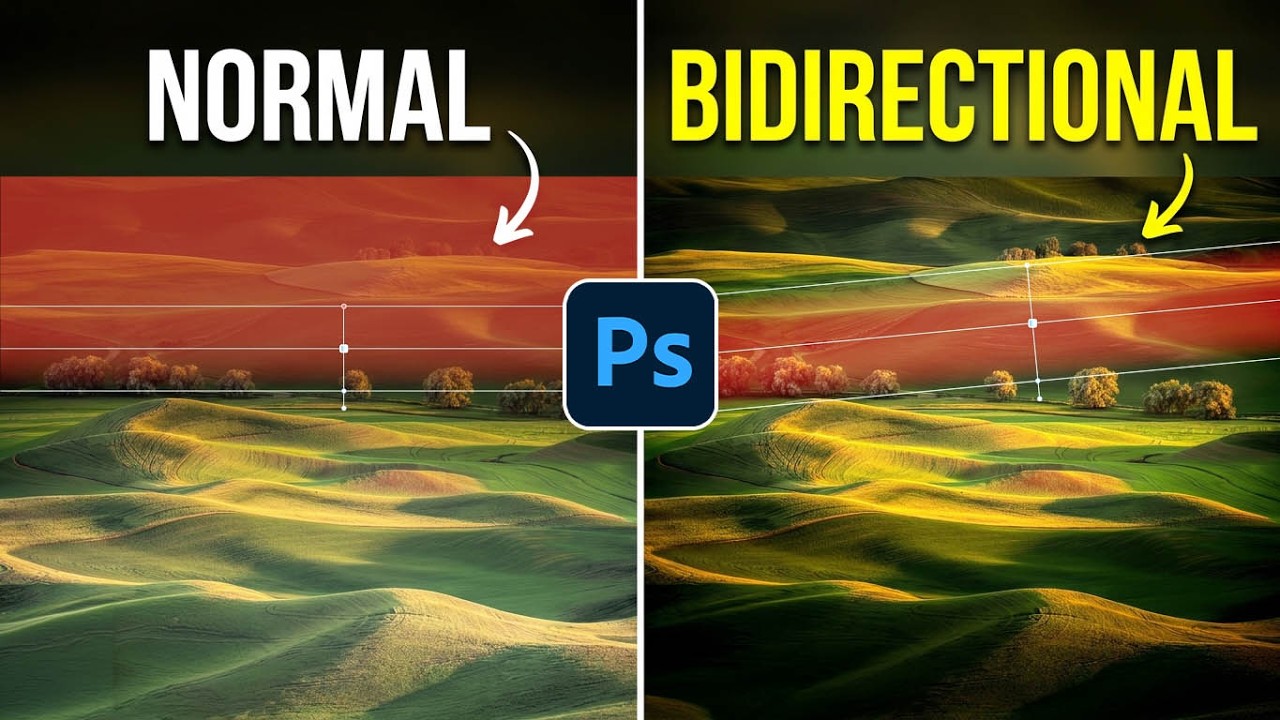
This is the new part. With your linear gradient selected, look for the Bidirectional checkbox in the mask options panel on the right side. Check it. The gradient’s white region, previously sitting at one end, will shift to the center. The effect now radiates outward from the middle and fades toward both the top handle and the bottom handle simultaneously. What was a one-sided fade becomes a band. This is exactly the tool I needed for those narrow strips of specular light across cheekbones or collarbones.
Bidirectional checkbox being enabled showing two-sided gradient
This is the new part. With your linear gradient selected, look for the Bidirectional checkbox in the mask options panel on the right side. Check it. The gradient’s white region, previously sitting at one end, will shift to the center. The effect now radiates outward from the middle and fades toward both the top handle and the bottom handle simultaneously. What was a one-sided fade becomes a band. This is exactly the tool I needed for those narrow strips of specular light across cheekbones or collarbones.
Step 5: Adjust the Handles Independently or Together
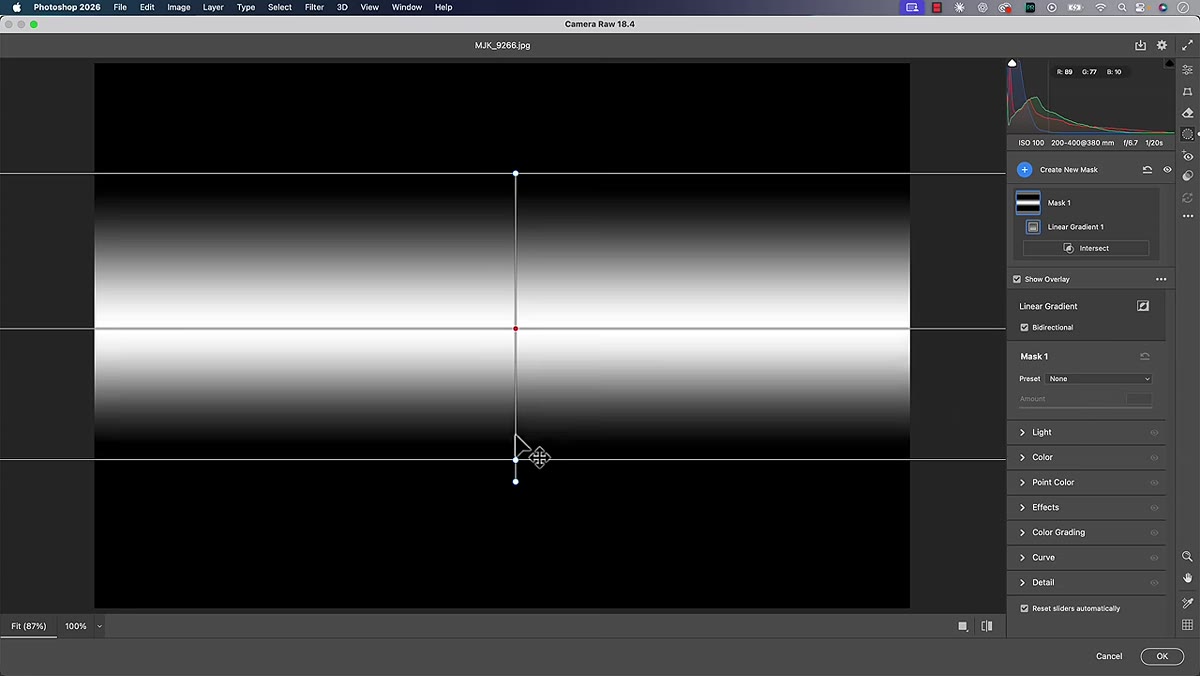 Dragging top and bottom gradient handles independently
The two handles that define the gradient’s transition zones can be moved separately or together. Drag the top handle alone to widen or narrow the fade on that side. Drag the bottom handle to do the same on the other side. If you want to move both handles symmetrically at the same time, hold Option on Mac or Alt on PC while dragging either handle. The Shift key constrains rotation to clean angles when you need to straighten the gradient, and it also prevents accidental rotation when you’re clicking to reposition. Spend a minute here just getting comfortable with how the handles behave. It’s more intuitive than it sounds.
Dragging top and bottom gradient handles independently
The two handles that define the gradient’s transition zones can be moved separately or together. Drag the top handle alone to widen or narrow the fade on that side. Drag the bottom handle to do the same on the other side. If you want to move both handles symmetrically at the same time, hold Option on Mac or Alt on PC while dragging either handle. The Shift key constrains rotation to clean angles when you need to straighten the gradient, and it also prevents accidental rotation when you’re clicking to reposition. Spend a minute here just getting comfortable with how the handles behave. It’s more intuitive than it sounds.
Step 6: Apply Your Adjustments and Refine
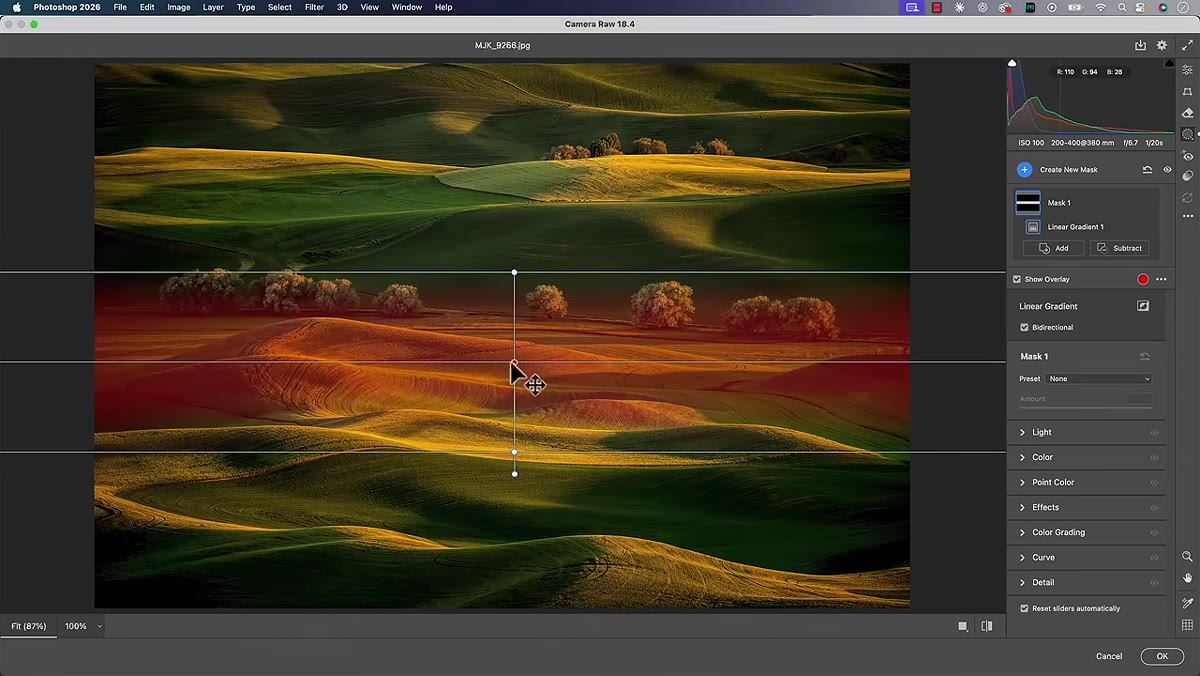 Exposure and highlights being adjusted on the center band of gradient
Switch your overlay back to Color Overlay so you can see the effect against your actual image. Now dial in your adjustments in the panel on the right. For a band of natural light on skin, a small exposure increase paired with a highlights reduction is usually the right combination. You’re adding luminosity without letting the brightest points clip. If the effect is pointing in the wrong direction, use the Invert option to flip it so the band becomes the unaffected area and the edges receive the adjustment instead. That inversion is worth exploring because it opens up a completely different set of use cases, like darkening the outer zones of a portrait to draw attention inward without a heavy vignette.
Exposure and highlights being adjusted on the center band of gradient
Switch your overlay back to Color Overlay so you can see the effect against your actual image. Now dial in your adjustments in the panel on the right. For a band of natural light on skin, a small exposure increase paired with a highlights reduction is usually the right combination. You’re adding luminosity without letting the brightest points clip. If the effect is pointing in the wrong direction, use the Invert option to flip it so the band becomes the unaffected area and the edges receive the adjustment instead. That inversion is worth exploring because it opens up a completely different set of use cases, like darkening the outer zones of a portrait to draw attention inward without a heavy vignette.
Step 7: Stack a Second Bidirectional Gradient for Layered Light Shaping
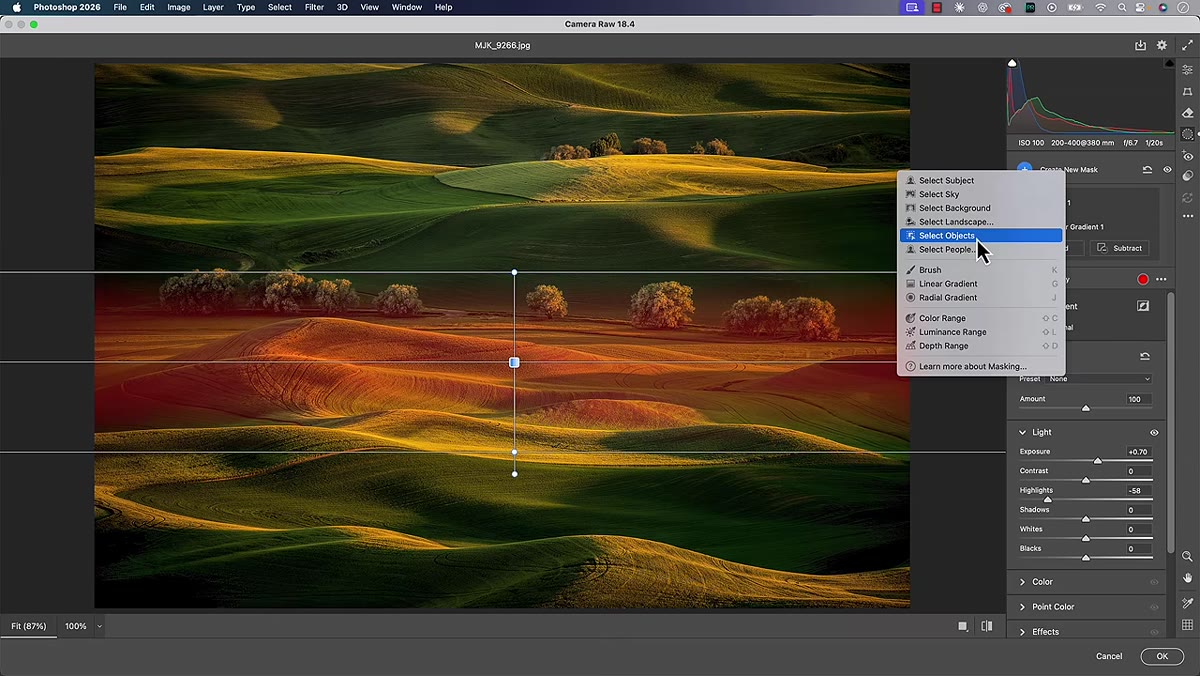 Second linear gradient being added across a different area of the photo
One gradient rarely finishes the job on its own. Add a new mask, choose Linear Gradient again, enable Bidirectional, and target a different zone of the image. Matt demonstrates this by laying a second gradient across a slightly different region to layer the light enhancement in a more natural way. In beauty retouching, this kind of additive approach, multiple subtle masks rather than one heavy one, is almost always the better path. Each mask stays small and targeted, which keeps the skin from looking manipulated.
Second linear gradient being added across a different area of the photo
One gradient rarely finishes the job on its own. Add a new mask, choose Linear Gradient again, enable Bidirectional, and target a different zone of the image. Matt demonstrates this by laying a second gradient across a slightly different region to layer the light enhancement in a more natural way. In beauty retouching, this kind of additive approach, multiple subtle masks rather than one heavy one, is almost always the better path. Each mask stays small and targeted, which keeps the skin from looking manipulated.
How I’m Folding This Into My Beauty Workflow
The double-gradient workaround I mentioned earlier actually caused me a small disaster on a fragrance campaign last year. The two opposing gradients created a subtle banding artifact right across the model’s jaw that I didn’t catch until the client did. Not my finest hour. A proper bidirectional gradient would have been a single, smooth transition with none of that risk.
What I’m finding now is that bidirectional gradients are particularly useful for hair lighting and collarbone work, two areas where the light often exists as a band rather than a sweep. I’ll use one to enhance the lit stripe through hair and a second, inverted, to gently pull back the zones where the light falls off too hard. The result reads as intentional studio light rather than post-processing, which is always the goal.
One thing to keep in mind: this tool won’t replace luminosity masks or subject-aware masking for complex skin work. Think of it as a light-shaping tool rather than a precision retouching tool. It works best when your goal is to guide the viewer’s eye through tonal control, not to fix a specific area of skin texture or color.
The single most useful shift in thinking here is this: a gradient doesn’t have to have a direction. It can have a center. That reframe alone will change how you approach light sculpting in Camera Raw. Watch the full tutorial on YouTube to see Matt walk through the complete technique, including the other Camera Raw 18.4 updates that didn’t make it into this breakdown.
Comments (2)
Been doing this wrong for years apparently. Thanks for the wake-up call.
Would love to see a follow-up going deeper into this topic.
Leave a Comment