
There’s a specific kind of dread that sets in when you’re staring at a folder of 400 wedding portraits at 11pm, knowing every single one needs skin work before the client preview tomorrow. I lived that dread for years before I finally made the shift from shooting to retouching full-time. What I wish someone had handed me back then was a system - not a collection of tricks, but an actual repeatable framework with a clock attached to it.
That’s exactly what Scott Kelby lays out in this KelbyOne tutorial, which accompanies his book Professional Portrait Retouching Techniques for Photographers. Watch the full tutorial on YouTube and you’ll notice the emphasis is right there in the subtitle: this is built for photographers, not for dedicated retouchers who bill by the hour. The distinction matters more than it sounds. A high-end beauty retoucher might spend four to six hours on a single face. Most photographers doing their own post-processing have four to six minutes. Kelby’s entire philosophy is built around that gap.
What I appreciate most is how honestly he names the economics of the situation. Clients expect polished, fully retouched deliverables, but retouching rarely appears as a separate line item on an invoice. That means the time you spend in Photoshop is time you’re not billing for. The faster you can get clean, professional results, the sooner you get back to the part of the work that actually pays. This tutorial is structured around that reality, and the walkthrough below follows the core framework Kelby presents.
Step 1: Understand the Book’s Structure Before You Open a Single File
 Scott Kelby explaining chapter breakdown by facial feature
Before touching Photoshop, Kelby walks through how the material is organized, and it’s worth internalizing because it changes how you approach a retouch. Rather than one long general workflow, the system is divided by subject area. Eyes get their own dedicated chapter - around 85 pages of techniques. Separate sections cover facial restructuring, body sculpting, and hair. The logic is that you rarely need every technique on every person. You identify what the image needs, go to that section, apply the relevant fixes, and move on.
Scott Kelby explaining chapter breakdown by facial feature
Before touching Photoshop, Kelby walks through how the material is organized, and it’s worth internalizing because it changes how you approach a retouch. Rather than one long general workflow, the system is divided by subject area. Eyes get their own dedicated chapter - around 85 pages of techniques. Separate sections cover facial restructuring, body sculpting, and hair. The logic is that you rarely need every technique on every person. You identify what the image needs, go to that section, apply the relevant fixes, and move on.
Think of it less like a recipe and more like a toolkit you pull from selectively. When I first started retouching beauty work for brands, I made the mistake of applying every technique I knew to every image. The results looked overworked. Kelby’s modular approach forces you to edit with intention, which is a skill in itself.
Step 2: Work from a Practice Image, Then Apply to a New One
 Discussion of downloadable practice images and second challenge image
Kelby includes downloadable images so you can follow along with exactly what he’s demonstrating, which is standard for his books. What’s new here is the addition of a second image for each technique - one you haven’t seen him retouch. You do the walkthrough on the first image, feel comfortable with the steps, then immediately apply the same technique to the second unfamiliar photo.
Discussion of downloadable practice images and second challenge image
Kelby includes downloadable images so you can follow along with exactly what he’s demonstrating, which is standard for his books. What’s new here is the addition of a second image for each technique - one you haven’t seen him retouch. You do the walkthrough on the first image, feel comfortable with the steps, then immediately apply the same technique to the second unfamiliar photo.
This is how retention actually works. Watching someone retouch and copying their steps builds muscle memory for that specific image. Applying the technique cold to something new is where the skill gets locked in. I’d recommend not skipping the second image even when you’re short on time. It’s the difference between recognizing a technique when you see it and being able to deploy it under pressure on a client file.
Step 3: Prioritize the Eyes Above Everything Else
 Kelby describing the 85-page eyes chapter and its importance
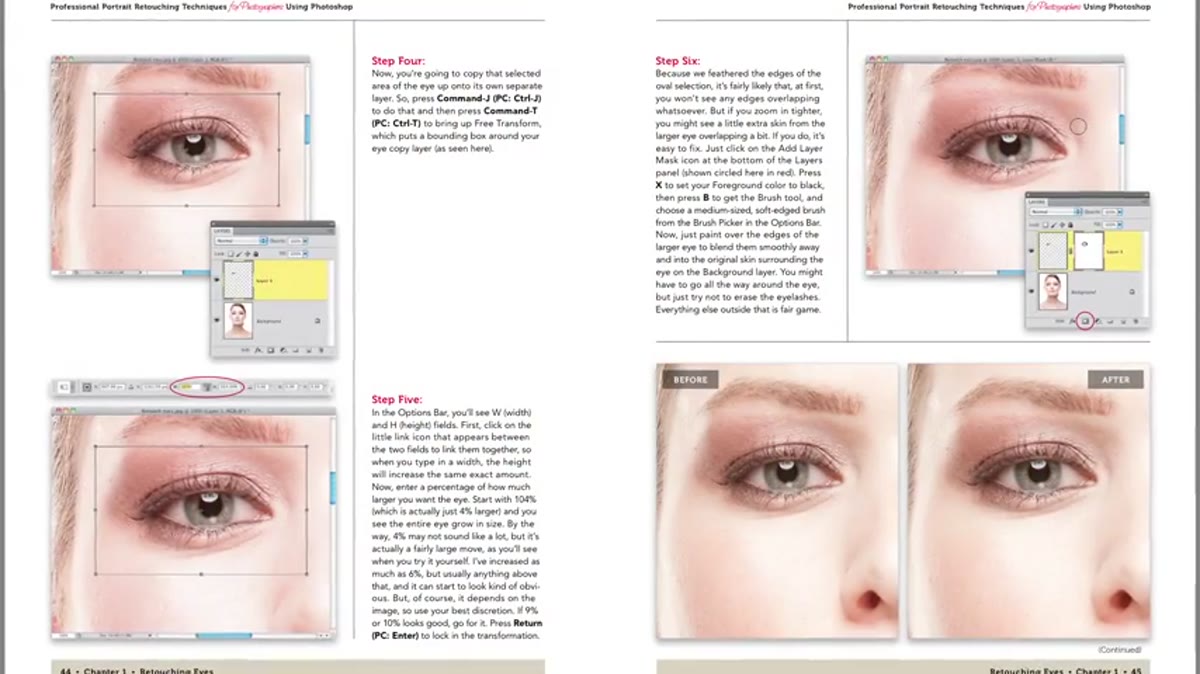
If there’s one place to concentrate your retouching energy, Kelby is unambiguous: it’s the eyes. The tutorial dedicates more material to eyes than any other feature, and from my experience working on beauty campaigns, that emphasis is completely earned. Eyes are where a viewer’s attention lands first and stays longest. Dull, flat, or unevenly retouched eyes will undermine every other correction you make.
Kelby describing the 85-page eyes chapter and its importance
If there’s one place to concentrate your retouching energy, Kelby is unambiguous: it’s the eyes. The tutorial dedicates more material to eyes than any other feature, and from my experience working on beauty campaigns, that emphasis is completely earned. Eyes are where a viewer’s attention lands first and stays longest. Dull, flat, or unevenly retouched eyes will undermine every other correction you make.
The techniques covered range from brightening the iris and sharpening detail to reducing redness and correcting uneven lids. You won’t use all of them on the same subject - that’s the point. Learn the full range so you can diagnose what a specific pair of eyes actually needs, then apply only those fixes. Over-retouched eyes have a glassy, inhuman look that clients notice even if they can’t name what’s wrong with the image.
Step 4: Address Facial Restructuring and Body Sculpting as Needed
 Overview of facial restructuring and body sculpting chapter topics
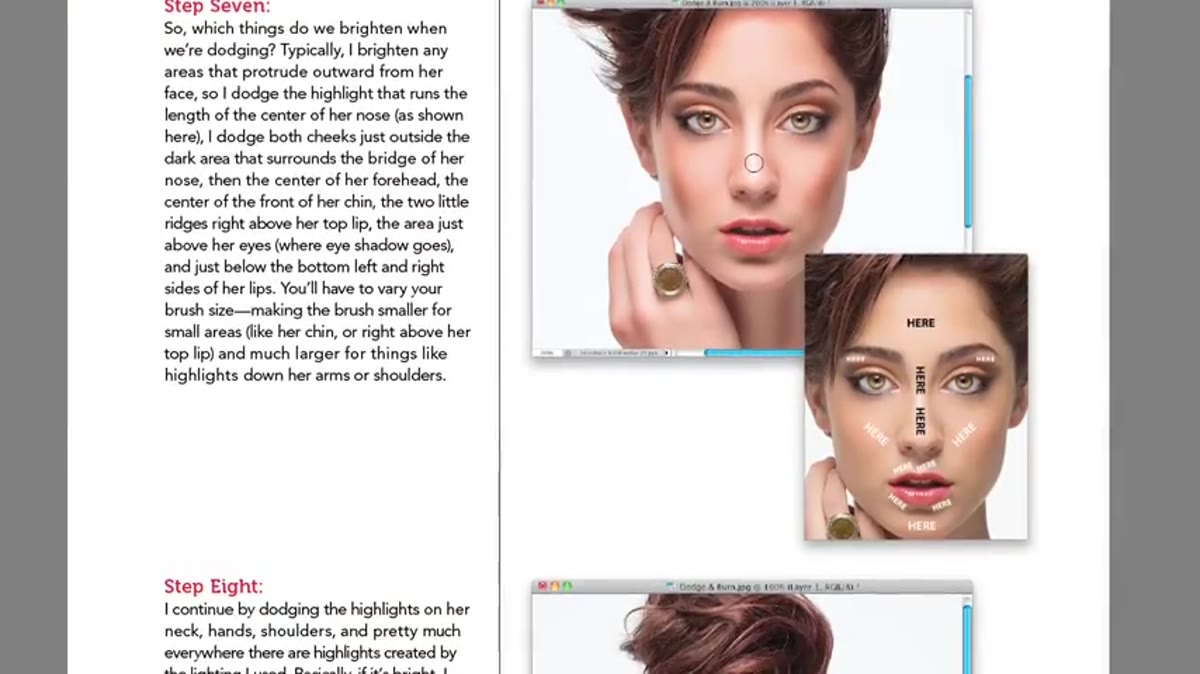
After the eyes, the framework moves into facial restructuring and body sculpting - tools like Liquify and related techniques for refining the shape and proportion of features. Kelby treats these as available options rather than defaults. Not every portrait needs Liquify work, and knowing when to leave something alone is as important as knowing how to fix it.
Overview of facial restructuring and body sculpting chapter topics
After the eyes, the framework moves into facial restructuring and body sculpting - tools like Liquify and related techniques for refining the shape and proportion of features. Kelby treats these as available options rather than defaults. Not every portrait needs Liquify work, and knowing when to leave something alone is as important as knowing how to fix it.
When these tools are appropriate, the key is subtlety and working on a duplicated layer so you can dial back the effect with opacity if it reads as too heavy. I have a Photoshop action I named “The Shining” that groups all my Liquify adjustments onto a stamped layer with a mask - it lets me paint back the original wherever I’ve pushed too far. Small, repeated nudges in Liquify produce far more natural results than one big push.
Step 5: Use the Timed Retouch Framework to Set Realistic Expectations
 Kelby describing the 5, 15, and 30-minute full retouch walkthroughs
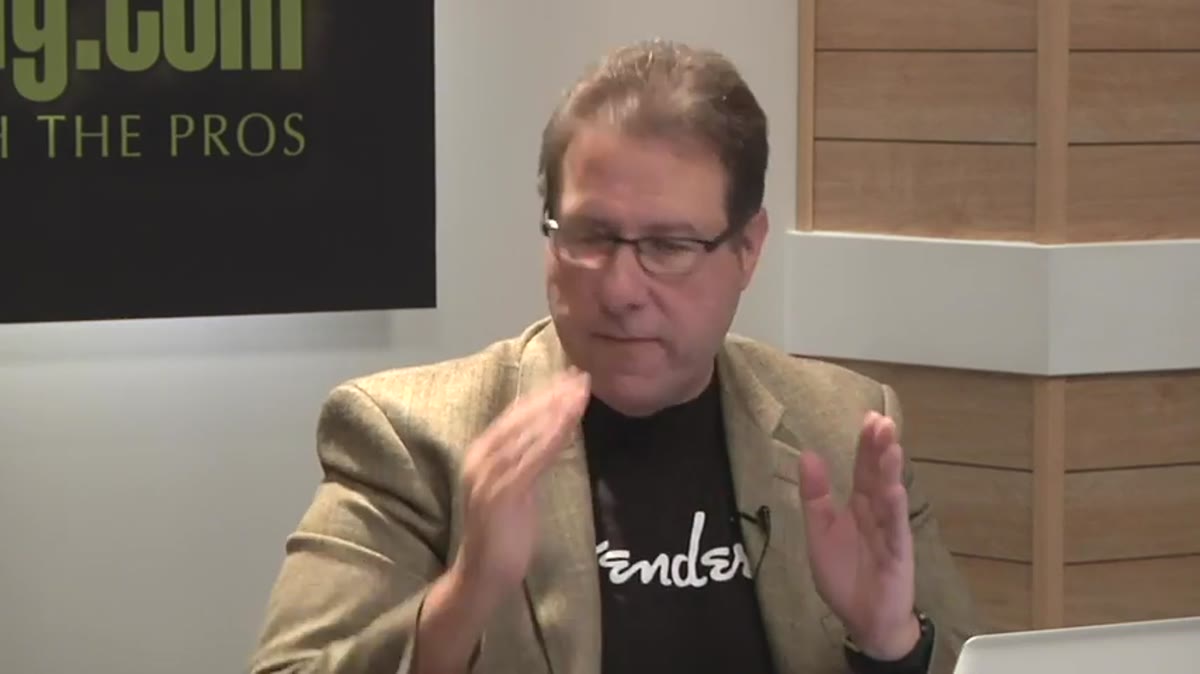
The section I return to most often is the final chapter Kelby describes: three complete start-to-finish retouches timed at five, fifteen, and thirty minutes. Each begins with a raw file straight from the camera and ends with a finished image. Every decision is shown and explained within the time constraint.
Kelby describing the 5, 15, and 30-minute full retouch walkthroughs
The section I return to most often is the final chapter Kelby describes: three complete start-to-finish retouches timed at five, fifteen, and thirty minutes. Each begins with a raw file straight from the camera and ends with a finished image. Every decision is shown and explained within the time constraint.
This is genuinely practical in a way that most retouching education isn’t. Before I knew this framework, I had no real sense of what a reasonable time budget for a portrait looked like. Five minutes forces you to identify the two or three highest-impact corrections and ignore everything else. Fifteen minutes lets you add eye work and skin smoothing. Thirty minutes is where you can address hair, body, and detailed facial work. Running through each version a few times trains your eye to triage quickly when a real deadline hits.
My Add-On: Build a Personal Triage Checklist
One thing I’ve added to Kelby’s framework from my own practice is a written triage checklist I run through before touching any tools. It takes about thirty seconds and covers: skin evenness, eye clarity and symmetry, stray hairs across the face, and any obvious distractions in the background. This mental scan means I’m not discovering problems halfway through a retouch and doubling back, which kills time and consistency.
I keep the checklist as a sticky note on my monitor. It sounds almost too simple, but it’s saved me more than once from spending twenty minutes on skin work on a portrait where the real issue was a harsh shadow across one eye. Fix the biggest problem first. The checklist keeps that discipline in place when I’m tired and on deadline.
The single most transferable lesson from this tutorial is that professional-quality retouching is not about spending more time - it’s about spending the right time on the right things. Kelby’s timed workflow framework reframes retouching from an open-ended art project into a structured, repeatable skill. Whether you have five minutes or thirty, knowing what to prioritize is what separates a polished deliverable from an overworked one.
Watch the full tutorial on YouTube to see Kelby walk through the techniques in real time - the timed retouch section alone is worth the full watch.
Comments (2)
The tip about retouch faster shoot more what was the missing piece for me. Thank you.
Finally someone explains this in a way that actually makes sense.
Leave a Comment