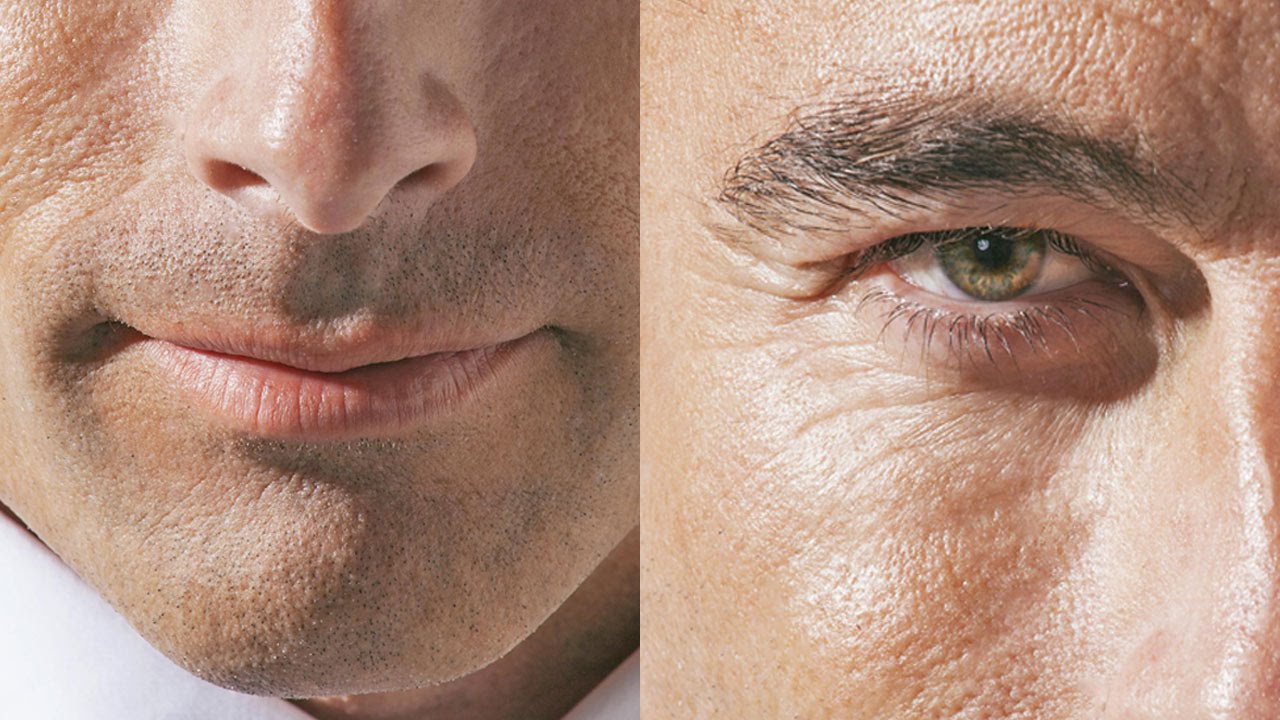
Most of my retouching work these days comes from beauty brands, and I’ll be honest - the briefs I find most interesting aren’t the ones asking me to create an impossibly smooth complexion. They’re the ones where the subject has a face that’s actually lived in. Laugh lines, textured skin, a little unevenness in tone. That’s where thoughtful retouching really earns its keep, because the goal isn’t erasure. It’s enhancement.
The challenge with mature skin specifically is that the standard retouching playbook - heavy frequency separation, aggressive healing - tends to make things worse rather than better. Deep shadows that settle into wrinkles and pores are doing a lot of the visual “aging” work in a portrait, and if you go after those wrinkles directly before dealing with the shadows, you end up in a game of whack-a-mole that leaves skin looking flat and artificial. I learned this the hard way early in my retouching career, after a client looked at my work and said, politely but clearly, that it didn’t look like her husband anymore.
That’s exactly why I keep coming back to this tutorial from Aaron Nace over at PHLEARN. Watch the full tutorial on YouTube - it’s a practical, well-paced walkthrough that reframes the whole problem. Instead of attacking individual wrinkles first, Aaron starts by addressing the underlying shadow structure that makes them so prominent. Then he layers color correction on top. The result feels more like the subject on a good day, not a different person entirely.
Here’s how to follow along step by step.
Step 1: Duplicate Your Background Layer
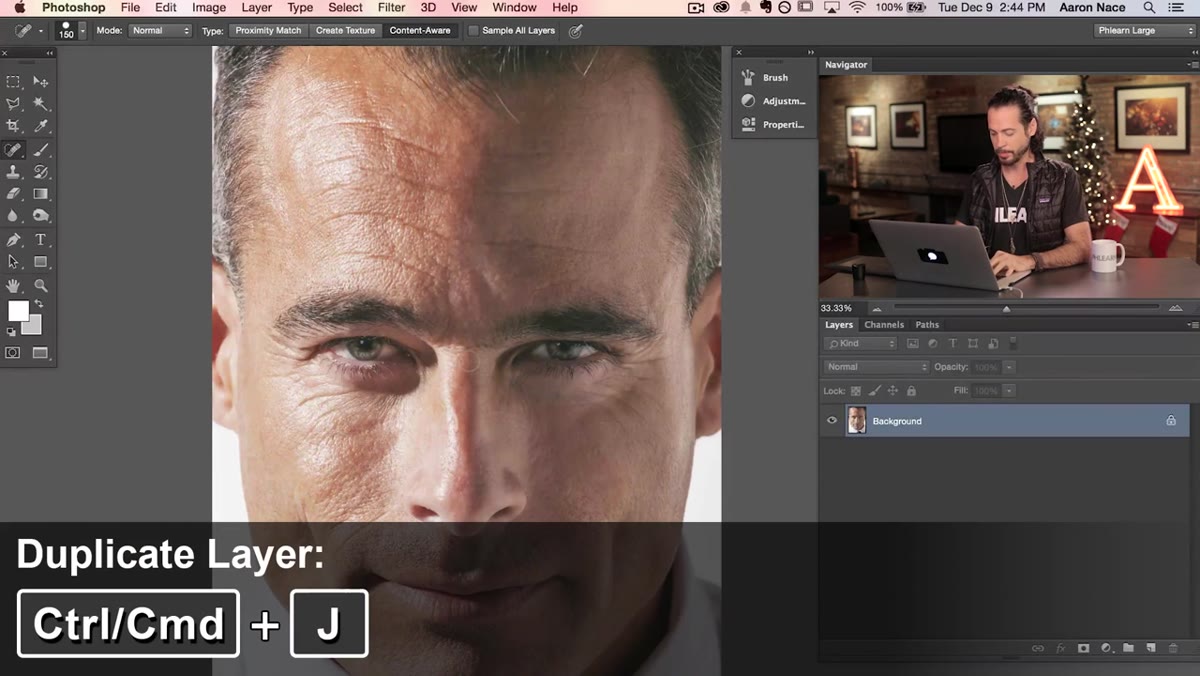 Background layer being duplicated in Layers panel
Before touching anything, duplicate your background layer. Hit Ctrl+J (or Cmd+J on Mac). This is non-negotiable. Every adjustment in this workflow happens on that duplicate, which means your original pixel data stays untouched underneath. If anything goes sideways, you’re never more than a click away from starting over. I name this layer something descriptive - usually “shadow lift” at this stage - so I can remember what it’s doing when I come back to the file later.
Background layer being duplicated in Layers panel
Before touching anything, duplicate your background layer. Hit Ctrl+J (or Cmd+J on Mac). This is non-negotiable. Every adjustment in this workflow happens on that duplicate, which means your original pixel data stays untouched underneath. If anything goes sideways, you’re never more than a click away from starting over. I name this layer something descriptive - usually “shadow lift” at this stage - so I can remember what it’s doing when I come back to the file later.
Step 2: Open Shadows and Highlights
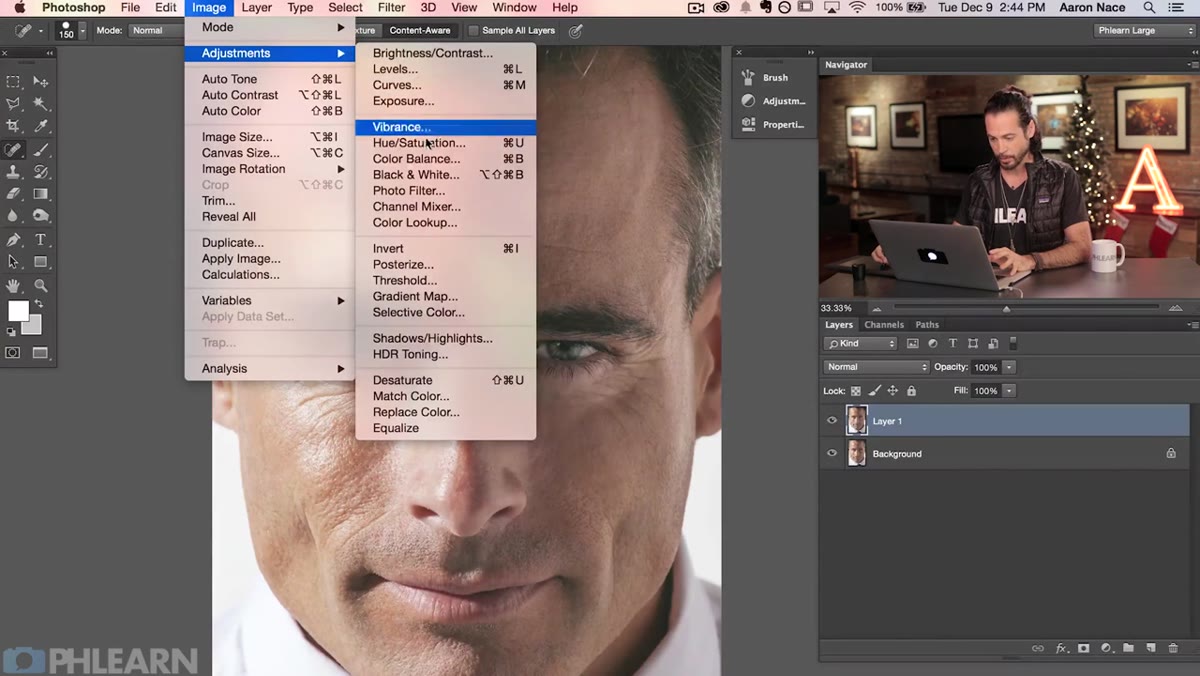 Image menu open with Adjustments submenu visible
With your duplicate layer selected, go to Image, then Adjustments, then Shadows/Highlights. This tool doesn’t get nearly enough credit in retouching conversations - most people associate it with recovering blown-out skies or underexposed backgrounds. But it’s remarkably effective on skin because it works locally, meaning it lifts shadow areas without blowing out the midtones around them.
Image menu open with Adjustments submenu visible
With your duplicate layer selected, go to Image, then Adjustments, then Shadows/Highlights. This tool doesn’t get nearly enough credit in retouching conversations - most people associate it with recovering blown-out skies or underexposed backgrounds. But it’s remarkably effective on skin because it works locally, meaning it lifts shadow areas without blowing out the midtones around them.
When the dialog opens, click “Show More Options” if you’re not already seeing the expanded view. The basic two-slider version hides the controls that actually make this technique precise.
Step 3: Set Your Shadow Amount and Ignore the Highlights
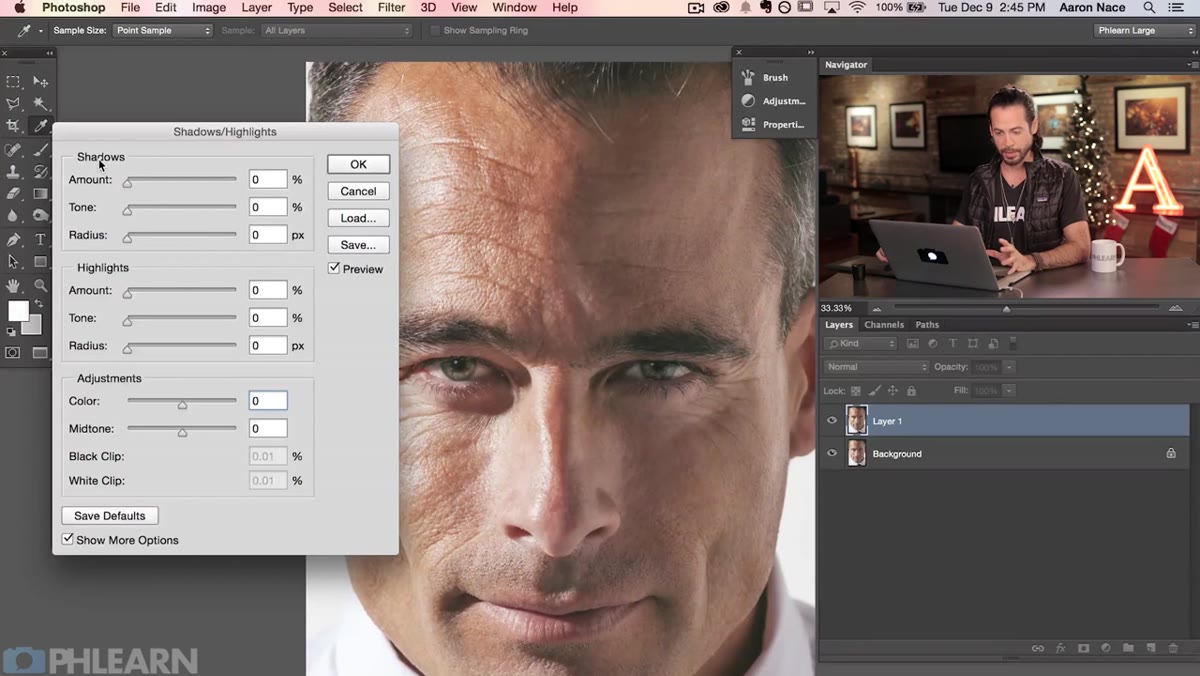 Shadows/Highlights dialog with Show More Options expanded
Here’s the counterintuitive part. You might assume that recovering highlights would help even out skin tone, but in practice it tends to flatten the face and actually accentuate wrinkles by reducing the tonal variation that gives skin its natural depth. Leave the Highlights amount at zero. Don’t touch it.
Shadows/Highlights dialog with Show More Options expanded
Here’s the counterintuitive part. You might assume that recovering highlights would help even out skin tone, but in practice it tends to flatten the face and actually accentuate wrinkles by reducing the tonal variation that gives skin its natural depth. Leave the Highlights amount at zero. Don’t touch it.
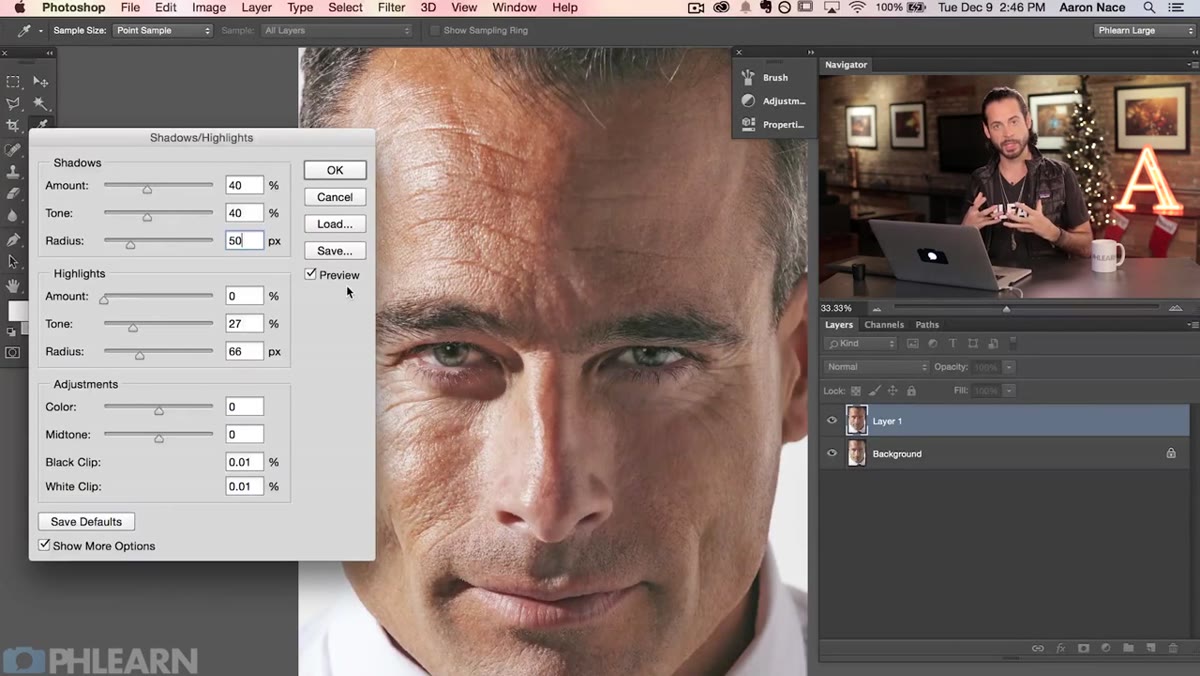
Focus entirely on the Shadows section. Bring the Amount up to around 40. Set the Tone to 40 as well. These aren’t universal values - Aaron is clear about this in the tutorial, and I’d echo it strongly - every image will need its own calibration based on how the light fell and how deep the shadows read on screen. But 40/40 is a solid starting point for a portrait with strong directional light.
Step 4: Dial In Your Radius
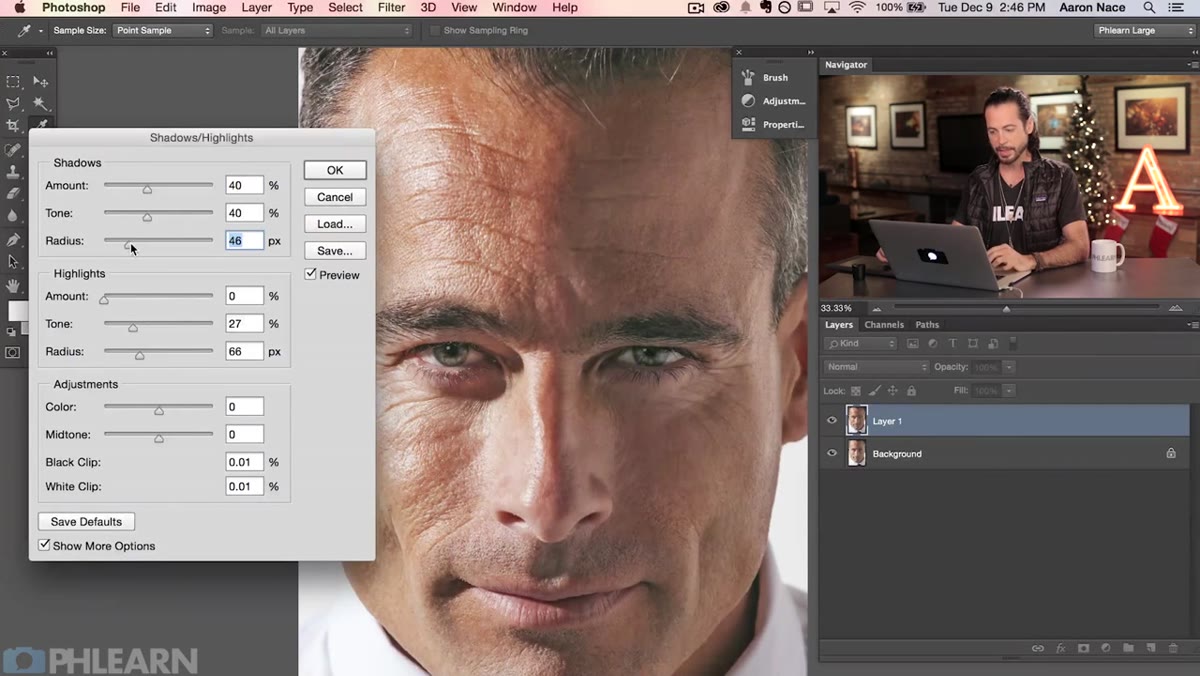 Radius slider being adjusted in Shadows/Highlights dialog
The Radius slider is where you fine-tune how localized the shadow recovery is. A low radius lifts very small shadow areas - individual pores and fine lines. A higher radius works on broader shadow regions like the hollows under the eyes or the deep creases around the mouth. For this portrait, Aaron lands around 50, which targets the mid-scale shadows without creating that telltale halo effect that makes Shadows/Highlights adjustments look obvious.
Radius slider being adjusted in Shadows/Highlights dialog
The Radius slider is where you fine-tune how localized the shadow recovery is. A low radius lifts very small shadow areas - individual pores and fine lines. A higher radius works on broader shadow regions like the hollows under the eyes or the deep creases around the mouth. For this portrait, Aaron lands around 50, which targets the mid-scale shadows without creating that telltale halo effect that makes Shadows/Highlights adjustments look obvious.
Zoom into a wrinkle-heavy area of the face while you drag this slider. You’ll see the shift clearly - the shadows soften, the skin reads as smoother, and you haven’t touched a single pixel of actual skin detail.
Step 5: Add Color Back Into the Skin
 Color adjustment field in Shadows/Highlights dialog being set to 10
Still inside the Shadows/Highlights dialog, scroll down to the Color field. Mature skin often photographs with a slightly desaturated, cool cast - not because the person is pale, but because the camera captures less chromatic variation in areas of deep shadow. Lifting those shadows surfaces a little more of that color, but the Color slider in this dialog gives it an additional nudge.
Color adjustment field in Shadows/Highlights dialog being set to 10
Still inside the Shadows/Highlights dialog, scroll down to the Color field. Mature skin often photographs with a slightly desaturated, cool cast - not because the person is pale, but because the camera captures less chromatic variation in areas of deep shadow. Lifting those shadows surfaces a little more of that color, but the Color slider in this dialog gives it an additional nudge.
A value of around 10 is subtle, which is the point. You’re not adding artificial warmth - you’re restoring what the lighting and sensor conspired to muffle. Hit OK and toggle your layer on and off to compare. The difference in skin vitality is usually immediately visible even at this modest value.
Step 6: Use the Spot Healing Brush for Remaining Wrinkles
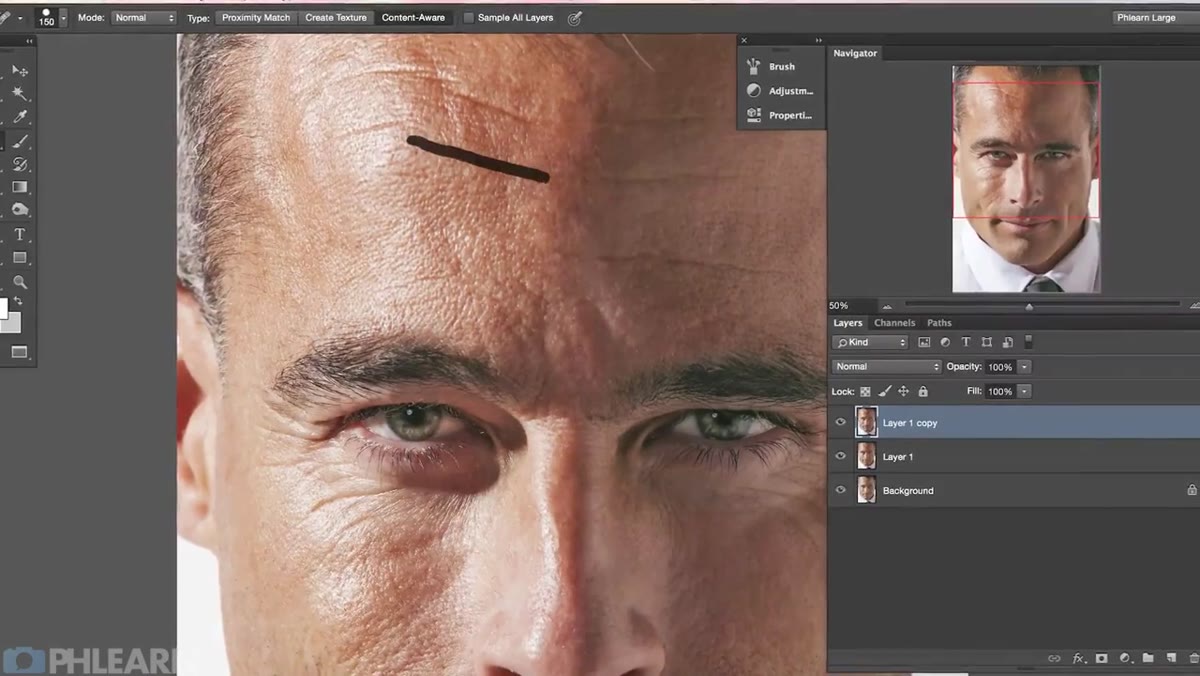 Spot Healing Brush tool selected in toolbar
After the shadow lift, some wrinkles will have already softened significantly just from the tonal change. For the ones that remain, reach for the Spot Healing Brush rather than the Clone Stamp. Set it to Content-Aware and work on your duplicate layer. The key here is restraint - short strokes along the wrinkle rather than painting over the whole region. You want to reduce the wrinkle’s contrast with the surrounding skin, not eliminate the underlying skin structure.
Spot Healing Brush tool selected in toolbar
After the shadow lift, some wrinkles will have already softened significantly just from the tonal change. For the ones that remain, reach for the Spot Healing Brush rather than the Clone Stamp. Set it to Content-Aware and work on your duplicate layer. The key here is restraint - short strokes along the wrinkle rather than painting over the whole region. You want to reduce the wrinkle’s contrast with the surrounding skin, not eliminate the underlying skin structure.
I tend to work at about 30-50% opacity on this step, which lets me build the effect gradually rather than committing to a single aggressive pass I might regret.
A Note From My Own Practice: Mask Your Adjustments
One thing I always add that isn’t in this particular tutorial is a layer mask on the shadow-lifted duplicate. After running Shadows/Highlights, I add a black mask and paint back the effect only on the face, avoiding the hair, background, and clothing. Shadows/Highlights can do odd things to non-skin areas - desaturating hair or creating a muddy look in darker fabrics. Masking keeps the correction exactly where you need it and nowhere else. It adds maybe two minutes to the workflow and saves you from a subtle but distracting artifact that’s easy to miss at 100% zoom.
The deepest lesson in Aaron’s approach is that retouching mature skin is really a problem of light before it’s a problem of texture. When you fix the shadows first, you remove the harshness that makes wrinkles and pores read so prominently - and you often find there’s far less healing work left to do than you expected. That shift in order of operations is what separates a natural-looking result from one that reads as “retouched.”
Watch the full tutorial on YouTube to see Aaron walk through each step in real time - seeing the before and after toggle on an actual portrait makes the shadow-lifting effect click in a way that’s hard to appreciate from description alone.
Comments (2)
Been doing this wrong for years apparently. Thanks for the wake-up call.
My workflow just got 10x faster. Not even kidding.
Leave a Comment