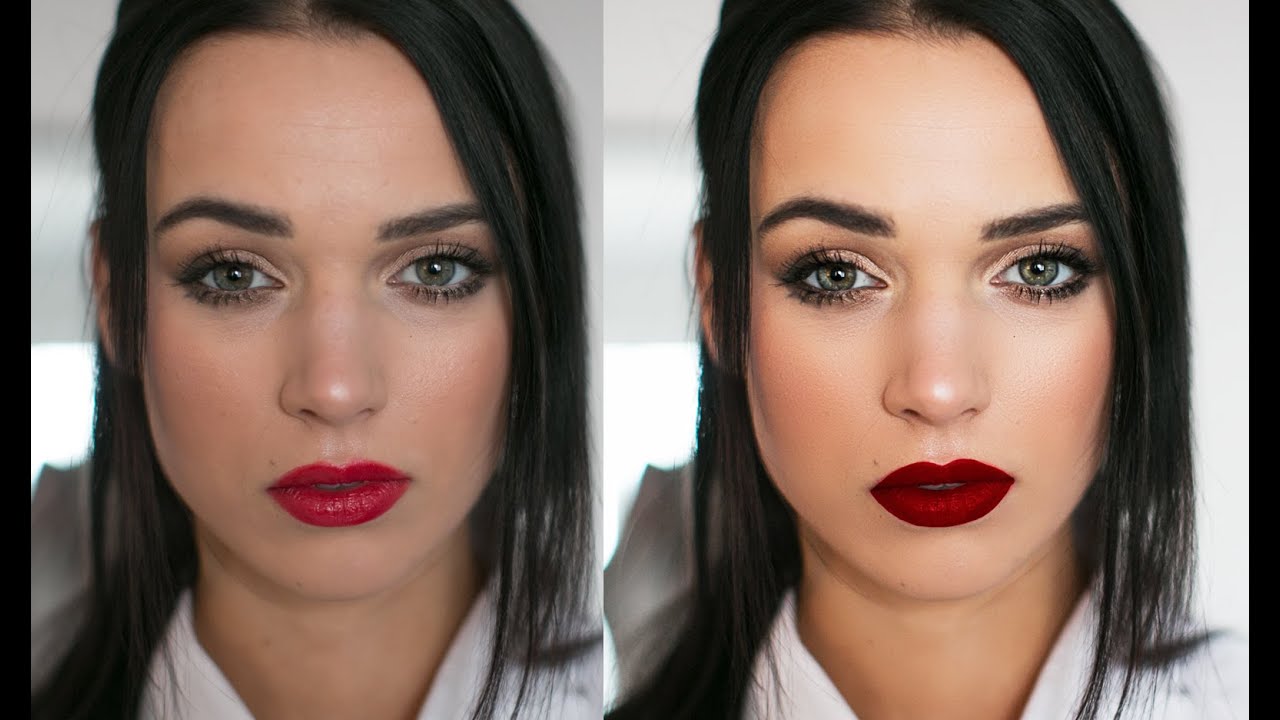
There’s a specific kind of client email I dread. It goes something like: “The skin looks a little… airbrushed?” That word, airbrushed, is the polite version of what they actually mean. I learned this the hard way early in my retouching career, back when I thought cranking up a Gaussian Blur and calling it done was a legitimate skin-smoothing strategy. It took me a long time to find techniques that actually hold up, ones that soften without erasing the person underneath.
That’s why when I came across this Jessica Kobeissi tutorial on simple portrait retouching, I made note of it immediately. Watch the full tutorial on YouTube. What she walks through is a beginner-friendly workflow that combines frequency separation with some smart masking and a tidy lip correction. It won’t replace a full professional retouch, and to her credit she says so directly. But for client proofs, quick turnarounds, or anyone just getting comfortable in Photoshop, this approach is genuinely effective. Here’s how to follow along.
Step 1: Set Up Frequency Separation
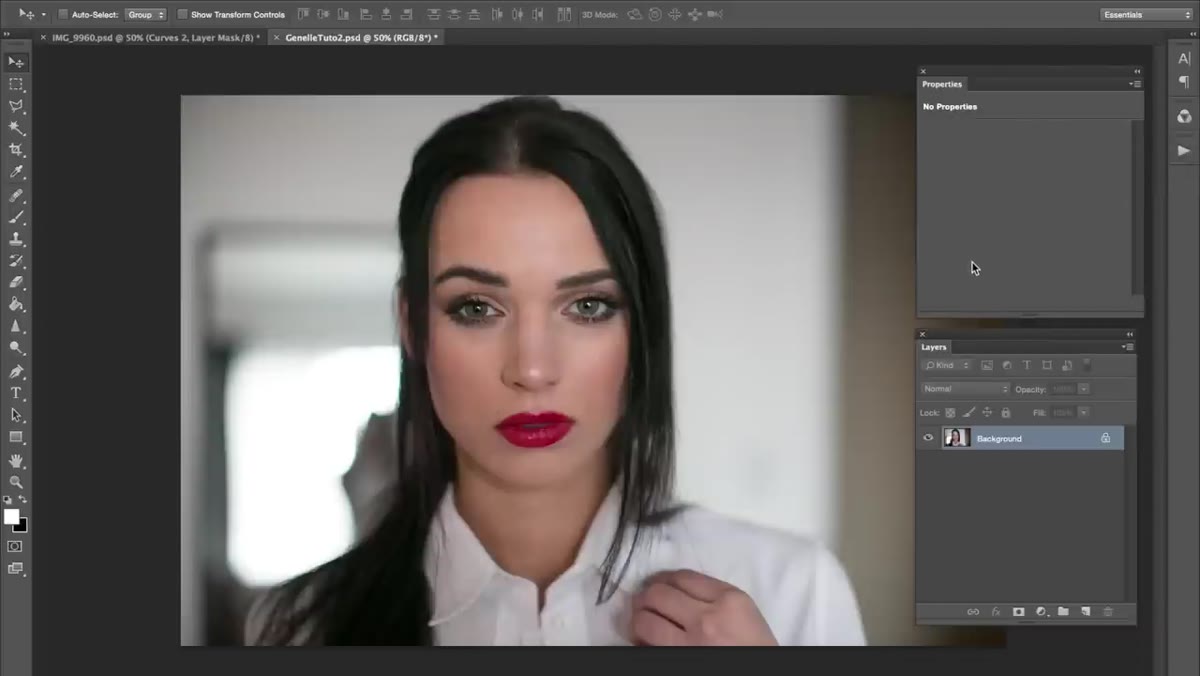 Frequency separation layers being created via Photoshop action
Frequency separation splits your image into two layers: one that holds color and tone (the low-frequency layer), and one that holds texture details like pores and fine lines (the high-frequency layer). This separation is what lets you smooth skin without destroying texture, which is the whole point.
Frequency separation layers being created via Photoshop action
Frequency separation splits your image into two layers: one that holds color and tone (the low-frequency layer), and one that holds texture details like pores and fine lines (the high-frequency layer). This separation is what lets you smooth skin without destroying texture, which is the whole point.
Jessica applies this using a saved Photoshop action, which runs the setup automatically. If you don’t have an action yet, you can find free frequency separation actions online or record your own. Once the action runs, you’ll have your two working layers ready to go. Keep the texture layer visible for now so you can see the full effect as you work.
Step 2: Duplicate the Low-Frequency (Color) Layer
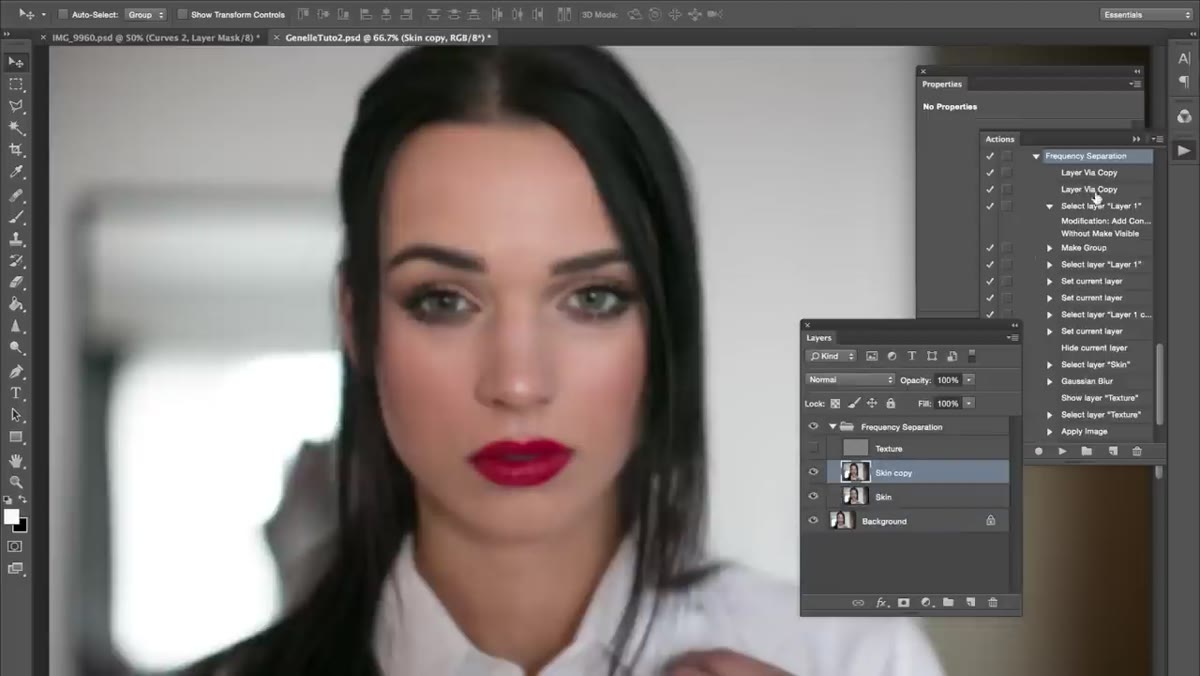 Duplicating the skin layer in the Layers panel
With your low-frequency layer selected, press Command+J (or Ctrl+J on Windows) to duplicate it. This copy is what you’ll apply the blur to. Working on a duplicate rather than the original gives you a safety net. If anything goes sideways, your base layer is still intact underneath.
Duplicating the skin layer in the Layers panel
With your low-frequency layer selected, press Command+J (or Ctrl+J on Windows) to duplicate it. This copy is what you’ll apply the blur to. Working on a duplicate rather than the original gives you a safety net. If anything goes sideways, your base layer is still intact underneath.
Keeping non-destructive habits like this one becomes second nature quickly, and it saves a lot of backtracking. Name this duplicate something obvious, like “skin blur” or, if you’re like me, something completely unrelated that you’ll regret later.
Step 3: Apply a Gaussian Blur to the Duplicate Layer
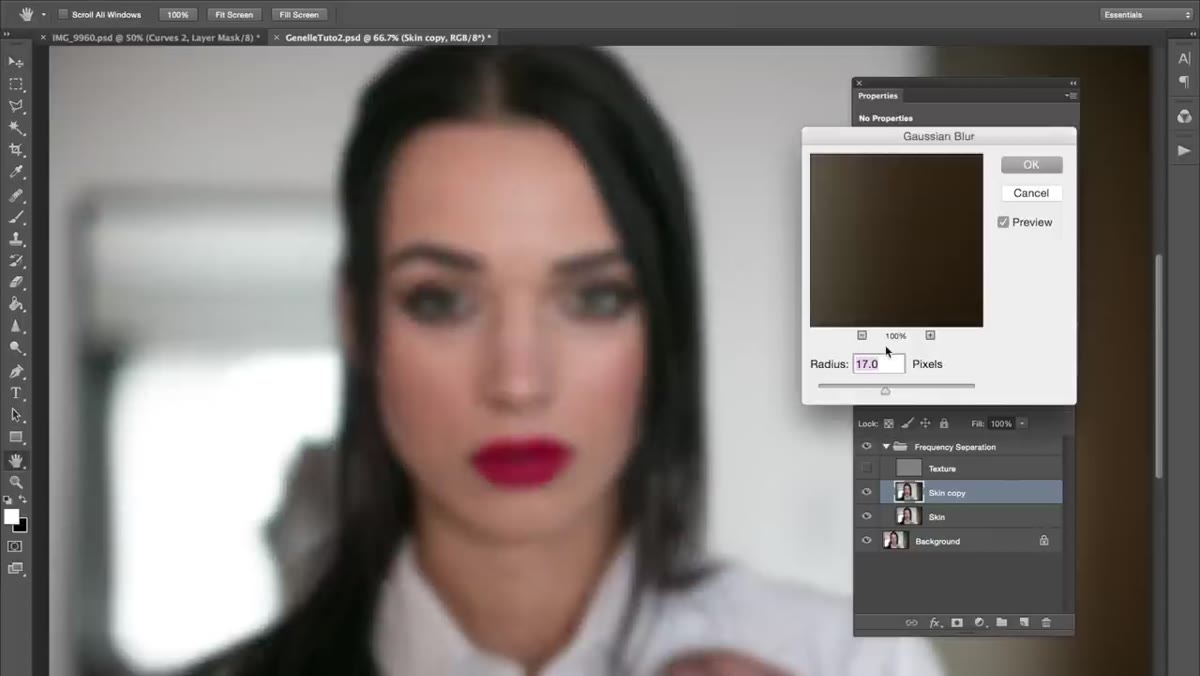 Gaussian Blur dialog box open with skin layer selected
Go to Filter, then Blur, then Gaussian Blur. The radius you choose here is intentionally flexible. Jessica’s guidance is to increase the blur until the colors in the skin start to blend smoothly into each other, without pushing it so far that the image starts to look like a watercolor painting.
Gaussian Blur dialog box open with skin layer selected
Go to Filter, then Blur, then Gaussian Blur. The radius you choose here is intentionally flexible. Jessica’s guidance is to increase the blur until the colors in the skin start to blend smoothly into each other, without pushing it so far that the image starts to look like a watercolor painting.
A good way to judge it: zoom out a little and look at the overall color transitions across the face. When the blotchy variation starts to even out and the tones move into each other gradually, you’re in the right range. There’s no single correct number here. Skin tone, image resolution, and how much retouching the subject needs all affect the ideal radius. Trust your eyes more than any preset value.
Step 4: Mask the Blur with a Painted Selection
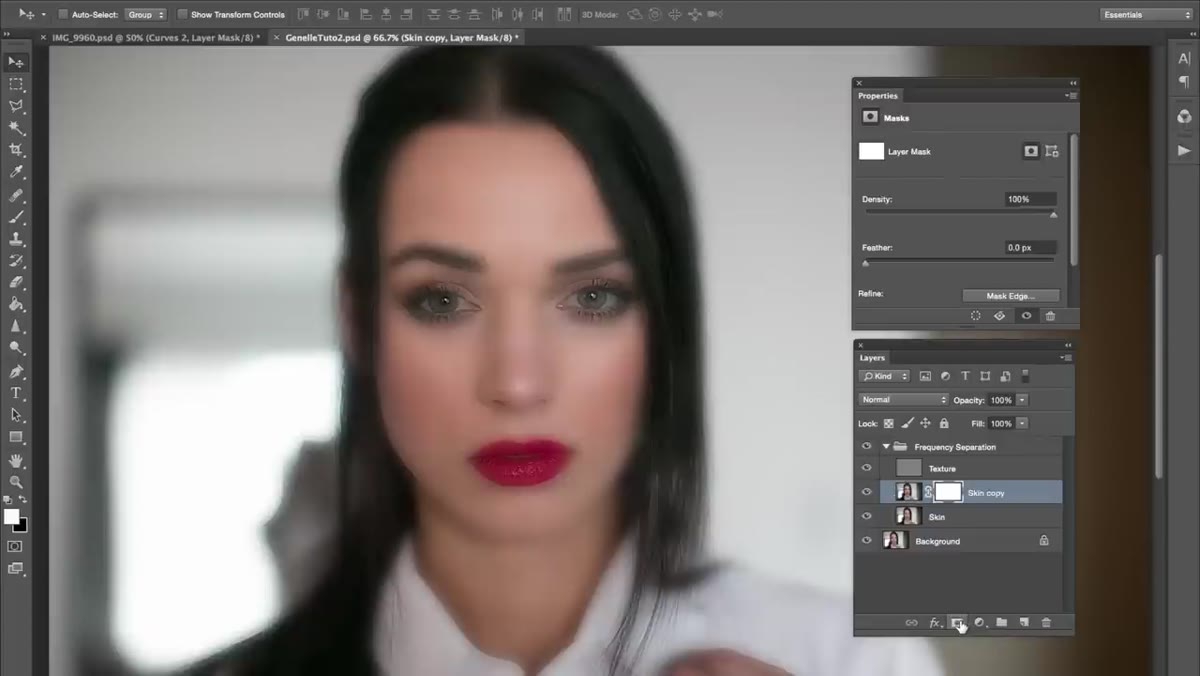 Black mask added to blurred layer, brush painting skin back in
Here’s where the technique gets genuinely smart. With your blurred duplicate selected, click the Layer Mask button at the bottom of the Layers panel. Then press Command+I (or Ctrl+I) to invert the mask from white to black. This hides the blur completely, and you’ll paint it back in only where you want it.
Black mask added to blurred layer, brush painting skin back in
Here’s where the technique gets genuinely smart. With your blurred duplicate selected, click the Layer Mask button at the bottom of the Layers panel. Then press Command+I (or Ctrl+I) to invert the mask from white to black. This hides the blur completely, and you’ll paint it back in only where you want it.
Switch to a soft round brush with hardness set to zero and opacity around 88%. Make sure your foreground color is white, and start painting over the skin areas. The smoothing reappears only where your brush touches. Stay away from defined edges: the nostrils, the lip line, the eyebrows, the eyelid creases. Painting over those areas will smear them, and that’s exactly the plastic look we’re trying to avoid. Keep the brush moving in broad, loose strokes over flat skin surfaces: cheeks, forehead, chin, neck, hands if they’re in frame.
Step 5: Adjust Opacity to Taste
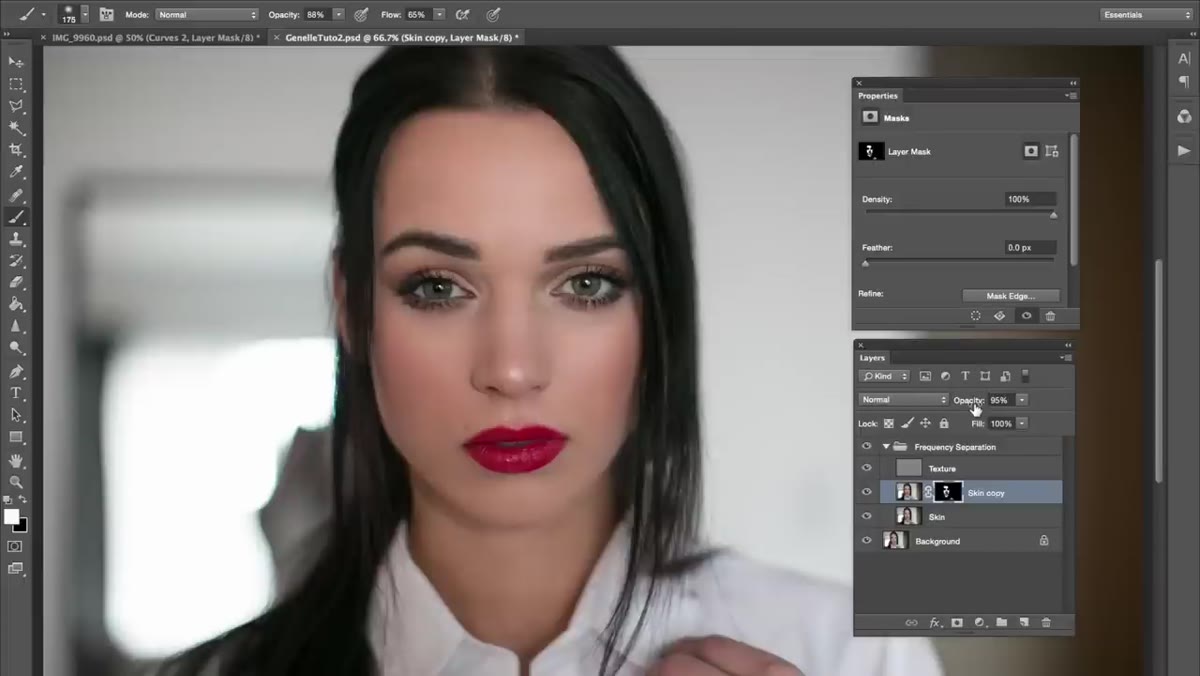 Layer opacity slider being adjusted on the blurred skin layer
Once you’ve painted in the smoothing across the skin, step back and look at the overall result. If the effect feels heavy, drop the layer opacity down. Somewhere between 70% and 90% often reads as natural while still doing real work. If the skin already looked good and you only needed minor correction, you might land closer to 60%.
Layer opacity slider being adjusted on the blurred skin layer
Once you’ve painted in the smoothing across the skin, step back and look at the overall result. If the effect feels heavy, drop the layer opacity down. Somewhere between 70% and 90% often reads as natural while still doing real work. If the skin already looked good and you only needed minor correction, you might land closer to 60%.
Jessica keeps hers near full opacity for this particular image, which works because the subject’s skin was already in good shape and just needed some tone blending. For images with more variation, or for clients who specifically ask for a lighter hand, the opacity slider is your best friend. It’s a quick, reversible adjustment that can take an edit from “retouched” to “just looks good.”
Step 6: Clean Up the Lips
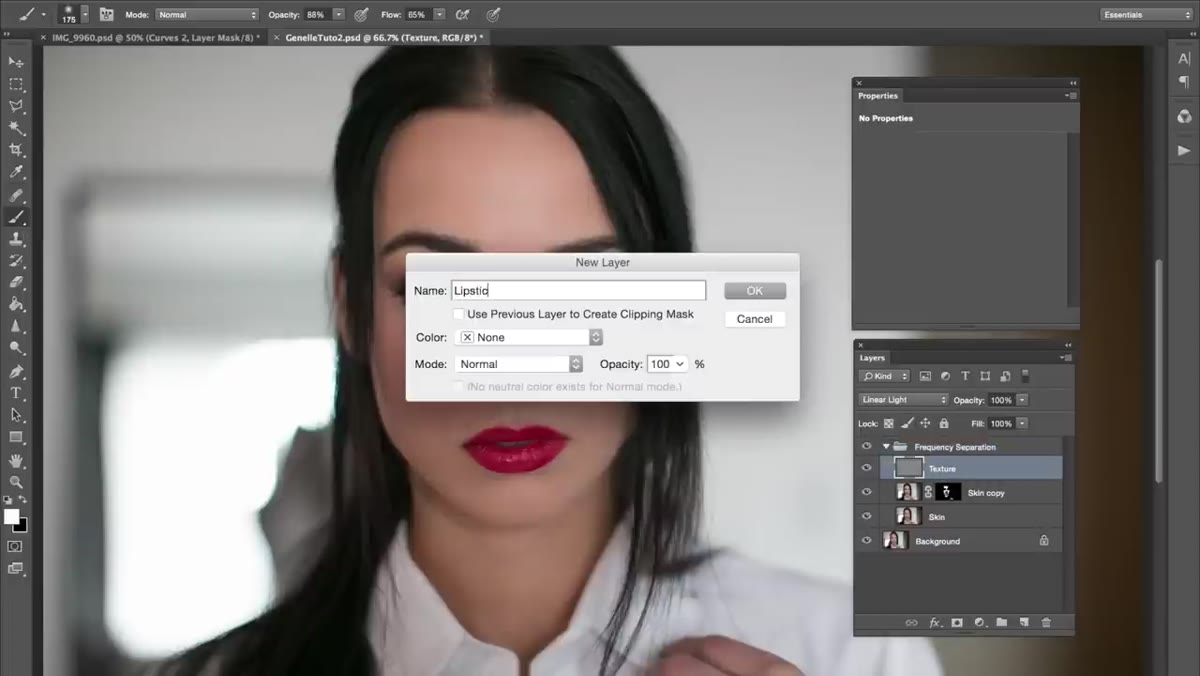 New lipstick layer created, brush sampling lip color
Create a new empty layer and name it something that identifies it as a lip correction layer. Zoom into the lips, then use the eyedropper tool to sample a color directly from the existing lipstick. You want a tone that’s already on the lip, not a guess at what it should be.
New lipstick layer created, brush sampling lip color
Create a new empty layer and name it something that identifies it as a lip correction layer. Zoom into the lips, then use the eyedropper tool to sample a color directly from the existing lipstick. You want a tone that’s already on the lip, not a guess at what it should be.
Switch back to your brush and set hardness to around 72% with opacity at 88%. Now trace carefully over the lips, following the edges that are already there. You’re not drawing lips from scratch. You’re reinforcing and tidying what’s already in the photo. If the color looks flat after painting, try changing the layer blending mode to Multiply or Color and adjusting opacity until it integrates naturally with the original.
A Note from My Own Workflow
I use frequency separation on nearly every skin retouch I deliver to beauty clients, but I almost never stop at a simple Gaussian blur on the color layer. For high-end work, I also spend time on the low-frequency layer with a clone stamp and healing brush, manually smoothing out deeper tone variations before the blur step. The painted mask technique Jessica demonstrates here is something I’d incorporated before but hadn’t thought to simplify into exactly this approach. Watching someone else’s process is a good way to notice where you’ve been overcomplicating your own.
For anyone presenting this kind of work professionally, I’d also recommend keeping a before/after snapshot at every stage. Clients sometimes ask to dial back a specific step, and being able to isolate each change saves a painful round of re-editing.
The single most important thing this tutorial gets right is the mask. Applying a smoothing effect to the entire face and then selectively painting it in, rather than trying to paint around every edge from scratch, is a fundamentally better way to work. It keeps the texture layer doing its job while letting you control exactly how much smoothing shows through.
Watch the full tutorial on YouTube to see Jessica’s hand on the brush and get a feel for the pacing. Reading about softness and seeing it are two different things, and she makes both the technique and the judgment calls easy to follow.
Comments
Leave a Comment