There’s a specific frustration I run into constantly when editing beauty and product work: the background needs its own treatment, completely separate from the subject. Sometimes it’s a seamless sweep that needs to pop. Sometimes it’s a reflective floor that should feel glossier, or a wall that’s pulling attention away from the face I’ve spent an hour perfecting. The subject selection tools in Lightroom are genuinely impressive now, but they’re built around the assumption that the subject is the thing you want to adjust. When you need the opposite, or something in between, most people reach for a brush and start painting, which works but takes forever. In this Scott Kelby tutorial, he demonstrates a single mode switch inside the Objects masking tool that changes the game entirely, and honestly, I’m a little annoyed I didn’t know about it sooner.
The tip itself is small. A single button click. But the difference in precision and speed it unlocks is significant enough that I’ve already reworked how I approach background edits in my beauty retouching sessions. If you’ve been defaulting to brush masks for anything that isn’t a subject or a sky, this is going to save you real time.
Step 1: Open the Masking Panel and Assess Your Options
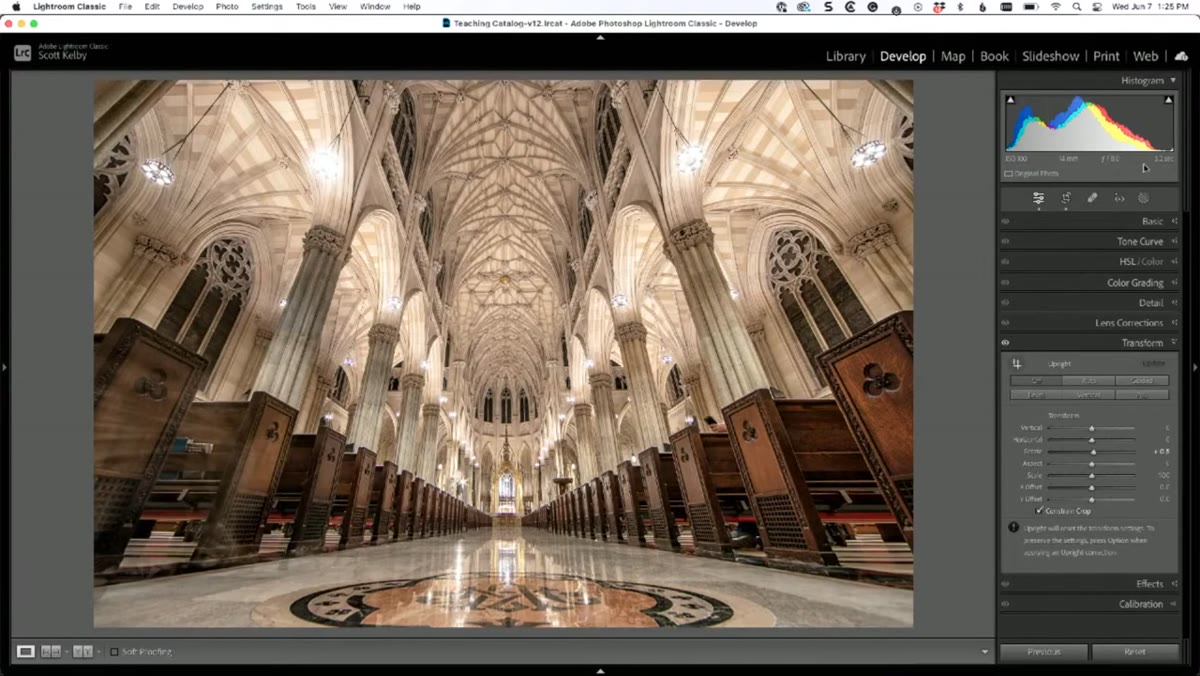 Masking panel open showing Subject, Sky, and Background options
Start by opening your image in Lightroom’s Develop module and clicking the Masking icon (the circle-with-dotted-outline icon in the toolbar, or press Shift+W). You’ll see the familiar options: Select Subject, Select Sky, Select Background, and further down, Objects. The instinct here is to reach for Select Background when you want to isolate a floor or wall, but as Scott points out, Background tends to grab everything that isn’t the subject, which is usually far more than you want. Select Subject will try to identify a person or prominent object, which doesn’t help you when the floor is what you’re after.
Masking panel open showing Subject, Sky, and Background options
Start by opening your image in Lightroom’s Develop module and clicking the Masking icon (the circle-with-dotted-outline icon in the toolbar, or press Shift+W). You’ll see the familiar options: Select Subject, Select Sky, Select Background, and further down, Objects. The instinct here is to reach for Select Background when you want to isolate a floor or wall, but as Scott points out, Background tends to grab everything that isn’t the subject, which is usually far more than you want. Select Subject will try to identify a person or prominent object, which doesn’t help you when the floor is what you’re after.
Recognizing which tool is the right starting point matters. For any specific, defined area of a scene, the Objects tool is your friend, but only once you know which mode to use.
Step 2: Select the Objects Tool and Find the Mode Button
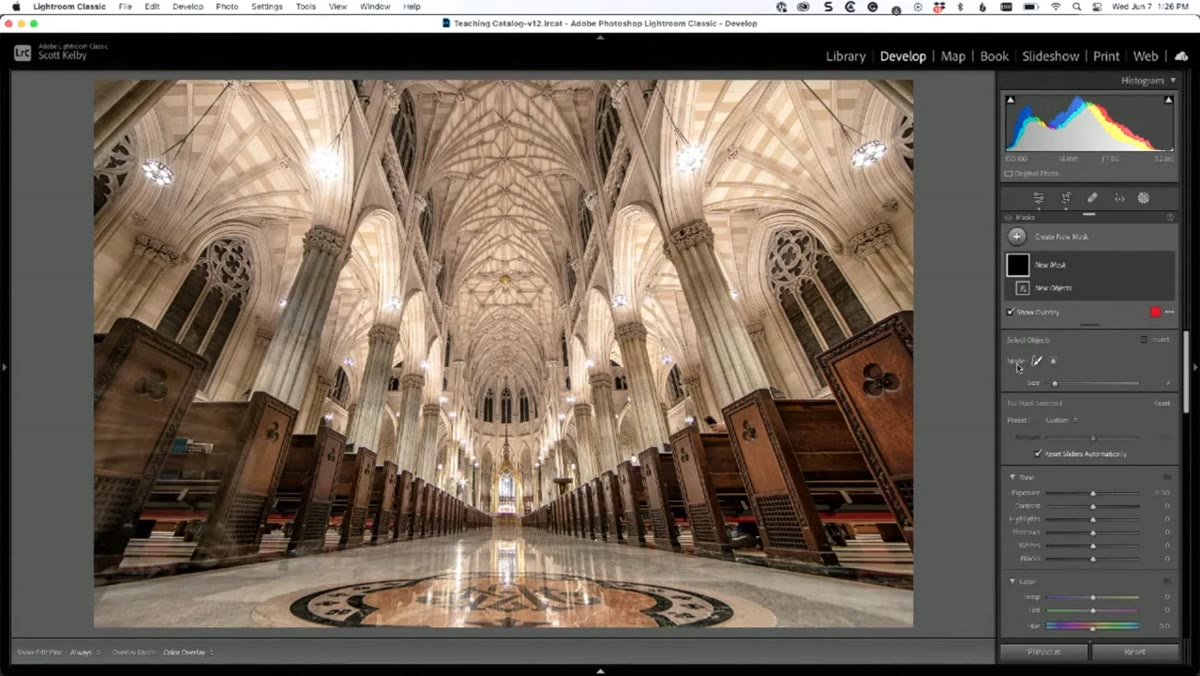 Objects tool selected with Mode toggle button visible
Click on “Objects” in the masking panel. By default, Lightroom opens this tool in a brush mode, which prompts you to paint over whatever you want to select. It looks intuitive, and for simple, large areas with clear edges it can work reasonably well. But Scott demonstrates that painting over a surface like a floor often produces a sloppy, inconsistent selection because the tool is trying to interpret your brushstroke rather than the shape of the object.
Objects tool selected with Mode toggle button visible
Click on “Objects” in the masking panel. By default, Lightroom opens this tool in a brush mode, which prompts you to paint over whatever you want to select. It looks intuitive, and for simple, large areas with clear edges it can work reasonably well. But Scott demonstrates that painting over a surface like a floor often produces a sloppy, inconsistent selection because the tool is trying to interpret your brushstroke rather than the shape of the object.
Before you paint anything, look at the small toggle near the top of the Objects tool options. There are two modes: a brush icon and a box/rectangle icon. Most people never touch this toggle because the brush mode is what’s visible by default. Click the box mode.
Step 3: Draw a Bounding Box Around Your Target Area
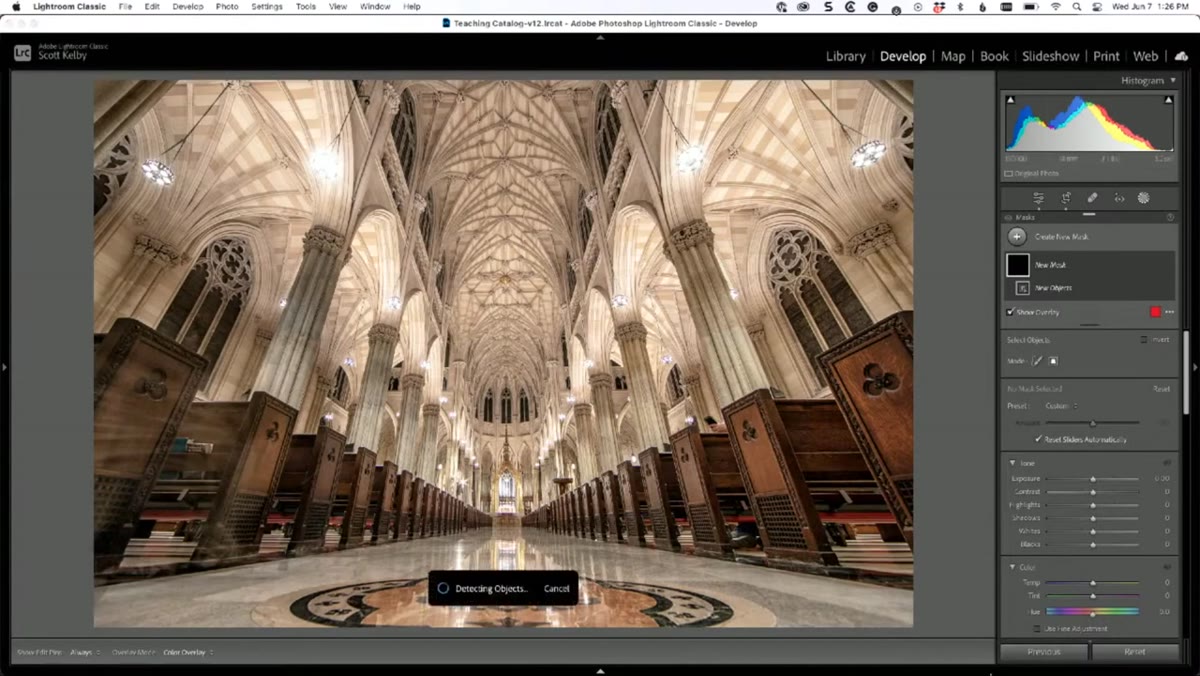 Bounding box being drawn over the floor area of the image
With box mode active, click and drag to draw a rectangle over the area you want to select, in Scott’s example this is the floor of an interior space. You don’t need to be surgical about it. The point of the bounding box isn’t to perfectly outline the floor; it’s to give Lightroom’s AI enough context to understand what object or surface you’re interested in. Draw a generous rectangle that covers the floor clearly, and let the algorithm do the interpretation.
Bounding box being drawn over the floor area of the image
With box mode active, click and drag to draw a rectangle over the area you want to select, in Scott’s example this is the floor of an interior space. You don’t need to be surgical about it. The point of the bounding box isn’t to perfectly outline the floor; it’s to give Lightroom’s AI enough context to understand what object or surface you’re interested in. Draw a generous rectangle that covers the floor clearly, and let the algorithm do the interpretation.
What you’ll see is that Lightroom is remarkably good at recognizing the surface you mean, even if your box overlaps edges or extends into adjacent areas. It essentially asks itself, “Given this region, what’s the most coherent selectable object here?” and returns a clean mask in most cases. The result is far more accurate than what brush mode produces for the same area.
Step 4: Refine the Mask with Add/Subtract if Needed
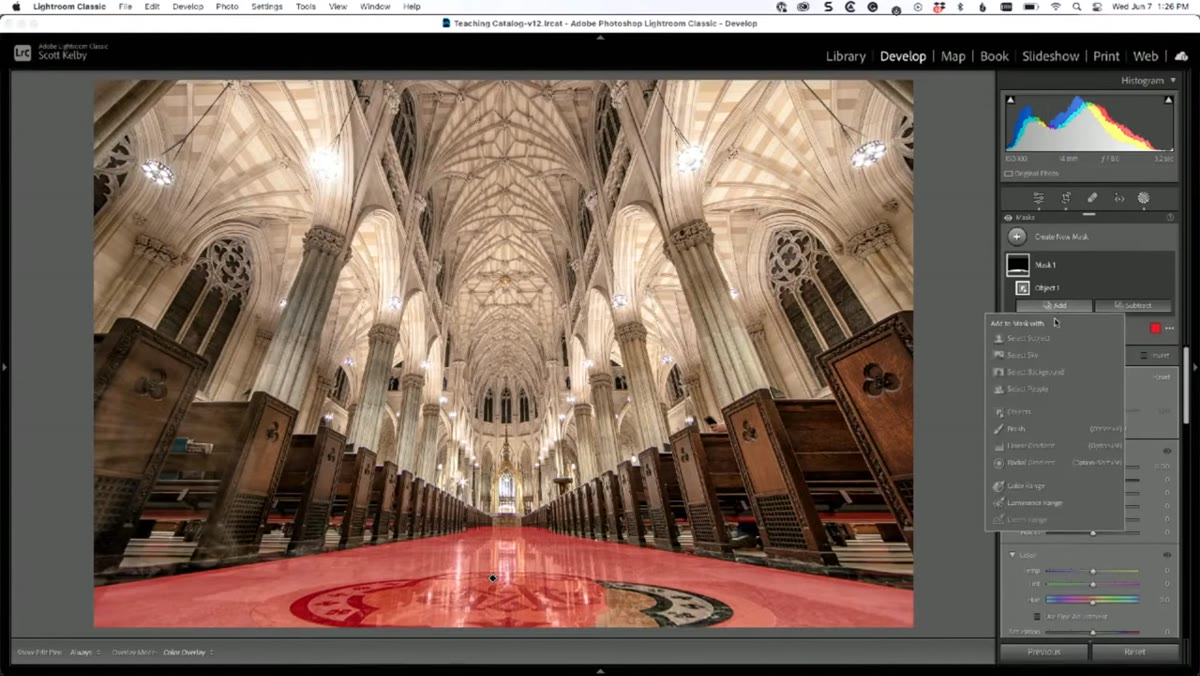 Mask overlay showing a small missed area on the floor
No automatic selection is perfect 100% of the time. After Lightroom generates your bounding box selection, toggle on the mask overlay (press O) to see exactly what got selected. Look for gaps or unwanted inclusions. In Scott’s demo, a small portion of the floor was missed at the edges, which is typical with complex or irregularly lit surfaces.
Mask overlay showing a small missed area on the floor
No automatic selection is perfect 100% of the time. After Lightroom generates your bounding box selection, toggle on the mask overlay (press O) to see exactly what got selected. Look for gaps or unwanted inclusions. In Scott’s demo, a small portion of the floor was missed at the edges, which is typical with complex or irregularly lit surfaces.
To fix this, click “Add” in the masking options and choose Brush. You don’t need to repaint the whole thing, just lightly brush over the missed sections. Keep the brush at a moderate feather value (around 50-70) so the addition blends naturally with the AI-generated edge. This two-step approach, box selection first, brush touch-up second, is almost always faster than a full manual brush mask from scratch.
Step 5: Apply Your Adjustments
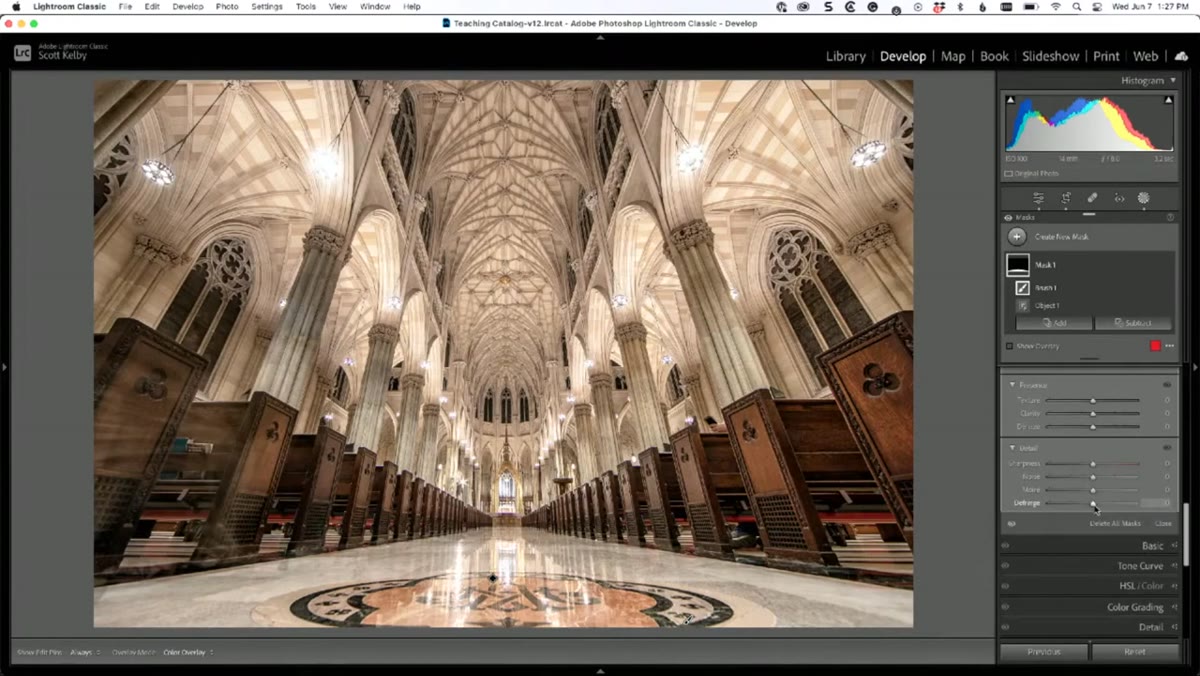 Clarity and Exposure sliders being adjusted on the masked floor
Once your mask looks solid, close the masking panel and start adjusting. For a floor specifically, Scott recommends reaching for the Clarity slider first if you want to bring out texture and create a sense of shininess or depth. Clarity adds midtone contrast and edge definition, which makes reflective or textured surfaces read as more three-dimensional. Pulling Exposure down slightly afterward can help redirect the viewer’s eye toward the subject rather than the ground.
Clarity and Exposure sliders being adjusted on the masked floor
Once your mask looks solid, close the masking panel and start adjusting. For a floor specifically, Scott recommends reaching for the Clarity slider first if you want to bring out texture and create a sense of shininess or depth. Clarity adds midtone contrast and edge definition, which makes reflective or textured surfaces read as more three-dimensional. Pulling Exposure down slightly afterward can help redirect the viewer’s eye toward the subject rather than the ground.
For beauty work, I apply this same logic to backdrops and seamless paper. A slight Clarity boost on a background makes it feel more present and intentional. Pulling the Highlights down on a bright white seamless keeps it from blooming into the subject’s hair. These are subtle moves, but they add up.
How I’ve Extended This in Beauty and Portrait Work
The bounding box mode in the Objects tool has quietly become one of my most-used masking methods for anything that isn’t skin or hair. When I’m editing a product shot with a marble surface, or a portrait where the floor behind the model is distracting, I now default to a quick bounding box rather than spending several minutes with a brush.
One thing worth knowing from experience: the box mode selection quality improves when the area you’re targeting has some visual contrast against its surroundings. On high-key setups where the background is nearly the same luminosity as the floor, the AI can struggle to distinguish between the two planes. In those cases, I’ll draw a tighter box and focus it specifically on the area with the most visual distinction, then add with a brush to extend outward. It’s a small adjustment to the workflow but it saves a round of cleanup later.
The single most important thing to take away here is this: the Objects masking tool has two modes, and the one that ships as the default is not the more powerful one. Switching to box mode before you interact with any surface gives Lightroom much more meaningful information to work with, and the selections you get back reflect that difference immediately. It’s the kind of tip that sounds minor until you actually use it on a problem image and suddenly your masking session is half as long.
Watch the full tutorial on YouTube to see Scott walk through the original example in real time.
Comments (2)
This saved me so much time on my last edit. Wish I'd found this sooner.
Quality content like this is rare. Keep it up.
Leave a Comment