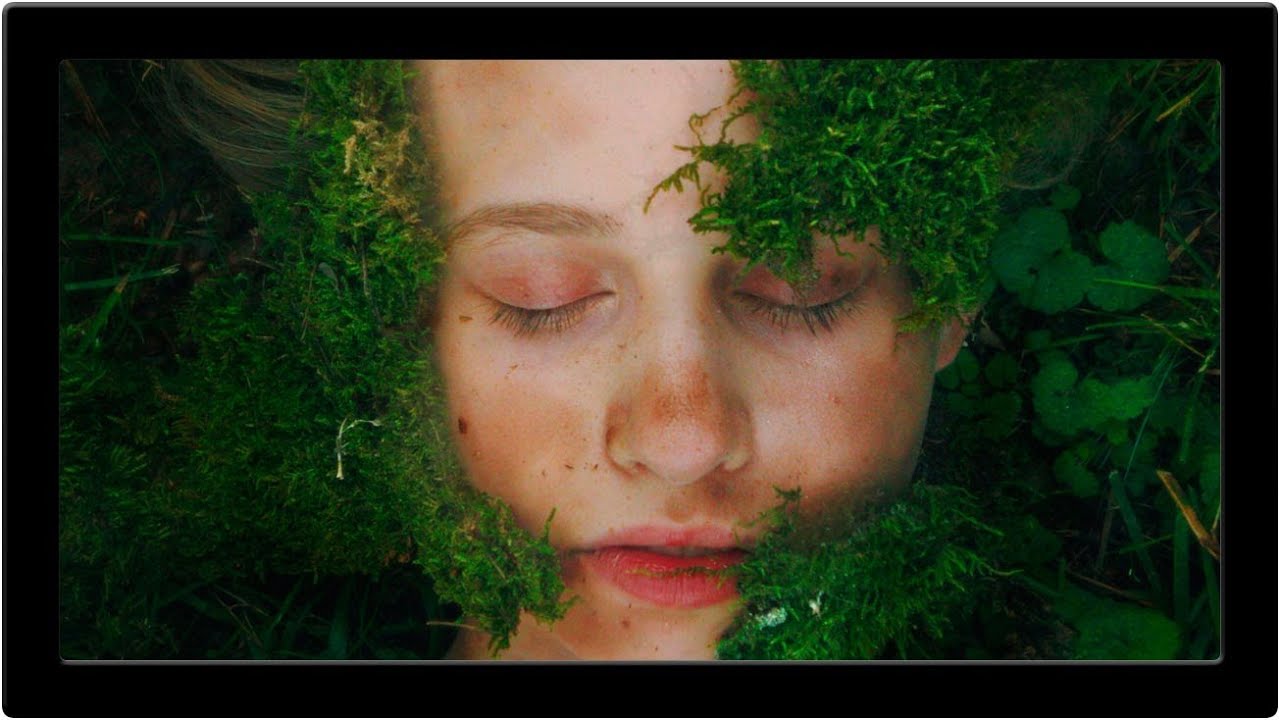
There’s a particular kind of frustration that comes from spending forty minutes hand-painting a dodge and burn layer, only to zoom out and realize the skin looks muddy, patchy, or just slightly wrong. I lived in that frustration for longer than I’d like to admit when I first transitioned from shooting weddings to doing beauty retouching full time. The problem wasn’t the concept. Dodging and burning is fundamental. The problem was that painting by hand means you’re guessing where the light and shadow fall, and skin doesn’t respond well to guesswork.
This technique, demonstrated in this Aaron Nace (PHLEARN) tutorial, removes the guesswork entirely. Instead of painting masks by hand, you let the image’s own luminosity data tell Photoshop exactly where to apply the correction. The result is a dodge and burn effect that’s perfectly keyed to the existing tonal structure of the skin. It’s non-destructive, repeatable, and once you understand the logic, surprisingly fast.
The tutorial works through a portrait with two classic problems: highlights that are a touch too hot, and shadows that are a touch too heavy. Sound familiar? Here’s how the technique works, step by step.
Step 1: Create a Curves Adjustment Layer and Push It Hard
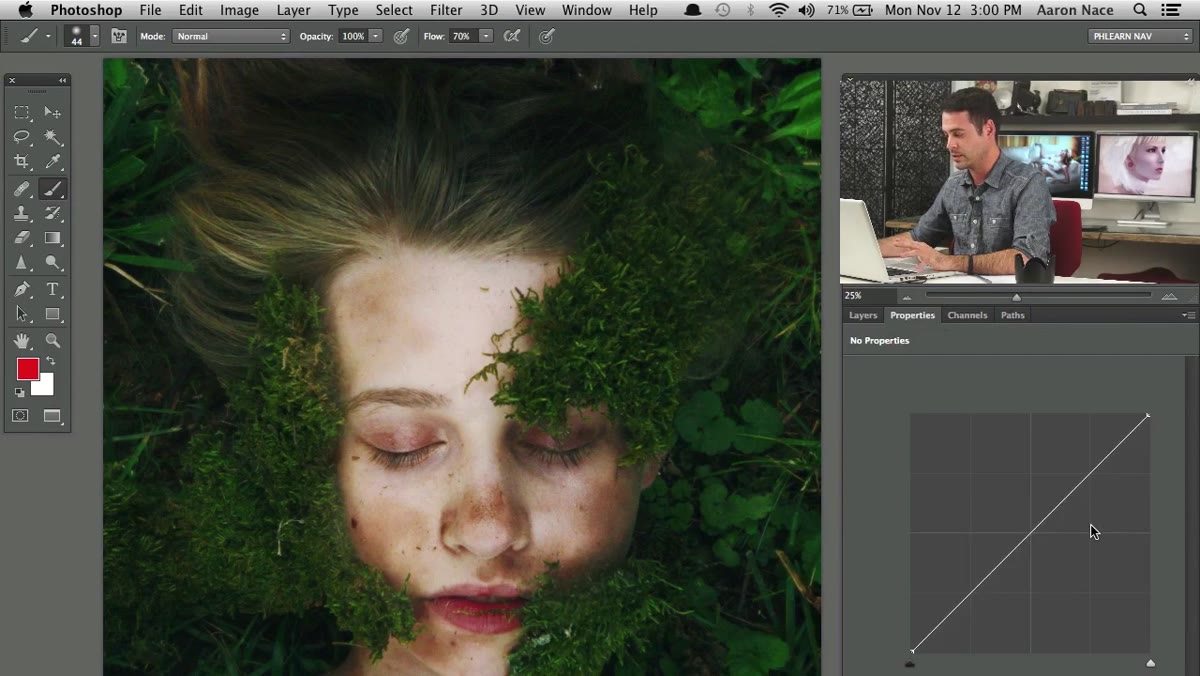 Curves adjustment layer dragged sharply upward in Photoshop
Start by adding a new Curves adjustment layer from the Adjustments panel. Click roughly in the middle of the diagonal line and drag it sharply upward. You want to push it much further than you’d ever use in a final edit. Think of this as an extreme brightening pass. The highlights will blow out completely and the whole image will look overexposed. That’s fine. You’re not editing the image yet. You’re building a mask based on luminosity values, and this exaggerated curve gives you cleaner contrast to work with in the next step.
Curves adjustment layer dragged sharply upward in Photoshop
Start by adding a new Curves adjustment layer from the Adjustments panel. Click roughly in the middle of the diagonal line and drag it sharply upward. You want to push it much further than you’d ever use in a final edit. Think of this as an extreme brightening pass. The highlights will blow out completely and the whole image will look overexposed. That’s fine. You’re not editing the image yet. You’re building a mask based on luminosity values, and this exaggerated curve gives you cleaner contrast to work with in the next step.
The key thing to understand here is that this Curves layer is a vehicle, not the destination. Its extreme settings exist only to generate the tonal information that Apply Image will read. You’ll be running this process four times total for different tonal ranges, so don’t worry about dialing anything in precisely at this stage.
Step 2: Select the Layer Mask and Open Apply Image
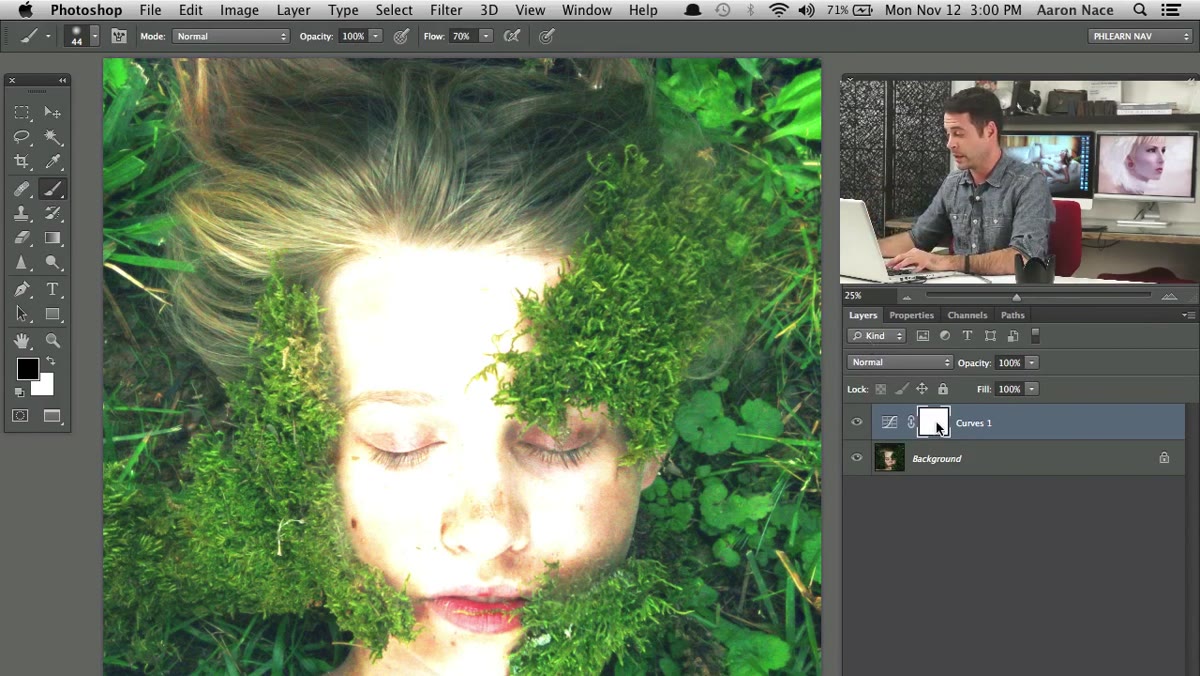 Layer mask thumbnail selected on the Curves layer in Layers panel
Click directly on the white layer mask thumbnail attached to your Curves adjustment layer in the Layers panel. This is a critical detail. You need the mask selected, not the layer itself. If you skip this and have the layer selected instead, Apply Image will do something entirely different and confusing.
Layer mask thumbnail selected on the Curves layer in Layers panel
Click directly on the white layer mask thumbnail attached to your Curves adjustment layer in the Layers panel. This is a critical detail. You need the mask selected, not the layer itself. If you skip this and have the layer selected instead, Apply Image will do something entirely different and confusing.
With the mask active, go to Image in the top menu and choose Apply Image. This command is one of Photoshop’s more powerful and underused tools. It lets you blend channel or layer data directly onto whatever you currently have selected, which in this case is the layer mask.
Step 3: Configure Apply Image Settings
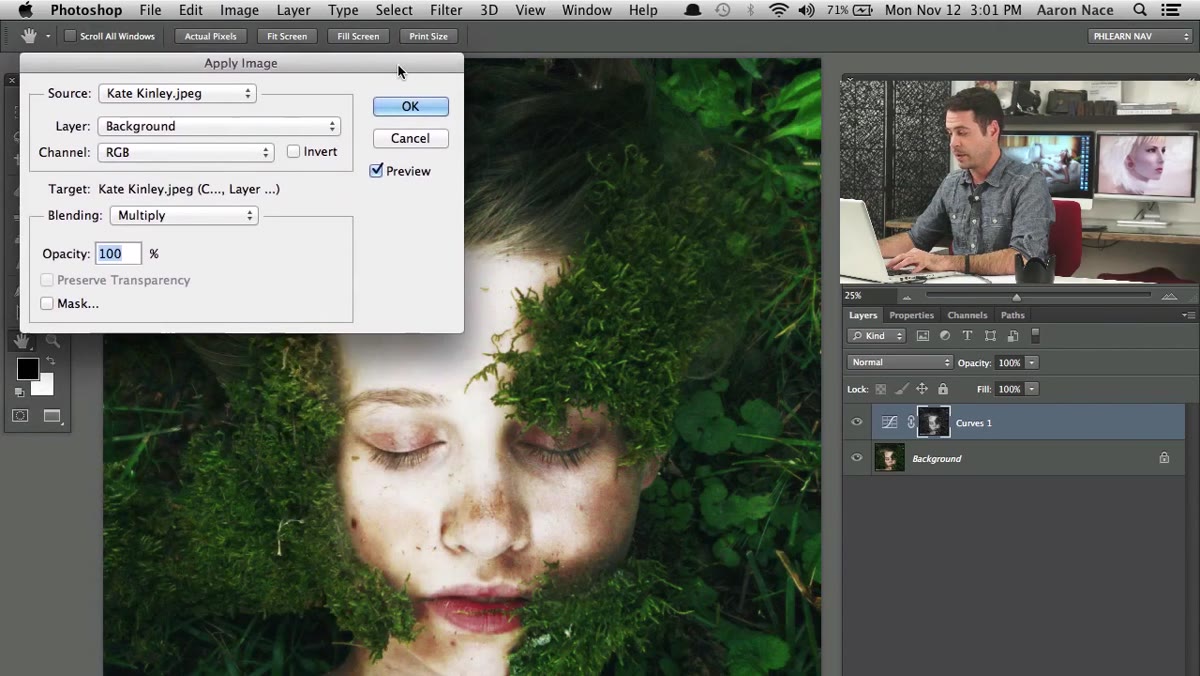 Apply Image dialog box open with settings visible
Inside the Apply Image dialog, your first job is to set the Source layer. Choose your Background layer, not Merged. Merged would use the composite appearance of everything visible, including the blown-out curves effect itself, which would defeat the purpose. You want the raw tonal information from the original image.
Apply Image dialog box open with settings visible
Inside the Apply Image dialog, your first job is to set the Source layer. Choose your Background layer, not Merged. Merged would use the composite appearance of everything visible, including the blown-out curves effect itself, which would defeat the purpose. You want the raw tonal information from the original image.
Set the Blending mode to Multiply. Then, because this first pass is targeting the shadows (you want to brighten only the dark areas), check the Invert box. Inverting flips the luminosity so that what was bright becomes dark on the mask and vice versa. The practical effect is that the brightening curve becomes invisible on the highlights and only lifts the shadows. You can watch the mask thumbnail update in real time as you toggle the preview. Click OK when you’re satisfied.
Step 4: Reduce Opacity to Taste
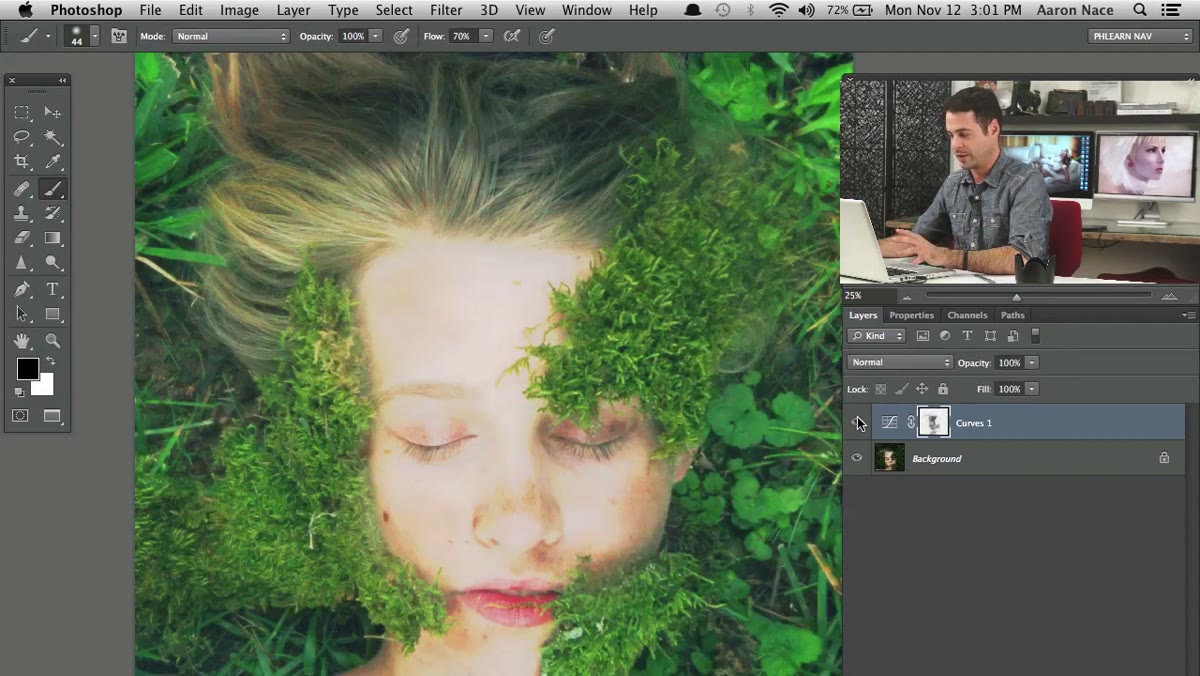 Layers panel showing reduced opacity on the Curves adjustment layer
The result at this point will look too strong. That’s expected. The Curves adjustment is still set to that extreme brightening value, and even with the mask limiting where it appears, it’s doing a lot. Reduce the layer opacity in the Layers panel until the shadow lifting looks natural. There’s no universal number here. With most portraits I work on, I’m landing somewhere between 30 and 60 percent, but let your eye guide you rather than chasing a specific value.
Layers panel showing reduced opacity on the Curves adjustment layer
The result at this point will look too strong. That’s expected. The Curves adjustment is still set to that extreme brightening value, and even with the mask limiting where it appears, it’s doing a lot. Reduce the layer opacity in the Layers panel until the shadow lifting looks natural. There’s no universal number here. With most portraits I work on, I’m landing somewhere between 30 and 60 percent, but let your eye guide you rather than chasing a specific value.
This is also a good moment to hold Alt (Option on Mac) and click the mask thumbnail to inspect it directly. You’ll see the actual grayscale mask that Apply Image generated. White areas will receive the full curve effect. Black areas are fully protected. The gradations between them are what make this technique feel organic rather than painted.
Step 5: Repeat the Process for Highlights
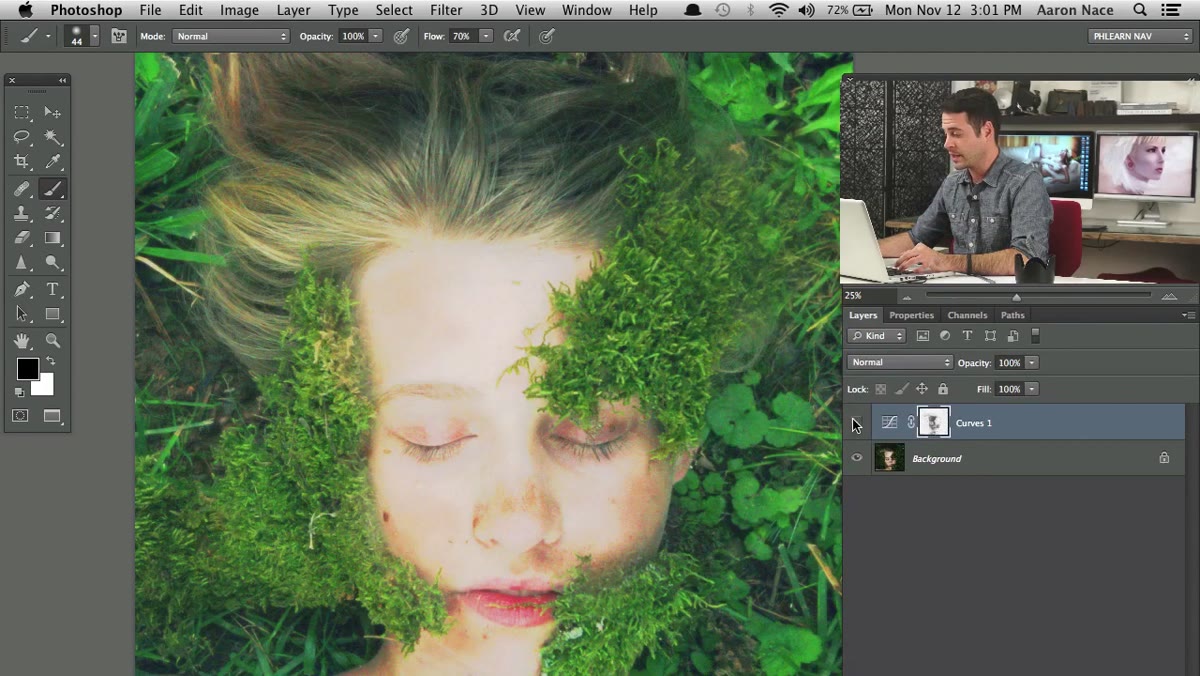 Second Curves layer being created for highlights correction
Duplicate the process with a second Curves adjustment layer, this time targeting the highlights. Create a new Curves layer and drag the midpoint sharply downward instead of upward, darkening the image significantly. Select the new layer mask, return to Image, then Apply Image, and use the same Background layer source and Multiply blend mode. This time, leave the Invert box unchecked. Without inverting, the mask will protect the shadow areas and allow the darkening curve to affect only the brightest parts of the skin. Reduce opacity until the highlight recovery looks natural.
Second Curves layer being created for highlights correction
Duplicate the process with a second Curves adjustment layer, this time targeting the highlights. Create a new Curves layer and drag the midpoint sharply downward instead of upward, darkening the image significantly. Select the new layer mask, return to Image, then Apply Image, and use the same Background layer source and Multiply blend mode. This time, leave the Invert box unchecked. Without inverting, the mask will protect the shadow areas and allow the darkening curve to affect only the brightest parts of the skin. Reduce opacity until the highlight recovery looks natural.
Running both corrections as separate layers lets you adjust them independently afterward, which has saved me more than once when a client wanted one changed without affecting the other.
Step 6: Refine With a Soft Brush If Needed
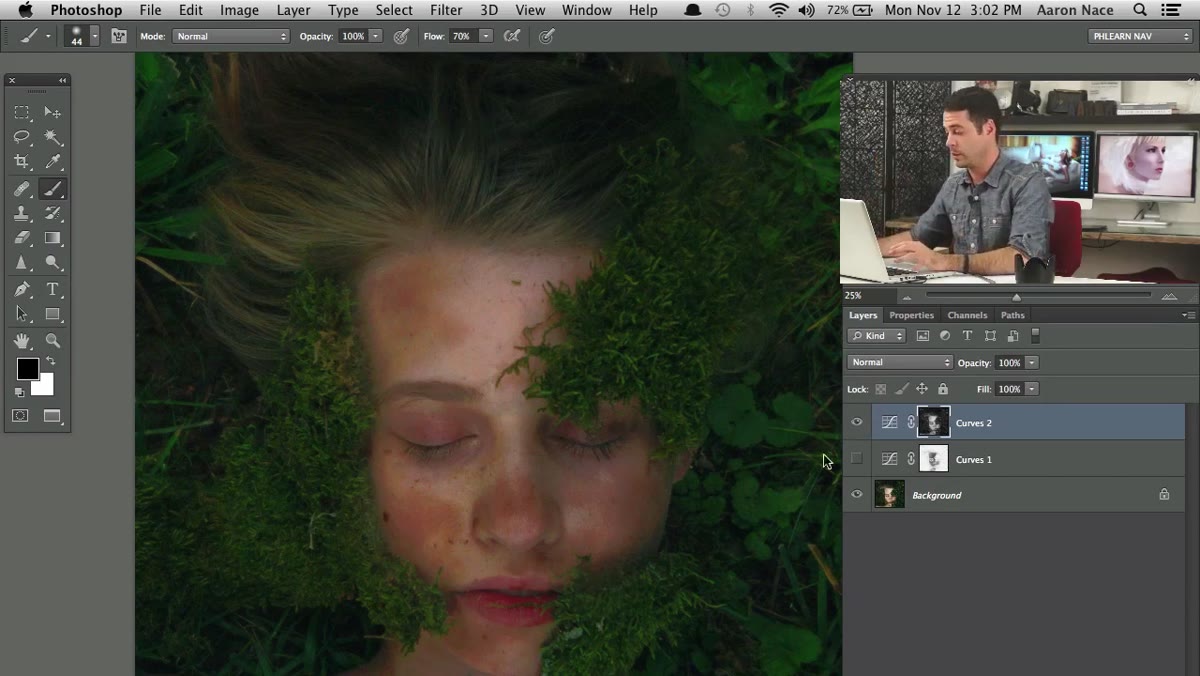 Painting on a layer mask with a low-opacity soft brush
Once both correction layers are in place, you can refine the masks by painting on them with a soft, low-opacity brush. Use black to hide the effect in areas where it’s too strong, white to restore it where it’s too subtle. Because Apply Image already did the heavy lifting, you’re making small adjustments rather than building the mask from scratch. This is where the technique earns back the time you’d otherwise spend on a full hand-painted dodge and burn. The brush work goes quickly because the structure is already right.
Painting on a layer mask with a low-opacity soft brush
Once both correction layers are in place, you can refine the masks by painting on them with a soft, low-opacity brush. Use black to hide the effect in areas where it’s too strong, white to restore it where it’s too subtle. Because Apply Image already did the heavy lifting, you’re making small adjustments rather than building the mask from scratch. This is where the technique earns back the time you’d otherwise spend on a full hand-painted dodge and burn. The brush work goes quickly because the structure is already right.
What I Do Differently in My Own Workflow
I tend to run this process on a flattened stamp of the skin before I’ve done any frequency separation work, because the luminosity data is cleanest at that stage. Once you introduce texture layers, the Apply Image reads can get a little noisier, especially on very high-resolution files from medium-format cameras. I also run a third pass targeting only the midtones by building an S-curve and using Apply Image twice with different channel data blended at partial opacity. It takes an extra ten minutes but gives me a dodge and burn that holds up at 100 percent zoom, which matters when you’re delivering to beauty clients who absolutely will zoom in.
The core insight from this technique is that the image already contains the roadmap for where it needs to be corrected. Apply Image lets you use that roadmap instead of drawing your own from scratch. That shift in thinking, from painting corrections to deriving them from the image data itself, is one of the things that moved my retouching from looking labored to looking seamless.
Watch the full tutorial on YouTube to see Aaron walk through the complete process, including the moment where he reveals the mask view and you really understand what Apply Image is doing under the hood.
Comments (2)
Would love to see a follow-up going deeper into this topic.
Printing this out and pinning it next to my monitor. That good.
Leave a Comment