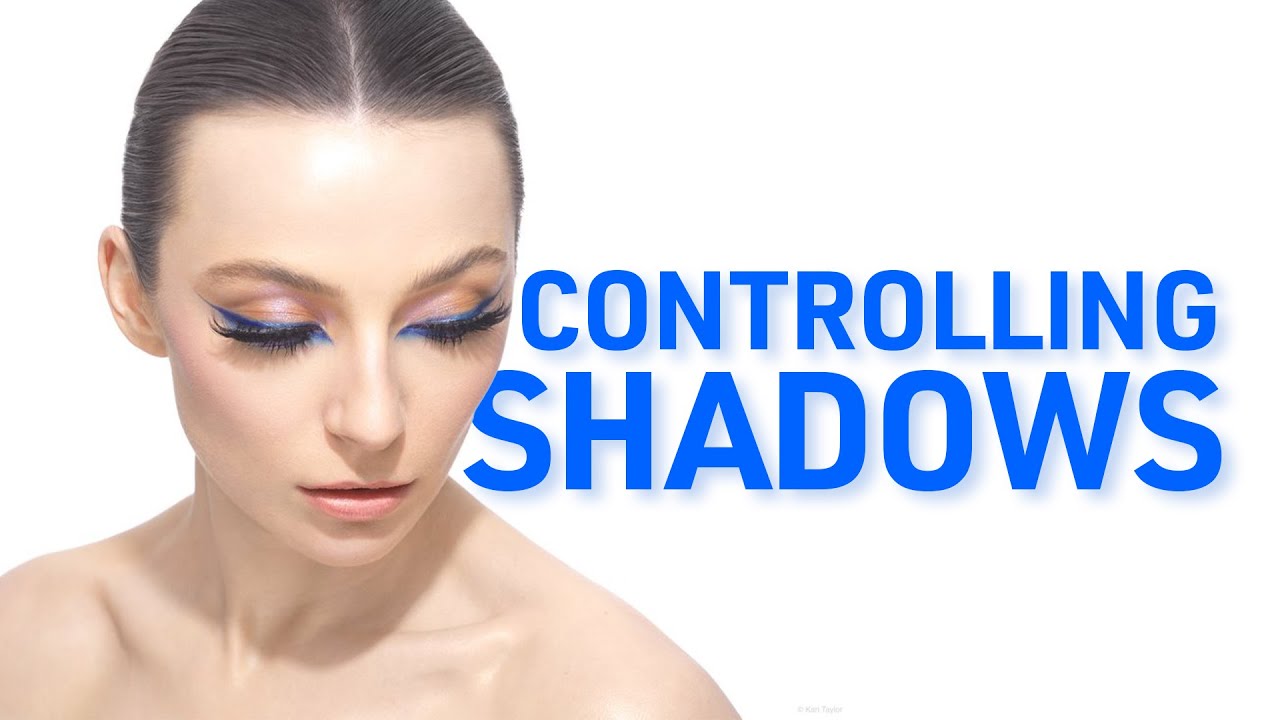
There’s a specific problem I run into constantly when I’m retouching beauty work: the shadows look either completely flat or oppressively dark, and neither one feels right. Flat shadows make skin look two-dimensional, which means I end up doing twice the work in post trying to sculpt cheekbones and collarbones that should have been lit properly on set. Dense black shadows swing to the other extreme, giving the whole image a dramatic, almost harsh energy that doesn’t match the soft, polished aesthetic most beauty clients want. For a long time, I assumed this was just a post-processing problem I had to solve in Photoshop. Turns out, it’s almost entirely a lighting problem — and once you understand the setup, it changes how you think about retouching altogether.
That’s exactly why I keep coming back to this Visual Education tutorial featuring photographer Karl Taylor. Watch the full tutorial on YouTube. Karl breaks down a specific behind-the-scenes beauty shoot with model Chelsea, and the lighting setup he reveals is one of those things that seems almost obvious once you see it — but that I never would have figured out by looking at the final image alone. If you work in beauty retouching and you want to understand why some source images are so much easier to work with than others, this tutorial is required viewing.
Step 1: Start by Reading the Shadows in the Final Image
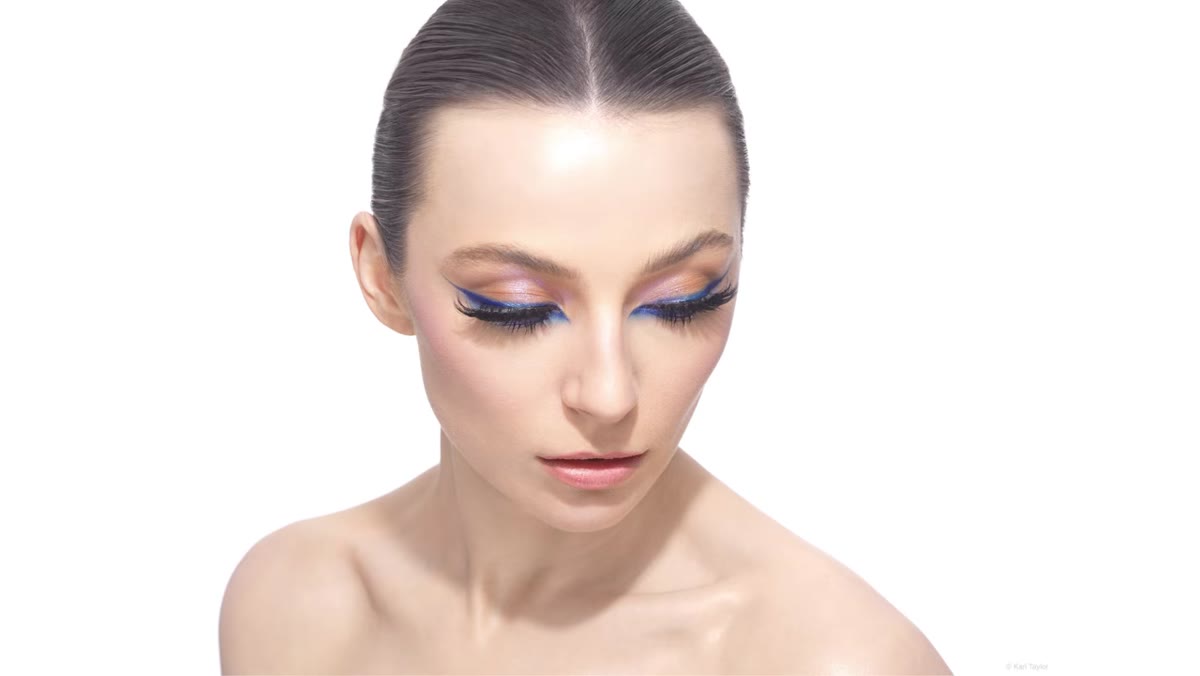 Final beauty image showing defined nose and collarbone shadows
Before you even think about gear, train your eye to read what the light is actually doing. In the final image of Chelsea, Karl points to two specific shadow details: the shadow cast beneath the nose and the shadow falling along the collarbone and under the chin. These shadows have sharp, well-defined edges rather than soft gradual falloff. That edge quality is the critical clue. Sharp-edged shadows always tell you a small, hard light source was involved. A large softbox produces gradual, feathery shadow edges. A small point source produces crisp, defined ones. Learning to read this distinction in a finished image means you can reverse-engineer lighting setups, which makes you dramatically better at knowing what you’re working with when a raw file lands in your retouching queue.
Final beauty image showing defined nose and collarbone shadows
Before you even think about gear, train your eye to read what the light is actually doing. In the final image of Chelsea, Karl points to two specific shadow details: the shadow cast beneath the nose and the shadow falling along the collarbone and under the chin. These shadows have sharp, well-defined edges rather than soft gradual falloff. That edge quality is the critical clue. Sharp-edged shadows always tell you a small, hard light source was involved. A large softbox produces gradual, feathery shadow edges. A small point source produces crisp, defined ones. Learning to read this distinction in a finished image means you can reverse-engineer lighting setups, which makes you dramatically better at knowing what you’re working with when a raw file lands in your retouching queue.
Step 2: Identify the Contradiction — Sharp Edges but Light Density
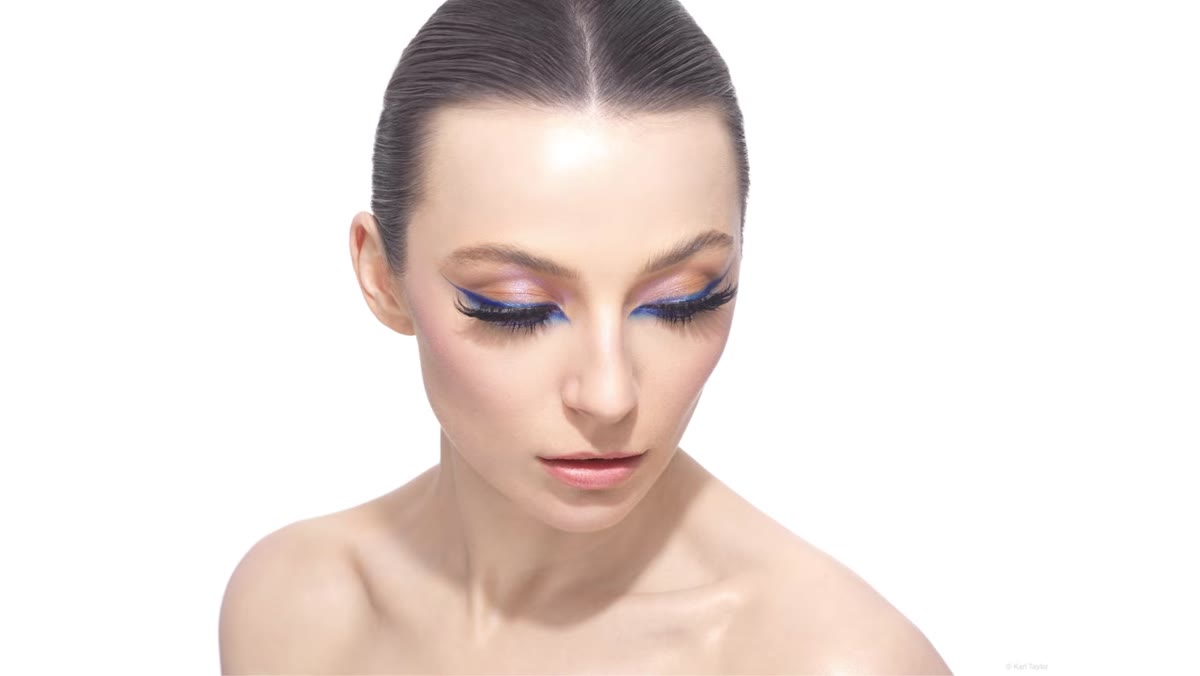 Model’s face showing soft overall light with defined shadow edges
Here’s where it gets interesting, and where Karl’s approach earns its sophistication. The shadows have sharp edges, but they’re not dark. They’re airy and luminous. Those two qualities seem like they should cancel each other out. A small hard light gives you sharp edges, but it also gives you deep, dense shadow areas with no detail. A large soft source fills those shadows beautifully but destroys the edge definition in the process. The puzzle Karl is solving is: how do you keep the crispness without keeping the darkness? The answer is that you don’t compromise between the two sources. You run them simultaneously, from the same axis, at different power levels.
Model’s face showing soft overall light with defined shadow edges
Here’s where it gets interesting, and where Karl’s approach earns its sophistication. The shadows have sharp edges, but they’re not dark. They’re airy and luminous. Those two qualities seem like they should cancel each other out. A small hard light gives you sharp edges, but it also gives you deep, dense shadow areas with no detail. A large soft source fills those shadows beautifully but destroys the edge definition in the process. The puzzle Karl is solving is: how do you keep the crispness without keeping the darkness? The answer is that you don’t compromise between the two sources. You run them simultaneously, from the same axis, at different power levels.
Step 3: Position the Large Parabolic as Your Primary Fill
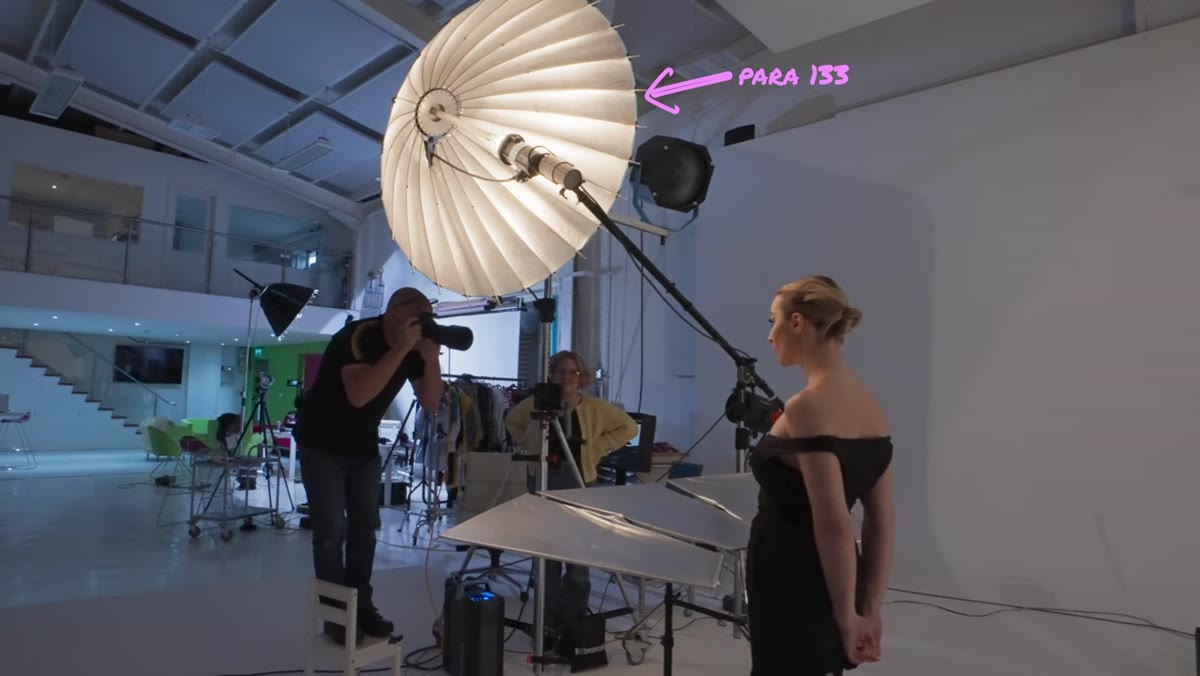 Behind-the-scenes showing large parabolic light above the camera
In the behind-the-scenes footage, Karl shows a Para 133 (a large parabolic reflector) positioned almost directly above and behind the camera position. This is the primary light in the setup, and its job is volume and sculpting. A parabolic of this size produces a broad, even wash of light with beautiful three-dimensional quality. It wraps around the face and shoulders, defining structure without creating any harsh transitions. Think of this light as your foundation layer. It establishes the overall luminosity of the image and does the heavy lifting for skin texture and facial dimension. At this stage, if you fired only this light, you’d have a gorgeous soft image with virtually no defined shadow edges anywhere.
Behind-the-scenes showing large parabolic light above the camera
In the behind-the-scenes footage, Karl shows a Para 133 (a large parabolic reflector) positioned almost directly above and behind the camera position. This is the primary light in the setup, and its job is volume and sculpting. A parabolic of this size produces a broad, even wash of light with beautiful three-dimensional quality. It wraps around the face and shoulders, defining structure without creating any harsh transitions. Think of this light as your foundation layer. It establishes the overall luminosity of the image and does the heavy lifting for skin texture and facial dimension. At this stage, if you fired only this light, you’d have a gorgeous soft image with virtually no defined shadow edges anywhere.
Step 4: Add a Small Hard Light on a Boom Arm Along the Same Axis
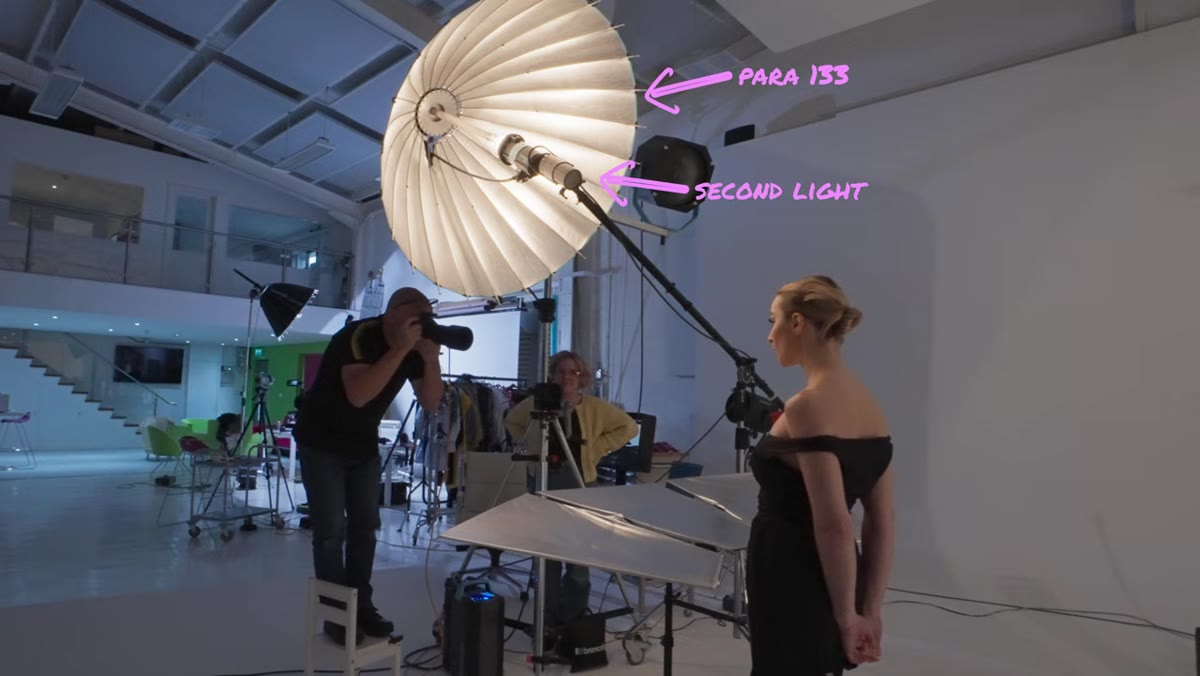 Small flashlight on boom arm positioned at center of parabolic
The second light is where the technique becomes distinctive. Karl positions a small flashlight (essentially a bare or minimally modified strobe head) on a boom arm so that it sits roughly at the center point of the parabolic, pointing in the same direction. The same-axis positioning is the key decision here. If that small hard light came in from a different angle, it would compete with the large soft source and create conflicting shadow directions, which reads as unnatural and unflattering. By aligning both sources along the same axis, they work together rather than against each other. The hard light casts those sharp-edged shadows. The large parabolic, already flooding the scene with soft fill, immediately lifts the density out of those shadow areas. The result is a shadow that has crisp definition but remains transparent and bright.
Small flashlight on boom arm positioned at center of parabolic
The second light is where the technique becomes distinctive. Karl positions a small flashlight (essentially a bare or minimally modified strobe head) on a boom arm so that it sits roughly at the center point of the parabolic, pointing in the same direction. The same-axis positioning is the key decision here. If that small hard light came in from a different angle, it would compete with the large soft source and create conflicting shadow directions, which reads as unnatural and unflattering. By aligning both sources along the same axis, they work together rather than against each other. The hard light casts those sharp-edged shadows. The large parabolic, already flooding the scene with soft fill, immediately lifts the density out of those shadow areas. The result is a shadow that has crisp definition but remains transparent and bright.
Step 5: Use a Silver Tri-Reflector Below to Lift the Under-Chin Area
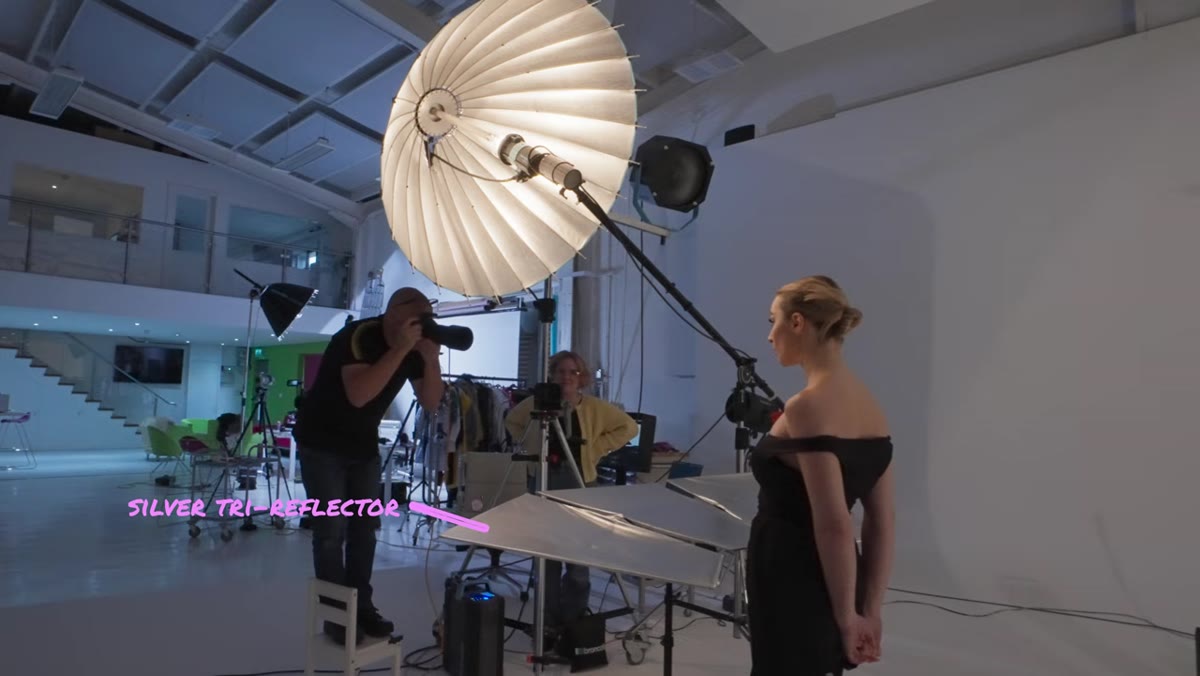 Silver tri-reflector positioned below model bouncing light upward
Below the model, Karl places a silver tri-reflector angled to bounce light upward into the chin, neck, and lower face. This serves two purposes. First, it further reduces any shadow density that the hard light introduced in the under-chin area, which is one of the most common places for unflattering pooling darkness in beauty work. Second, it adds a subtle upward fill that rounds out the three-dimensionality of the lighting, so the face reads as lit from multiple directions even though both actual light sources are coming from in front. If you’re retouching images and you notice the under-chin area always needs heavy dodge work, the absence of a reflector in this position at the shoot is almost certainly why.
Silver tri-reflector positioned below model bouncing light upward
Below the model, Karl places a silver tri-reflector angled to bounce light upward into the chin, neck, and lower face. This serves two purposes. First, it further reduces any shadow density that the hard light introduced in the under-chin area, which is one of the most common places for unflattering pooling darkness in beauty work. Second, it adds a subtle upward fill that rounds out the three-dimensionality of the lighting, so the face reads as lit from multiple directions even though both actual light sources are coming from in front. If you’re retouching images and you notice the under-chin area always needs heavy dodge work, the absence of a reflector in this position at the shoot is almost certainly why.
Step 6: Observe How Eyelashes Become the Star of the Image
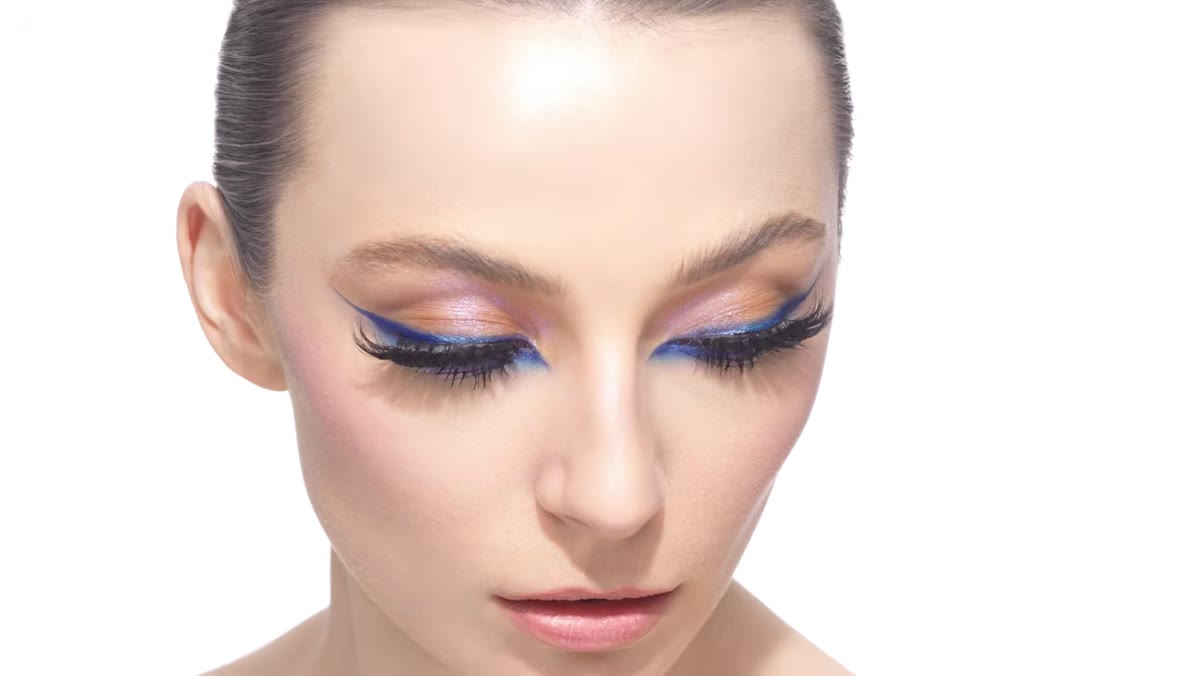 Close-up showing eyelash shadows cast on the cheekbone area
This is the detail I find most elegant about the entire setup. Because the model is looking downward and the hard point source is positioned above, the eyelashes themselves cast those crisp, defined shadows down onto the cheekbone. The whole point of the shoot was to celebrate the makeup and the lashes, and the lighting is engineered specifically to make those lashes do something dramatic and visible. That shadow becomes part of the composition, not an accident to fix in retouching. When you receive beauty files where the eyelash shadows are working like this, resist the urge to remove them. They are the light source doing exactly what it was designed to do.
Close-up showing eyelash shadows cast on the cheekbone area
This is the detail I find most elegant about the entire setup. Because the model is looking downward and the hard point source is positioned above, the eyelashes themselves cast those crisp, defined shadows down onto the cheekbone. The whole point of the shoot was to celebrate the makeup and the lashes, and the lighting is engineered specifically to make those lashes do something dramatic and visible. That shadow becomes part of the composition, not an accident to fix in retouching. When you receive beauty files where the eyelash shadows are working like this, resist the urge to remove them. They are the light source doing exactly what it was designed to do.
What I’d Add From My Own Retouching Experience
When I receive files shot with a setup like this, I approach the dodge and burn phase completely differently than I would with flat or overlit beauty files. Because the shadow edges are already well-defined, I’m not building structure from scratch. Instead, I’m making micro-adjustments to the luminosity within those existing shadow shapes, keeping the transitions Karl baked in at the shoot. I’ll often create a Curves adjustment layer I call “Chinatown” (old habit) specifically for reinforcing the collarbone shadow and any eyelash shadow detail, using a very small soft brush at 8 to 12 percent flow. The goal is to honor what the lighting did, not overwrite it with my own interpretation.
Understanding the intent behind a lighting setup is one of the most underrated skills in retouching. The more you study how light actually works on set, the better your instincts become about what to protect and what to adjust when you open a file. Karl Taylor’s breakdown of this dual-source technique is one of the clearest explanations I’ve seen of how to engineer shadows that serve the image instead of fighting it. Watch the full tutorial on YouTube and pay close attention to the behind-the-scenes footage. The finished image makes sense in a completely different way once you’ve seen the setup that created it.
Comments (3)
Solid advice. Especially the part about taking your time with it.
I've watched a dozen tutorials on this and yours is the clearest by far.
I tried this on a client project yesterday and the results were way better than expected.
Leave a Comment