
There’s a particular kind of portrait that comes back from a sunny outdoor shoot looking almost right. The skin is warm, the light is flattering, and then you open it in Photoshop and realize the greens in the background are fighting with everything, the saturation is cranked up too high straight out of camera, and you have about forty decisions to make before the image feels settled. I used to dread those files. Now I actually find them interesting, mostly because I’ve watched enough skilled retouchers work through exactly that kind of problem out loud.
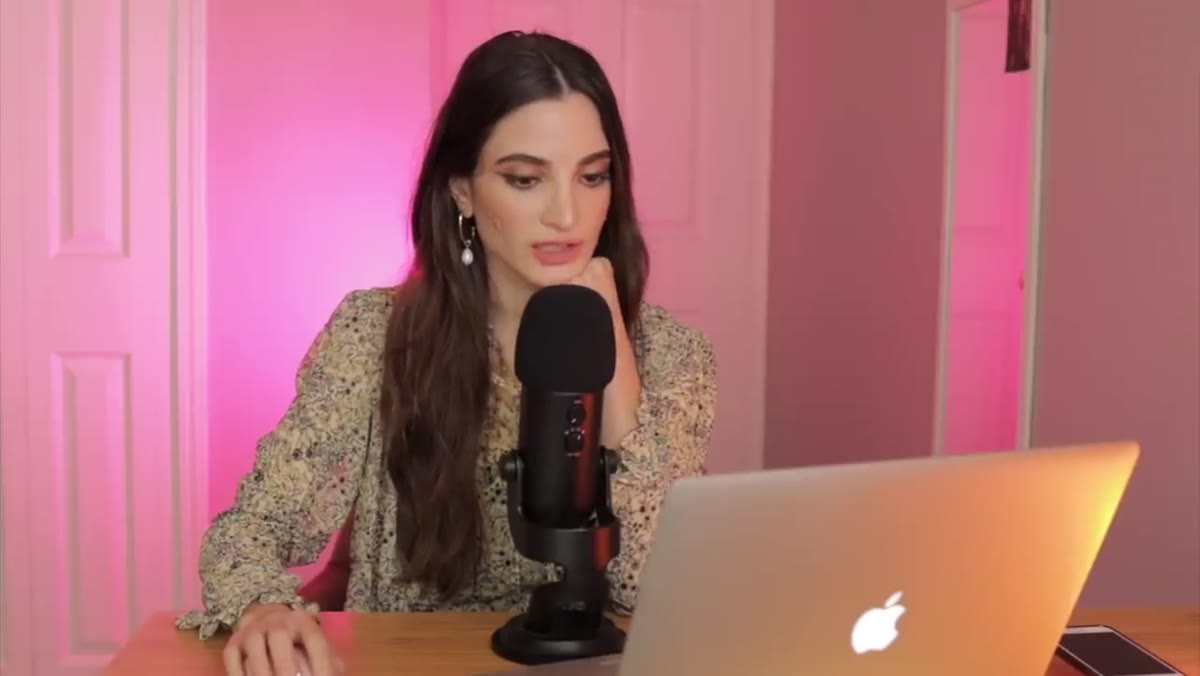
In this Jessica Kobeissi tutorial, Watch the full tutorial on YouTube, she works through a California outdoor portrait in a relaxed, real-time session that shows how she thinks through color and tone before she even gets to skin work. What I appreciate about her approach is that she doesn’t pretend there’s one correct answer. She second-guesses herself, changes direction, and talks through the reasoning as she goes. That’s actually what good retouching looks like in practice.
What follows is my breakdown of her workflow, with the kind of specifics you need to actually replicate it at your own desk.
Step 1: Open in Camera Raw and Set Your Intentions Early
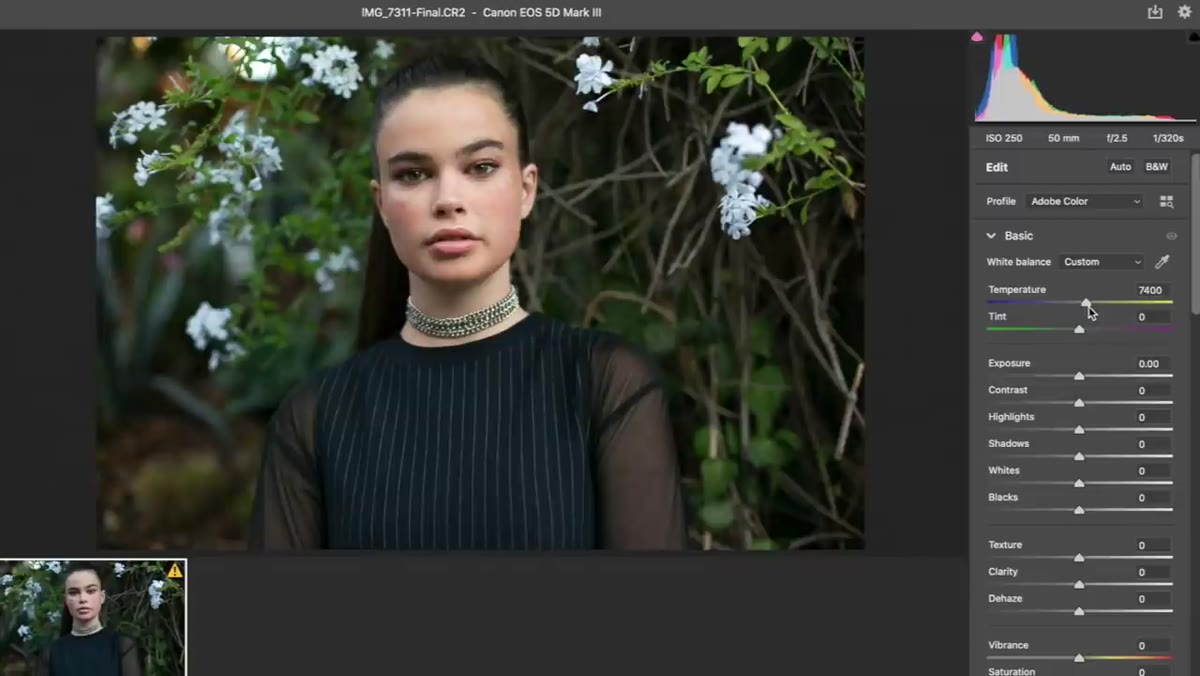 Raw file open in Photoshop’s Camera Raw window
Before she touches any sliders, Jessica orients herself to the image’s mood. She decides she wants the photo to read warmer overall, and that single decision shapes every adjustment that follows. This is worth pausing on. Going into a raw file with a directional intention, “warmer,” “cooler,” “desaturated and moody,” saves you from randomly dragging sliders and wondering why nothing looks cohesive.
Raw file open in Photoshop’s Camera Raw window
Before she touches any sliders, Jessica orients herself to the image’s mood. She decides she wants the photo to read warmer overall, and that single decision shapes every adjustment that follows. This is worth pausing on. Going into a raw file with a directional intention, “warmer,” “cooler,” “desaturated and moody,” saves you from randomly dragging sliders and wondering why nothing looks cohesive.
In Camera Raw, pulling the Temperature slider to the right adds warmth by shifting toward yellow and orange. Even a modest push of 200-400 units on a daylight image can make skin glow without going muddy. Set your white balance with purpose, not as a technical correction, but as a creative starting point.
Step 2: Bring Down Saturation Slightly
 Saturation slider being decreased in Camera Raw HSL panel
One of the quieter but most useful moves Jessica makes is dropping the overall saturation slightly in the raw edit. Straight-out-of-camera files, especially shot in bright California sun, often have saturation that reads as slightly garish on a calibrated monitor. A small reduction, somewhere in the range of -5 to -15 in the Saturation slider under Basic, calms the image down and gives you more room to be selective with color later.
Saturation slider being decreased in Camera Raw HSL panel
One of the quieter but most useful moves Jessica makes is dropping the overall saturation slightly in the raw edit. Straight-out-of-camera files, especially shot in bright California sun, often have saturation that reads as slightly garish on a calibrated monitor. A small reduction, somewhere in the range of -5 to -15 in the Saturation slider under Basic, calms the image down and gives you more room to be selective with color later.
Think of it as clearing the table before you start arranging. If the base image is already screaming with color, any targeted adjustments you make to individual hues are going to feel chaotic.
Step 3: Work the HSL Panel Selectively, Especially Greens
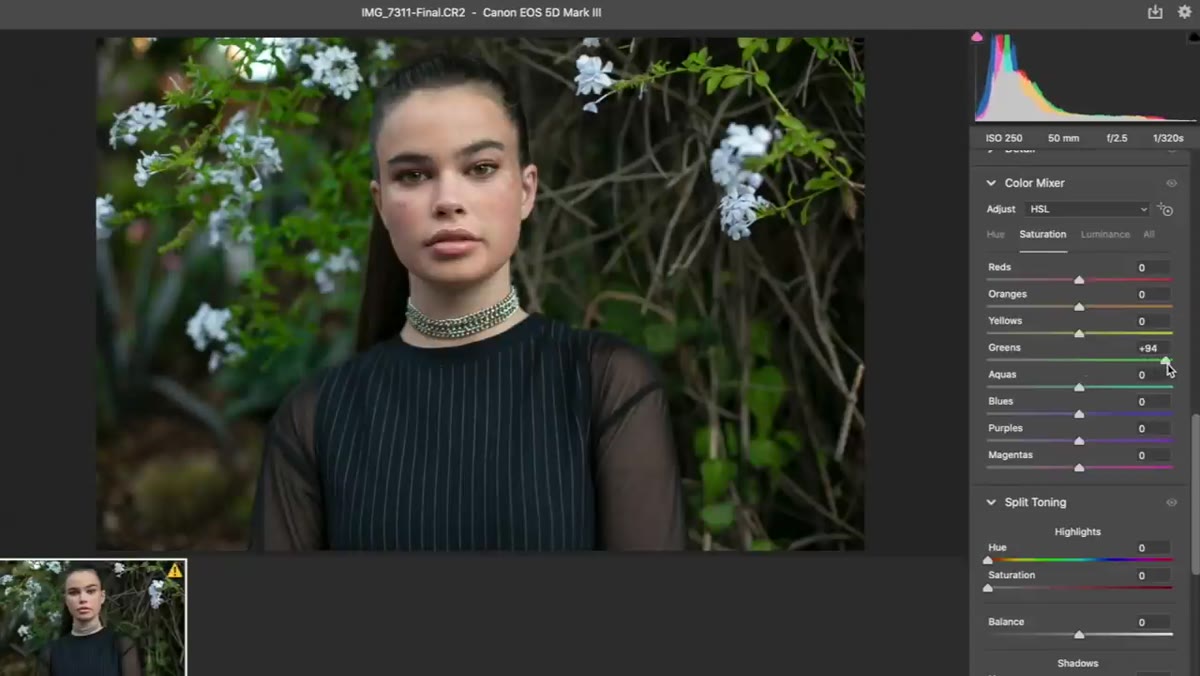 HSL panel open with green hue and luminance sliders being adjusted
This is where Jessica gets specific. She talks about popping the greens in the image, and she’s right that greens are genuinely difficult. Foliage in the background can shift from lush to sickly depending on tiny adjustments to Hue, Saturation, and Luminance. Her instinct to engage with the greens rather than ignore them is something I’d encourage every retoucher to adopt.
HSL panel open with green hue and luminance sliders being adjusted
This is where Jessica gets specific. She talks about popping the greens in the image, and she’s right that greens are genuinely difficult. Foliage in the background can shift from lush to sickly depending on tiny adjustments to Hue, Saturation, and Luminance. Her instinct to engage with the greens rather than ignore them is something I’d encourage every retoucher to adopt.
In the HSL panel in Camera Raw (or Lightroom, same sliders), isolate the Green and Aqua channels. Pulling Green Hue slightly toward yellow tends to warm up foliage. Reducing Green Saturation a little can prevent the background from competing with the subject’s skin. Adjusting Luminance up on greens can make a shadowy background feel airier. Small moves, 5 to 10 units at most, make a real difference here.
Step 4: Add Clarity Intentionally
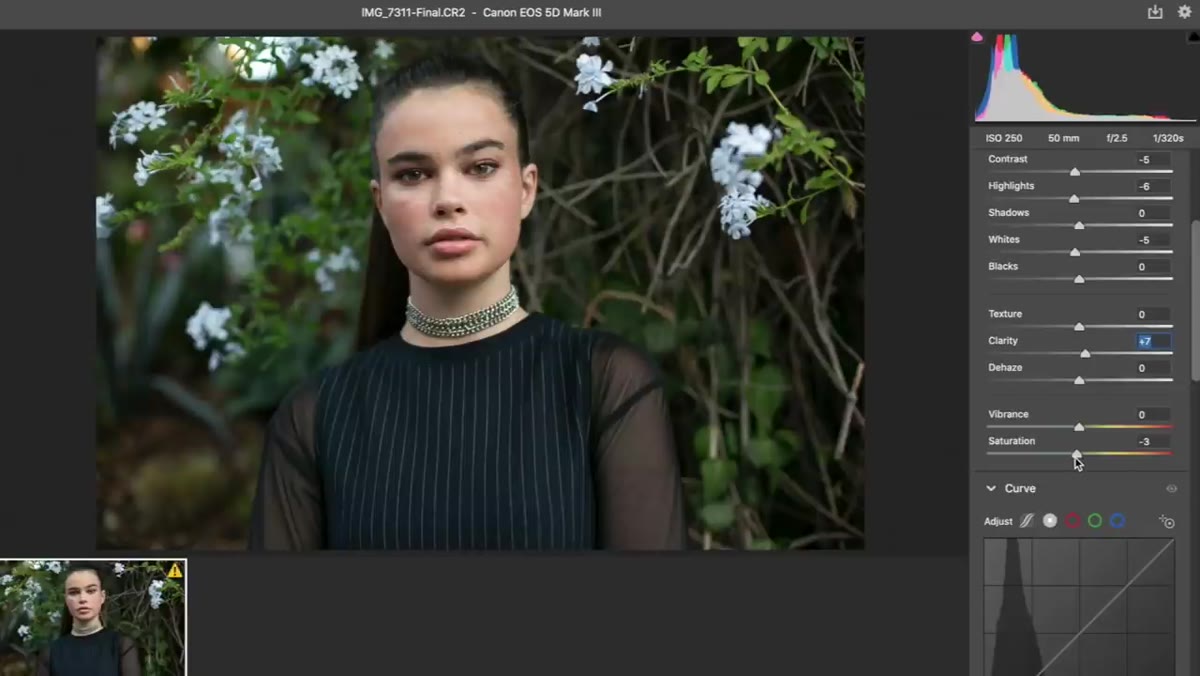 Clarity slider being adjusted in Camera Raw Basic panel
Jessica adds a touch of Clarity during the raw edit. Clarity works by adding localized contrast at midtone edges, which means it sharpens perceived detail and adds a slight gritty texture. For portraits, this is a slider to use with restraint. A small positive value, say +5 to +15, can give skin and hair a grounded, textured feel without making the image look over-processed.
Clarity slider being adjusted in Camera Raw Basic panel
Jessica adds a touch of Clarity during the raw edit. Clarity works by adding localized contrast at midtone edges, which means it sharpens perceived detail and adds a slight gritty texture. For portraits, this is a slider to use with restraint. A small positive value, say +5 to +15, can give skin and hair a grounded, textured feel without making the image look over-processed.
The reason I bring this up separately is that Clarity behaves very differently at +10 versus +40. It’s worth pulling it up to an extreme just to understand what it’s doing, then backing it down to where you actually want it. Know the tool before you trust it.
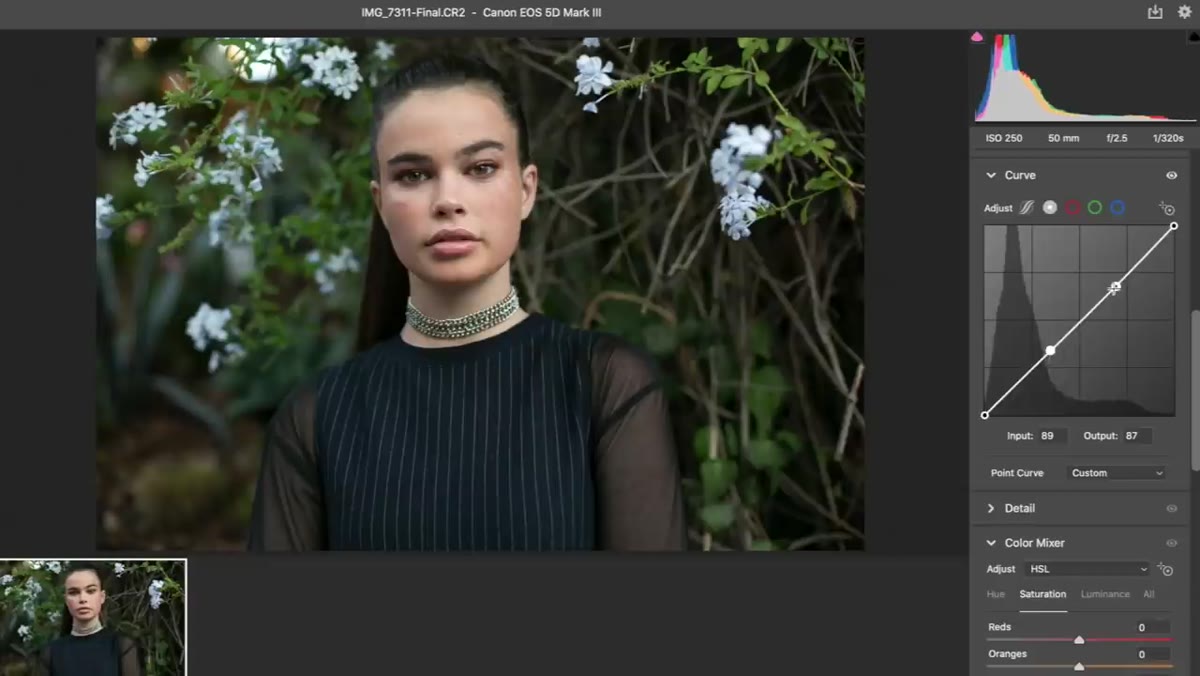
Step 5: Consider Curves, But Know When to Wait
 Curves panel being considered in Camera Raw
Jessica pauses at the Curves panel and asks herself whether she should adjust it now in Camera Raw or wait until she’s in Photoshop proper. This hesitation is actually good workflow thinking. Camera Raw Curves affect the raw data, while a Curves adjustment layer in Photoshop gives you more flexibility, masking options, blend modes, and non-destructive editing on top of a flattened or layered file.
Curves panel being considered in Camera Raw
Jessica pauses at the Curves panel and asks herself whether she should adjust it now in Camera Raw or wait until she’s in Photoshop proper. This hesitation is actually good workflow thinking. Camera Raw Curves affect the raw data, while a Curves adjustment layer in Photoshop gives you more flexibility, masking options, blend modes, and non-destructive editing on top of a flattened or layered file.
Her approach is pragmatic: if you’re reasonably confident in your tonal intentions, a gentle S-curve in Camera Raw (lift the lights slightly, deepen the shadows slightly) can serve as a solid foundation. But if you’re still feeling out the image’s direction, hold off and do it as an adjustment layer in Photoshop so you can modify or mask it later.
Step 6: Bring the File into Photoshop and Assess Before Retouching
 File opening from Camera Raw into Photoshop main workspace
Once Jessica brings the file into Photoshop, the approach shifts from global to local. The raw edit establishes mood and color foundation. Photoshop is where you address the subject specifically: skin texture, tonal consistency, any distractions in the frame.
File opening from Camera Raw into Photoshop main workspace
Once Jessica brings the file into Photoshop, the approach shifts from global to local. The raw edit establishes mood and color foundation. Photoshop is where you address the subject specifically: skin texture, tonal consistency, any distractions in the frame.
Before jumping into any skin work, zoom out to about 25-33% and look at the image as a whole. Ask what’s pulling your eye away from where it should be. This is the moment to catch color casts in shadows, uneven skin tones across the face, or background elements that compete with the subject. Making a mental list before you start retouching keeps you from getting lost in a single pore for forty-five minutes while the overall image drifts.
What I’d Add From My Own Experience
The part of Jessica’s process that resonates most with me is her willingness to state an intention first and then edit toward it. Warmer. Greens need attention. Saturation is too high. These are editorial decisions, not technical ones, and newer retouchers often skip straight to tools without making them.
I spent a long stretch early in my retouching work letting the image tell me what to do, which sounds intuitive but actually produces inconsistent results. The files you’re most uncertain about are the ones that need the clearest intention going in. I now spend about sixty seconds with every new portrait just looking, before I open a single panel, deciding what the image wants to feel like. It sounds almost too simple, but it changed how I edit.
One caution on the saturation work: if you’re retouching for beauty clients, be careful pulling global saturation down on lip colors or any product shades in the image. A slight overall desaturation can accidentally neutralize a lipstick that was specifically chosen by an art director. Go to HSL and target only the channels that need it.
Jessica’s workflow is a reminder that portrait retouching doesn’t have to be a high-tension process. Getting the raw edit right, making intentional color decisions early, and entering Photoshop with clear eyes goes further than any single technique. The single most useful thing in this tutorial is watching someone think out loud about why they’re making each move, not just what they’re clicking.
Watch the full tutorial on YouTube and follow along with your own outdoor portrait file. You’ll get more out of it by doing than by watching.
Comments (4)
The before and after really sells it. Incredible difference.
Love this. I referenced a similar technique in one of my recent posts. Always good to see other perspectives.
Just used this on a wedding shoot edit. Client was thrilled.
The tip about warm skin honest color a worki was the missing piece for me. Thank you.
Leave a Comment