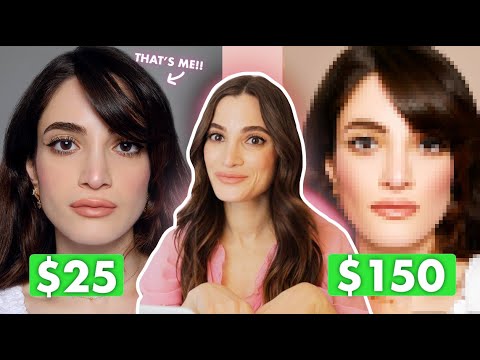
One of the hardest things to explain to a new client is why a retouch that “does less” often costs more. Early in my retouching career, I lost a client because my edits looked, in her words, like a wax figure. She wasn’t wrong. I had smoothed everything, brightened everything, and in doing so erased the quiet details that made her face feel like a face. That experience sent me deep into studying how the best retouchers actually work, and what I keep coming back to is this: the goal is removal of distraction, not removal of humanity.
That’s exactly what makes this experiment by photographer Jessica Kobeissi so instructive. In her video, Watch the full tutorial on YouTube, she hired five Fiverr retouchers at price points ranging from $20 to $150 and sent them all the same portrait, a clean headshot with good light, real skin, and a few honest imperfections like stray hairs and slightly uneven lip liner. Watching her compare the results side by side is a genuinely useful education in what clients actually respond to and what separates a retoucher who charges $20 from one who charges $150.
What follows is my breakdown of the key techniques the best-performing retouchers in this video used, framed as a workflow you can apply to your own portrait work.
Step 1: Evaluate the Image Before Touching a Single Tool
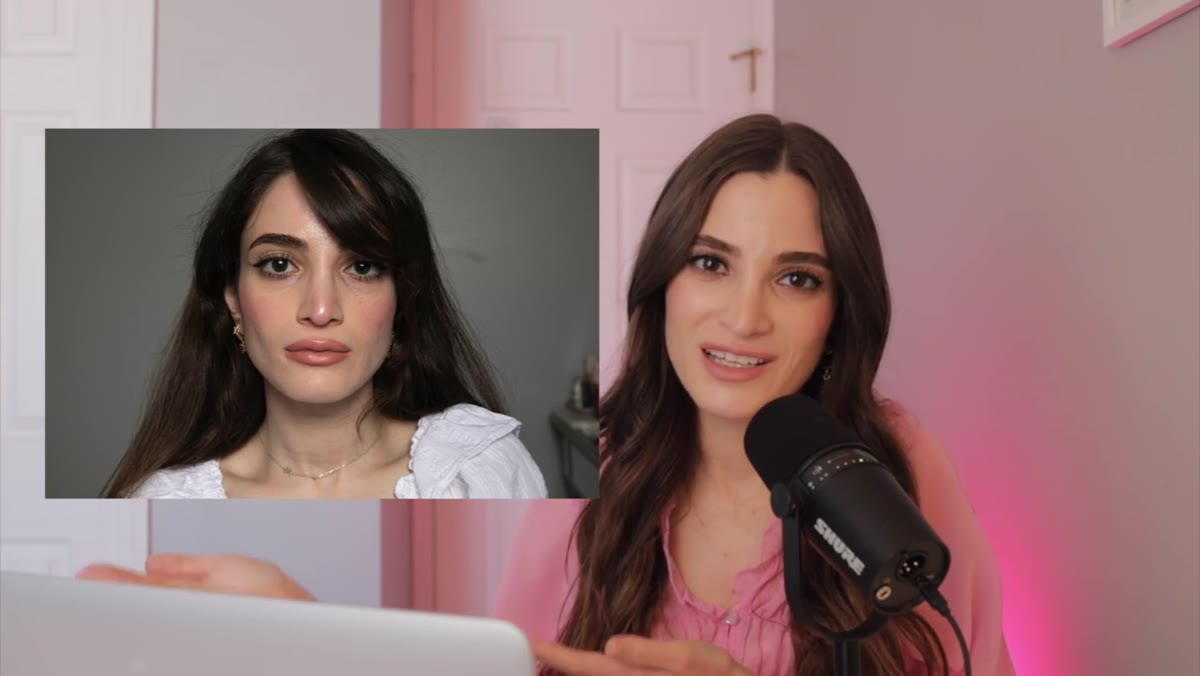 Original unretouched portrait displayed before any editing begins
Before we open a single panel in Photoshop, we need to actually look at the photo. Jessica’s portrait had several distinct areas of note: flyaway and frizz-heavy hair, very clean skin (she mentions she was having an unusually good skin day), slightly smudged lip liner on one corner, and mascara residue in the inner corners of both eyes. The retouchers who performed best clearly catalogued these elements before starting, because they addressed all of them systematically rather than just smoothing the skin and calling it done.
Original unretouched portrait displayed before any editing begins
Before we open a single panel in Photoshop, we need to actually look at the photo. Jessica’s portrait had several distinct areas of note: flyaway and frizz-heavy hair, very clean skin (she mentions she was having an unusually good skin day), slightly smudged lip liner on one corner, and mascara residue in the inner corners of both eyes. The retouchers who performed best clearly catalogued these elements before starting, because they addressed all of them systematically rather than just smoothing the skin and calling it done.
Make a habit of creating a simple text note layer or a physical list before you start. Categorize issues by type: hair cleanup, skin, makeup correction, eye brightening. This keeps you from rabbit-holing on one area while missing something obvious elsewhere.
Step 2: Clean Up Stray Hairs With the Clone Stamp and Healing Brush in Combination
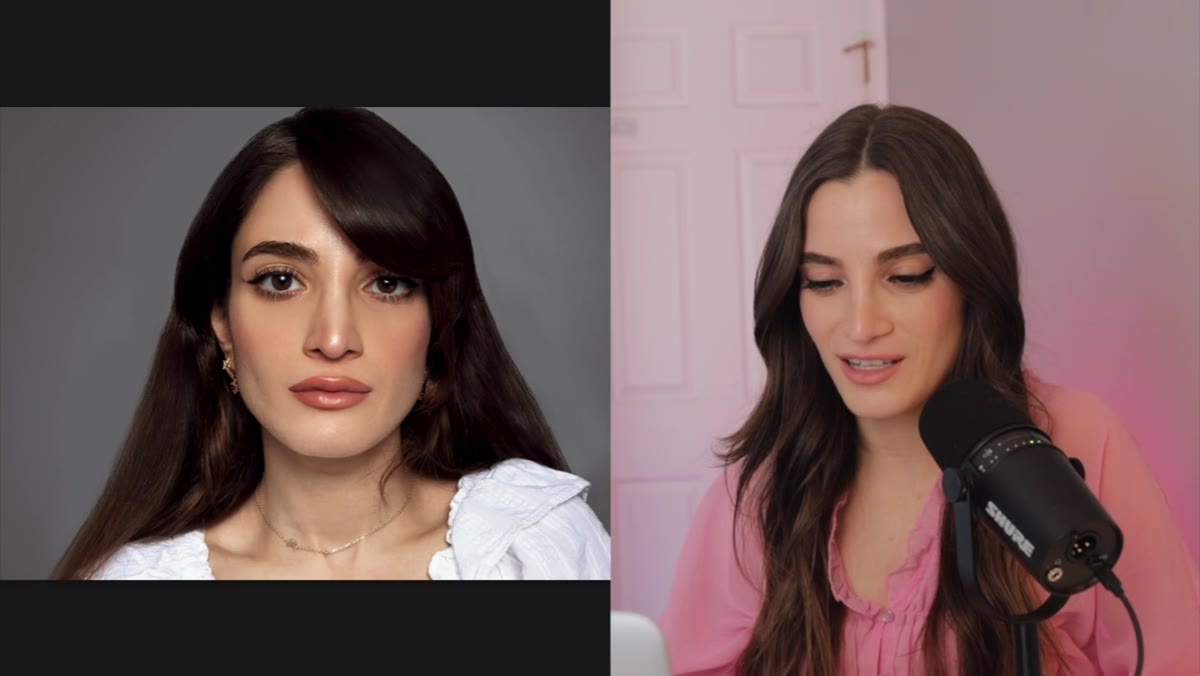 Comparison showing frizzy hair before and cleaned hair after editing
Hair cleanup is one of those tasks that looks simple until you’re forty-five minutes in and the edges still look pasted on. The $25 retoucher in Jessica’s comparison did exceptional work here, removing fine flyaways along the hairline and even addressing individual stray hairs near the temples without making the hair silhouette look hard or digital.
Comparison showing frizzy hair before and cleaned hair after editing
Hair cleanup is one of those tasks that looks simple until you’re forty-five minutes in and the edges still look pasted on. The $25 retoucher in Jessica’s comparison did exceptional work here, removing fine flyaways along the hairline and even addressing individual stray hairs near the temples without making the hair silhouette look hard or digital.
The technique that works best for this is alternating between the Clone Stamp tool at around 20-30% opacity and the Healing Brush. Use the Clone Stamp to carry clean background texture into the area where the stray hair lives, then follow up with the Healing Brush to blend the tonal transition. Always work on a separate layer so you can dial back opacity if the result reads too clean. Hair that is slightly imperfect still reads as real hair. Hair that is perfectly smooth reads as a wig.
Step 3: Correct Makeup Inconsistencies With Careful Masking
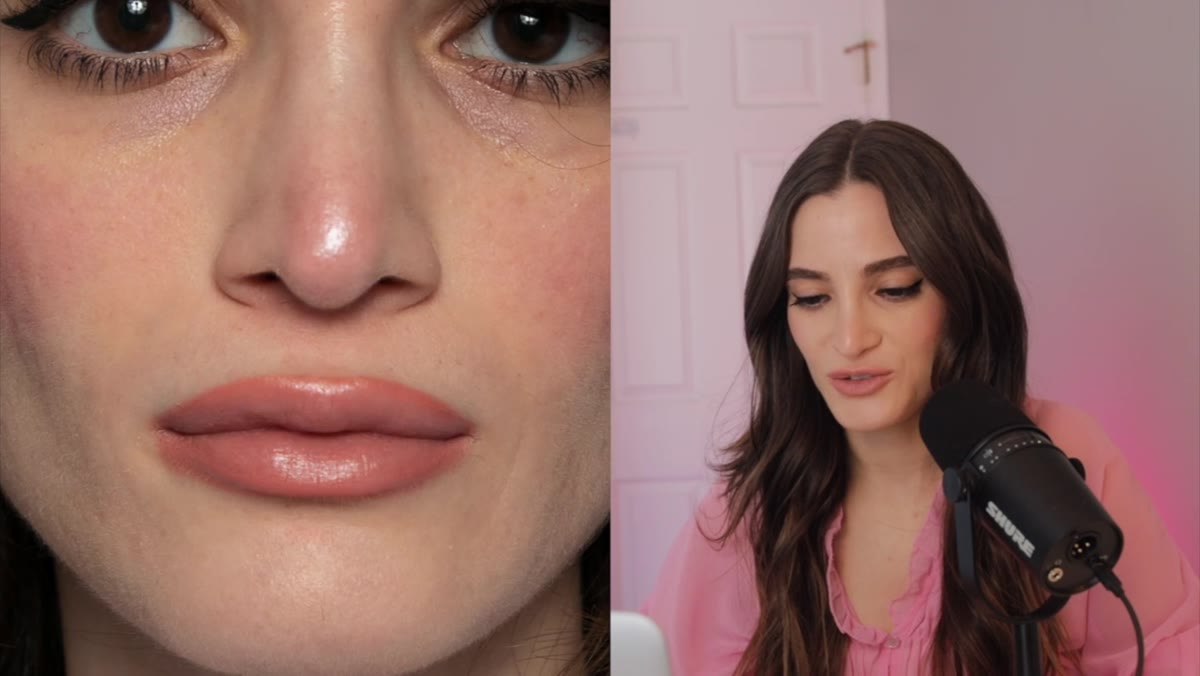 Lip liner correction shown in close-up before and after comparison
Jessica mentioned that her lip liner was slightly off on one side, the kind of thing you don’t notice until you’re staring at a full-resolution portrait file. Both the $20 and $25 retouchers caught this and corrected it. The approach that works without creating a smeared or artificial edge is to use the Lasso tool with a 2-3 pixel feather to isolate just the problem area, then use the Clone Stamp to pull color and texture from a clean section of the lip line nearby.
Lip liner correction shown in close-up before and after comparison
Jessica mentioned that her lip liner was slightly off on one side, the kind of thing you don’t notice until you’re staring at a full-resolution portrait file. Both the $20 and $25 retouchers caught this and corrected it. The approach that works without creating a smeared or artificial edge is to use the Lasso tool with a 2-3 pixel feather to isolate just the problem area, then use the Clone Stamp to pull color and texture from a clean section of the lip line nearby.
Resist the urge to use the Liquify tool for small makeup corrections like this. Liquify changes shape, and even subtle shape changes on the mouth can make a face feel subtly wrong to a viewer who can’t articulate why. Stick to color and texture corrections first, and only reach for Liquify if there’s a genuine shape problem that can’t be solved any other way.
Step 4: Brighten Eyes Without Destroying the Iris Texture
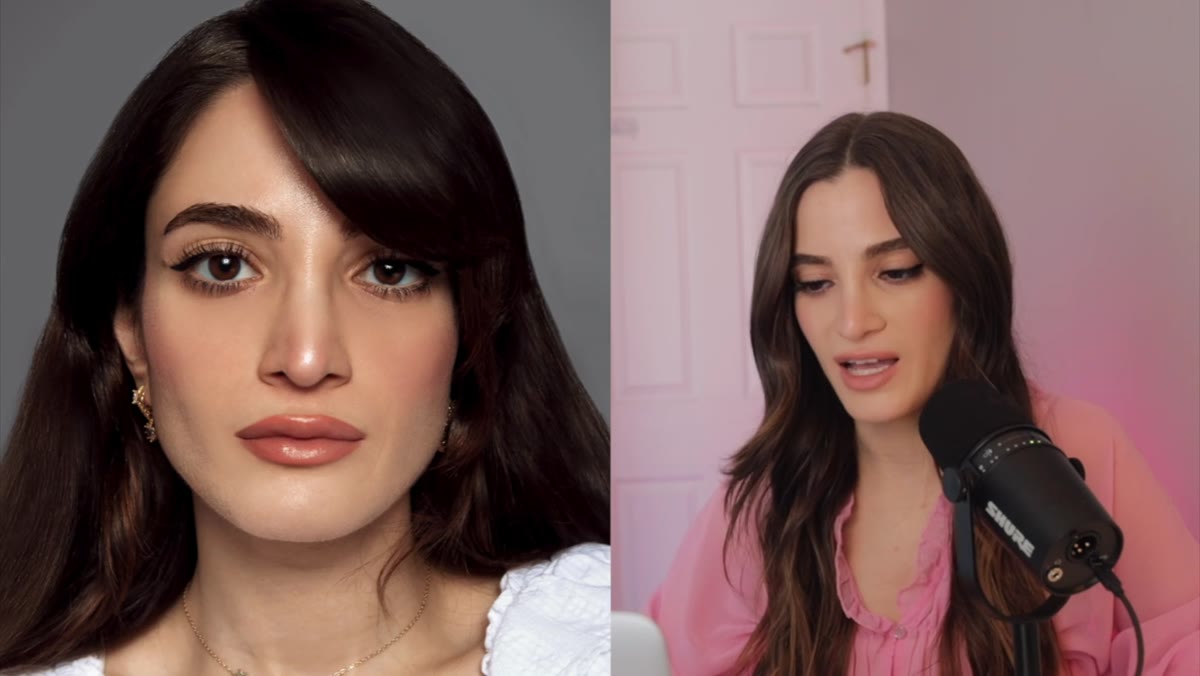 Eye brightening comparison showing enhanced iris detail and whites
The best retouchers in Jessica’s comparison added depth and brightness to her eyes without making them look like they’d been replaced with CGI orbs. The approach here is two separate adjustments on two separate layers. First, use a Curves adjustment layer clipped to a mask that isolates the whites of the eyes. Bring up the midtones very slightly, maybe a 5-7 point nudge, and use Luminosity blend mode so you’re affecting brightness without color shift.
Eye brightening comparison showing enhanced iris detail and whites
The best retouchers in Jessica’s comparison added depth and brightness to her eyes without making them look like they’d been replaced with CGI orbs. The approach here is two separate adjustments on two separate layers. First, use a Curves adjustment layer clipped to a mask that isolates the whites of the eyes. Bring up the midtones very slightly, maybe a 5-7 point nudge, and use Luminosity blend mode so you’re affecting brightness without color shift.
Second, address the iris separately. Create a soft Hue/Saturation adjustment clipped to the iris area and gently increase saturation by 10-15 points. Jessica noted that her brown eyes picked up some warmth and gold tones from this kind of treatment. The key word is gently. The goal is to make the eyes read clearly in a compressed JPEG on a website, not to turn them into a different color entirely.
Step 5: Skin Retouching - Heal, Don’t Smooth
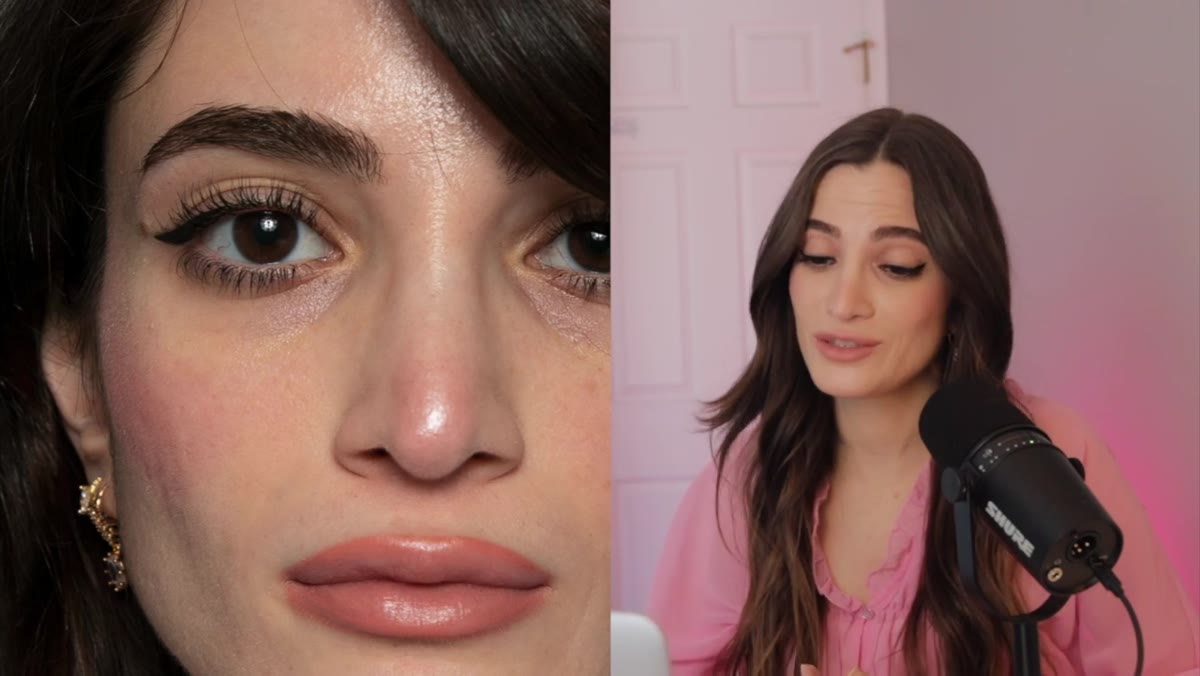 Skin before and after showing natural texture preserved post-retouch
Because Jessica’s skin was already in good condition, the top retouchers in this comparison did very little to it, and that restraint is itself the skill. What they did do was use the Healing Brush to address any temporary blemishes or uneven patches while leaving the natural pore texture completely intact.
Skin before and after showing natural texture preserved post-retouch
Because Jessica’s skin was already in good condition, the top retouchers in this comparison did very little to it, and that restraint is itself the skill. What they did do was use the Healing Brush to address any temporary blemishes or uneven patches while leaving the natural pore texture completely intact.
If you find yourself reaching for the Gaussian Blur or the Mixer Brush to smooth skin, stop and ask whether the skin actually needs smoothing or just targeted spot healing. Over-smoothing is the single fastest way to make a retouch look cheap, regardless of how expensive your software is. Texture is what makes skin look like skin.
Step 6: Hair Volume and Shape Enhancement
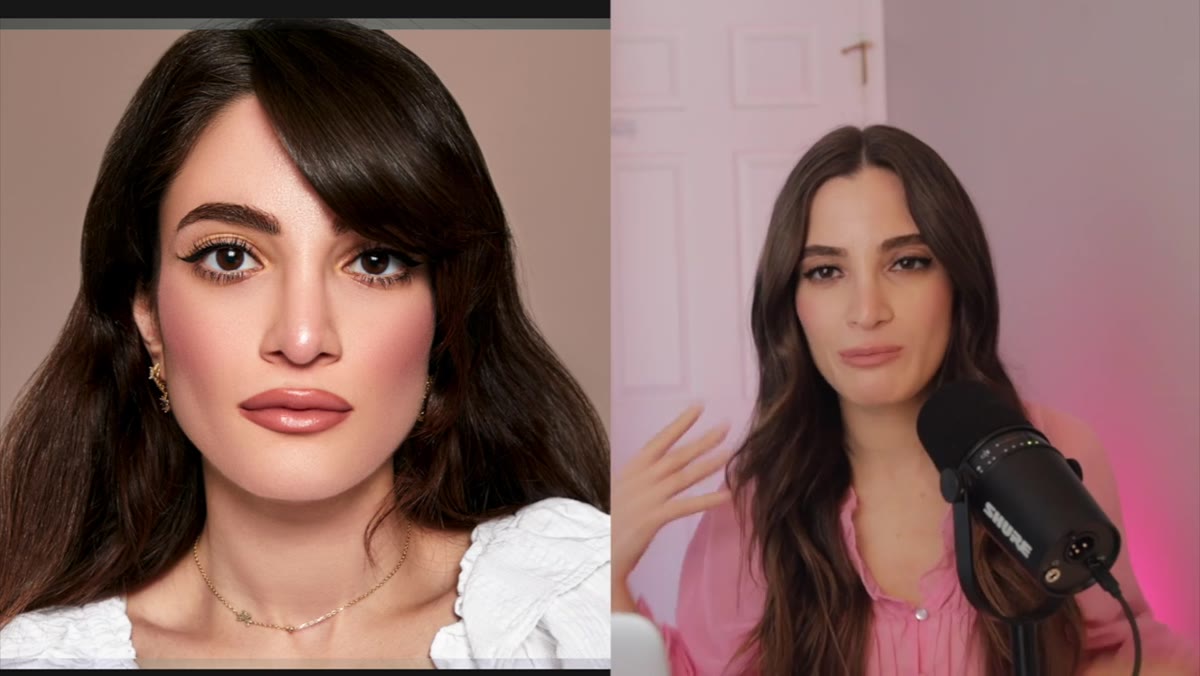 Flowing hair enhancement showing added volume and smoothed silhouette
The highest-priced retoucher added flowing volume to Jessica’s hair using what was almost certainly a combination of Liquify for shape and a painted-in hair extension technique using sampled hair strands. Jessica described the result as looking like “princess hair,” and it did transform the silhouette significantly.
Flowing hair enhancement showing added volume and smoothed silhouette
The highest-priced retoucher added flowing volume to Jessica’s hair using what was almost certainly a combination of Liquify for shape and a painted-in hair extension technique using sampled hair strands. Jessica described the result as looking like “princess hair,” and it did transform the silhouette significantly.
This is an advanced technique worth knowing even if you use it sparingly. On a separate merged layer, use the Liquify filter’s Forward Warp tool at a large brush size and low pressure to gently arc sections of the hair outward. Then, if the client wants genuine volume added, you can paint new hair strands using a custom hair brush, sampling colors from the existing hair with the eyedropper as you work.
What I Do Differently After Years of Client Work
The retouchers who impressed me most in this comparison worked the way I try to work now: they fixed what distracted, and left everything else alone. But one thing I’d add to any of these workflows is a final “reality check” step where I zoom out to roughly the size the image will actually be displayed, whether that’s a website header or a social media profile image, and evaluate it at that scale. Details that seem important at 100% zoom often disappear entirely at display size, and sometimes what looked like a necessary correction turns out to have been unnecessary work.
I learned this after spending two hours on a skin retouch for a client whose final image ended up as a 400-pixel-wide thumbnail. The grain I’d agonized over was completely invisible. Knowing your delivery context changes what you prioritize, and it will make you a faster, calmer retoucher.
The single most transferable idea from Jessica’s experiment is that the retouchers who delivered the most convincing results weren’t the ones who did the most work. They were the ones who were most precise about which work actually needed doing. Clean eyes, tidy hair, corrected makeup, and untouched skin will beat an over-processed face every single time.
Watch the full tutorial on YouTube to see all five retouches compared side by side. Seeing them in sequence is genuinely one of the clearest illustrations I’ve found of what “natural retouching” actually means in practice.
Comments (2)
Shared this with my photography group. Everyone loved it.
I keep coming back to this article. It's that useful.
Leave a Comment