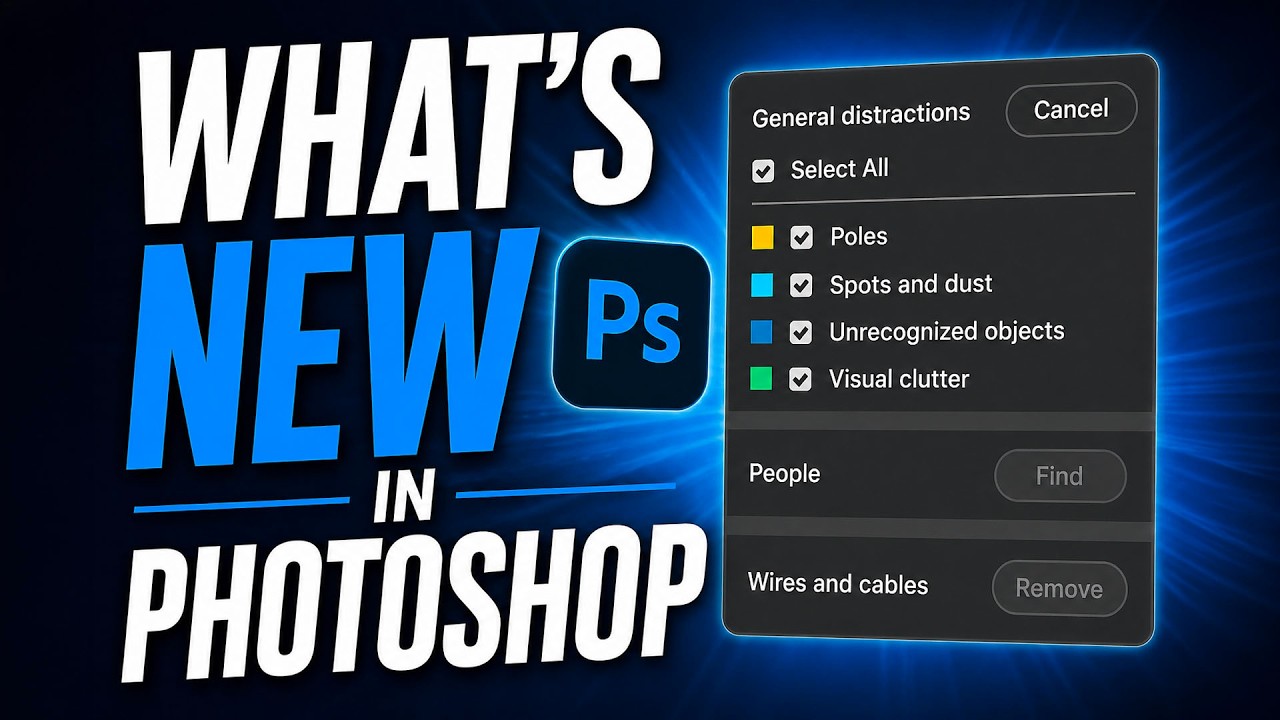
Every few months Adobe drops a Photoshop update, and most of the time I skim the release notes, nod politely, and go back to whatever action I was running (currently the entire Blade Runner franchise, in case you were wondering). But the April 2026 update genuinely caught my attention, partly because of a Matt Kloskowski tutorial I watched while finishing my third cup of green tea on a Tuesday morning. Watch the full tutorial on YouTube – it runs about four minutes and covers the highlights quickly and clearly.
Matt frames these updates from a photographer’s perspective, which maps closely enough onto beauty and portrait retouching work that I found myself pausing and going straight into Photoshop to test things. Two features stood out: a smarter distraction-finding system inside the Remove Tool, and reflection removal now living inside the main Photoshop interface rather than just Camera Raw. Neither of these replaces nuanced manual work for high-end beauty edits, but both solve real problems that eat up time on commercial jobs.
The distraction removal update in particular is one I wish had existed when I was starting out. I spent an embarrassing number of hours early in my retouching career painting over background clutter with a clone stamp, squinting at a laptop screen at midnight, convinced I was being thorough. These tools won’t replace your judgment, but they will stop you from missing things.
Step 1: Update Photoshop Before You Begin
 Adobe Creative Cloud app showing available updates list
Before any of this works, you need the April 2026 version of Photoshop installed. Open your Adobe Creative Cloud desktop app, navigate to the Updates section, and install whatever is available. Adobe’s support pages are the right place to go if anything stalls during the update. This sounds obvious, but I have definitely filmed an entire screen recording walkthrough before realizing I was on a version two releases behind. Do not be me.
Adobe Creative Cloud app showing available updates list
Before any of this works, you need the April 2026 version of Photoshop installed. Open your Adobe Creative Cloud desktop app, navigate to the Updates section, and install whatever is available. Adobe’s support pages are the right place to go if anything stalls during the update. This sounds obvious, but I have definitely filmed an entire screen recording walkthrough before realizing I was on a version two releases behind. Do not be me.
Step 2: Open Your Image and Select the Remove Tool
 Remove Tool selected in Photoshop toolbar with photo open
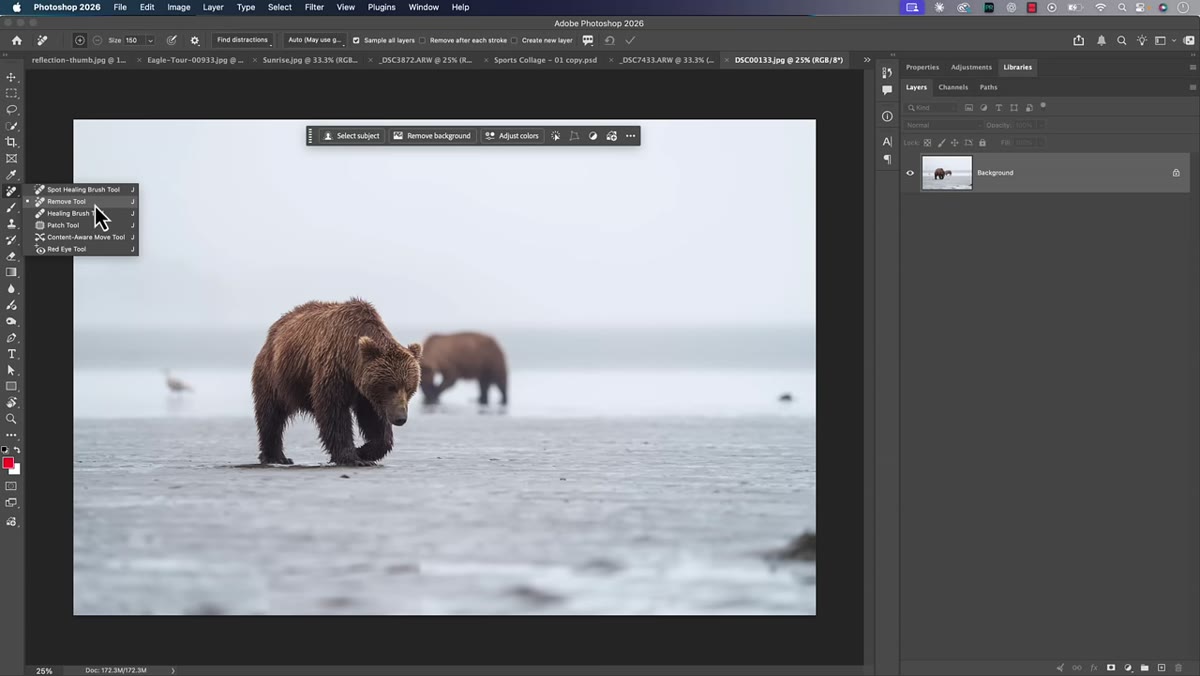
Open the photo you want to work on, then grab the Remove Tool from the toolbar. For retouching work, this might be an environmental portrait with a busy background, a lifestyle shot with cables or signage creeping into the frame, or any image where the background is competing with your subject. The Remove Tool is where this whole workflow lives, so everything we’re about to do happens from here.
Remove Tool selected in Photoshop toolbar with photo open
Open the photo you want to work on, then grab the Remove Tool from the toolbar. For retouching work, this might be an environmental portrait with a busy background, a lifestyle shot with cables or signage creeping into the frame, or any image where the background is competing with your subject. The Remove Tool is where this whole workflow lives, so everything we’re about to do happens from here.
Step 3: Use “Find Distractions” to Auto-Detect Problem Areas
 Find Distractions panel open showing detection categories
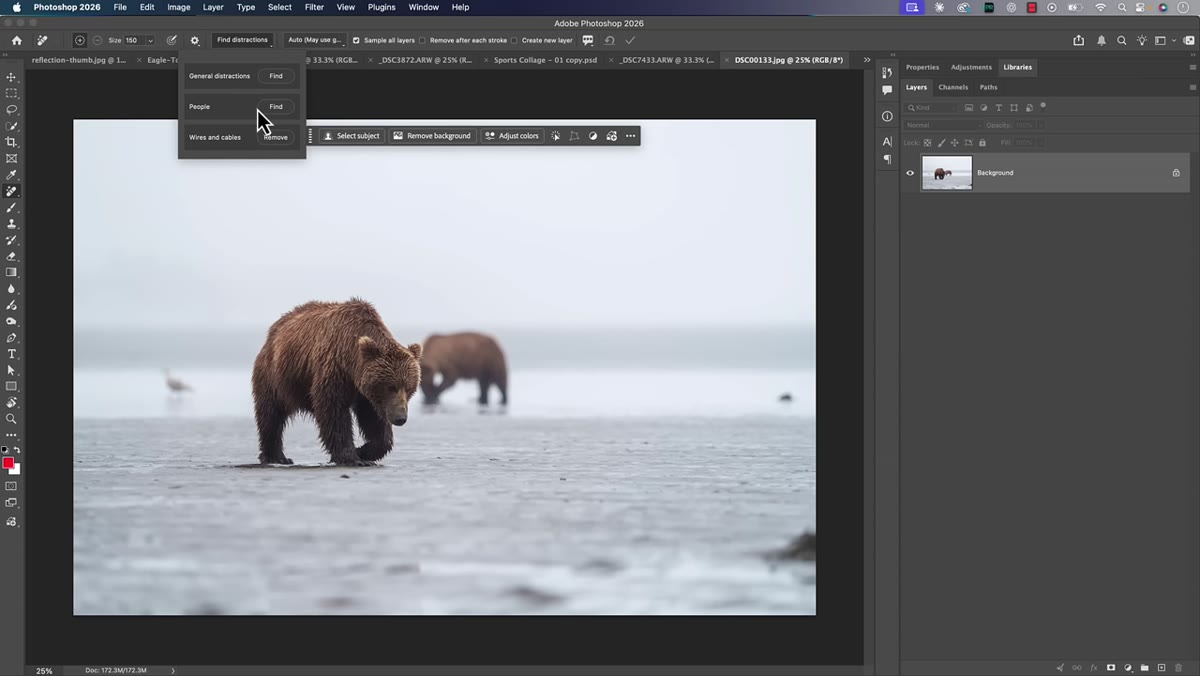
Inside the Remove Tool options, look for the “Find Distractions” section. This area previously gave you two auto-detect options: people and wires or cables. The April 2026 update adds a third category called General Distractions. Click Find, and Photoshop will analyze the entire image and flag anything it considers a visual distraction. On a busy environmental portrait, that might include background signage, urban structures, stray objects, or anything else pulling focus away from the subject.
Find Distractions panel open showing detection categories
Inside the Remove Tool options, look for the “Find Distractions” section. This area previously gave you two auto-detect options: people and wires or cables. The April 2026 update adds a third category called General Distractions. Click Find, and Photoshop will analyze the entire image and flag anything it considers a visual distraction. On a busy environmental portrait, that might include background signage, urban structures, stray objects, or anything else pulling focus away from the subject.
Once the analysis finishes, Photoshop color-codes the detected areas and lists them with checkboxes in the panel. This is where things get genuinely useful. You can turn categories on and off individually, so if Photoshop flagged something you actually want to keep – a brick wall texture that adds mood, for example – you uncheck it and move on. For beauty and portrait work, I tend to keep anything that touches skin unchecked and let the tool handle the environmental clutter only.
Step 4: Refine Your Selection with the Brush
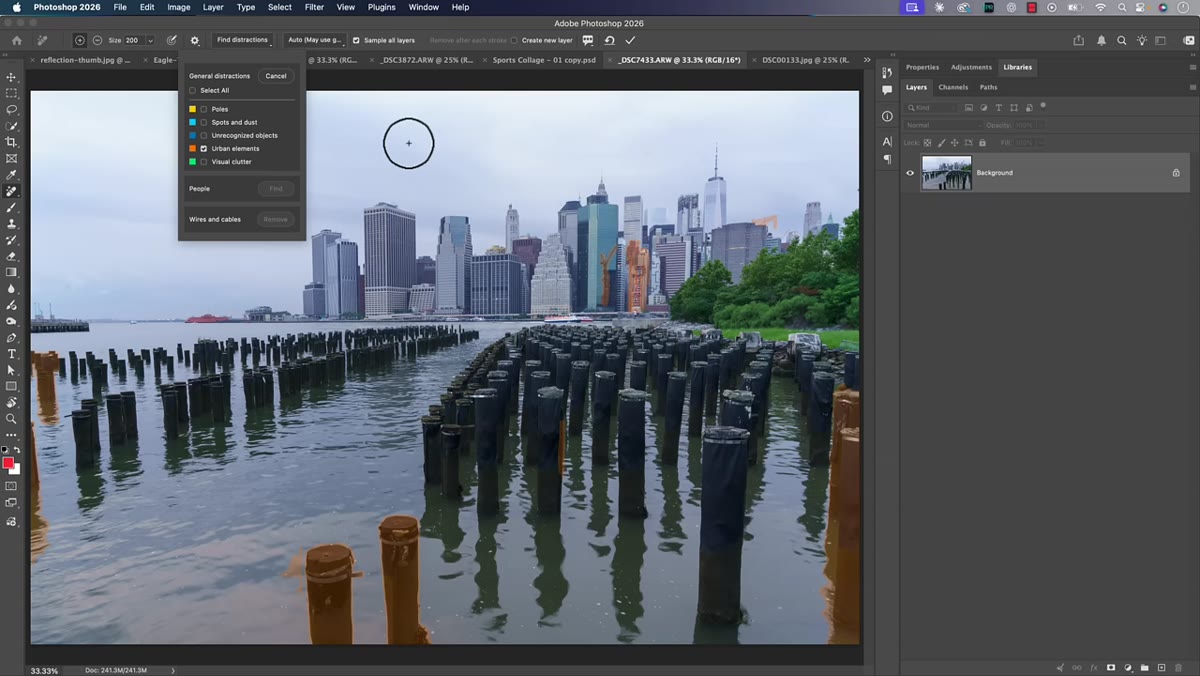 Remove Tool brush being used to subtract from selected area
Before you commit to the removal, use the Remove Tool brush to fine-tune what gets processed. The right bracket key makes the brush larger, the left bracket key makes it smaller. On a Mac, holding Option while painting switches you into subtract mode. On PC, that is the Alt key. Subtract mode lets you paint back over any areas that were flagged but that you want to protect. This step matters more than people think – letting AI tools remove something adjacent to a jawline or earlobe without refinement first is how you end up with a photo that needs significant cleanup afterward.
Remove Tool brush being used to subtract from selected area
Before you commit to the removal, use the Remove Tool brush to fine-tune what gets processed. The right bracket key makes the brush larger, the left bracket key makes it smaller. On a Mac, holding Option while painting switches you into subtract mode. On PC, that is the Alt key. Subtract mode lets you paint back over any areas that were flagged but that you want to protect. This step matters more than people think – letting AI tools remove something adjacent to a jawline or earlobe without refinement first is how you end up with a photo that needs significant cleanup afterward.
Step 5: Apply the Removal and Review
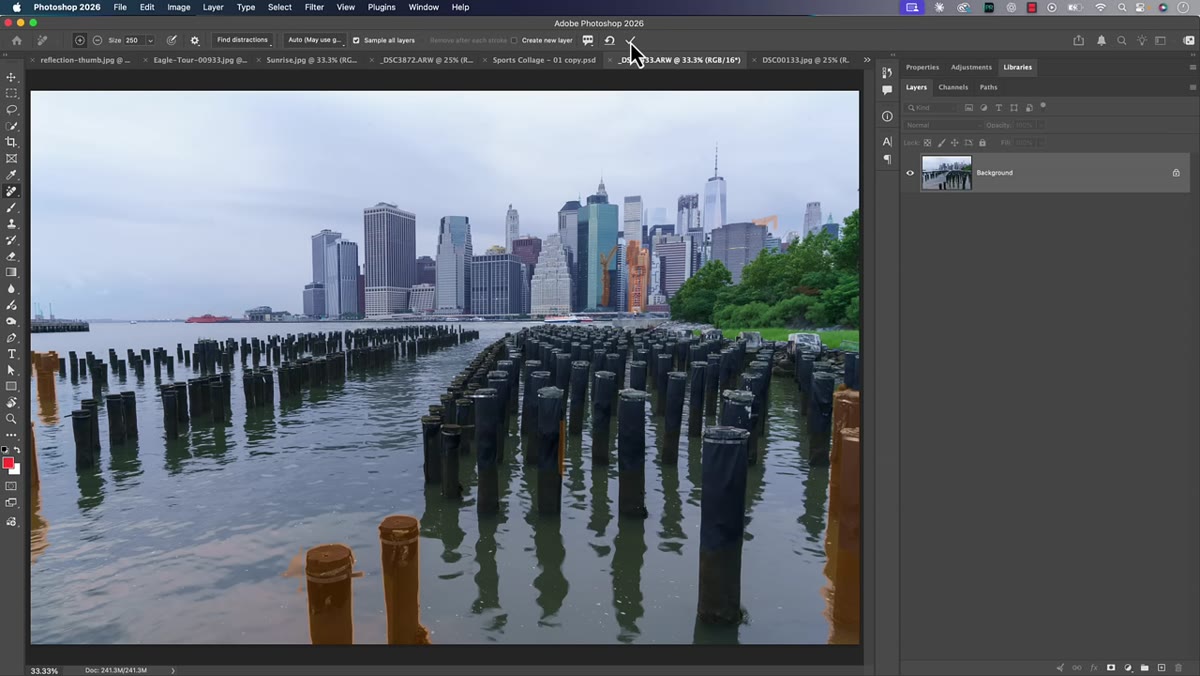 Checkmark button in top bar to apply distraction removal
When your selections look right, click the small checkmark at the top of the workspace. Photoshop processes the removal and fills the flagged areas. Zoom in at 100 percent and check edges carefully, especially anywhere the detected distraction was close to your subject’s hair or skin. The results with General Distractions are genuinely impressive on backgrounds with moderate complexity. Very busy scenes with overlapping elements still need manual follow-up, but the tool dramatically reduces the number of strokes you have to make yourself.
Checkmark button in top bar to apply distraction removal
When your selections look right, click the small checkmark at the top of the workspace. Photoshop processes the removal and fills the flagged areas. Zoom in at 100 percent and check edges carefully, especially anywhere the detected distraction was close to your subject’s hair or skin. The results with General Distractions are genuinely impressive on backgrounds with moderate complexity. Very busy scenes with overlapping elements still need manual follow-up, but the tool dramatically reduces the number of strokes you have to make yourself.
Step 6: Use Reflection Removal for Glass and Window Shots
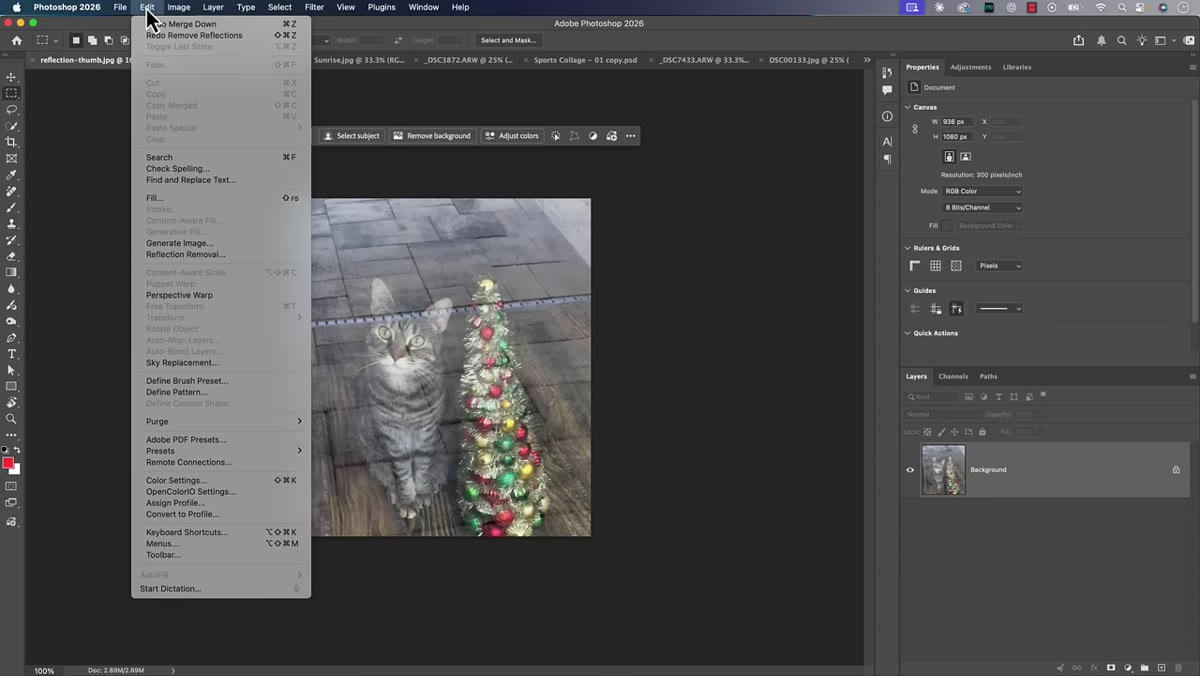 Edit menu open with Reflection Removal option highlighted
The second feature lives under the Edit menu. Go to Edit, then scroll down to Reflection Removal. This tool was available in Camera Raw previously, but it now works on any photo inside the main Photoshop interface, which matters because a lot of edited files are TIFFs or JPEGs by the time we are working on them.
Edit menu open with Reflection Removal option highlighted
The second feature lives under the Edit menu. Go to Edit, then scroll down to Reflection Removal. This tool was available in Camera Raw previously, but it now works on any photo inside the main Photoshop interface, which matters because a lot of edited files are TIFFs or JPEGs by the time we are working on them.
Inside the Reflection Removal dialog, you will see a Quality setting with three options: Preview, Standard, and Best. Start with Preview – it processes quickly and gives you a reliable read on whether the tool is going to help. If the preview result looks close to what you need, then run Best quality and let it take the time it needs. You also have the option to generate a separate reflection layer, which Photoshop places below your corrected layer in the Layers panel. That layer shows you exactly what the algorithm identified and removed, and it gives you a reference if you need to manually blend or mask anything the auto process did not handle cleanly.
How I’m Actually Using This in Beauty Work
Reflection removal is the one I am most excited about for product-adjacent beauty work. Shooting beauty campaigns sometimes means you end up with catches on skin that look like glass reflections rather than natural highlights, and there are times a client will send a packaged shot where window glare is sitting right over the hero product next to the model. Having a dedicated removal tool rather than a custom frequency separation workaround saves meaningful time.
For the General Distractions tool, I have started using it as a first-pass audit on environmental portraits before I begin skin work. I run the detection, review everything it flags, and use that as a checklist alongside my own eye. It has caught background elements I genuinely missed on first look, which is a little humbling but mostly useful.
The single most important thing I took from this tutorial: these tools are refining your workflow, not replacing your eye. Photoshop is getting better at identifying what does not belong in a frame, but knowing what to remove and what to protect still requires a retoucher who understands the image. Use the automation to move faster. Use your judgment to move well.
Watch the full tutorial on YouTube to see Matt demonstrate both features with his own images – seeing the layer panel updates in real time makes the reflection removal workflow especially clear.
Comments (6)
Just subscribed. If the rest of your content is this good, I'm in.
Never thought of approaching it this way. Really creative.
Excellent tutorial. I'd add that from a photography standpoint, this technique is incredibly versatile.
The tip about what adobe actually changed in was the missing piece for me. Thank you.
Would love to see a follow-up going deeper into this topic.
This is going in my reference folder. Incredibly useful.
Leave a Comment