There’s a specific kind of frustration that comes from knowing a tool exists, using it every single day, and still feeling like you’re fighting it. For the longest time, that was me with Lightroom’s masking panel. I came to beauty retouching after years of wedding photography, and I built my masking habits fast and messy, learning just enough to get through a deadline. It wasn’t until I started slowing down and actually studying how other working photographers use these tools that things clicked into place.
This tutorial by Matt Kloskowski is one I keep coming back to. Watch the full tutorial on YouTube before or after reading through these steps. Matt covers five masking tips inside Lightroom Classic and Adobe Camera Raw that are genuinely underused, the kind of things that don’t show up in beginner guides but make a real difference once you know them. I’ve folded several of these into my own retouching workflow and I want to walk you through what I learned, step by step.
One thing worth noting up front: everything Matt covers in Lightroom Classic also applies inside the Camera Raw filter in Photoshop. If your portrait retouching workflow lives in Photoshop (mine does, mostly), just go to Filter > Camera Raw Filter and you’ll find the same masking panel with the same behavior. The two environments are nearly identical for our purposes here.
Step 1: Understand Where the Masking Panel Lives (And That It Works Everywhere)
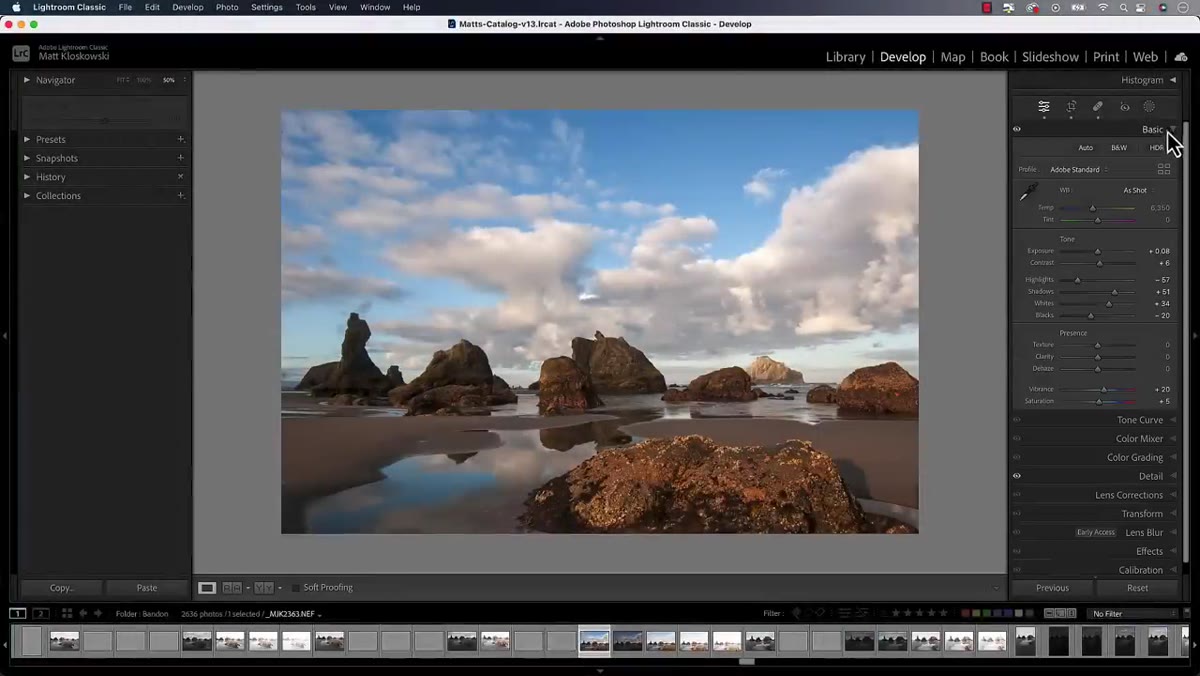 Masking tool highlighted in Lightroom Classic toolbar
Open any raw file in Lightroom Classic and look at your toolbar on the right side. The masking tool is your entry point for all of these tips. If you’re a Photoshop-first person, navigate to Filter > Camera Raw Filter, then locate the masking icon in the panel. Matt makes a point of establishing this early because a lot of photographers don’t realize the masking tools in both applications are functionally the same. Any tip that works in Lightroom Classic will work in Camera Raw, and also in the cloud version of Lightroom. You’re not learning three different systems. You’re learning one.
Masking tool highlighted in Lightroom Classic toolbar
Open any raw file in Lightroom Classic and look at your toolbar on the right side. The masking tool is your entry point for all of these tips. If you’re a Photoshop-first person, navigate to Filter > Camera Raw Filter, then locate the masking icon in the panel. Matt makes a point of establishing this early because a lot of photographers don’t realize the masking tools in both applications are functionally the same. Any tip that works in Lightroom Classic will work in Camera Raw, and also in the cloud version of Lightroom. You’re not learning three different systems. You’re learning one.
Step 2: Turn On Solo Mode Inside the Masking Panel
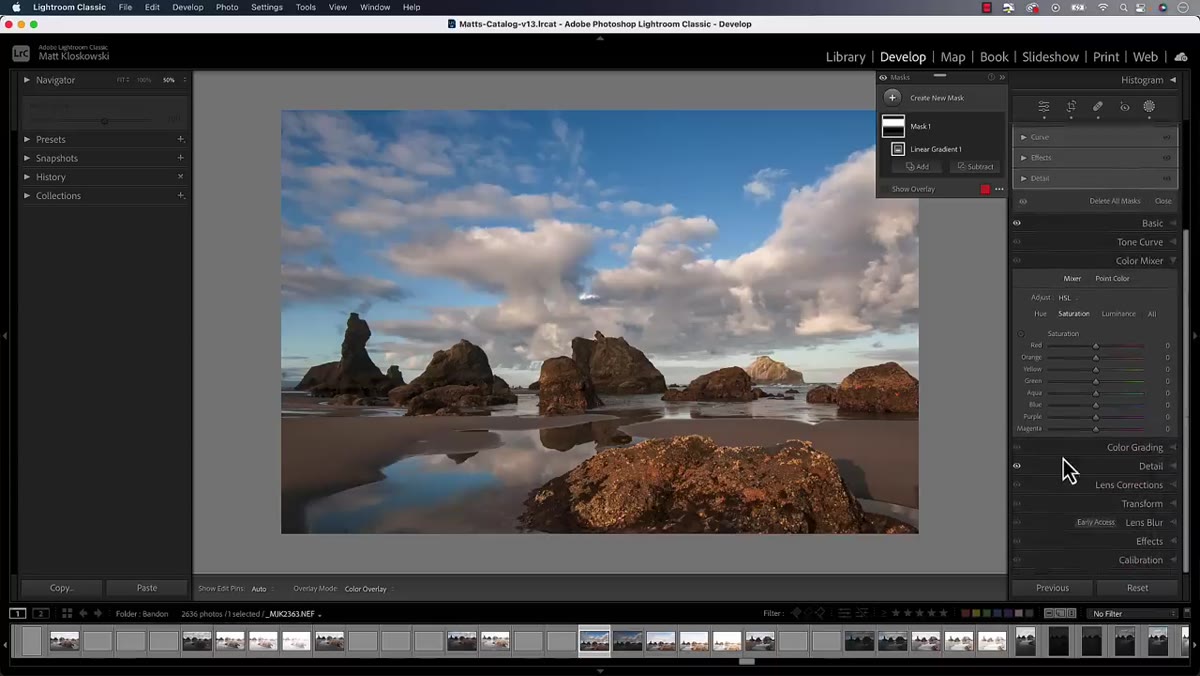 Right-click context menu showing Solo Mode option in masking panel
Here’s the one that quietly changed how I work. When you apply a mask in Lightroom Classic, the adjustment panel below it now breaks your settings into separate sections: Tone, Color, Point Color, Curve, Effects, Detail. It mirrors the main editing interface, which sounds helpful until you have three of those sections open at once and you’re scrolling endlessly just to find your Exposure slider.
Right-click context menu showing Solo Mode option in masking panel
Here’s the one that quietly changed how I work. When you apply a mask in Lightroom Classic, the adjustment panel below it now breaks your settings into separate sections: Tone, Color, Point Color, Curve, Effects, Detail. It mirrors the main editing interface, which sounds helpful until you have three of those sections open at once and you’re scrolling endlessly just to find your Exposure slider.
The fix is Solo Mode, but here’s the thing Matt flags: even if you’ve already enabled Solo Mode in your main editing panels, it does not automatically carry over to your masking panels. They’re separate. To turn it on, right-click anywhere in the masking adjustment panel and select Solo Mode from the context menu. Once it’s on, clicking any section header will automatically collapse the previously open section. One panel open at a time. It sounds small but it removes a constant low-level friction from the editing process.
Step 3: Make a Select Sky Mask and Refine It With Intention
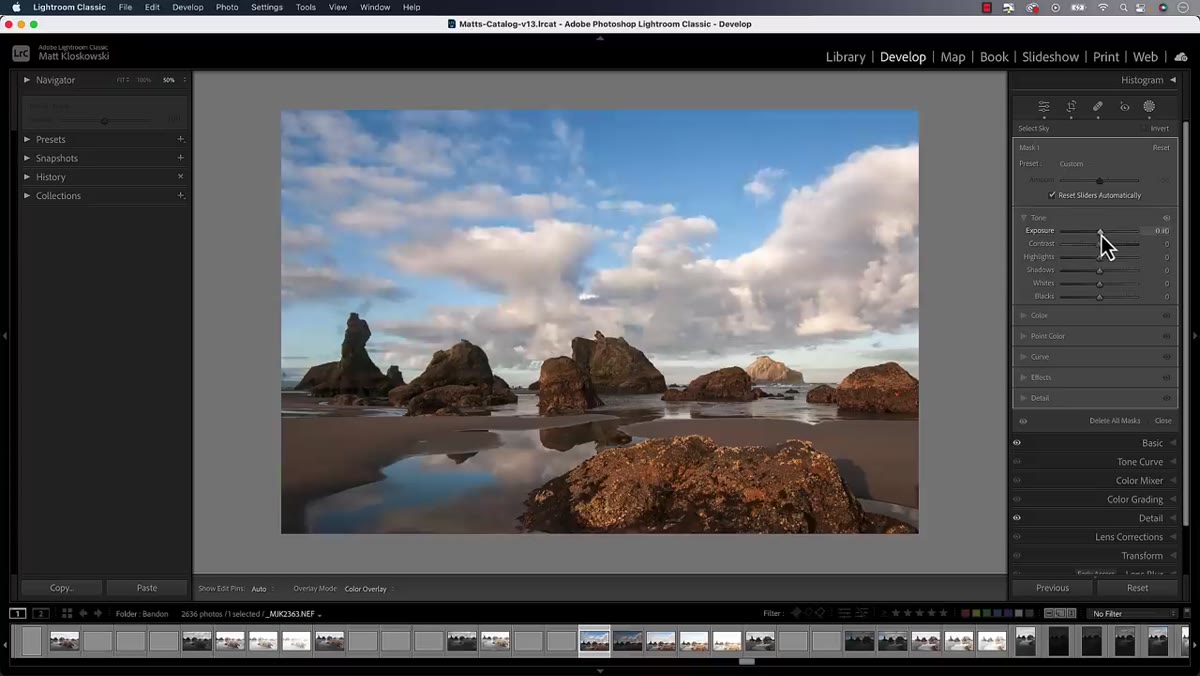 Select Sky mask applied with tone and color adjustments visible
Matt walks through a sky edit to set up the next few tips, and it’s worth following along because the setup matters. Go to your masking panel, click Create New Mask, and choose Select Sky. Lightroom will generate the mask automatically. From there, work through the Tone section: pull highlights back to recover any blown areas, bring exposure up slightly, lift the whites a touch, add a little contrast. Then move to Color and add some saturation to deepen the sky. In Effects, try a small amount of Clarity to bring out cloud texture, but keep it gentle. On portraits, I’d apply this same logic to a background or backdrop selection rather than a sky, but the workflow is identical.
Select Sky mask applied with tone and color adjustments visible
Matt walks through a sky edit to set up the next few tips, and it’s worth following along because the setup matters. Go to your masking panel, click Create New Mask, and choose Select Sky. Lightroom will generate the mask automatically. From there, work through the Tone section: pull highlights back to recover any blown areas, bring exposure up slightly, lift the whites a touch, add a little contrast. Then move to Color and add some saturation to deepen the sky. In Effects, try a small amount of Clarity to bring out cloud texture, but keep it gentle. On portraits, I’d apply this same logic to a background or backdrop selection rather than a sky, but the workflow is identical.
The point of this step isn’t the specific settings. It’s practicing the habit of using multiple sub-panels within a single mask adjustment, because that’s the context where Solo Mode (Step 2) earns its value.
Step 4: Reset Individual Sliders Without Scrapping the Whole Mask
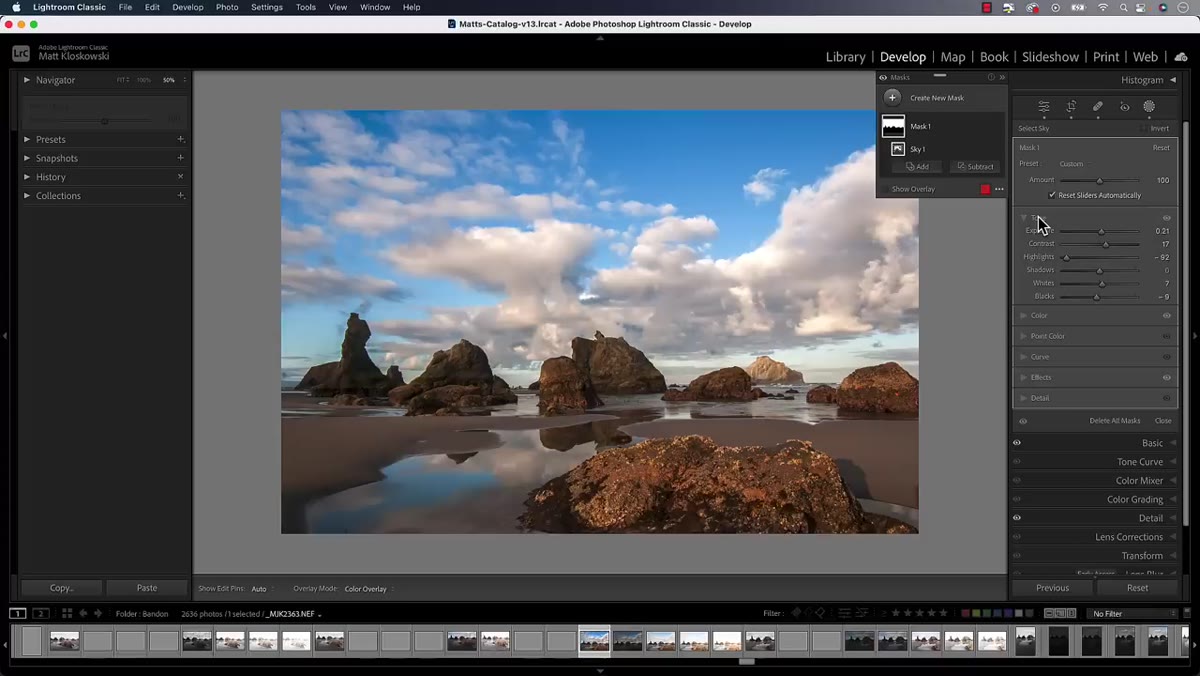 Scrolling through masking adjustments on sky with multiple panels open
This is where editing gets real. You come back to a photo days or weeks later and the sky you adjusted looks overdone. Your taste changed, the client brief changed, or you just pushed it too far in the first place. The instinct is to delete the mask and start over, but you don’t have to.
Scrolling through masking adjustments on sky with multiple panels open
This is where editing gets real. You come back to a photo days or weeks later and the sky you adjusted looks overdone. Your taste changed, the client brief changed, or you just pushed it too far in the first place. The instinct is to delete the mask and start over, but you don’t have to.
Inside any mask adjustment, you can double-click any individual slider to reset it to zero without touching the others. So if your Clarity is too heavy but your Exposure and Saturation are exactly right, double-click the Clarity slider only. That precision matters when you’ve built up a careful multi-slider adjustment and you only need to walk back one piece of it. It’s a faster path than scrubbing a slider by hand trying to eyeball neutral.
Step 5: Use the Mask Amount Slider to Dial Back the Whole Effect
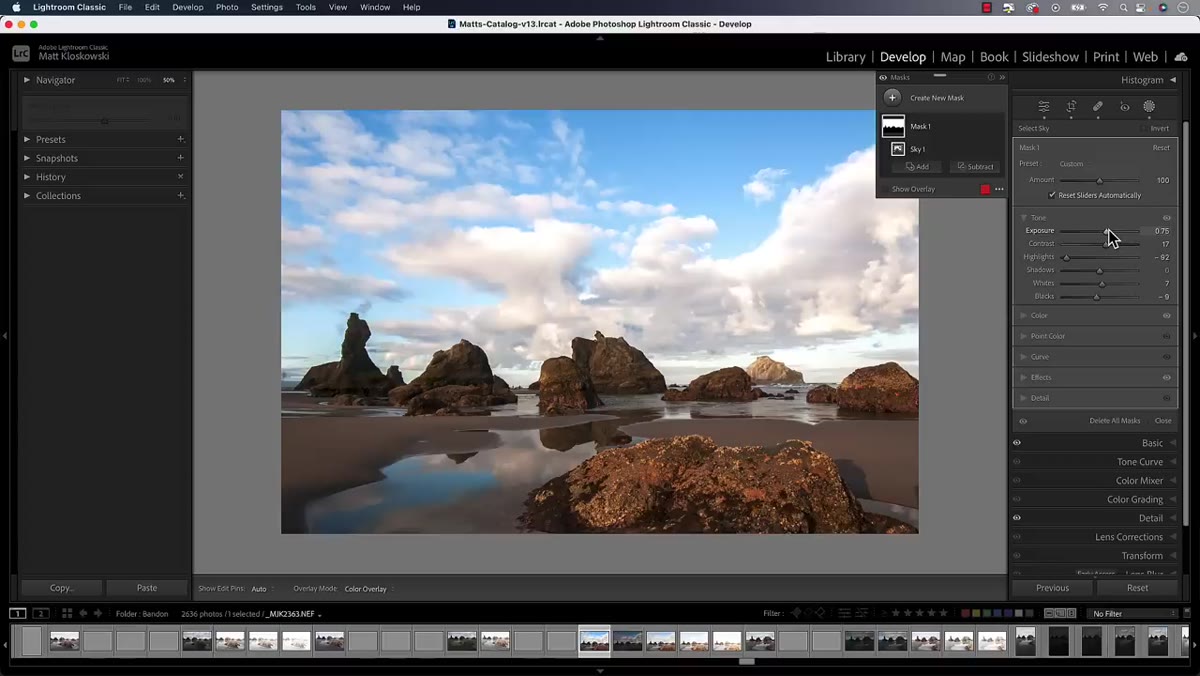 Mask amount slider being pulled back to reduce overall adjustment intensity
Matt surfaces this one specifically for the “I went too far” scenario, and I wish someone had shown it to me earlier. At the top of any mask adjustment panel, there’s an Amount slider. It defaults to 100, meaning the full strength of every adjustment you’ve made is being applied. Pull it back to 50 and every single slider in that mask scales proportionally. Your Exposure drops by half, your Saturation drops by half, your Clarity drops by half. The relationships between your adjustments stay intact.
Mask amount slider being pulled back to reduce overall adjustment intensity
Matt surfaces this one specifically for the “I went too far” scenario, and I wish someone had shown it to me earlier. At the top of any mask adjustment panel, there’s an Amount slider. It defaults to 100, meaning the full strength of every adjustment you’ve made is being applied. Pull it back to 50 and every single slider in that mask scales proportionally. Your Exposure drops by half, your Saturation drops by half, your Clarity drops by half. The relationships between your adjustments stay intact.
This is especially useful for portrait work. Say you’ve done careful skin adjustments with a people mask and the overall effect reads as slightly too heavy. Instead of tweaking five individual sliders, you pull Amount back until it feels natural. One move, proportional result.
A Note From My Own Workflow
Solo Mode was the tip I implemented immediately and the one I now mention in every workshop I teach. But the Amount slider is the one that quietly earns its keep every week. When I’m retouching for beauty clients, I often build a mask adjustment that’s slightly more aggressive than needed, then use Amount to settle it into the right range. It’s the equivalent of mixing something strong and then diluting to taste, and it gives me more control than trying to nail every slider on the first pass.
If you’re doing frequency separation or complex layer work in Photoshop, these Camera Raw masking tools still have a place in your process. I’ll often do a Camera Raw pass on a Smart Object before I ever get into my main retouching layers. These masking tips apply there too.
The single biggest shift these tips create is this: they turn the masking panel from a place you visit once and try to get right, into a flexible workspace you can return to and refine over time. Solo Mode reduces clutter, the Amount slider lets you back off without losing your work, and double-clicking resets give you surgical precision when you only need to change one thing.
Watch the full tutorial on YouTube to see Matt demonstrate all five tips with his own footage. His delivery is clear and efficient, and watching the panel behavior in motion will reinforce what’s described here.
Comments (2)
I keep coming back to this article. It's that useful.
Just subscribed. If the rest of your content is this good, I'm in.
Leave a Comment