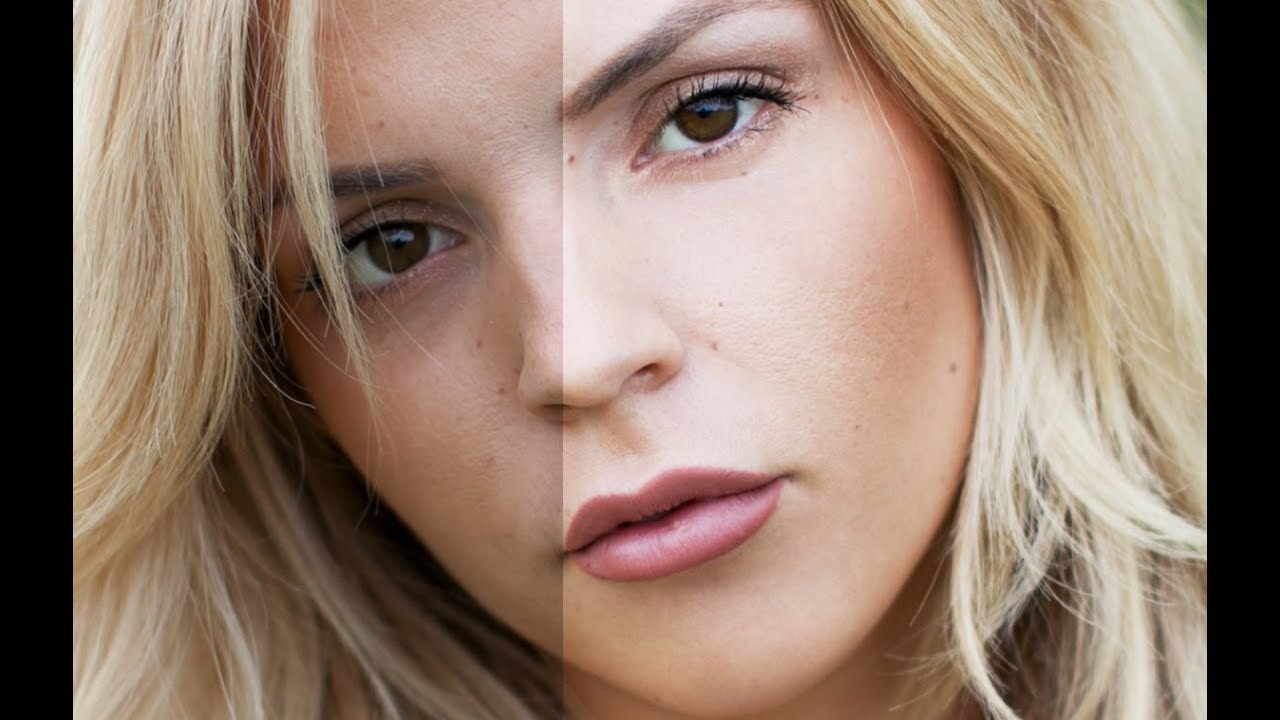
There is a specific kind of client feedback that stays with you. Mine came early in my retouching career, when a beauty brand coordinator replied to a delivered gallery with three words: “looks too plastic.” I had smoothed everything. Pores, texture, the slight variation in tone across the cheekbones. The skin looked like a render, not a person. I had been treating the entire face as one problem to solve instead of two separate problems: color and texture. That distinction is the whole foundation of frequency separation, and once I understood it properly, my retouching changed completely.
Watch the full tutorial on YouTube
In this Jessica Kobeissi tutorial on professional skin retouching, she walks through the Gaussian blur approach to frequency separation with the kind of practical clarity that took me considerably longer to find on my own. The method splits a portrait into two independent layers: one holding only the skin’s tonal information (color, shadow, highlight blending) and one holding only the physical texture (pores, fine lines, surface detail). You retouch each layer separately, which means you can even out blotchy skin tones without ever touching the texture, and the result looks like skin rather than porcelain. Here is the full walkthrough so you can follow along in Photoshop without pausing the video every thirty seconds.
Step 1: Duplicate the Background Layer Twice
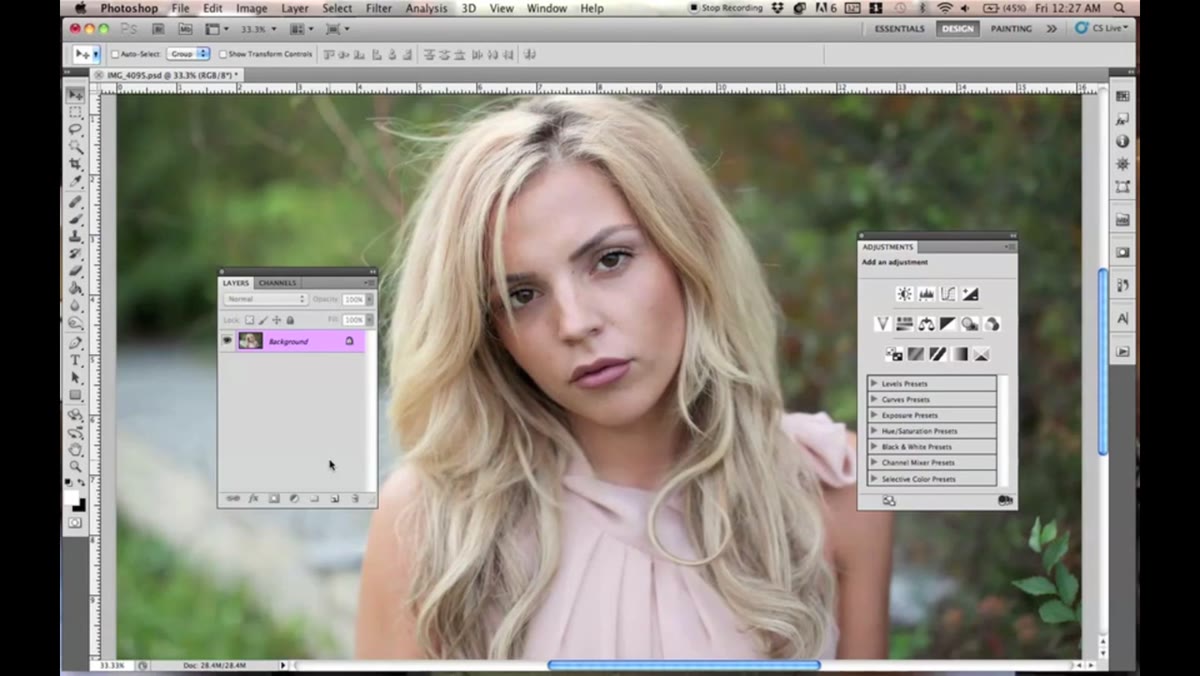 Two duplicate layers created above the background layer
Start with your base image open in Photoshop. Select the background layer and press Command+J (or Ctrl+J on Windows) twice to create two identical copies sitting above the original. You want the original background untouched as a permanent reference. Select both duplicate layers, then press Command+G to group them together. Keeping these two working layers inside their own group is a small organizational habit that pays off later, especially when a project has multiple rounds of revision.
Two duplicate layers created above the background layer
Start with your base image open in Photoshop. Select the background layer and press Command+J (or Ctrl+J on Windows) twice to create two identical copies sitting above the original. You want the original background untouched as a permanent reference. Select both duplicate layers, then press Command+G to group them together. Keeping these two working layers inside their own group is a small organizational habit that pays off later, especially when a project has multiple rounds of revision.
Step 2: Name and Arrange Your Layers
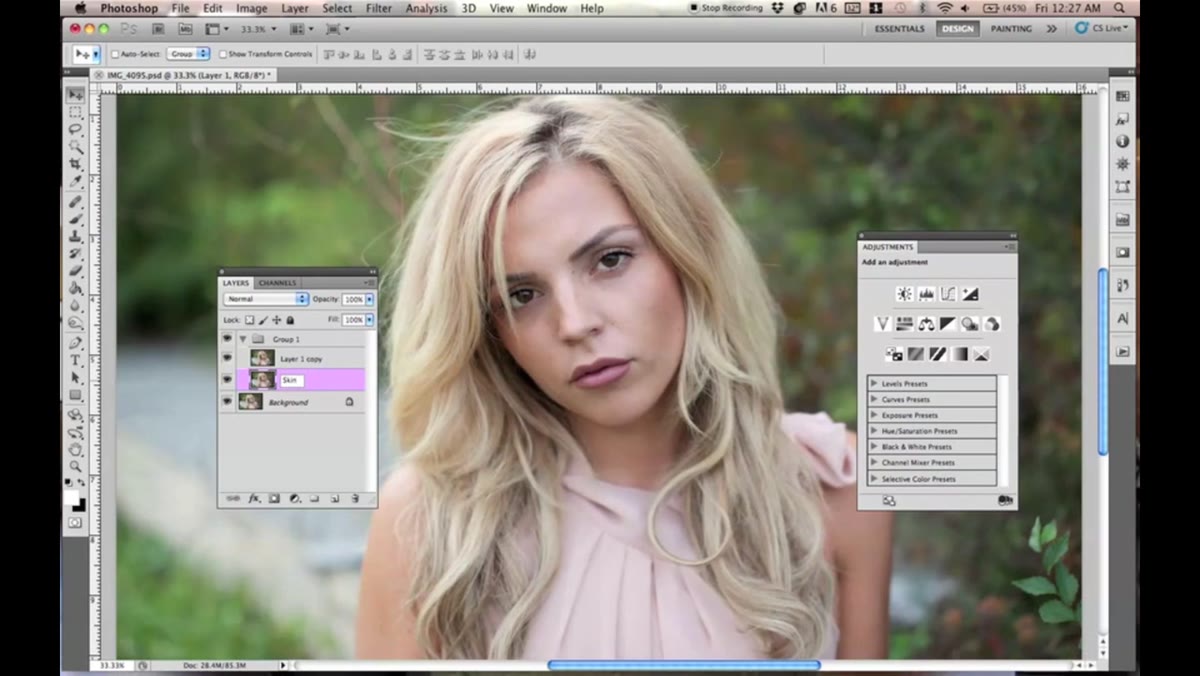 Two layers renamed “skin” and “texture” inside a group
With your two duplicates inside the group, name the bottom one “skin” and the top one “texture.” These names directly describe what each layer will carry after the separation is complete. The skin layer will hold soft, blurred tonal information. The texture layer will carry all the fine surface detail. Before doing anything else, hide the texture layer by clicking its visibility eye so you are working only on the skin layer in the next step.
Two layers renamed “skin” and “texture” inside a group
With your two duplicates inside the group, name the bottom one “skin” and the top one “texture.” These names directly describe what each layer will carry after the separation is complete. The skin layer will hold soft, blurred tonal information. The texture layer will carry all the fine surface detail. Before doing anything else, hide the texture layer by clicking its visibility eye so you are working only on the skin layer in the next step.
Step 3: Apply Gaussian Blur to the Skin Layer
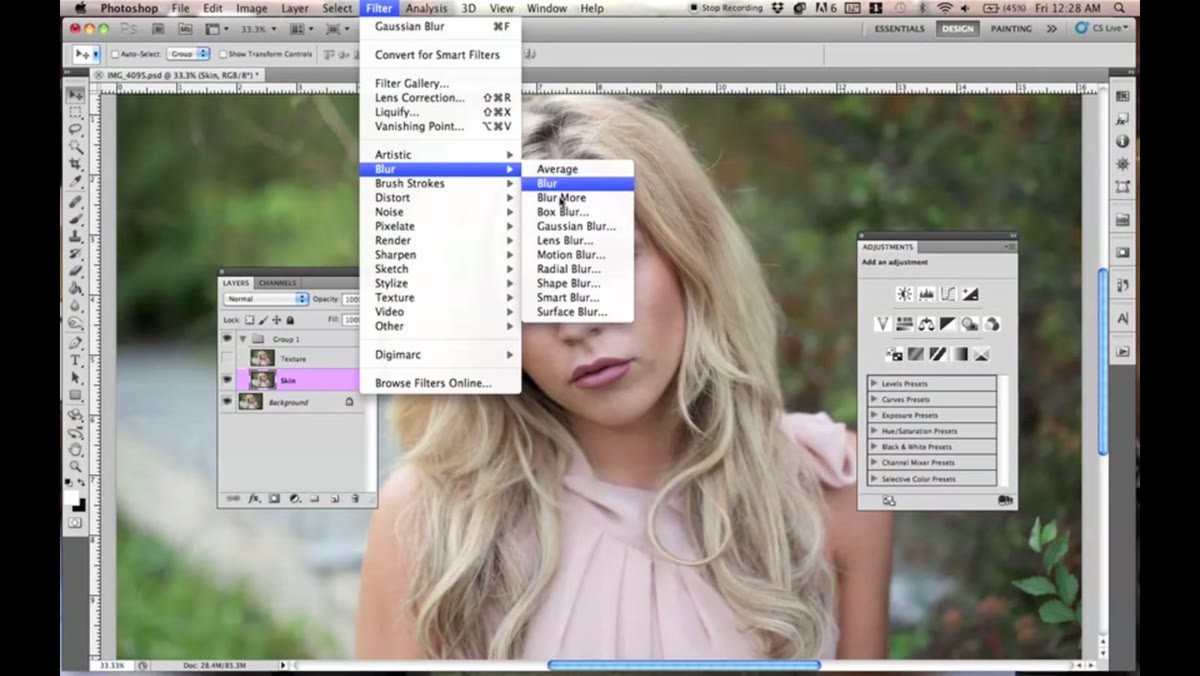 Gaussian Blur dialog open with radius around 9 pixels
With the skin layer selected and the texture layer hidden, go to Filter, then Blur, then Gaussian Blur. The radius value you choose depends on two things: the resolution of your file and the size of the skin features you want to smooth. You are looking for a setting where the distinct color patches and tonal variations on the skin start to blend into each other, but you have not gone so far that the image looks like a watercolor. Kobeissi uses a value of around 9 pixels as a working example. For a high-resolution beauty shot, you might push this closer to 12 or 14. For a smaller file, 4 or 5 may be enough. The visual cue to trust is the merging of tones, not a specific number.
Gaussian Blur dialog open with radius around 9 pixels
With the skin layer selected and the texture layer hidden, go to Filter, then Blur, then Gaussian Blur. The radius value you choose depends on two things: the resolution of your file and the size of the skin features you want to smooth. You are looking for a setting where the distinct color patches and tonal variations on the skin start to blend into each other, but you have not gone so far that the image looks like a watercolor. Kobeissi uses a value of around 9 pixels as a working example. For a high-resolution beauty shot, you might push this closer to 12 or 14. For a smaller file, 4 or 5 may be enough. The visual cue to trust is the merging of tones, not a specific number.
Step 4: Apply Image on the Texture Layer
 Apply Image dialog with skin layer selected and Invert checked
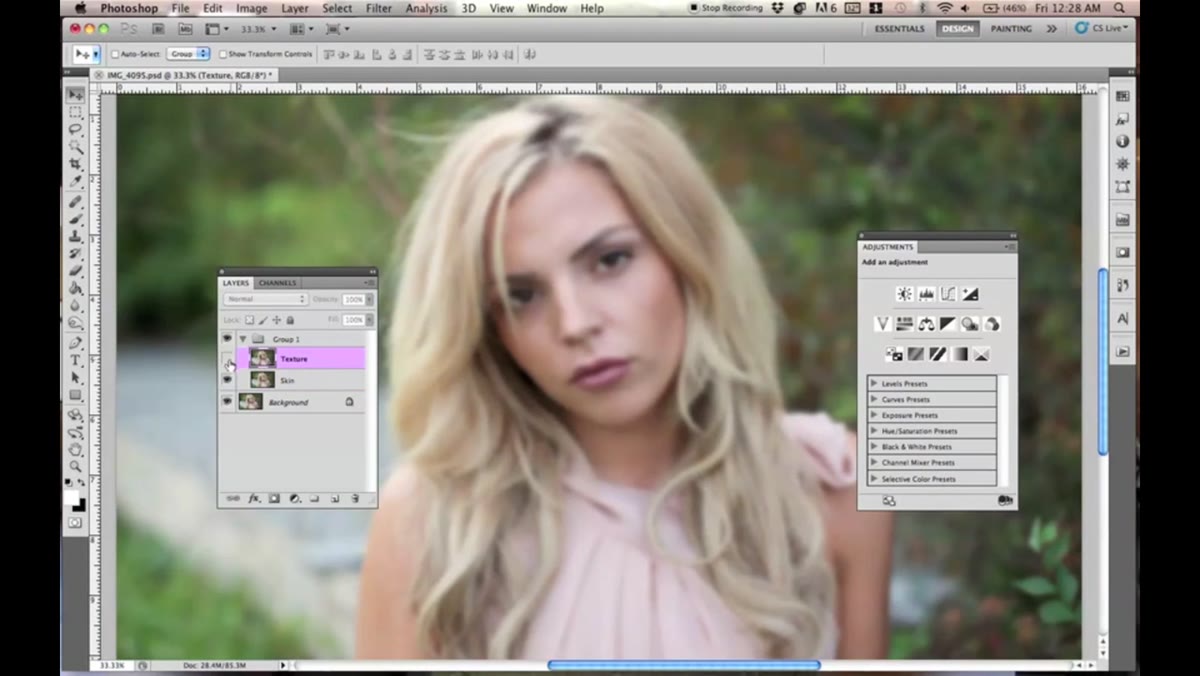
Turn the texture layer back on and select it. Now go to Image and choose Apply Image. This dialog is where the frequency separation actually happens. In the Layer dropdown, choose your skin layer. Check the Invert box. Set the Blending mode to Add, Opacity to 100 percent, and Scale to 2. What this does is mathematically subtract the blurred skin layer from the original, leaving behind only the high-frequency detail: the texture, the pores, the fine lines. The canvas will turn a flat, neutral gray when you click OK, which is exactly what you want. Do not panic. It is supposed to look like that.
Apply Image dialog with skin layer selected and Invert checked
Turn the texture layer back on and select it. Now go to Image and choose Apply Image. This dialog is where the frequency separation actually happens. In the Layer dropdown, choose your skin layer. Check the Invert box. Set the Blending mode to Add, Opacity to 100 percent, and Scale to 2. What this does is mathematically subtract the blurred skin layer from the original, leaving behind only the high-frequency detail: the texture, the pores, the fine lines. The canvas will turn a flat, neutral gray when you click OK, which is exactly what you want. Do not panic. It is supposed to look like that.
Step 5: Change Texture Layer Blend Mode to Linear Light
 Layer blend mode dropdown being changed from Normal to Linear Light
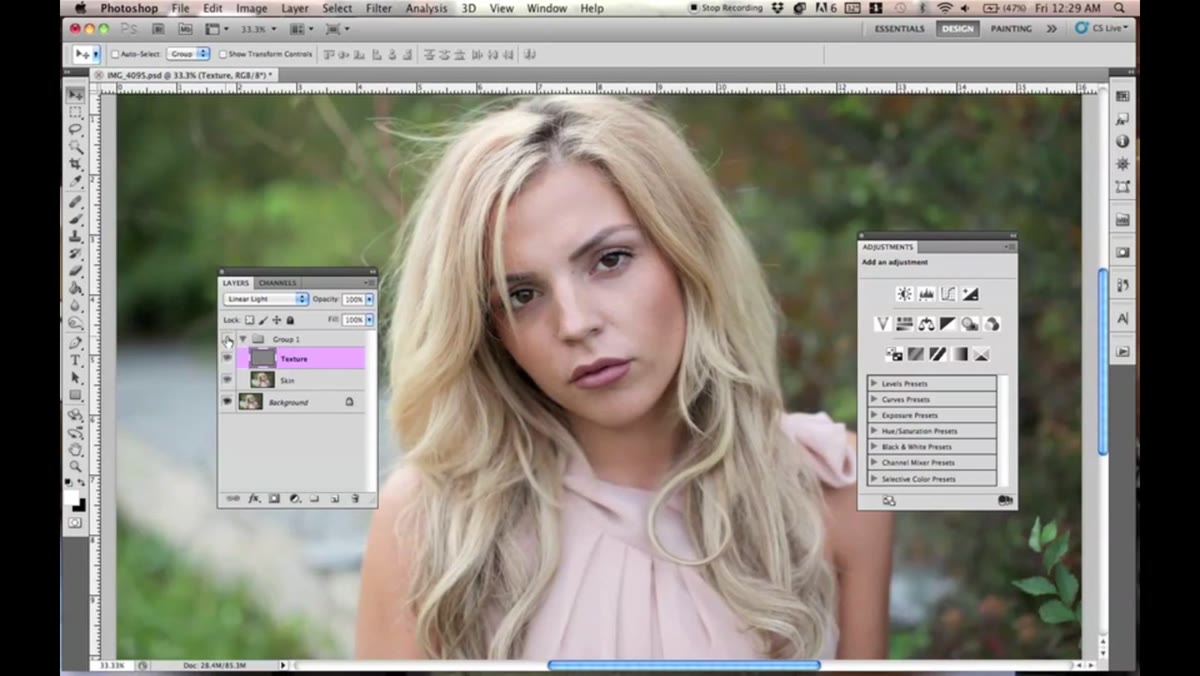
With the texture layer still selected, find the blend mode dropdown at the top of the Layers panel (it defaults to Normal) and change it to Linear Light. The image should now look identical to your original photo. If it does, you have set up the separation correctly. The real proof is in what happens when you toggle the texture layer off: you will see the blurred, smoothed skin layer underneath with all the tonal information and none of the surface detail. Toggle it back on and the texture reappears as though it was never removed.
Layer blend mode dropdown being changed from Normal to Linear Light
With the texture layer still selected, find the blend mode dropdown at the top of the Layers panel (it defaults to Normal) and change it to Linear Light. The image should now look identical to your original photo. If it does, you have set up the separation correctly. The real proof is in what happens when you toggle the texture layer off: you will see the blurred, smoothed skin layer underneath with all the tonal information and none of the surface detail. Toggle it back on and the texture reappears as though it was never removed.
Step 6: Retouch the Skin Layer with the Healing Brush
 Healing brush active on the skin layer, sampling nearby tone
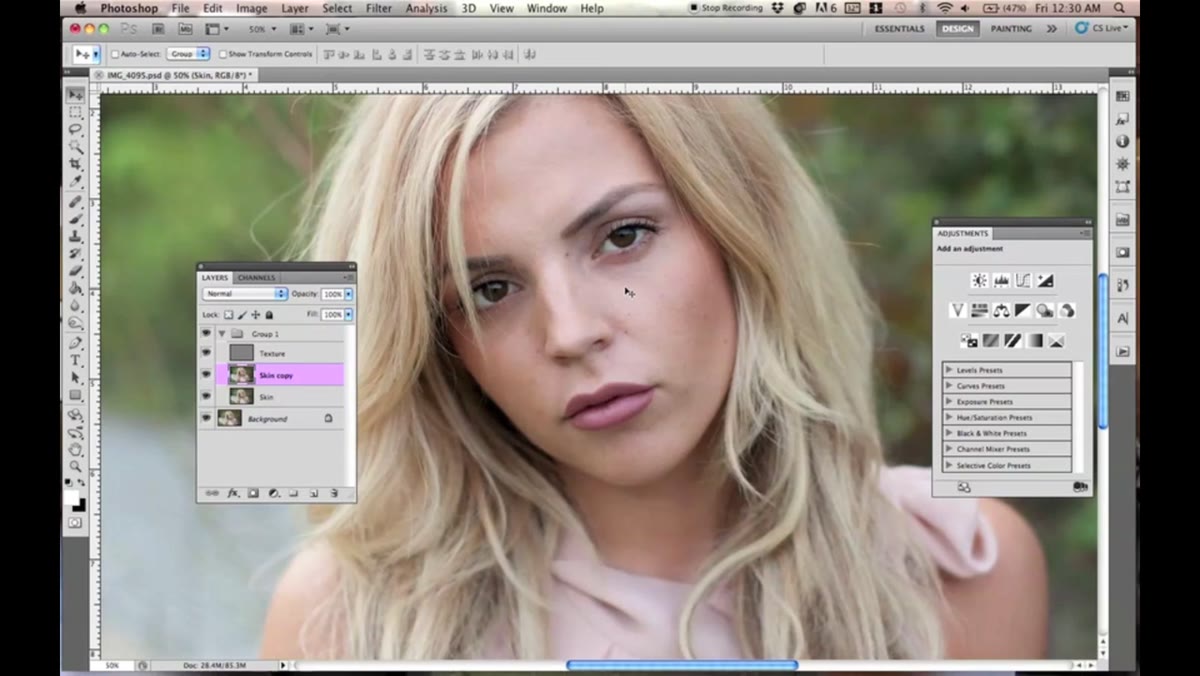
Make a copy of your skin layer before you touch it. It takes two seconds and it has saved me from redoing twenty minutes of work more times than I want to admit. Then select the Healing Brush tool, not the Spot Healing Brush. Kobeissi uses a brush size around 80, hardness at 100, and spacing at 20 percent. Make sure the Sample setting is on Current Layer. Hold Alt (or Option on Mac) and click to sample from an area of even, clean skin tone, then paint over the patches you want to correct. You are blending colors, not smearing them. Short, deliberate strokes sample and apply tone from nearby areas, gradually making the color distribution more consistent. Work across the forehead, cheeks, and any areas with visible redness or discoloration. The texture layer above is still completely intact the entire time, so you are not touching the pores or skin surface at all.
Healing brush active on the skin layer, sampling nearby tone
Make a copy of your skin layer before you touch it. It takes two seconds and it has saved me from redoing twenty minutes of work more times than I want to admit. Then select the Healing Brush tool, not the Spot Healing Brush. Kobeissi uses a brush size around 80, hardness at 100, and spacing at 20 percent. Make sure the Sample setting is on Current Layer. Hold Alt (or Option on Mac) and click to sample from an area of even, clean skin tone, then paint over the patches you want to correct. You are blending colors, not smearing them. Short, deliberate strokes sample and apply tone from nearby areas, gradually making the color distribution more consistent. Work across the forehead, cheeks, and any areas with visible redness or discoloration. The texture layer above is still completely intact the entire time, so you are not touching the pores or skin surface at all.
A Note from My Own Workflow
The Gaussian blur radius is the step I see people rush, and it is the one that matters most. If the blur is too low, you will leave tonal information in the texture layer and the separation will be incomplete. If it is too high, you lose the edge detail that keeps skin looking three-dimensional. I use a simple test: after applying the blur, I zoom in to 100 percent and look at the transition between lit skin and shadow on the cheekbone. If I can still see a hard edge there, the blur is not high enough. If the whole cheek looks like a gradient with no structural information, I have gone too far. Finding that middle point is worth spending two extra minutes on before you commit.
The other habit I have built in is naming my Photoshop actions. My frequency separation setup action is called “The Separation” (yes, the 2002 film). Silly, but it means I can find it in half a second and the setup is always consistent.
Frequency separation is one of those techniques that feels complicated right up until it clicks, and then it feels obvious. The insight that changed my work was understanding that I had been treating skin tone and skin texture as the same problem when they actually require completely different tools and intentions. Kobeissi’s tutorial explains the Gaussian blur method cleanly and practically, and it is the version of this technique I keep coming back to for beauty work.
Watch the full tutorial on YouTube to see the technique in motion and follow along with the actual before-and-after on a real portrait.
Comments (4)
Bookmarked. Coming back to this one for sure.
I've watched a dozen tutorials on this and yours is the clearest by far.
Well explained. I think my audience would really benefit from this — mind if I link to it?
I keep coming back to this article. It's that useful.
Leave a Comment